15 Halloween Nail Designs That Are Spooky and Chic
Halloween is the one time of year when your nails are allowed to misbehave. For eleven months you keep things polished and sensible, and then October arrives with its pumpkins, black cats, and haunted houses — and suddenly a tiny ghost on your ring finger feels completely reasonable. The best halloween nail designs walk a fine line: spooky enough to be fun, chic enough that you are not embarrassed to wear them to work on October 30th. If you are still easing out of summer shades, our roundup of fall nail trends is a good warm-up, and this list takes you the rest of the way into full Halloween mode.
What makes a Halloween manicure work is clarity and contrast. These designs are meant to be seen — in party lighting, in flash photos, across a crowded room. Bold dark bases, sharp details, and a limited palette of black, orange, purple, and red do most of the heavy lifting. Below are 15 halloween nail designs ranging from cute to properly creepy, with honest notes on who each one suits and whether to book a salon appointment or break out the nail art brushes at home.
Why Halloween Nail Designs Deserve Real Planning
Halloween nails are not like everyday nail art. They have a deadline, they get photographed more than any other manicure you wear all year, and they need to survive a night of parties, candy bowls, and costume changes. That means planning matters more than usual. Salon artists book up fast in the last two weeks of October, so if you want detailed hand-painted art, call at least ten days ahead and bring reference photos.
There is also a practical side. Dark Halloween colors — black, deep purple, oxblood — stain the nail plate if you skip base coat, and intricate art chips faster than solid color. The designs below are ordered from simplest to most detailed, so you can match your pick to your skill level and your calendar. A well-done simple design always looks better than an ambitious one that is half-chipped by Halloween night.
1. Black Cat Silhouettes
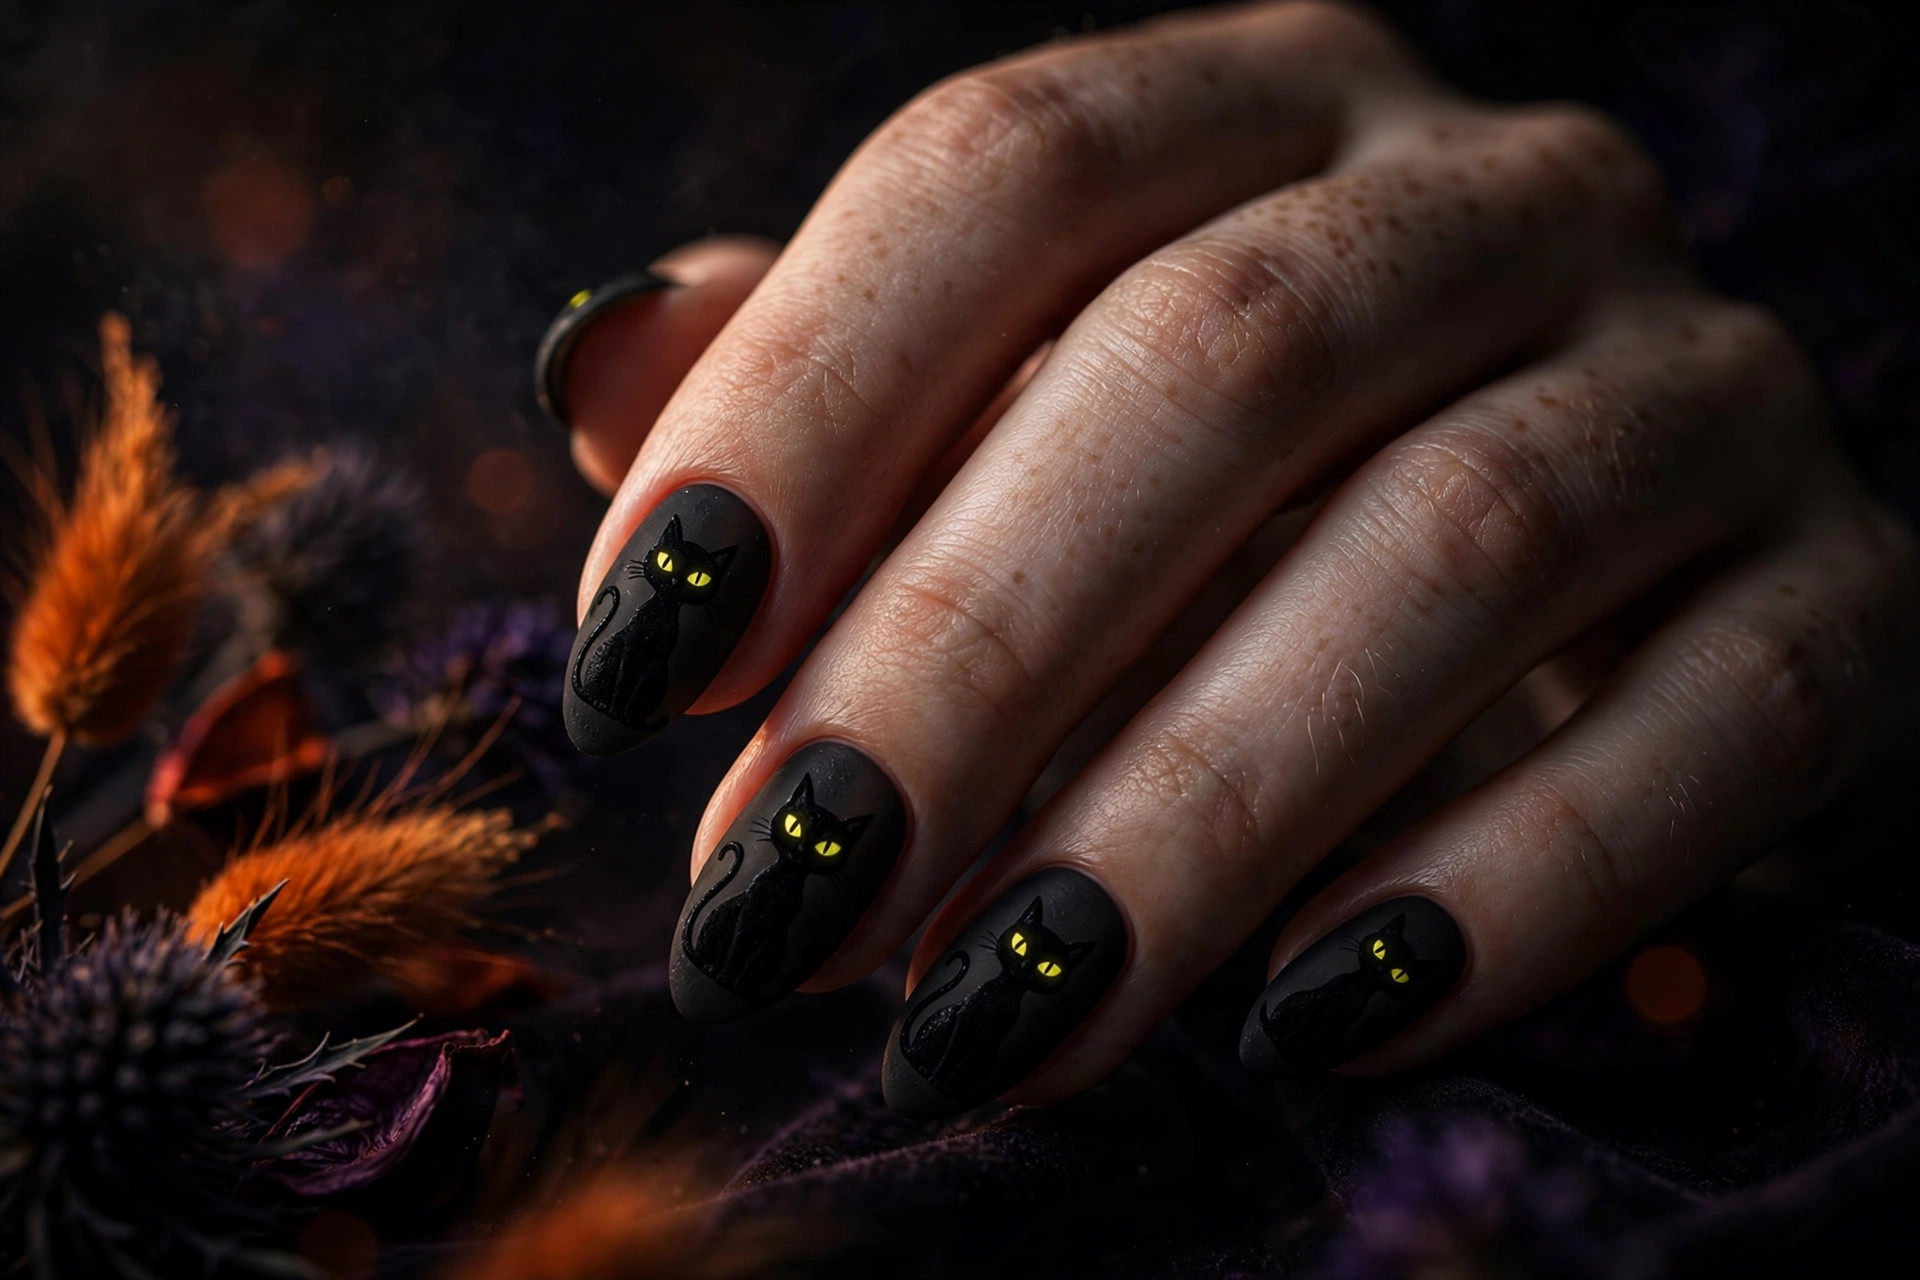
Few images say Halloween like a black cat, and on nails the silhouette reads instantly — arched back, curled tail, two glowing yellow eyes staring out of the dark. This design usually keeps most nails a simple matte black, with the cat painted on one or two accent nails so the detail has room to breathe. The matte finish is what makes it look expensive rather than costume-shop.
It suits anyone who wants classic Halloween imagery without anything gory or over the top. Black cats are recognizable at a glance, which makes this a great choice if your manicure needs to read clearly in photos. At home, paint the base black, then use a fine nail art brush and yellow polish for the eyes — or cheat with tiny cat stickers sealed under top coat. Almond or oval shapes give the silhouette the most elegant frame.
2. Jack-o’-Lantern Faces
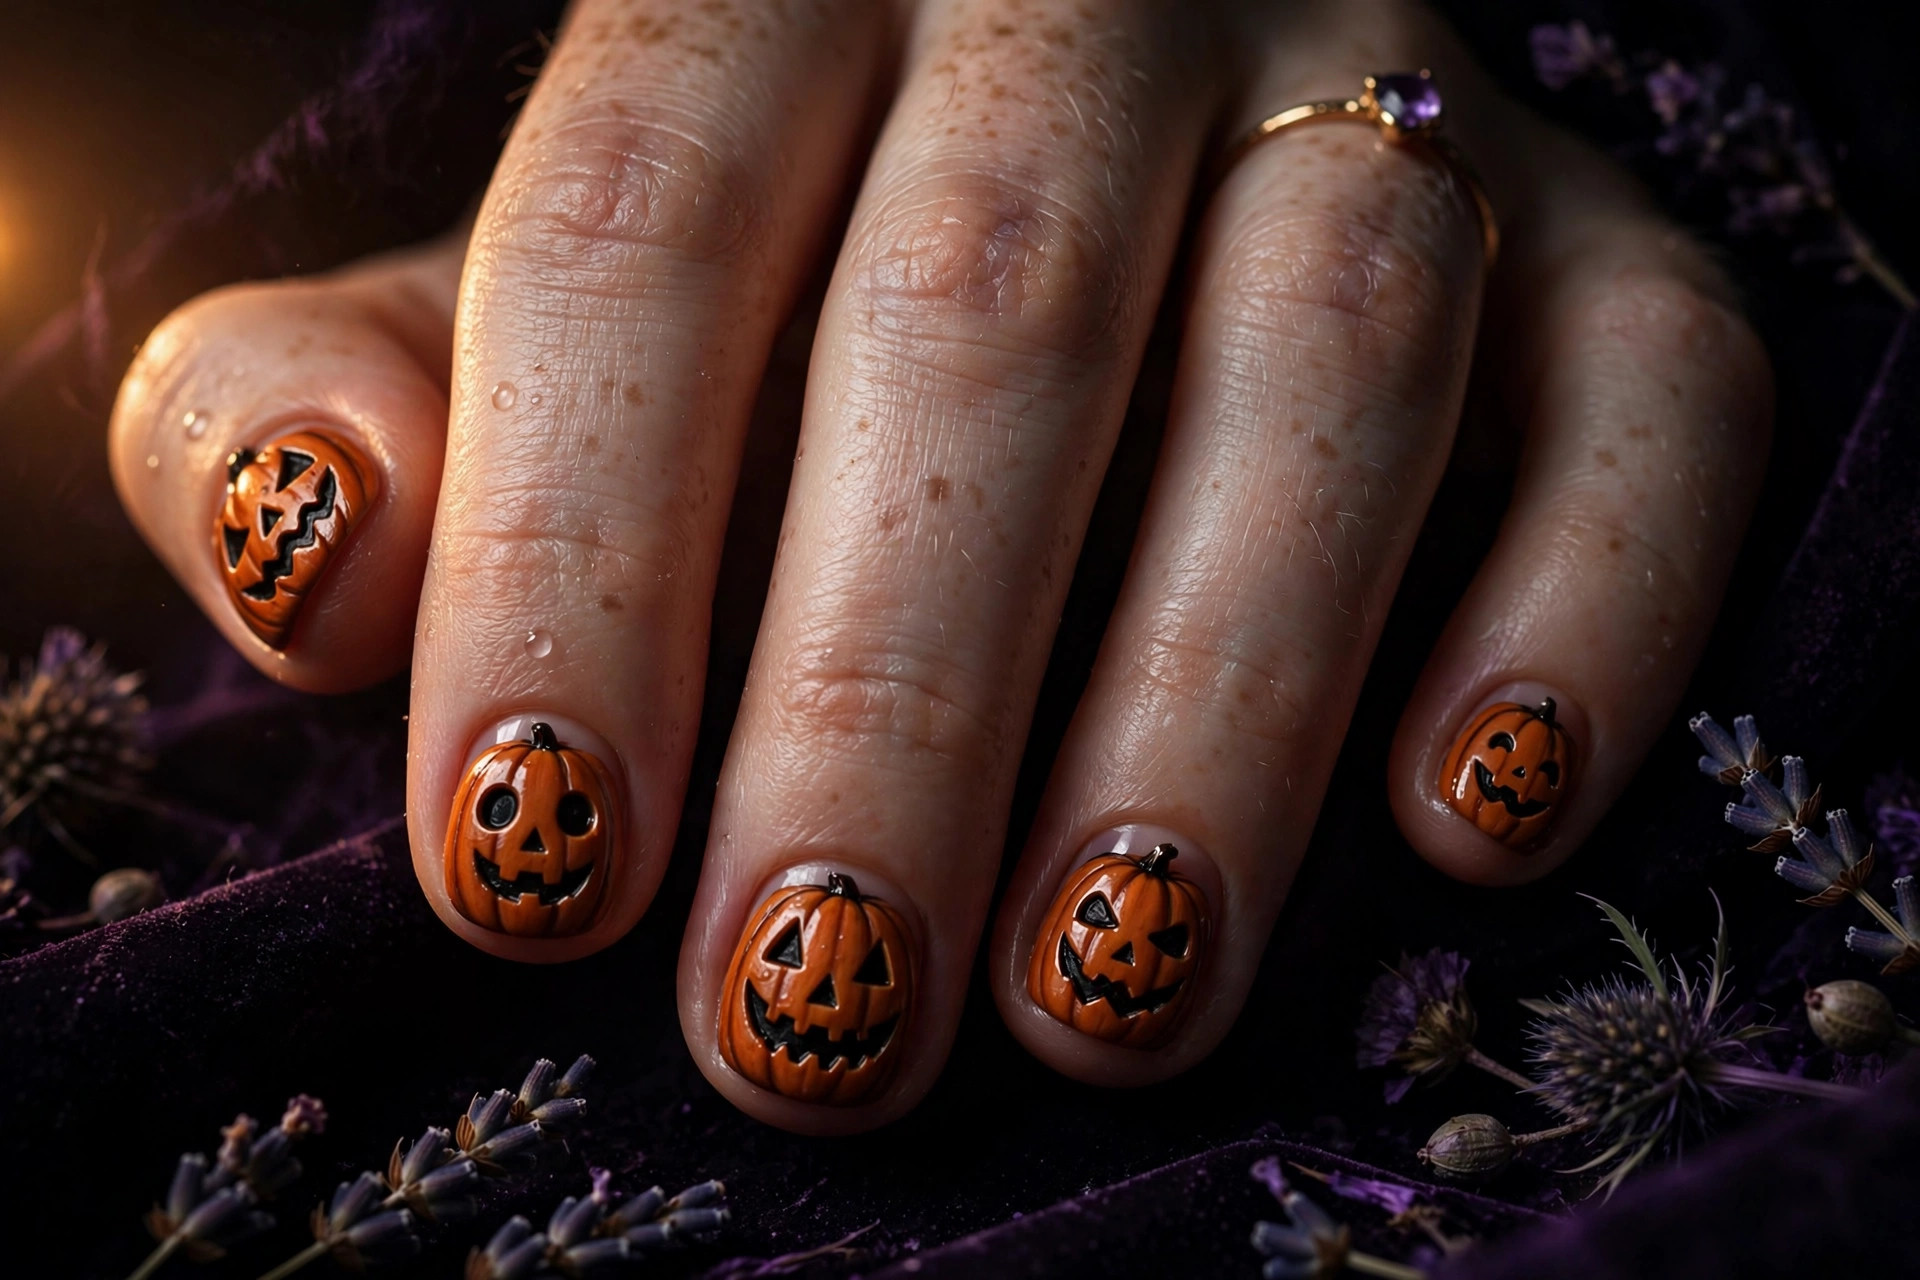
Burnt orange nails with little black jack-o’-lantern faces are Halloween at its happiest. Each nail gets a different carved expression — triangle eyes here, a jagged grin there — and the whole set looks like a row of tiny pumpkins lined up on a porch. It is playful rather than scary, which is exactly why it works for school events, office parties, and anyone whose costume leans cute.
This is one of the most DIY-friendly designs on the list. Paint your nails burnt orange, then use a dotting tool or the tip of a bobby pin for the black eyes and mouths — imperfect faces actually look more charming. It suits short nails particularly well, since the faces stay legible at any size. Two coats of orange, a steady hand for the details, and a glossy top coat are all you need.
3. Friendly Ghosts
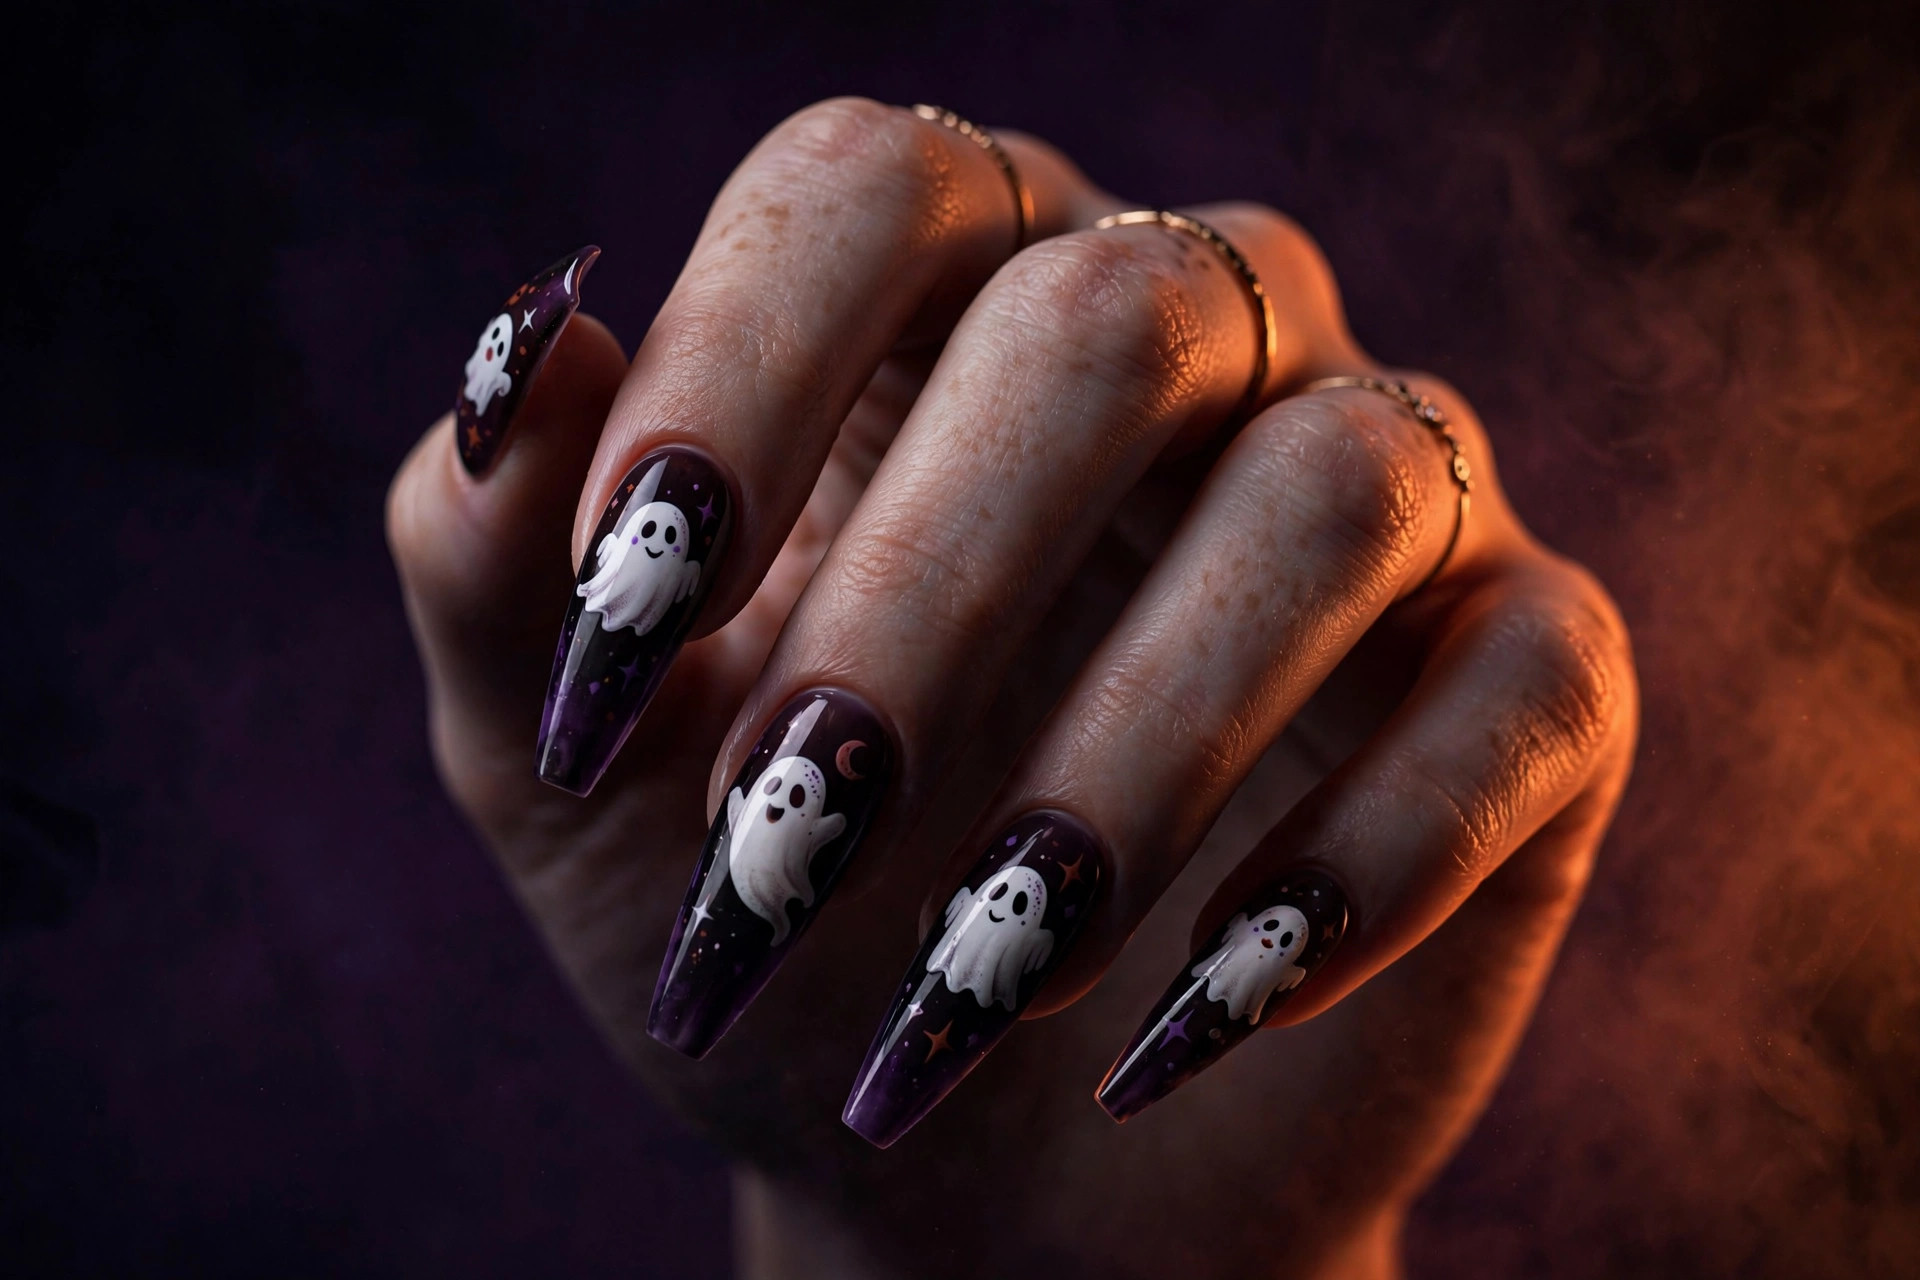
Not all Halloween ghosts need to be terrifying. These little white sheet ghosts — round heads, two black dot eyes, tiny open mouths — floating over a deep purple-to-black gradient are more charming than chilling. The gradient background gives the design real depth, like the ghosts are drifting through a night sky, and the contrast makes the white pop beautifully.
It suits people who like Halloween but not horror. The ghosts are simple shapes, so this is very doable at home: sponge a purple-to-black gradient, then paint white blobs with a dotting tool and add the faces with black polish. Longer nails, especially coffin or almond, give the ghosts more sky to float in. Finish with a glossy top coat to make the gradient look smooth and glassy.
4. Spider Webs
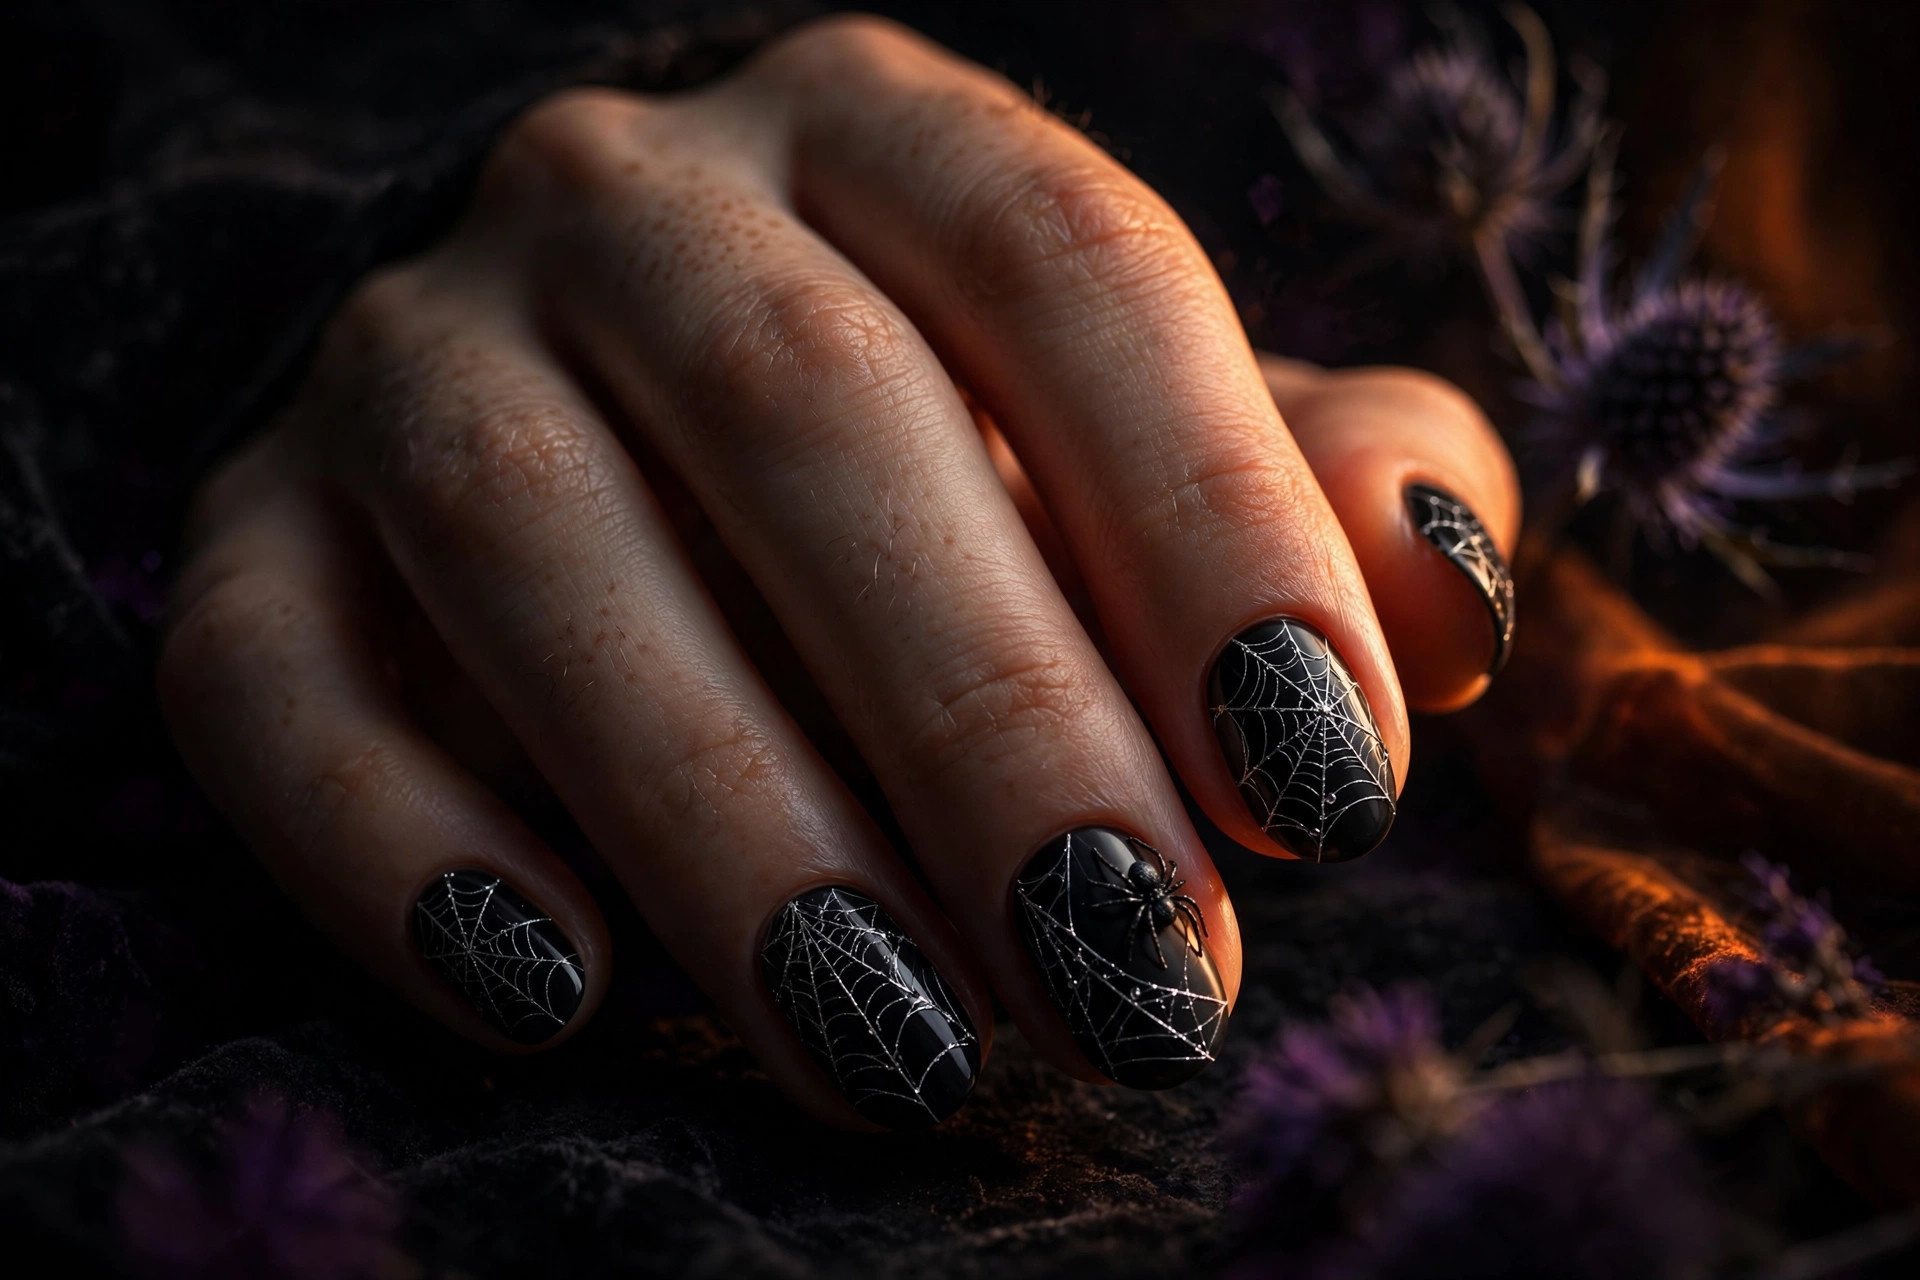
A single delicate spider web stretched across the corner of a glossy black nail is Halloween minimalism at its best. The web is drawn in thin silver or white lines radiating from one corner, with a tiny spider dangling from a thread on the accent nail. It is spooky, but in a jewelry-like way — the kind of detail people only notice up close, which makes it feel sophisticated rather than loud.
This suits anyone who wants a nod to Halloween without committing to a full themed set. The technique needs a striping brush and a steady hand: anchor three or four lines from the cuticle corner, then connect them with curved cross-lines. Keep the web to one or two nails per hand and leave the rest solid black for the most elegant result. Oval or almond shapes flatter the radiating lines best.
5. Vampy Wine
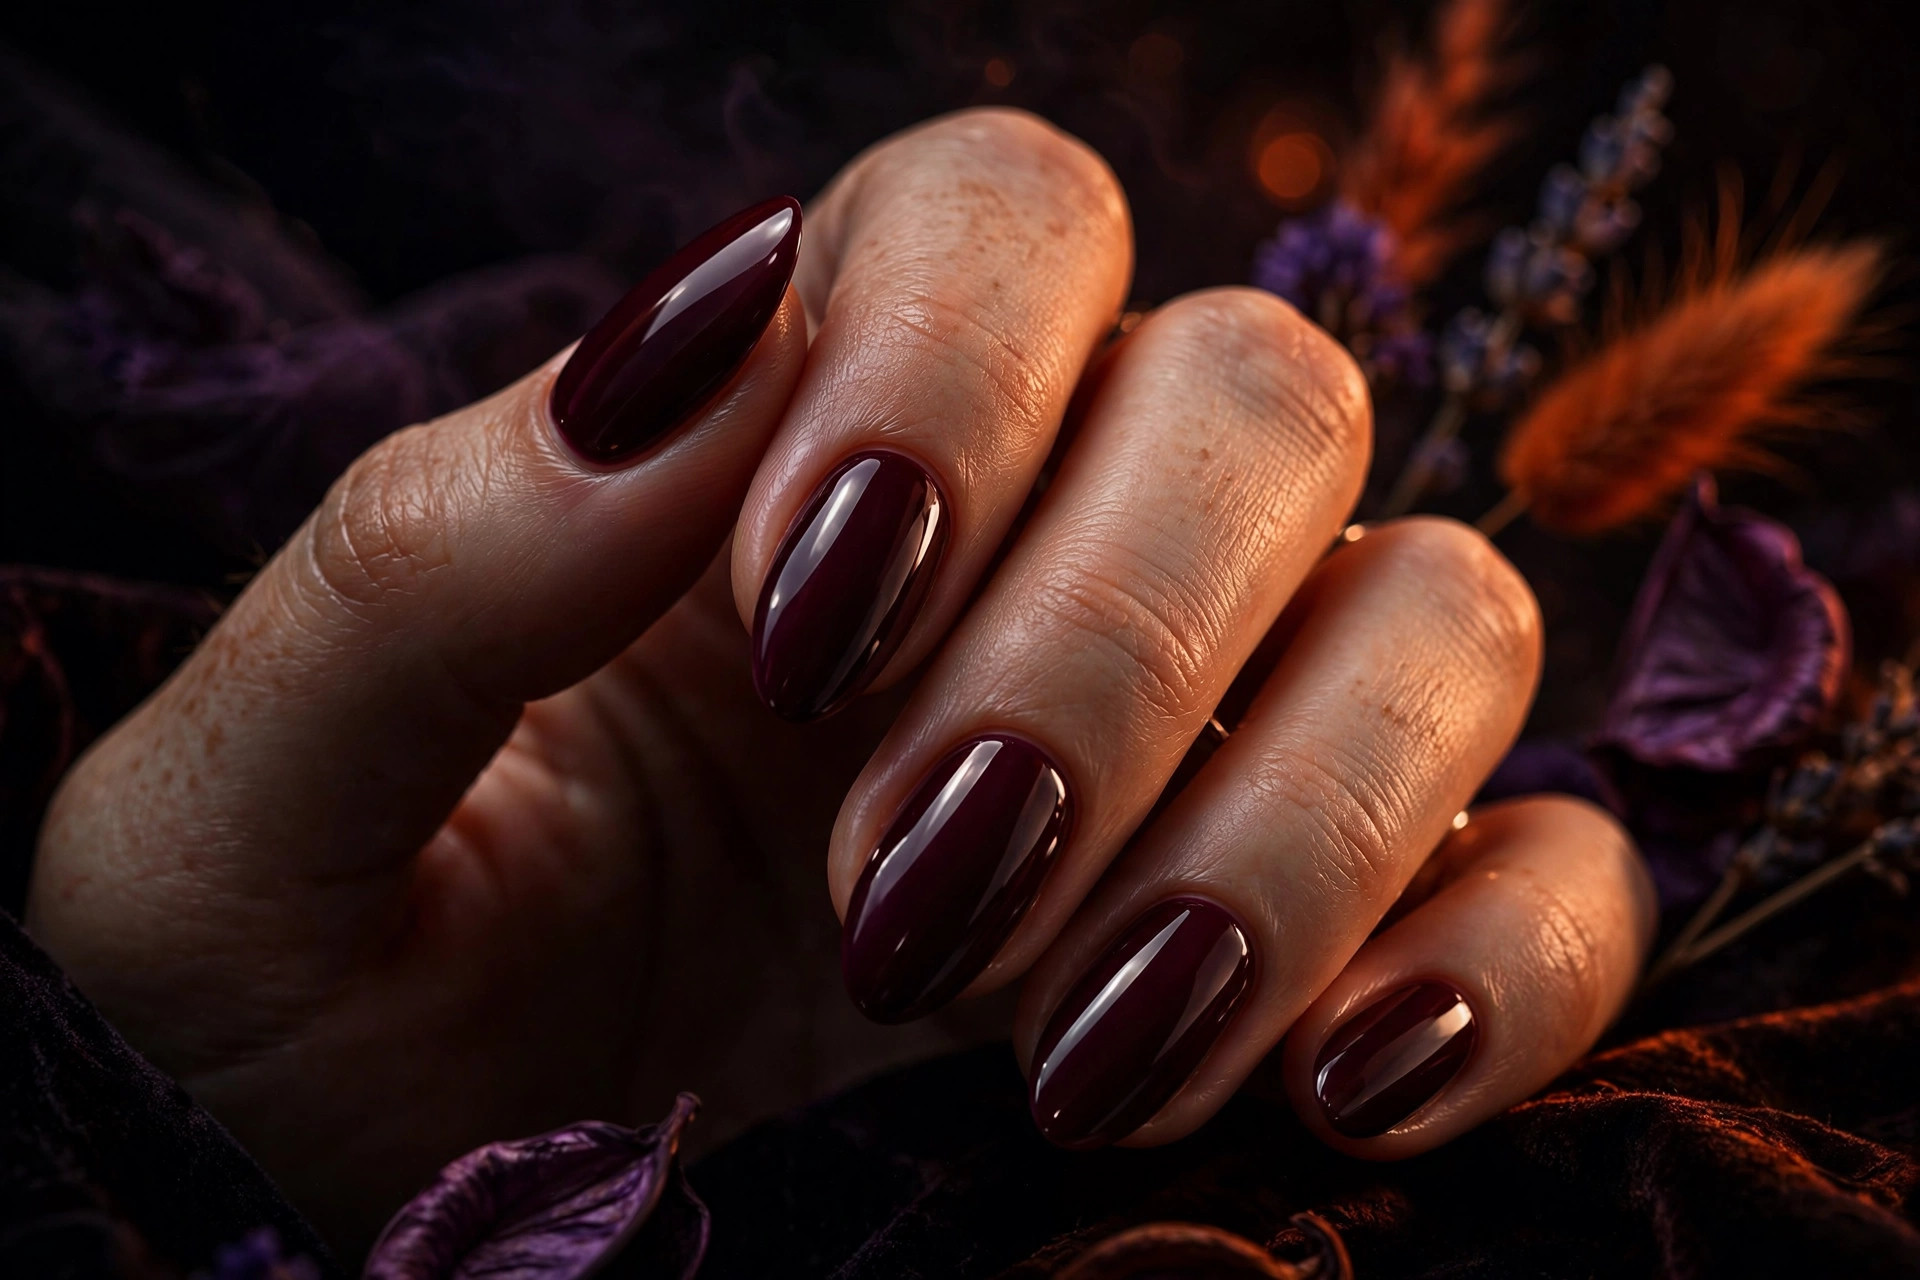
Sometimes the spookiest thing you can wear is a deep, dark, almost-black wine red. Vampy wine nails are glossy, dramatic, and just gothic enough for Halloween while staying completely office-appropriate. The color does all the talking — no art needed. In low light it reads nearly black; in bright light the red depths come alive, which gives it a moody, vampire-adjacent energy without a single fang in sight.
It suits absolutely everyone, which is why it is the safest Halloween pick on this list. Dark reds flatter every skin tone and every nail length, and the application is as simple as it gets: base coat is non-negotiable with dark shades, then two thin coats of an oxblood or black-cherry polish and a high-shine top coat. If your Halloween plans include a nice dinner or a work event, this is the design that never looks out of place.
6. Candy Corn Tips
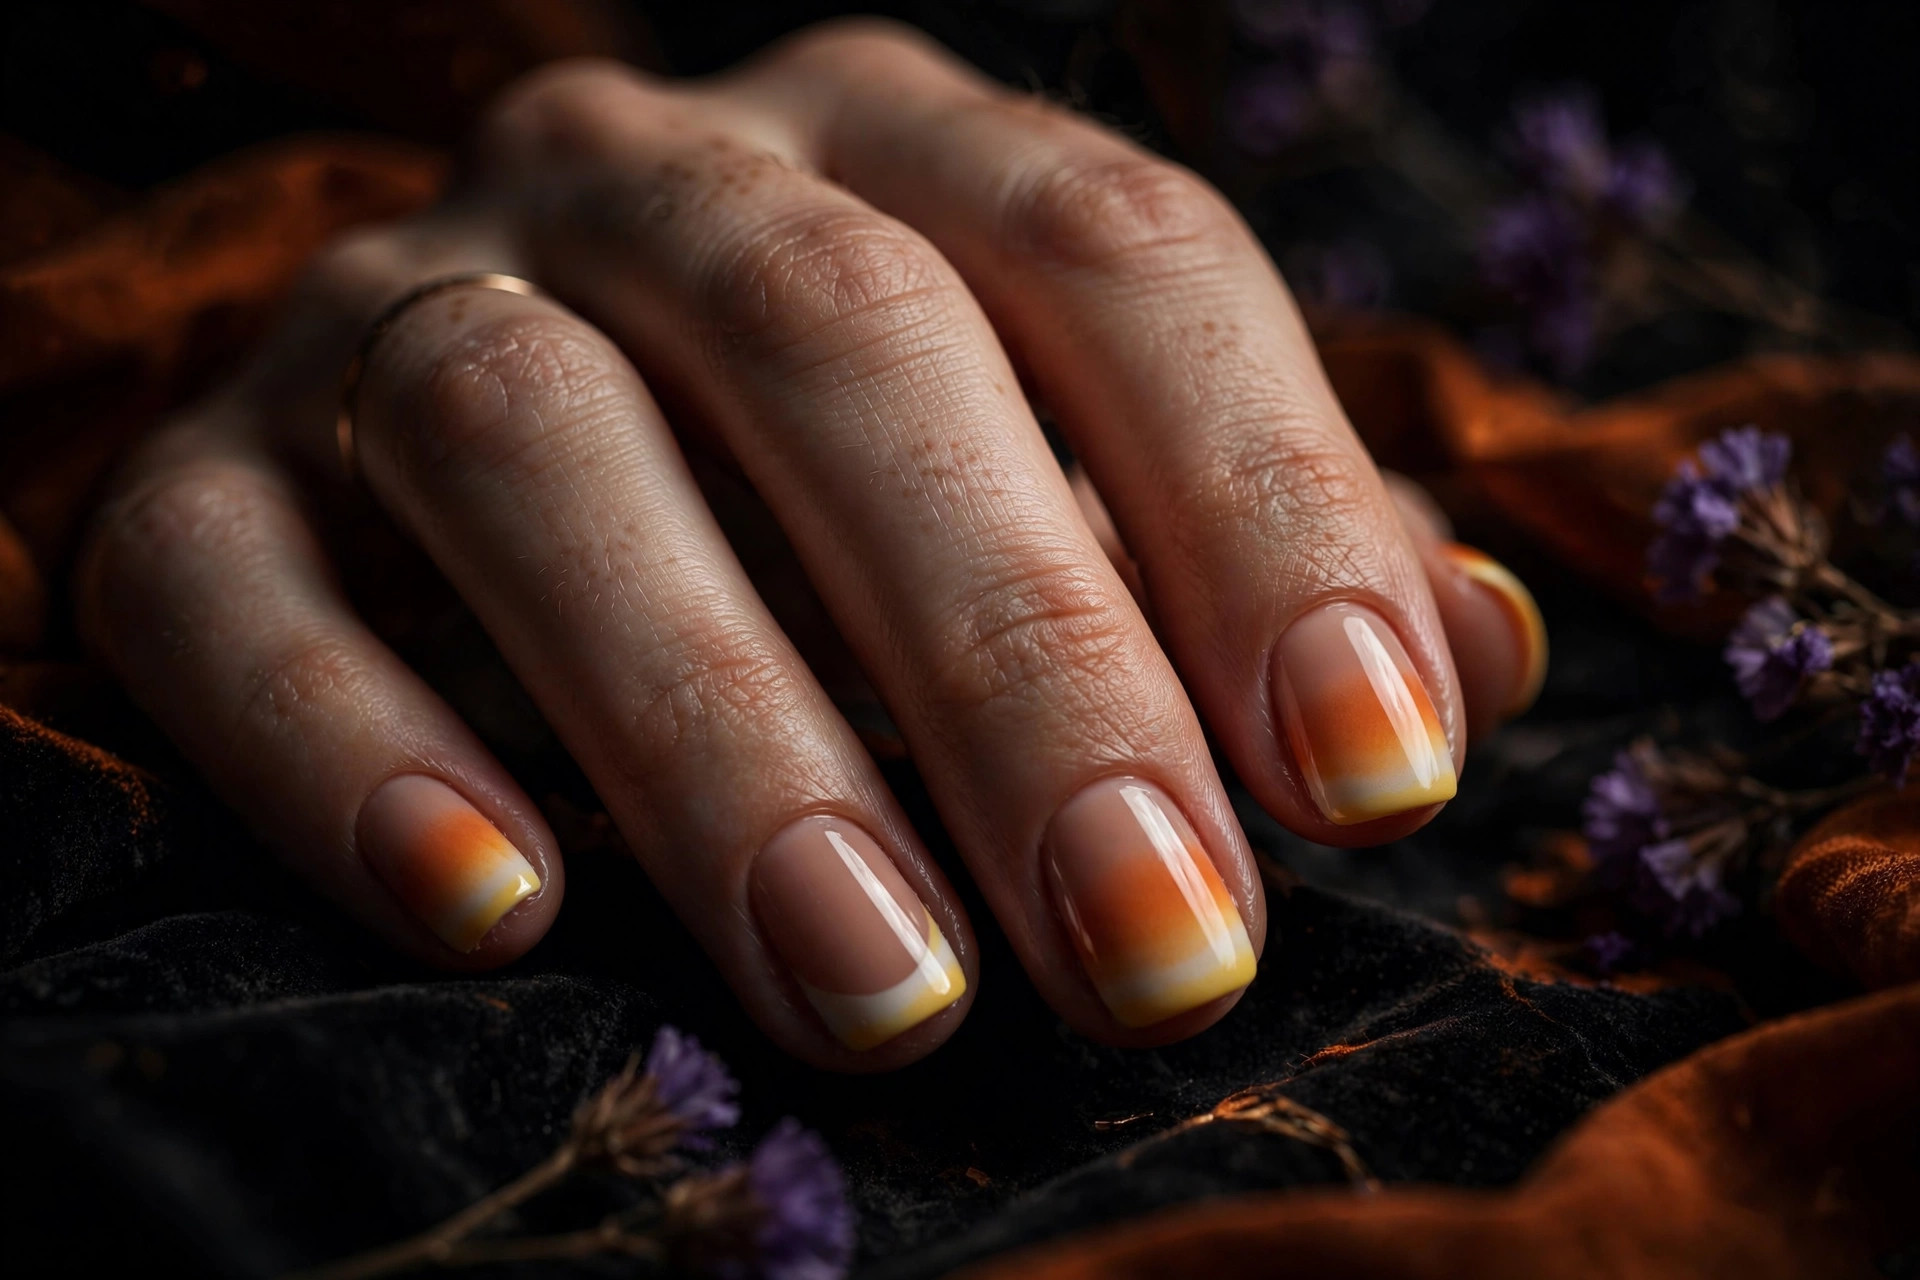
Candy corn tips take the classic French manicure and give it a Halloween candy makeover: a nude base with the tip divided into white, orange, and yellow bands, just like the actual candy. It is nostalgic, sweet, and instantly recognizable — the manicure equivalent of a childhood Halloween. The three-color tip keeps it interesting without any drawing skill required.
This suits anyone who loves the holiday’s playful side. Because the design lives only on the tips, it works beautifully on short nails and grows out gracefully. At home, paint the nude base first, then use striping tape or a steady hand to add the three bands — white at the very tip, orange in the middle, yellow nearest the base. A glossy top coat blends the bands together and makes the whole thing look polished rather than crafty.
7. Witchy Purple Chrome
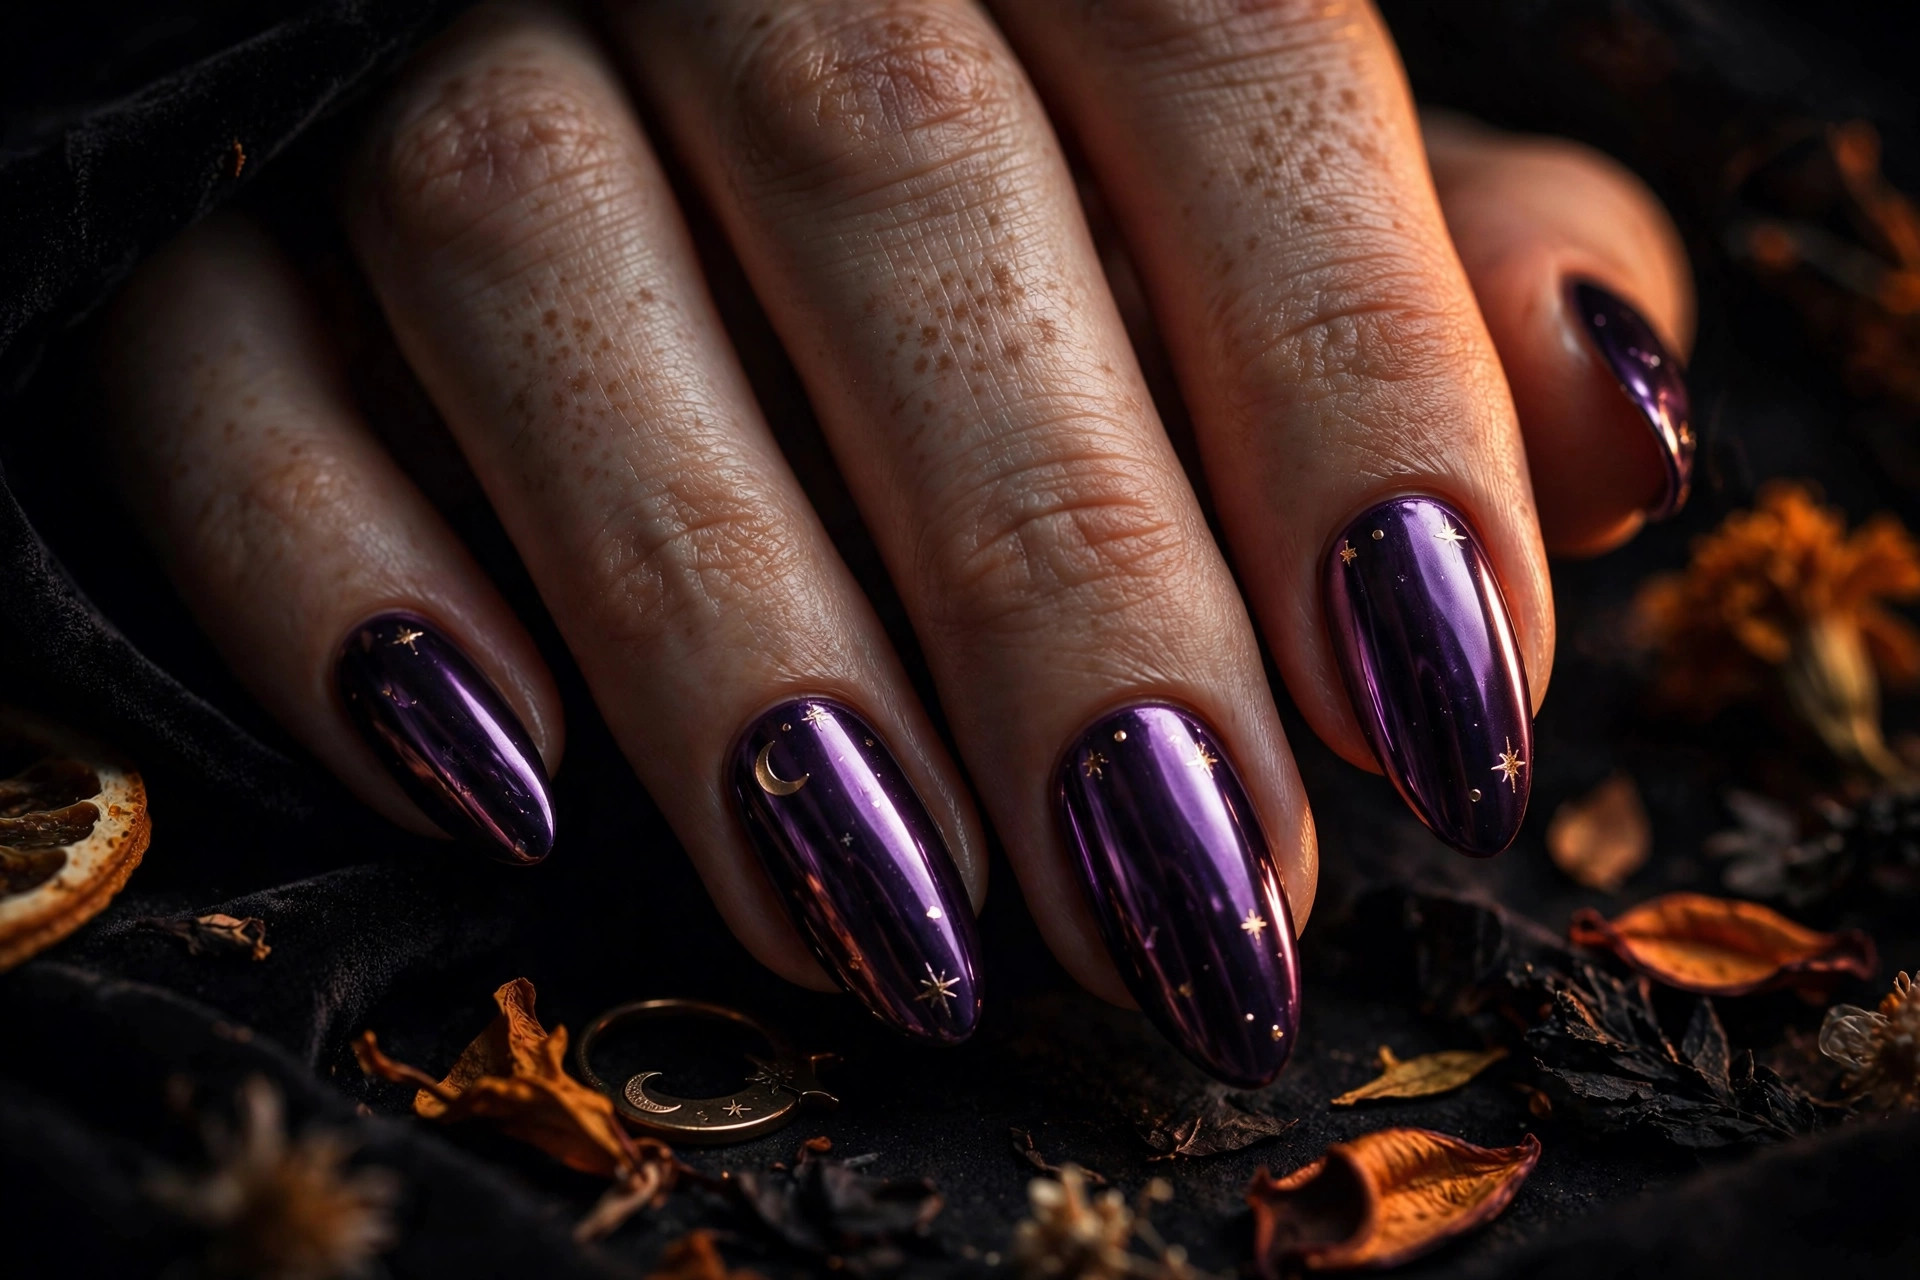
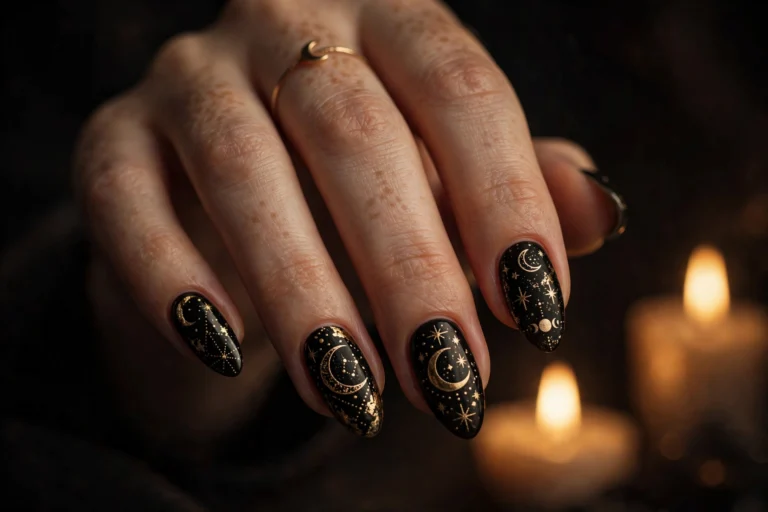
Deep purple chrome nails look like something a very fashionable witch would wear — mirror-shine, otherworldly, and just a little bit dangerous. The chrome finish shifts from eggplant to violet as you move your hand, and tiny moon and star decals scattered over the top complete the spellbook aesthetic. It is the most glamorous design on this list, and it photographs like a dream.
It suits statement-makers and anyone whose Halloween costume leans sorceress, vampire, or dark fairy. True chrome needs a gel base and chrome powder rubbed over it, so this is a salon job — ask for a deep purple base with a violet chrome pigment. Press-on chrome sets are a decent at-home alternative if you prep the nail surface well. Almond shapes show off the reflective finish best, since the curved surface catches more light.
8. Midnight Bats
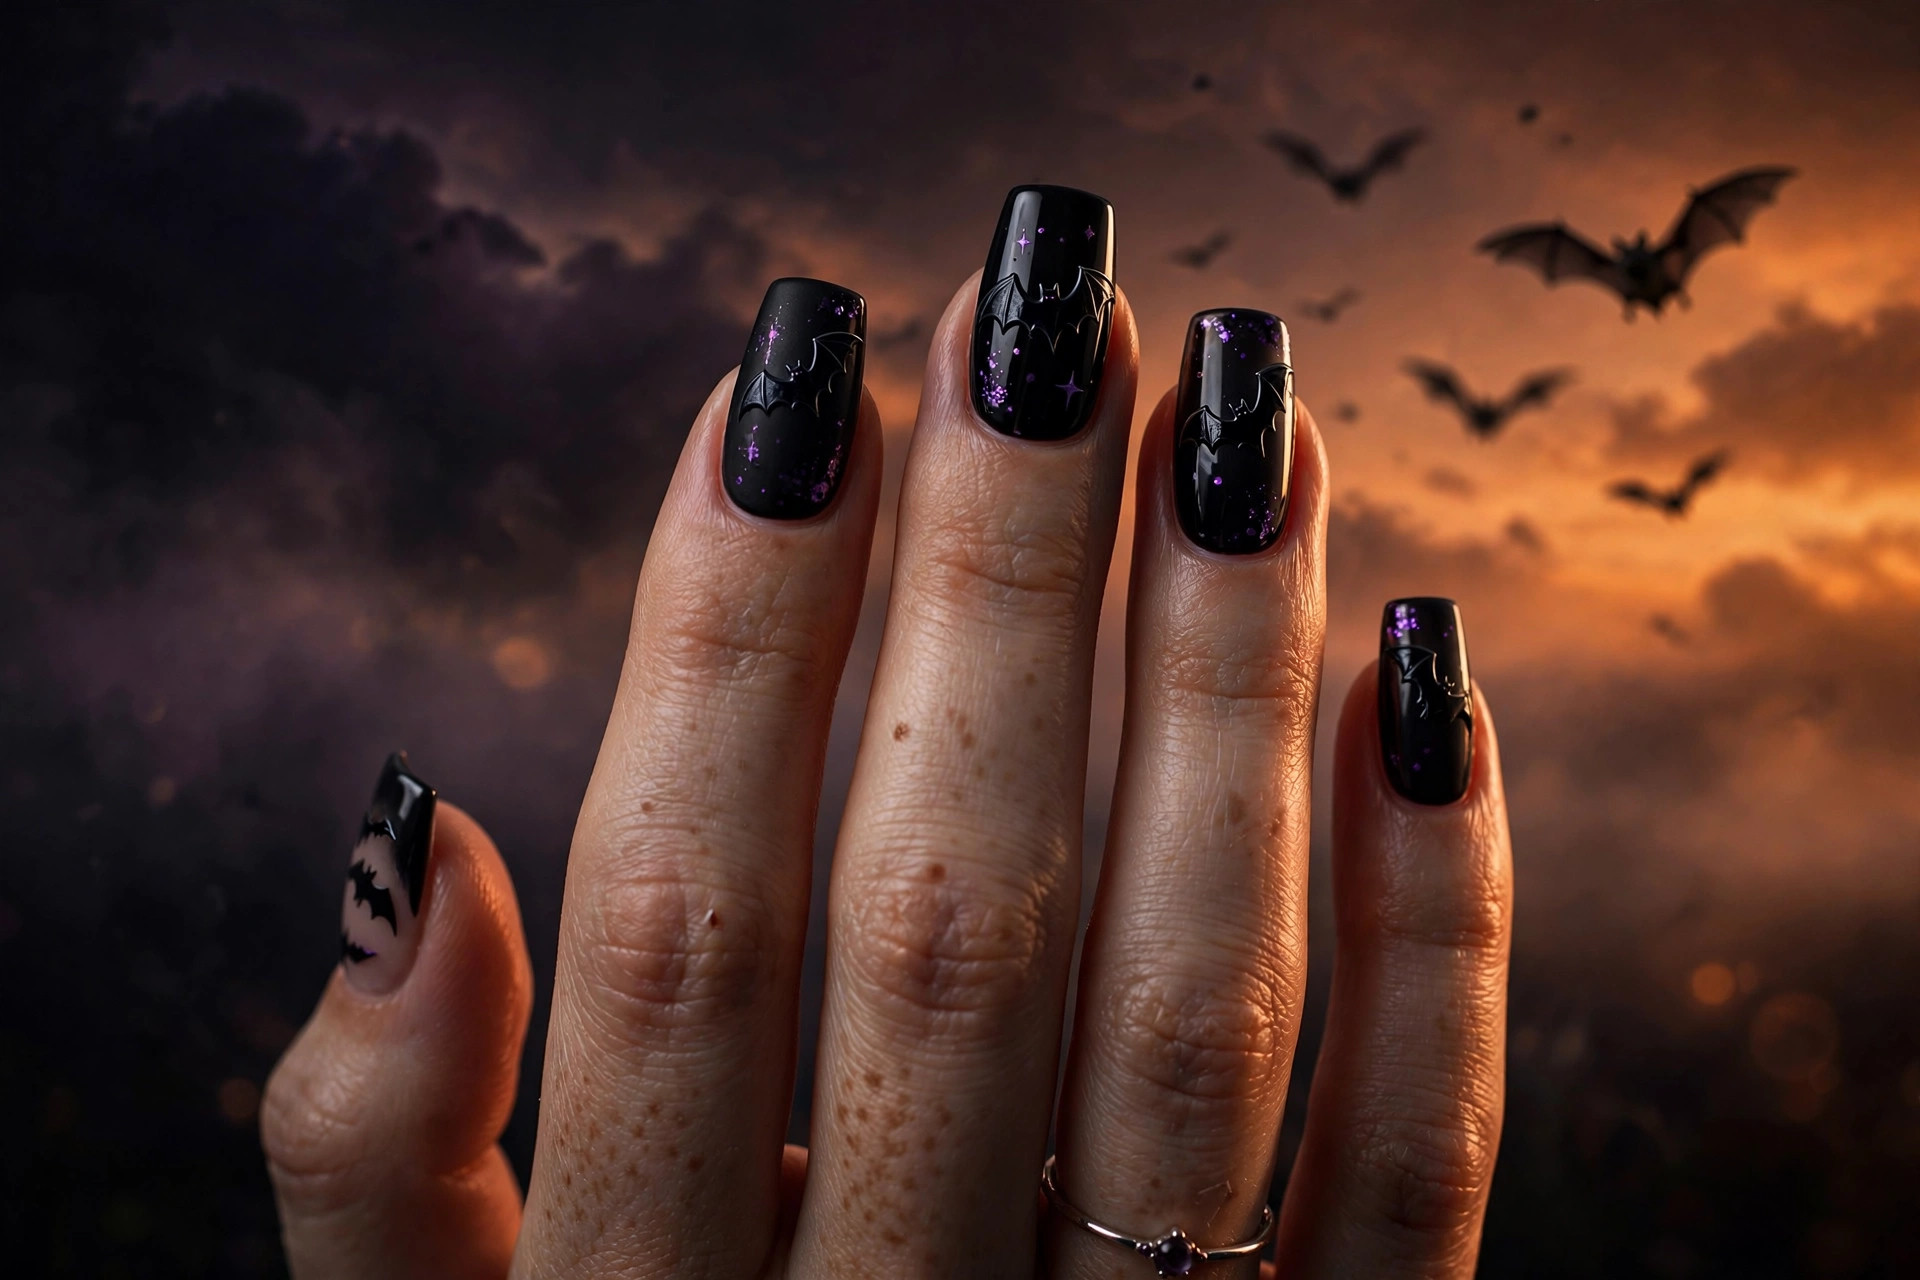
Black bat silhouettes scattered across a dusky orange-to-black gradient look like the sky at the exact moment Halloween begins. The gradient does the atmospheric work — burnt orange melting into deep black — while the little bats add the unmistakable Halloween signature. It is dramatic without being detailed, which makes it one of the highest-impact designs for the effort involved.
This suits anyone who wants a bold Halloween look but does not trust their freehand art skills. Sponge the gradient first (orange at the cuticle, black at the tip works best), then add the bats with nail stickers or a stamping plate — both give crisp silhouettes with zero drawing. Longer coffin nails give the gradient the most room to glow. Seal with two coats of top coat so the sponge texture disappears completely.
9. Frankenstein Green
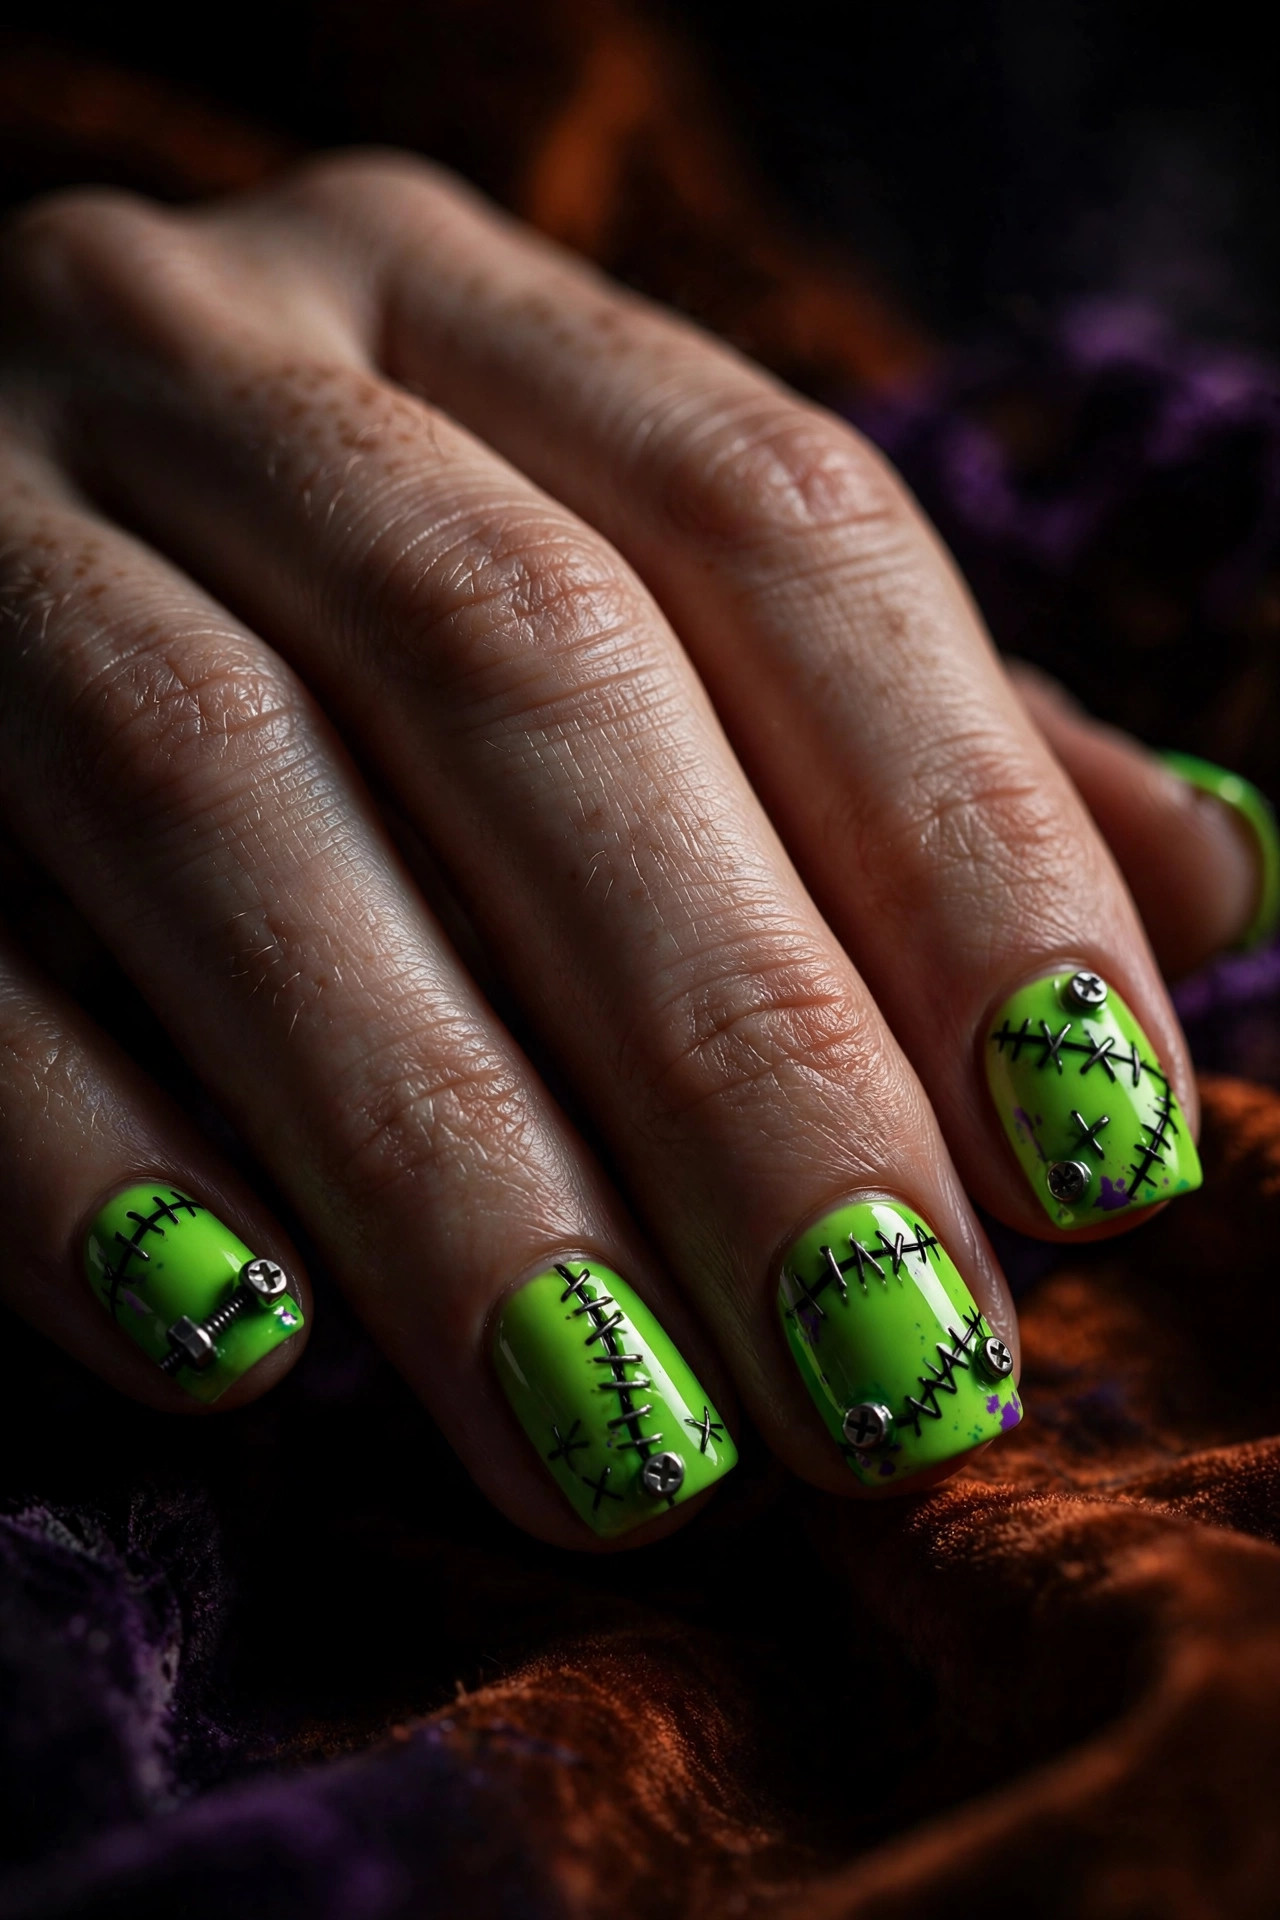
Neon green nails with black stitch lines and little bolt details are Frankenstein’s monster translated into manicure form — goofy, bold, and impossible to ignore. The bright green is the whole point: it glows against everything, photographs incredibly well, and instantly signals that you are here for the fun of Halloween, not the elegance of it. The stitches keep it from reading as just a bright green manicure.
It suits costume parties, trick-or-treat duty, and anyone with a playful streak. At home this is very achievable: two coats of a vivid green, then black stitch lines drawn with a striping brush or a thin nail art pen — little x-shapes across the nail like sutures. Short square nails keep the look punchy and cartoonish. It is not subtle, and that is exactly the point.
10. Haunted House Silhouette
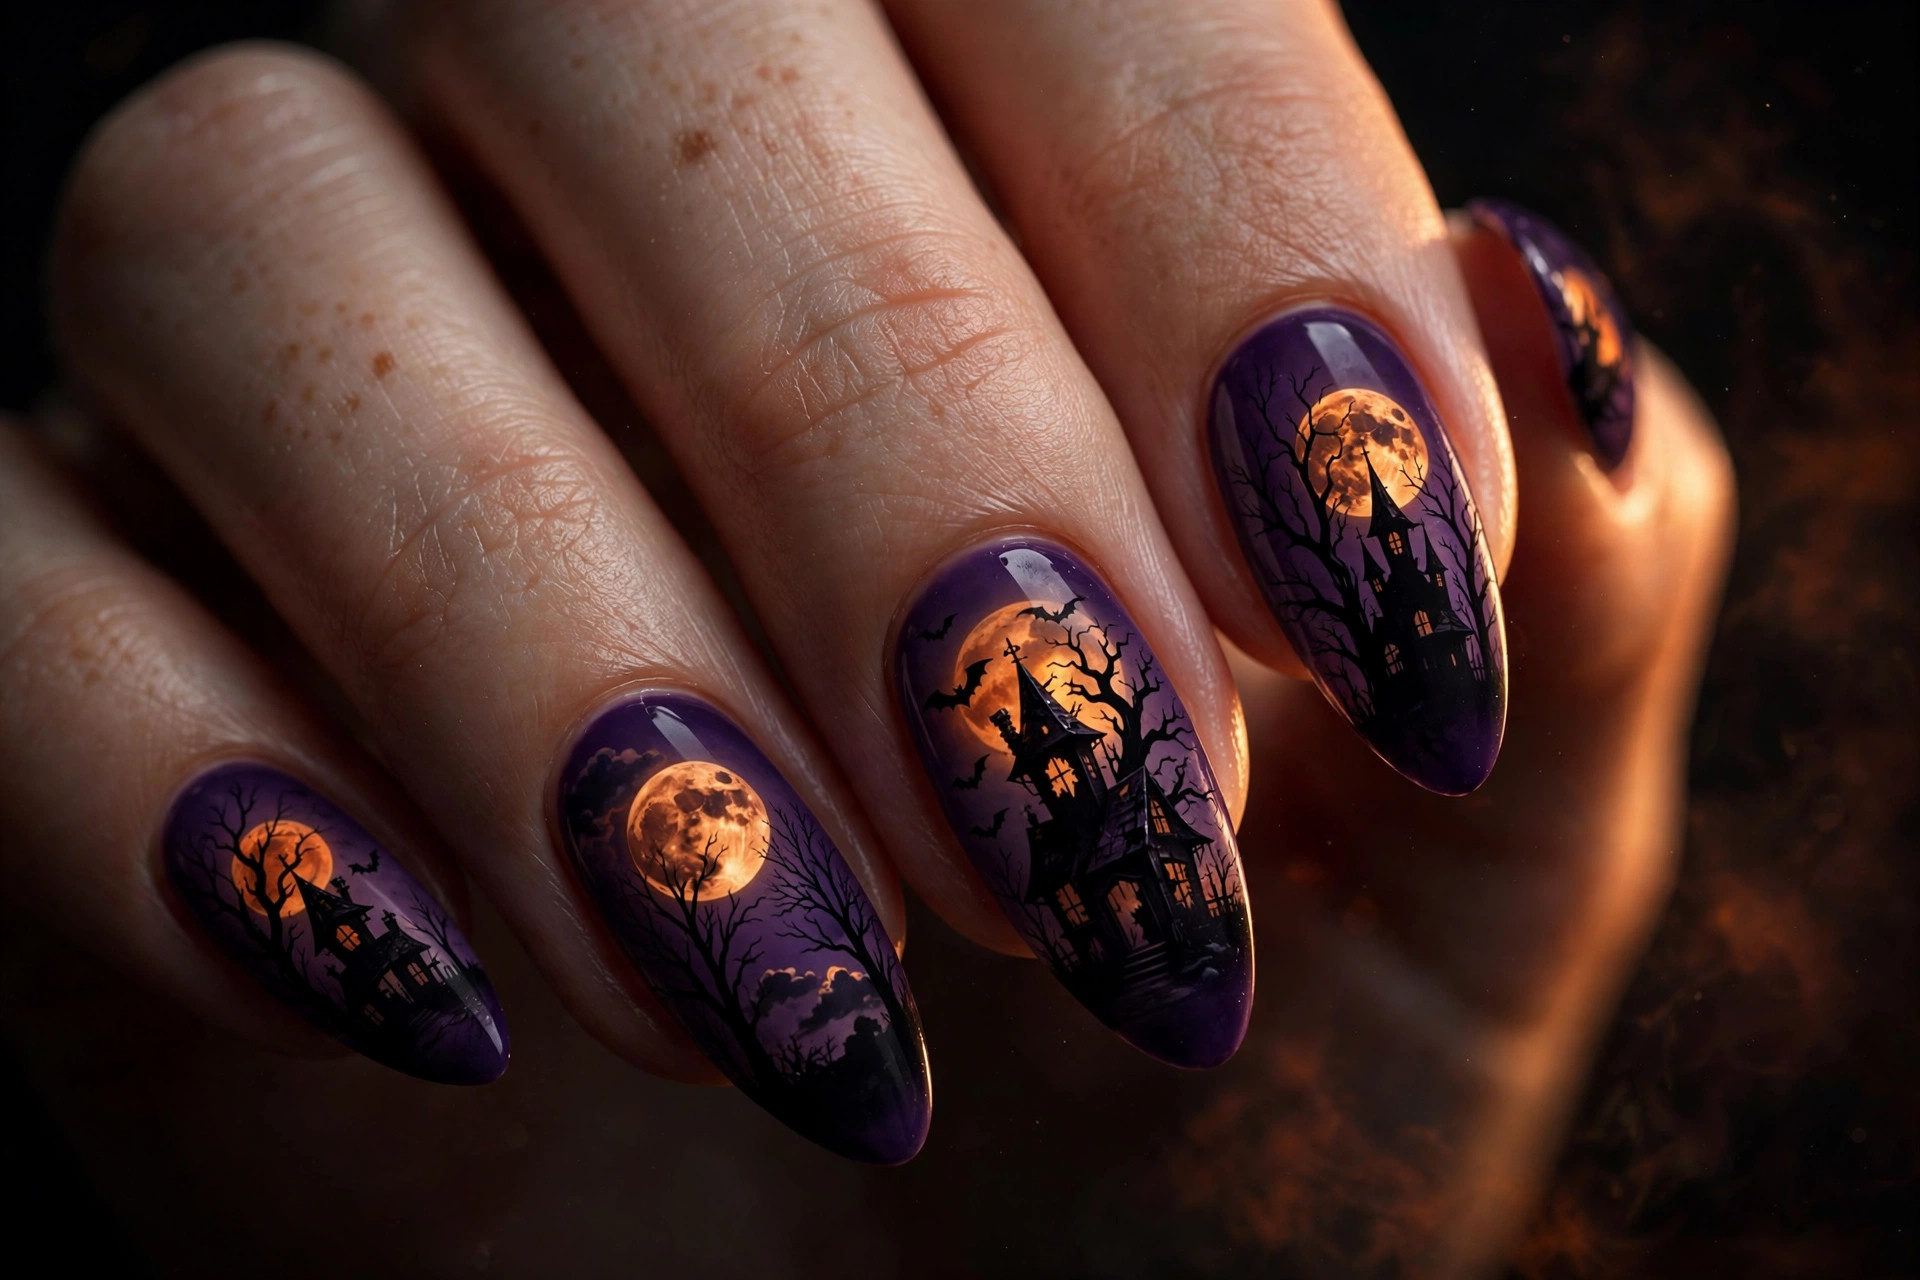
A black haunted house silhouette — crooked chimneys, bare twisted trees — set against a glowing full moon on deep purple nails is Halloween as a tiny painting. This is the most detailed, most artistic design on the list, and it rewards a skilled hand: the moon glows, the house looms, and every nail tells a little piece of the story. Done well, it looks like wearable art rather than a manicure.
It suits detail lovers and anyone willing to book a talented nail artist — this is firmly salon territory. Bring reference photos and ask for the moon on the thumbnail or ring finger where it has the most space. Long almond nails give the scene the canvas it needs; our almond nail looks for fall show how much difference the right shape makes for detailed art. In gel, this design lasts well into November.
11. Orange-and-Black Ombre
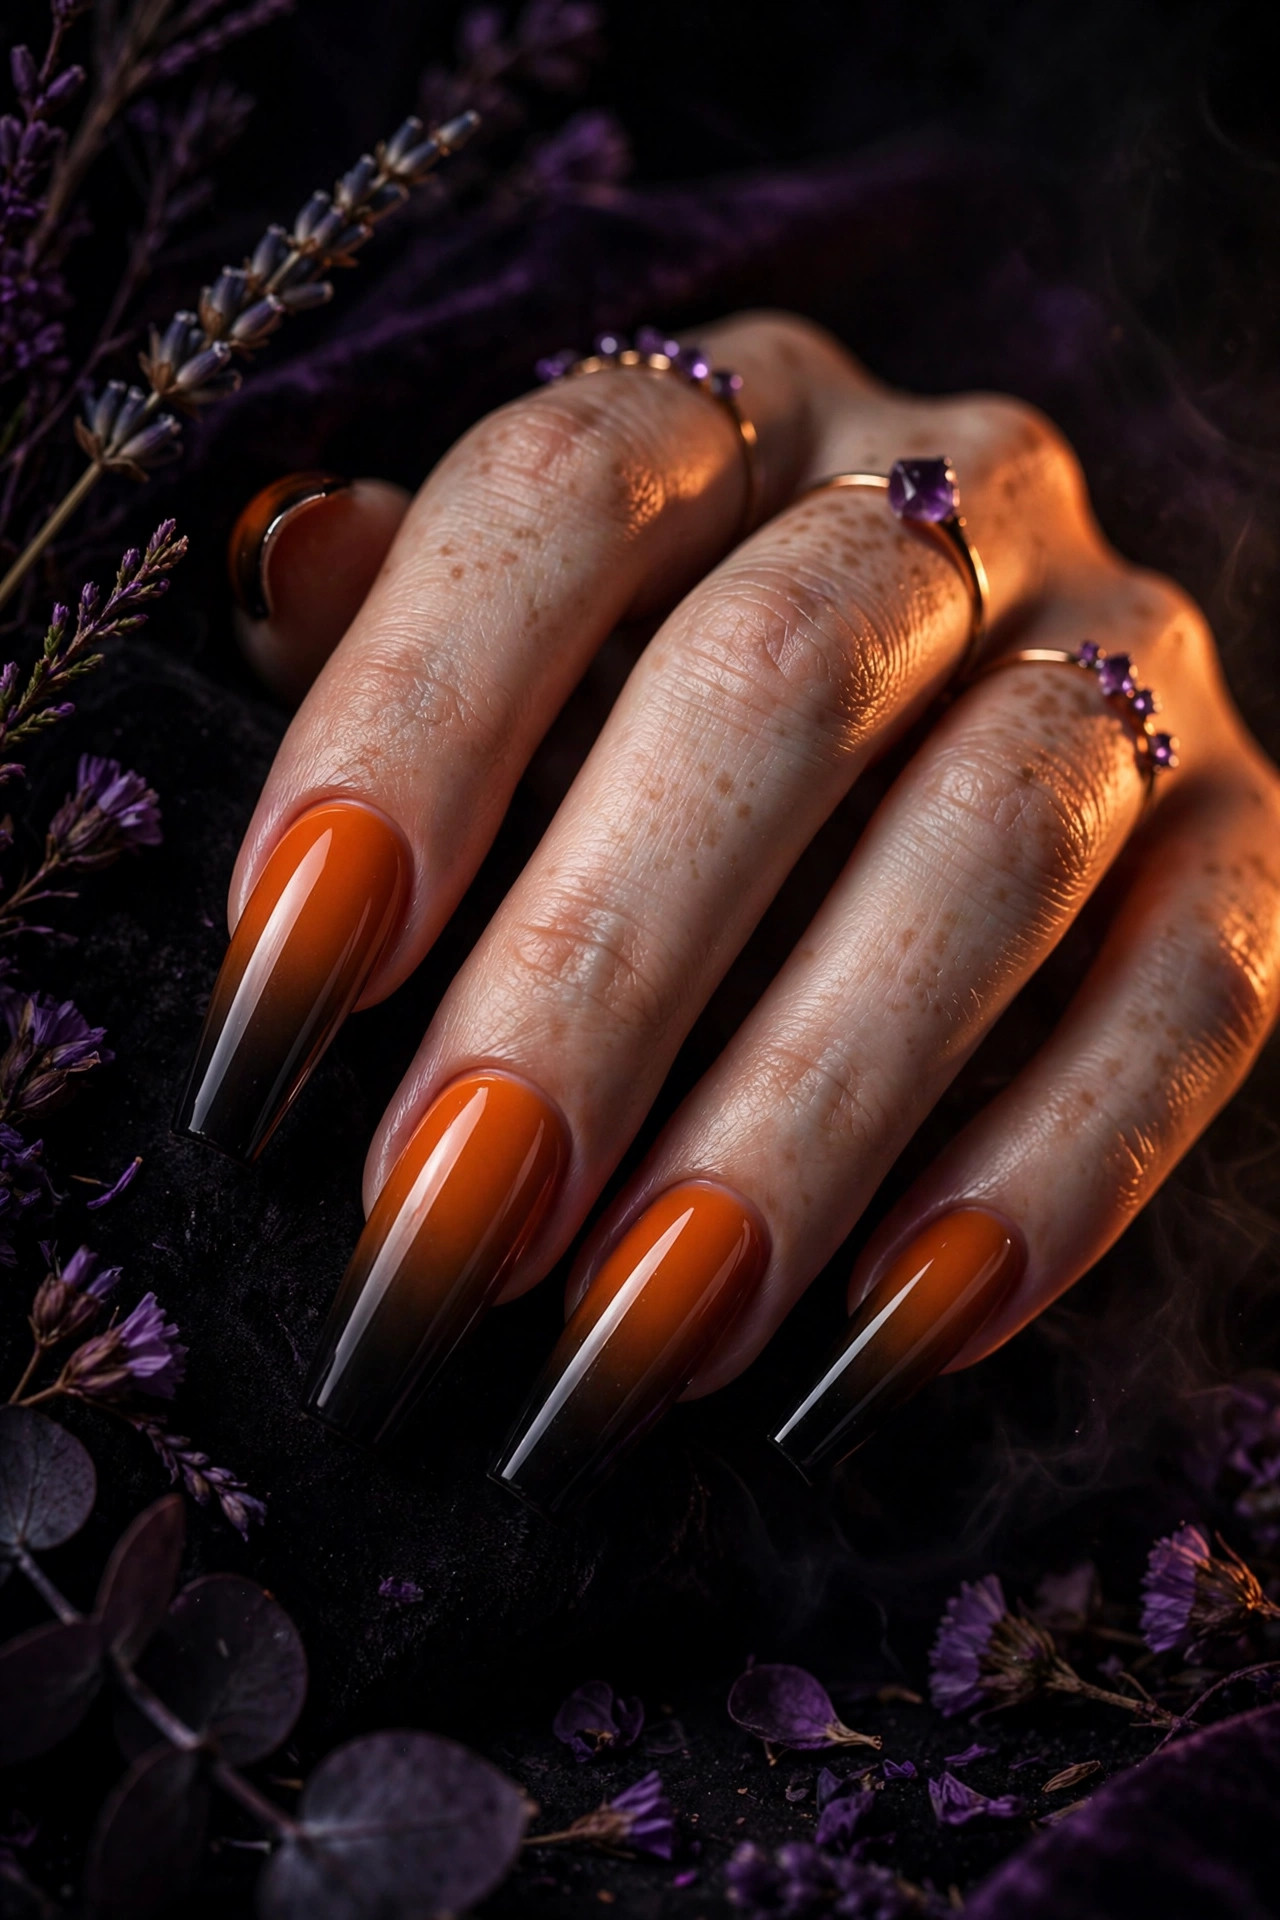
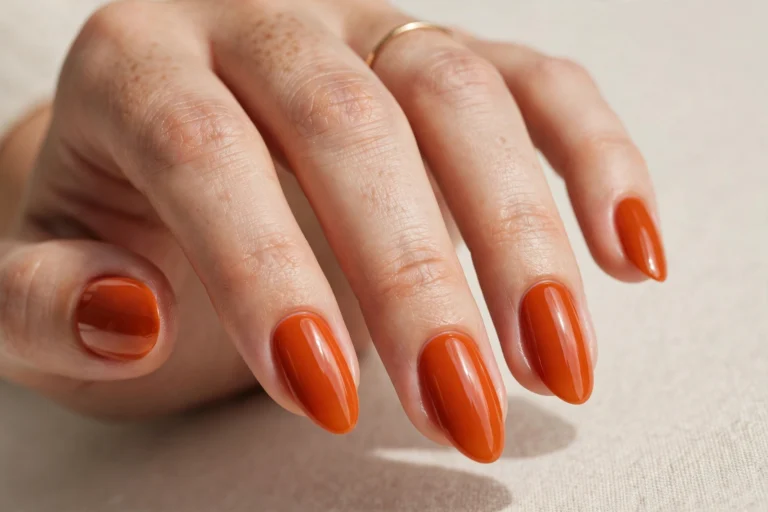
Burnt orange melting into deep black is Halloween distilled into a gradient — no art, no decals, just the season’s two signature colors doing all the work. The ombre gives nails a smoky, dimensional quality that looks far more expensive than the technique actually is. It is bold enough for a costume party and clean enough to wear all October long.
This suits everyone, and it is one of the easiest dramatic looks to DIY. Sponge burnt orange at the cuticle and black at the tip, dabbing until the blend is smooth, then clean up around the nails and seal with a glossy top coat — gloss is what melts the gradient together. If warm autumn shades are your thing beyond Halloween, our brown nail ideas for fall roundup has more ways to wear the season’s palette. Longer nails show off the fade best.
12. Skeleton Hands
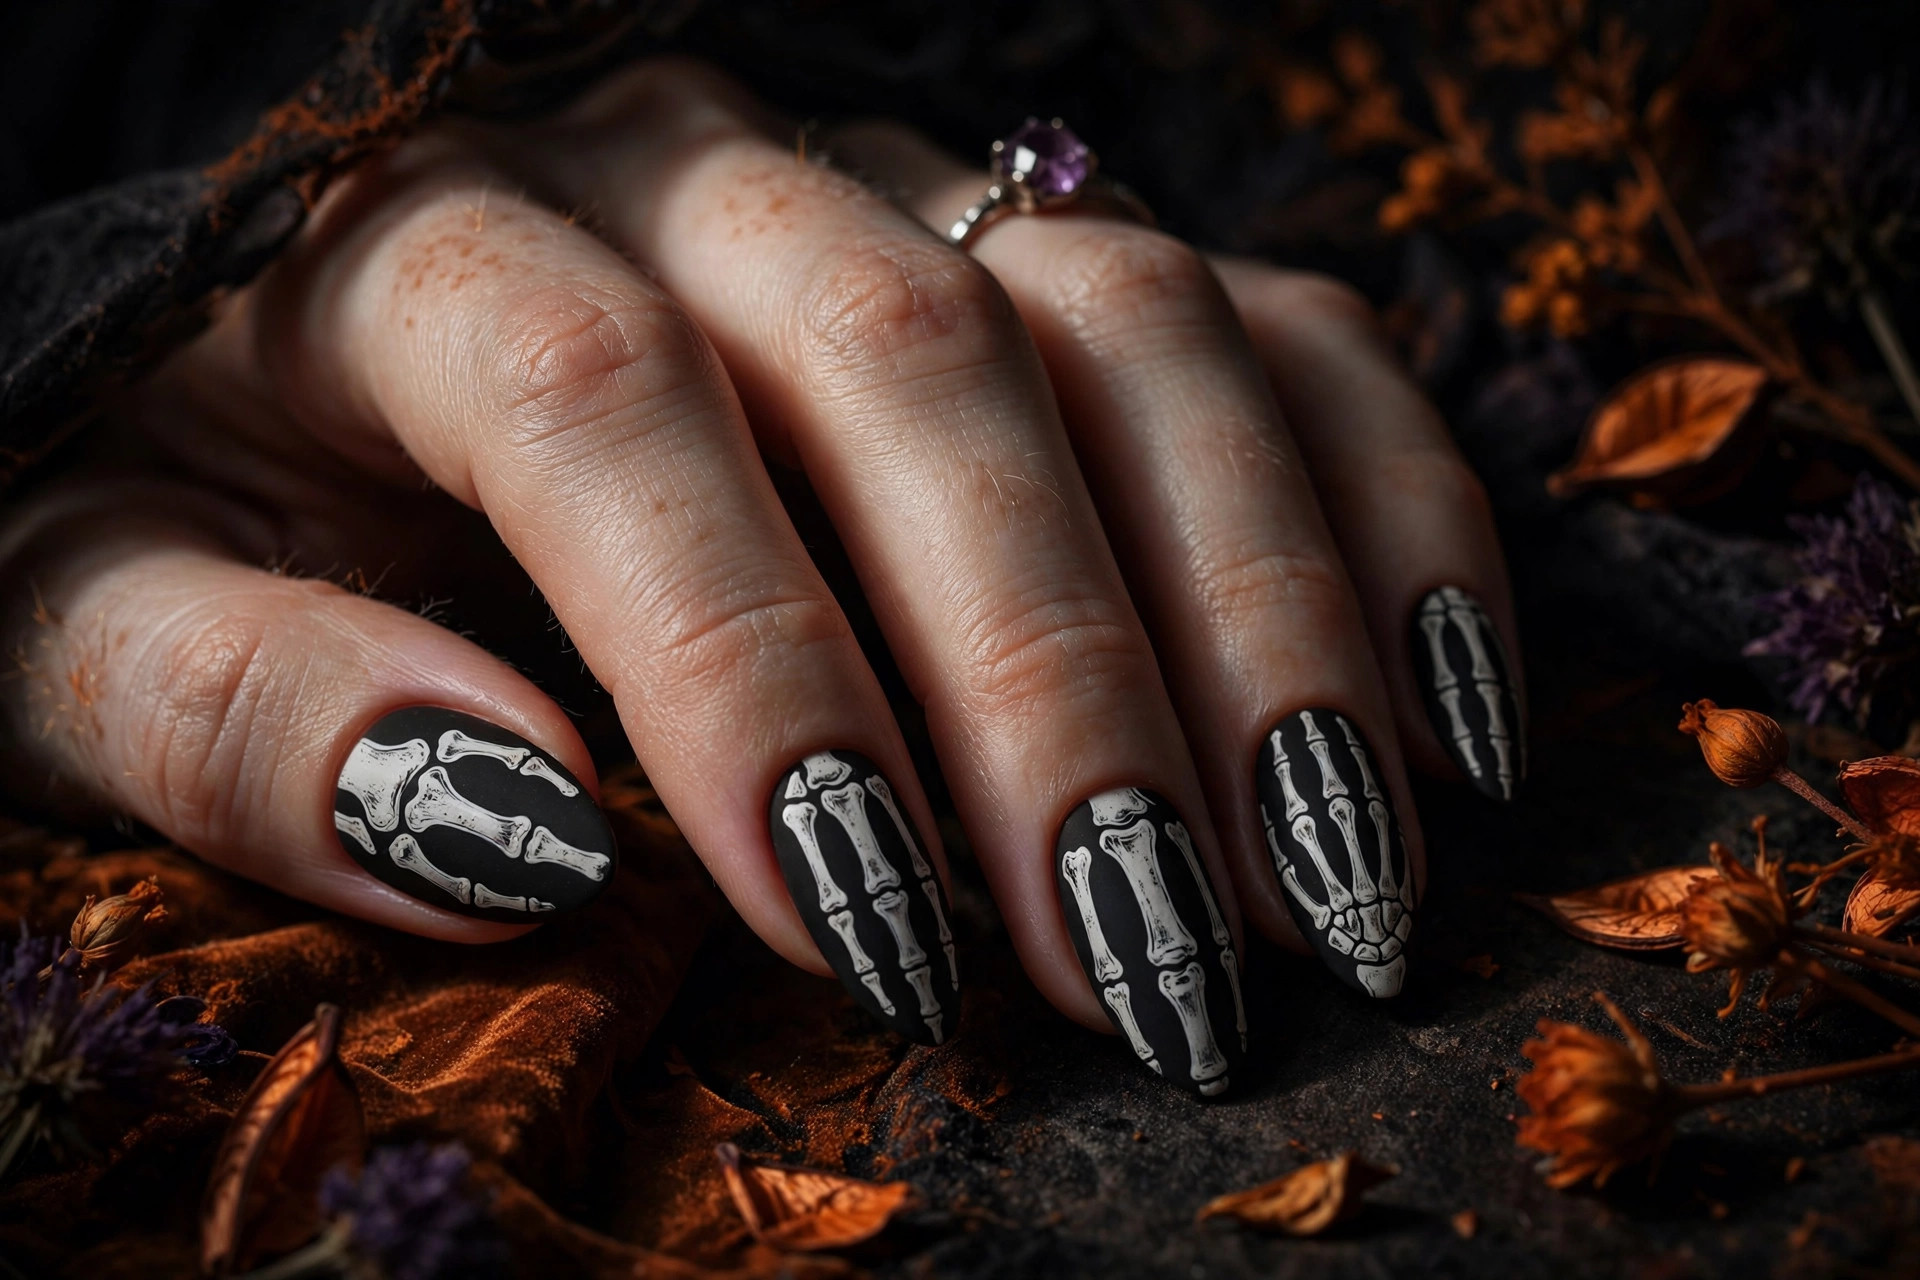
White skeleton finger bones painted over matte black nails are Halloween at its most striking. Each nail carries a segment of bone — knuckles, joints, fingertips — so the whole hand looks like an x-ray when you spread your fingers. The high-contrast black and white is graphic and bold, and the matte black base keeps it gothic rather than cartoonish.
It suits anyone with an edgy streak who wants a proper statement manicure. The bone shapes are simpler than they look — rounded rectangles connected by small circles — but they take patience, so this is a good salon request or a slow Sunday project with a fine brush. White bone stickers exist and look surprisingly convincing under matte top coat. Keep the rest of your styling simple; these nails are the whole outfit.
13. Vampire Fang Accents
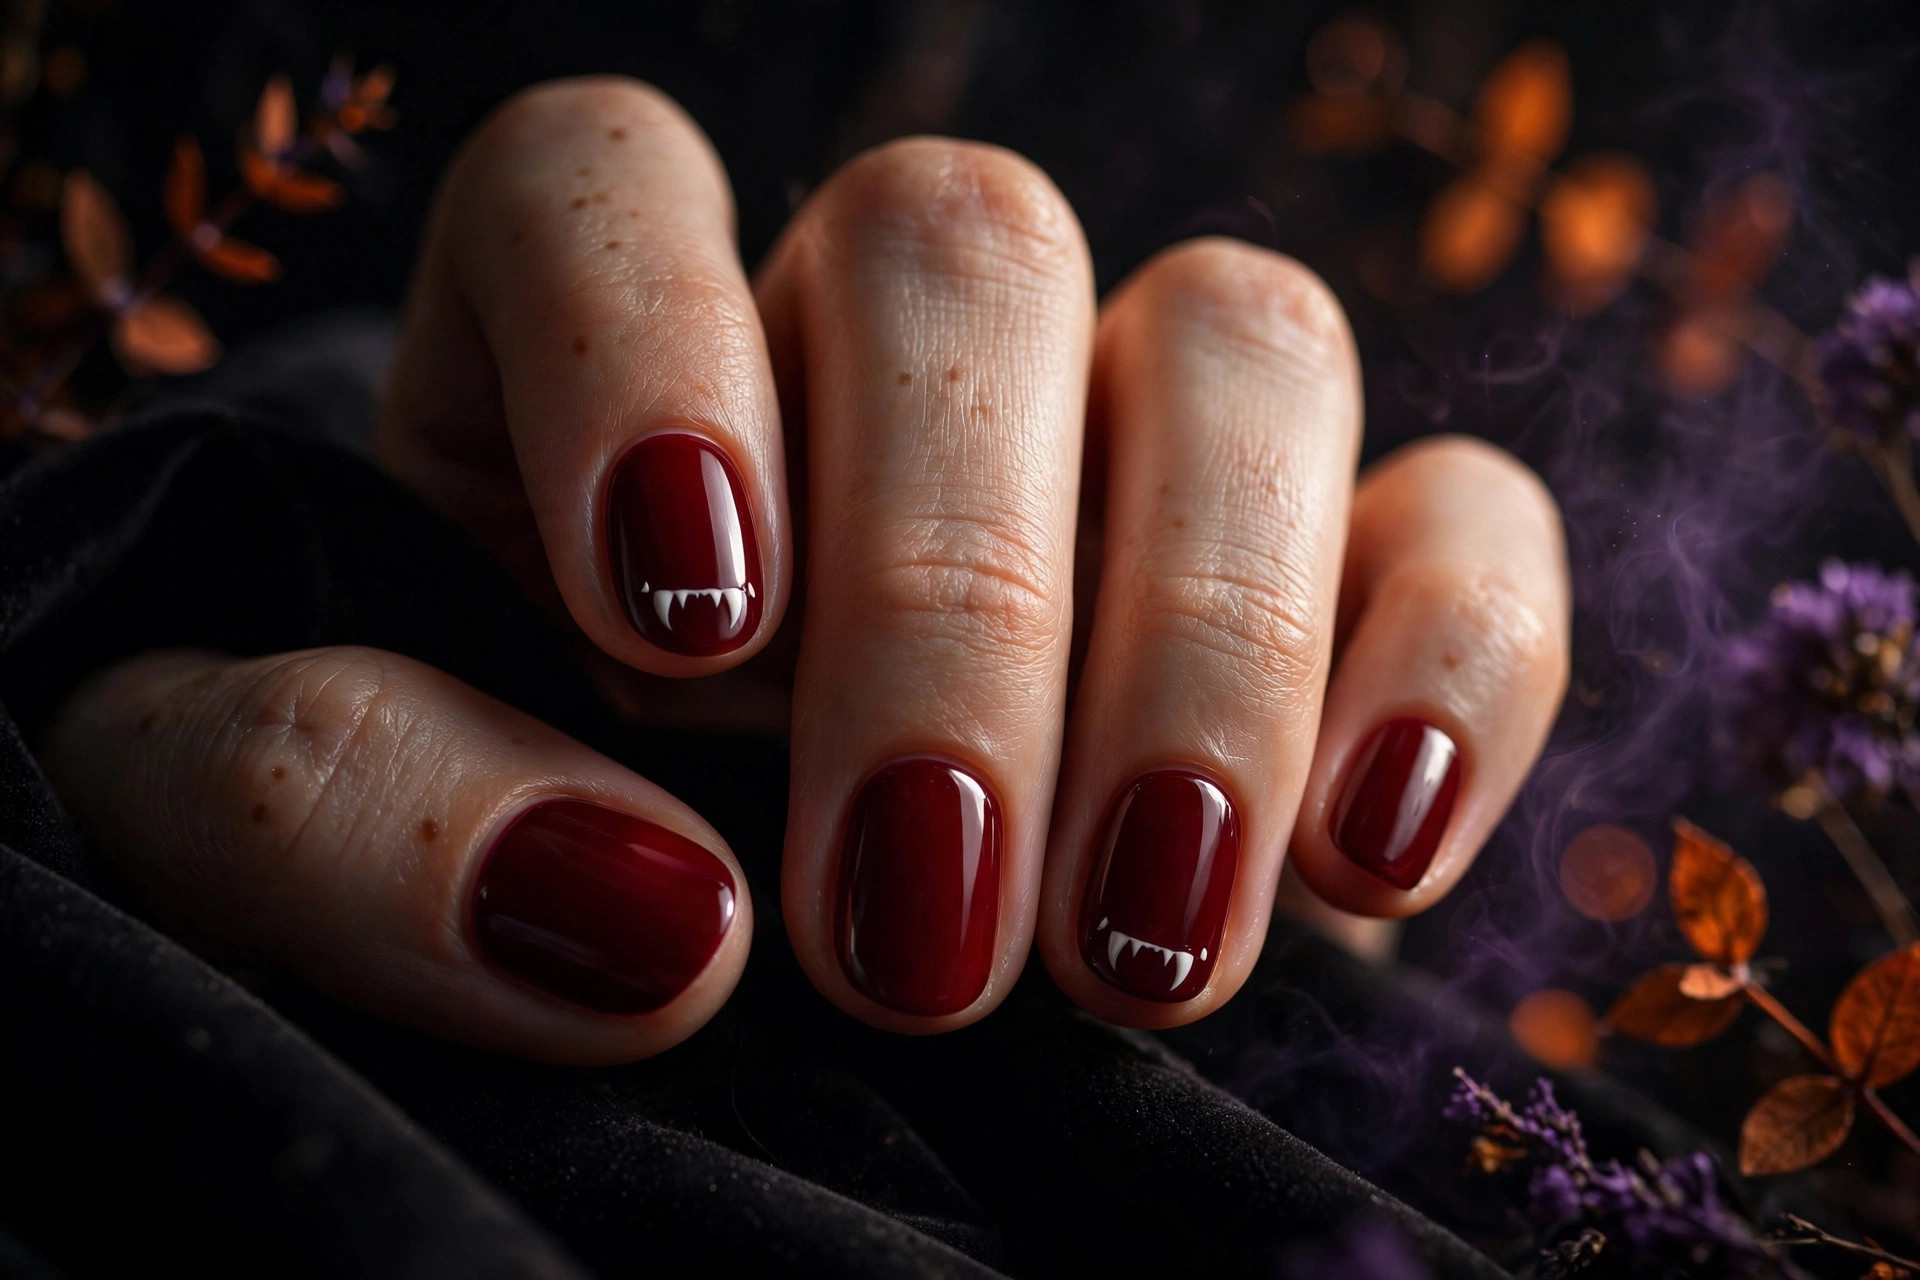
Tiny white fangs on two accent nails, with the rest of the set in deep oxblood red, give you vampire energy without a drop of the obvious. The fangs are small and sharp — little white triangles near the tips — and against the dark red base they read as playful rather than gruesome. It is the Halloween equivalent of a wink.
This suits people who like the vampire aesthetic but want to keep things cute. The design is very DIY-friendly: paint the oxblood base, then add the fangs with white polish and a dotting tool or toothpick on the ring fingers. Short to medium oval nails keep it neat. It pairs perfectly with a dark lip and takes about twenty minutes, making it ideal for a last-minute Halloween plan.
14. Glow-in-the-Dark
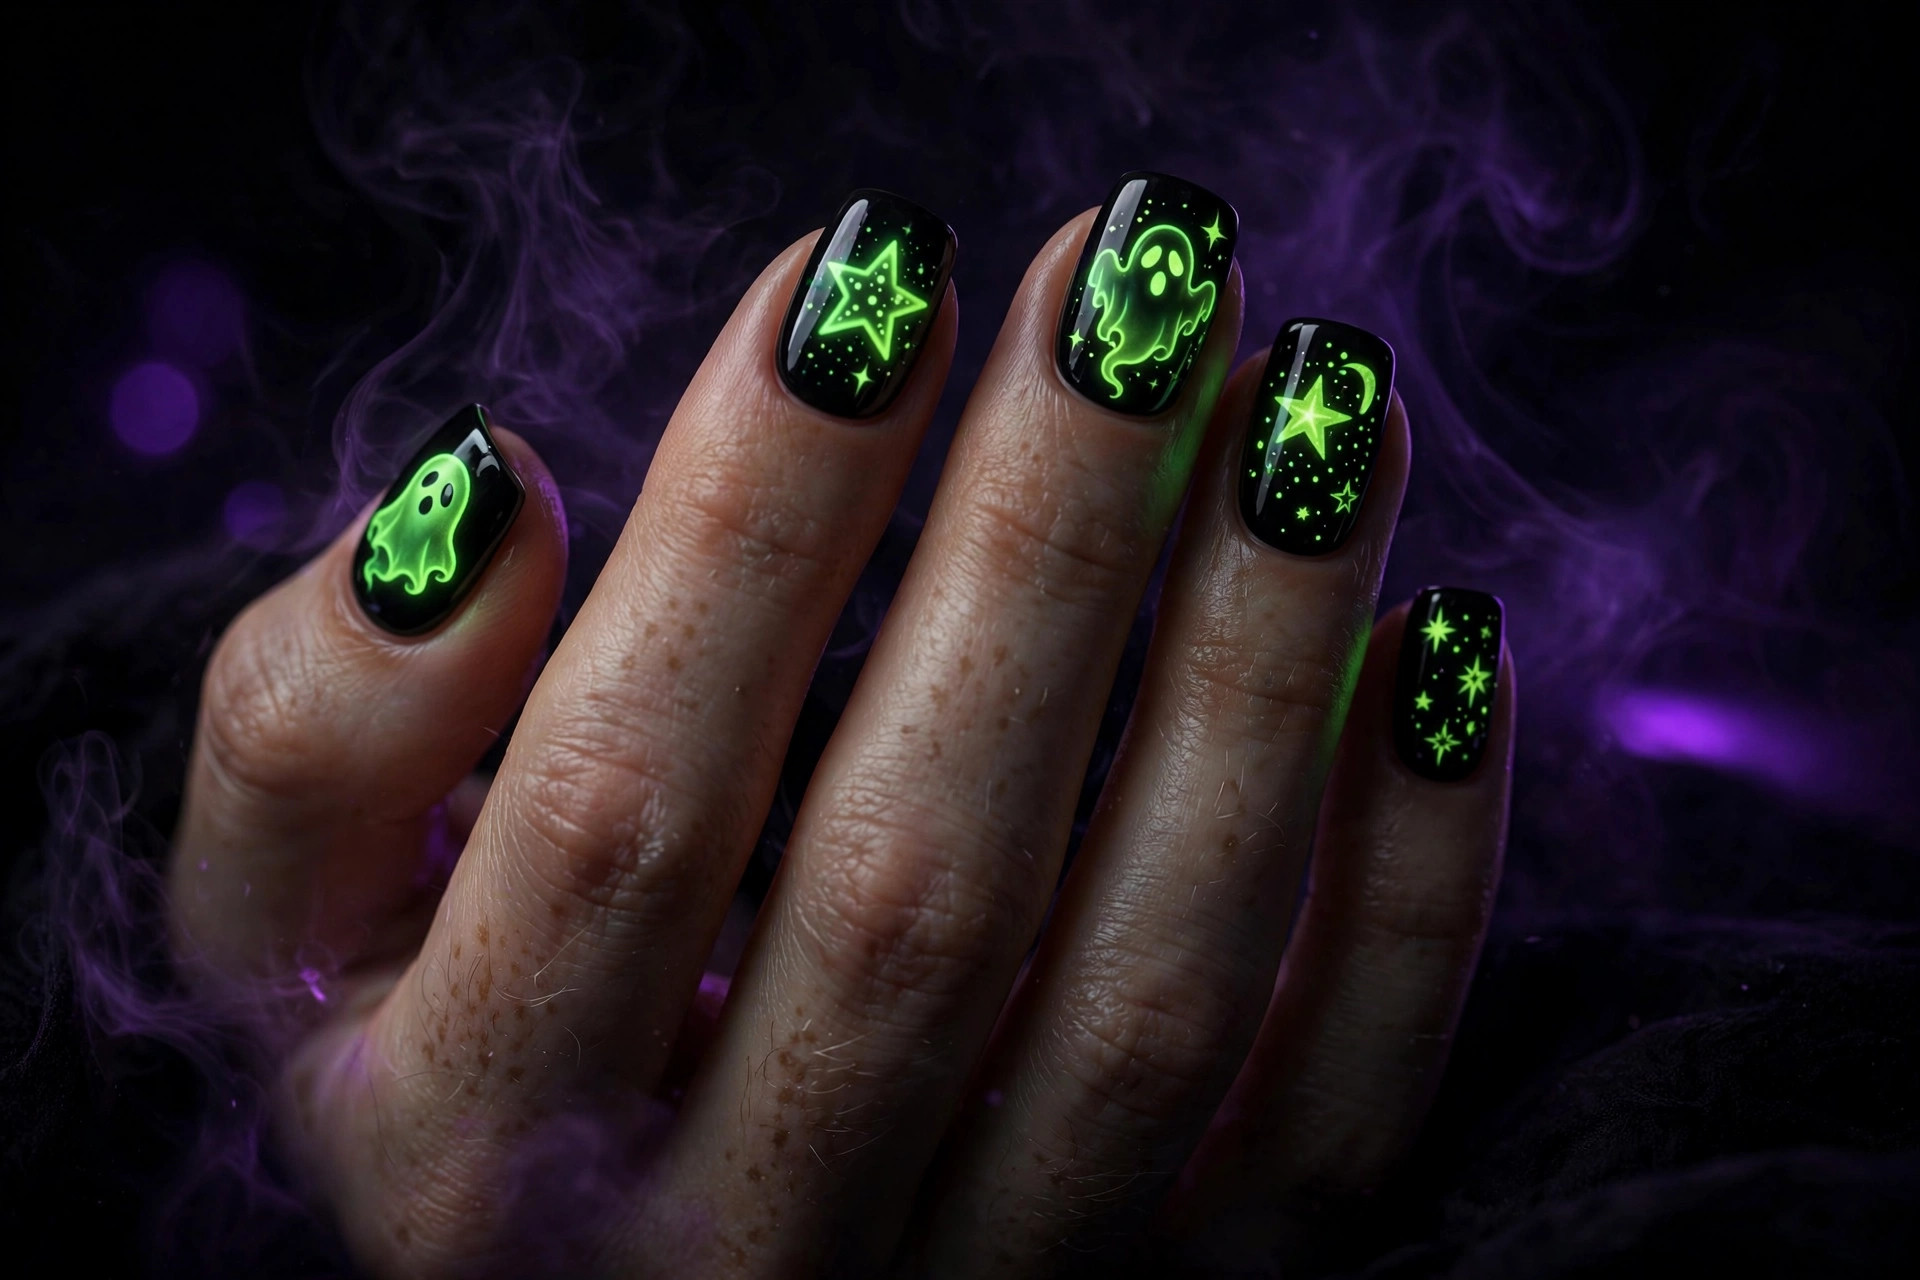
Ghost and star nail art that glows neon green in the dark is Halloween’s best party trick. In normal light it looks like a fun black set with pale green details; turn the lights off and the whole manicure lights up. It is made for haunted houses, night parties, and handing out candy after dark — kids absolutely lose their minds over it.
It suits anyone whose Halloween happens after sunset. Glow polish needs to be “charged” under bright light to glow its best, so spend a few minutes in daylight or under a lamp before heading out. Layer the glow polish over white for maximum brightness, and keep designs simple — ghosts, stars, and moons read best in the dark. The effect fades after a few hours but recharges every time the lights come back on.
15. Spiderweb French Tips
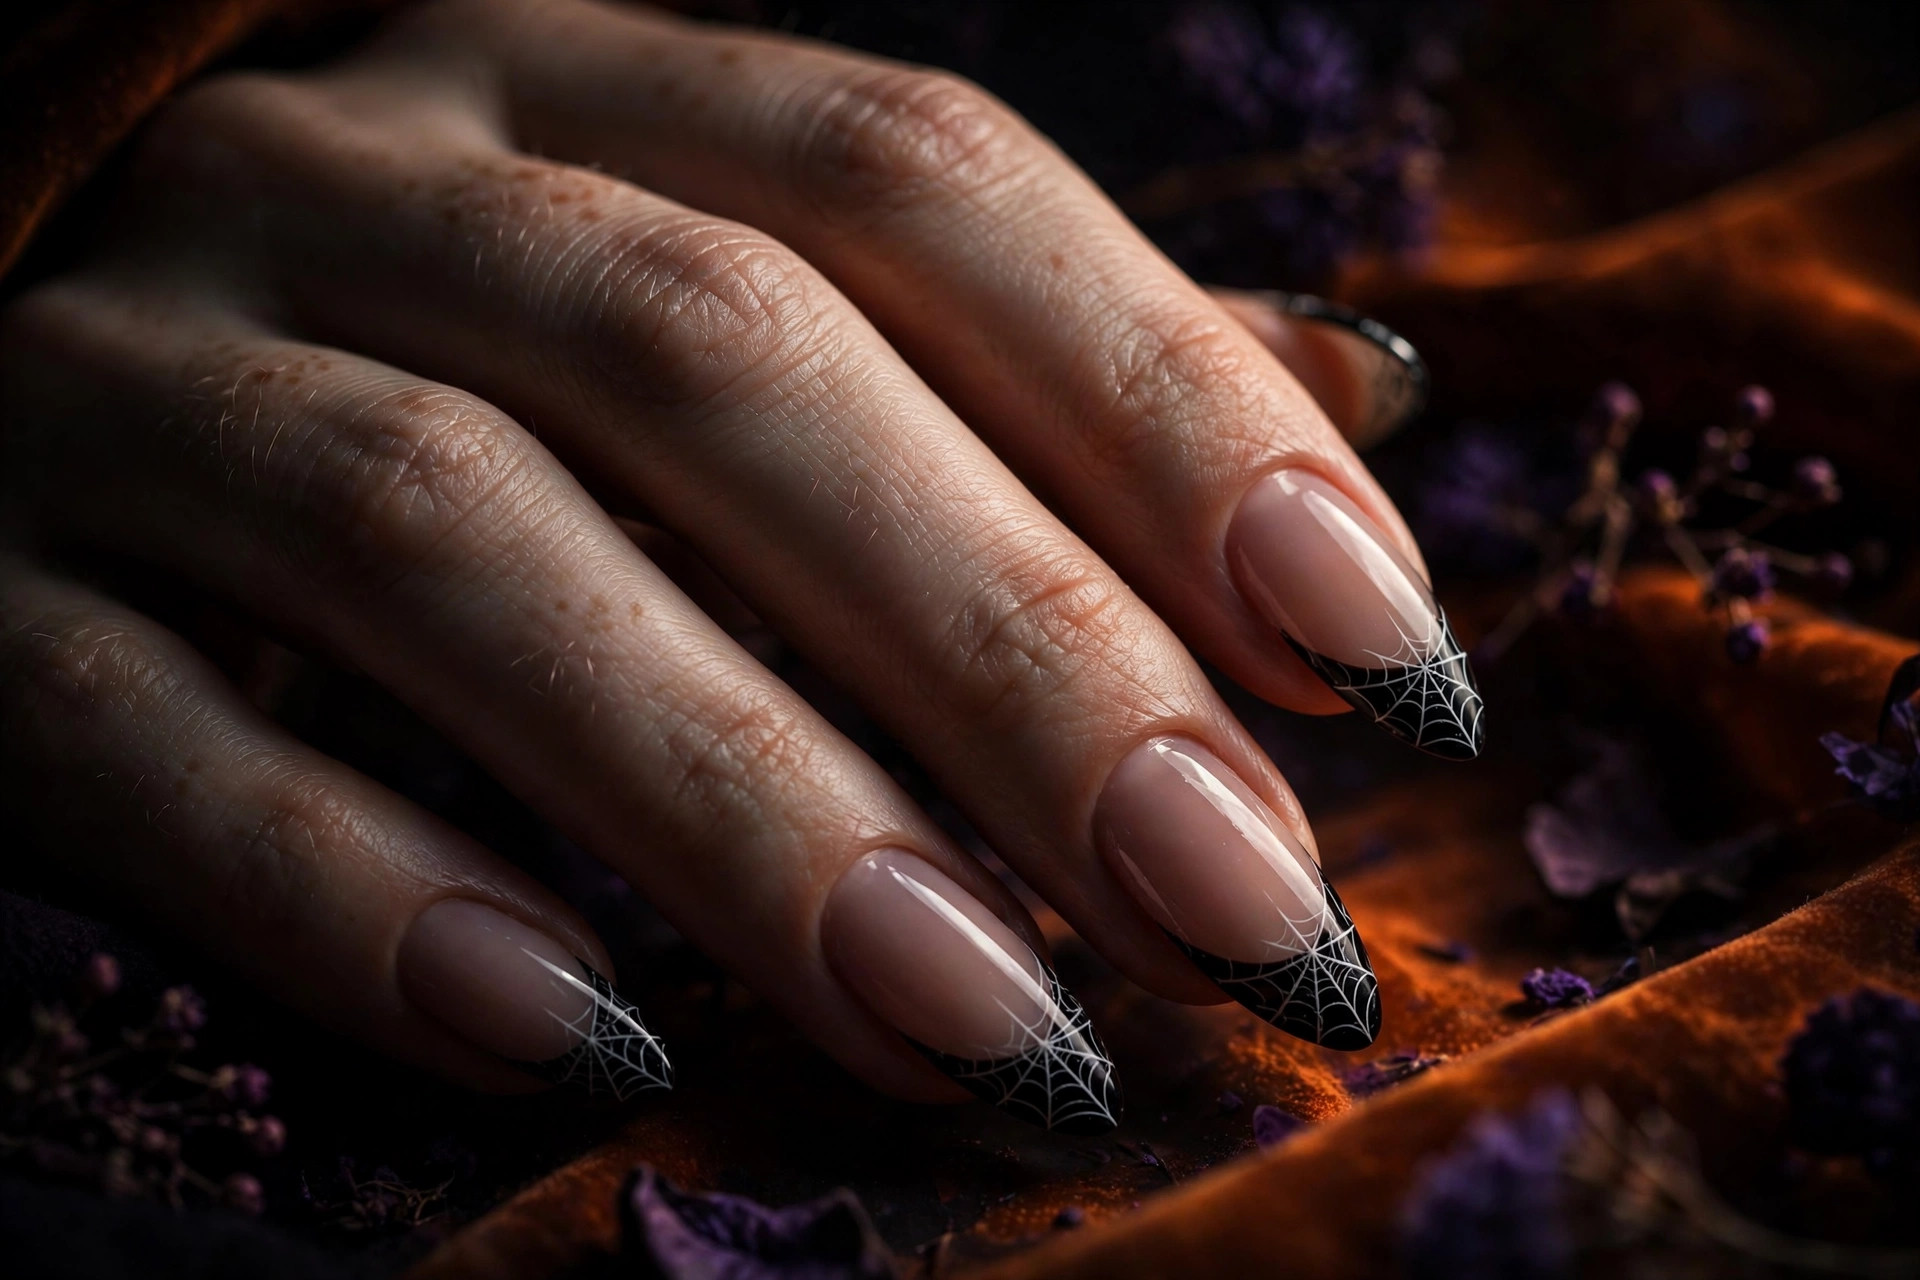
A sheer nude base with black French tips, each tip traced with a delicate white spiderweb, is the chicest Halloween manicure on this list. It keeps the clean, polished feeling of a French manicure but swaps the classic white tip for something with a seasonal bite. From a distance it reads as an edgy French; up close, the webs reveal themselves.
This suits minimalists, professionals, and anyone who needs their Halloween nails to survive a workday. The technique is straightforward: nude base, black tips (use guides for clean lines), then web details with a striping brush on two or three nails. Almond shapes flatter the French line beautifully. It is understated enough to wear into November, which makes it the best value pick of all fifteen.
How to Make Halloween Nail Designs Last
Halloween manicures take more abuse than most — costume changes, party prep, buckets of candy, and a lot of hand-washing. Start with proper prep: push back cuticles, lightly buff the nail surface, and never skip base coat, especially under dark Halloween colors that stain. Apply color in thin coats rather than thick ones, cap the free edge with every layer, and seal detailed art with two coats of top coat.
For the hand-painted designs above, gel polish is worth considering — art done in gel easily survives two to three weeks of October festivities, while regular polish art benefits from a fresh top coat every couple of days. Keep cuticle oil by your bed and use it nightly; flexible polish chips far less than dry, brittle polish. If you want to try the art designs at home, this nail art kit has the striping brushes, dotting tools, and detail pens that make webs, faces, and fine lines much easier. And wear gloves for dishes and cleaning — hot water and detergent are the fastest way to ruin good nail art.
Final Thoughts
Halloween nail designs are really about choosing your version of spooky. Maybe that is a full haunted house scene painted across long almond nails, or maybe it is just a deep vampy wine that hints at the season without saying a word. Either way, pick the design that matches your plans — detailed art for the big party night, simpler solids and French tips if your Halloween includes an office.
Start with one design from this list, wear it for the week leading up to the 31st, and see how it feels in your actual life before committing to anything more elaborate next year. And when the pumpkins come down and you are ready for everyday inspiration again, our guide to beautiful nail designs trending right now has plenty to carry you through the rest of the season.