17 Star Nail Designs
Star nail designs have a way of making your hands look magical without trying too hard. There is something about tiny stars scattered across a glossy base that feels both dreamy and effortless, whether you go for a full galaxy look or just a single sparkling accent. If you love celestial themes, you might also enjoy these extra celestial nail ideas that are out of this world for even more inspiration.
The best part about star nail art is how flexible it is. Stars work on every nail length and shape, they pair well with almost any color, and they can look minimal or dramatic depending on your mood. From delicate gold decals to hand-painted galaxies, this collection of 17 star nail designs covers every style, so you can find the one that feels like you.
Why Star Nails Are Taking Over
Star nails keep showing up everywhere, from red carpets to your Pinterest feed, and it is easy to see why. They hit that sweet spot between playful and elegant, and they never really go out of style the way some trends do. A star motif also photographs beautifully, which is why so many nail artists love it for client photos. For a deeper dive into the trend, check out these celestial nail ideas for your most mesmerizing manicure yet.
Another reason star nail designs are so popular is how beginner-friendly they are. A dotting tool, a thin brush, or even a pack of nail decals is all you need to get a clean, pretty result at home. And because stars look good slightly imperfect, you do not need a steady professional hand to pull them off. Whether you want subtle sparkle for the office or a full cosmic statement for a night out, there is a star design below with your name on it.
1. Tiny Gold Stars on Nude
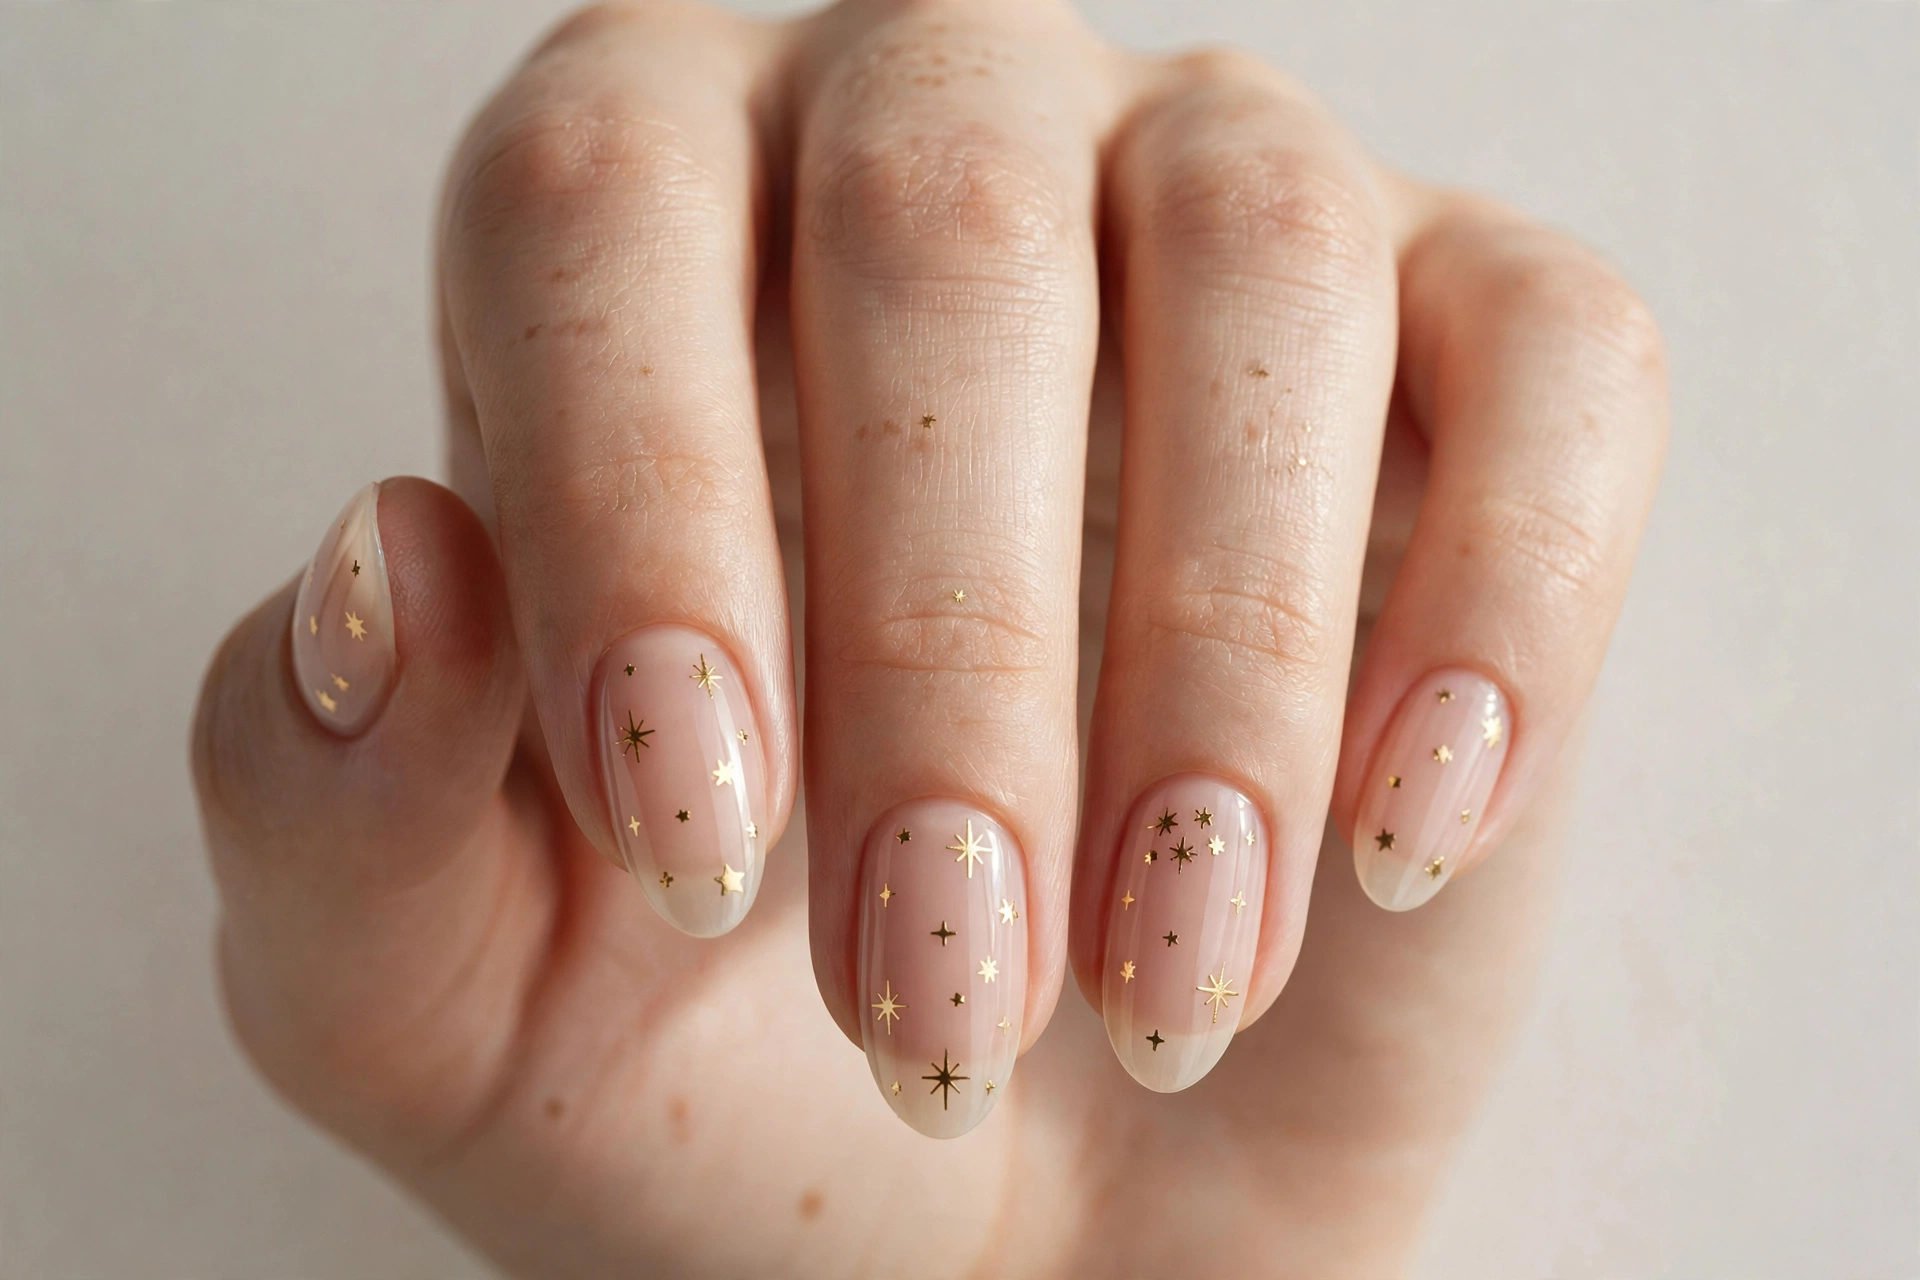
This is the star nail design for minimalists. A sheer nude base keeps everything soft and wearable, while tiny gold star decals add just enough sparkle to catch the light. It looks polished at work, pretty on a date, and it goes with literally everything in your closet. The design suits short and medium nails especially well, since the small stars do not overwhelm a shorter nail bed.
To get it at home, apply two coats of your favorite sheer nude polish, then place small gold star decals or stickers on each nail while the second coat is still slightly tacky. You can scatter them randomly for a playful feel or line up one star per nail for a cleaner look. Seal everything with a glossy top coat so the decals sit flat and last. This is also a great first attempt if you are new to nail art, since decals do all the hard work for you.
2. Starry Night Sky
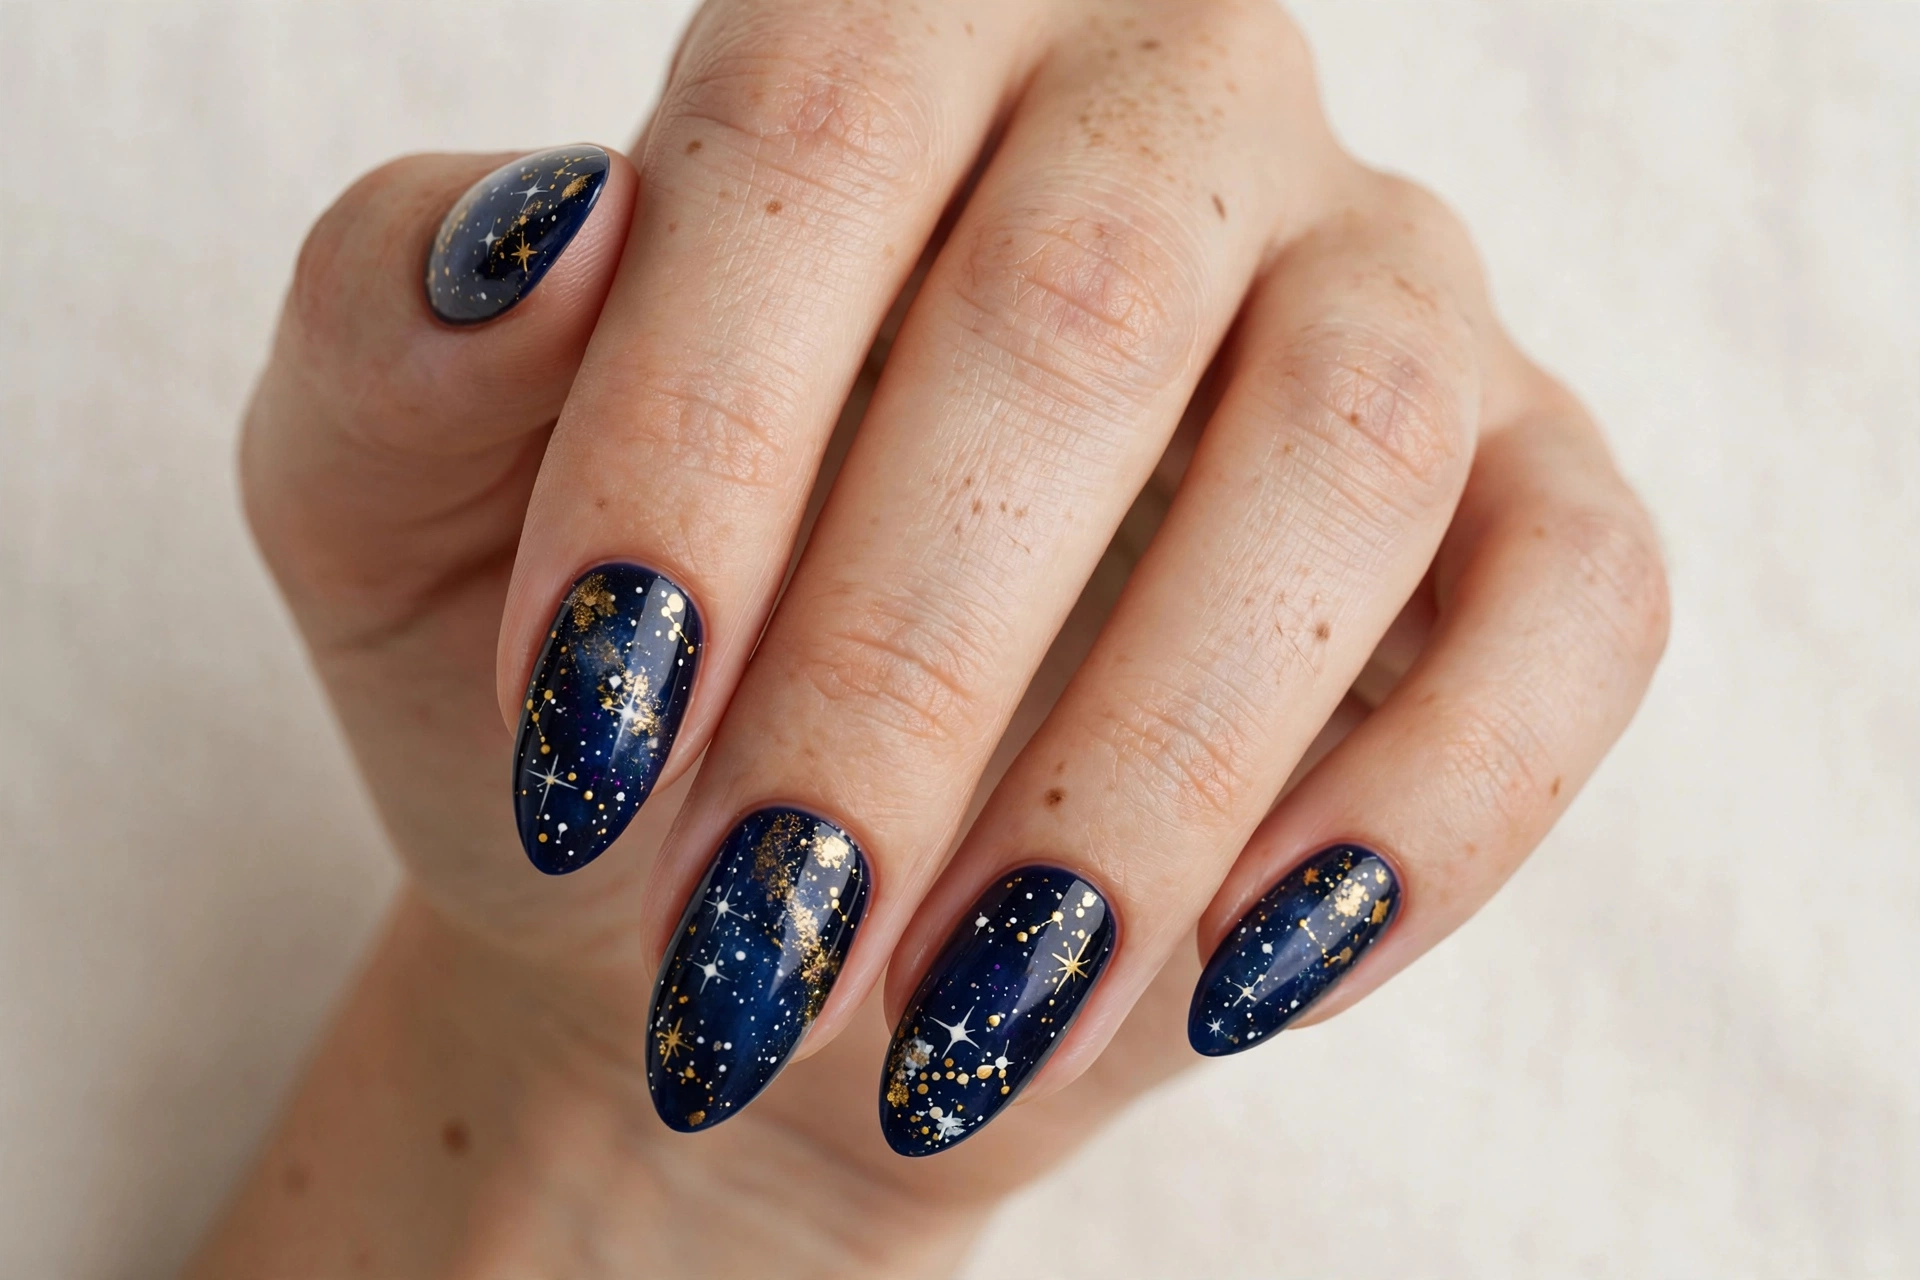
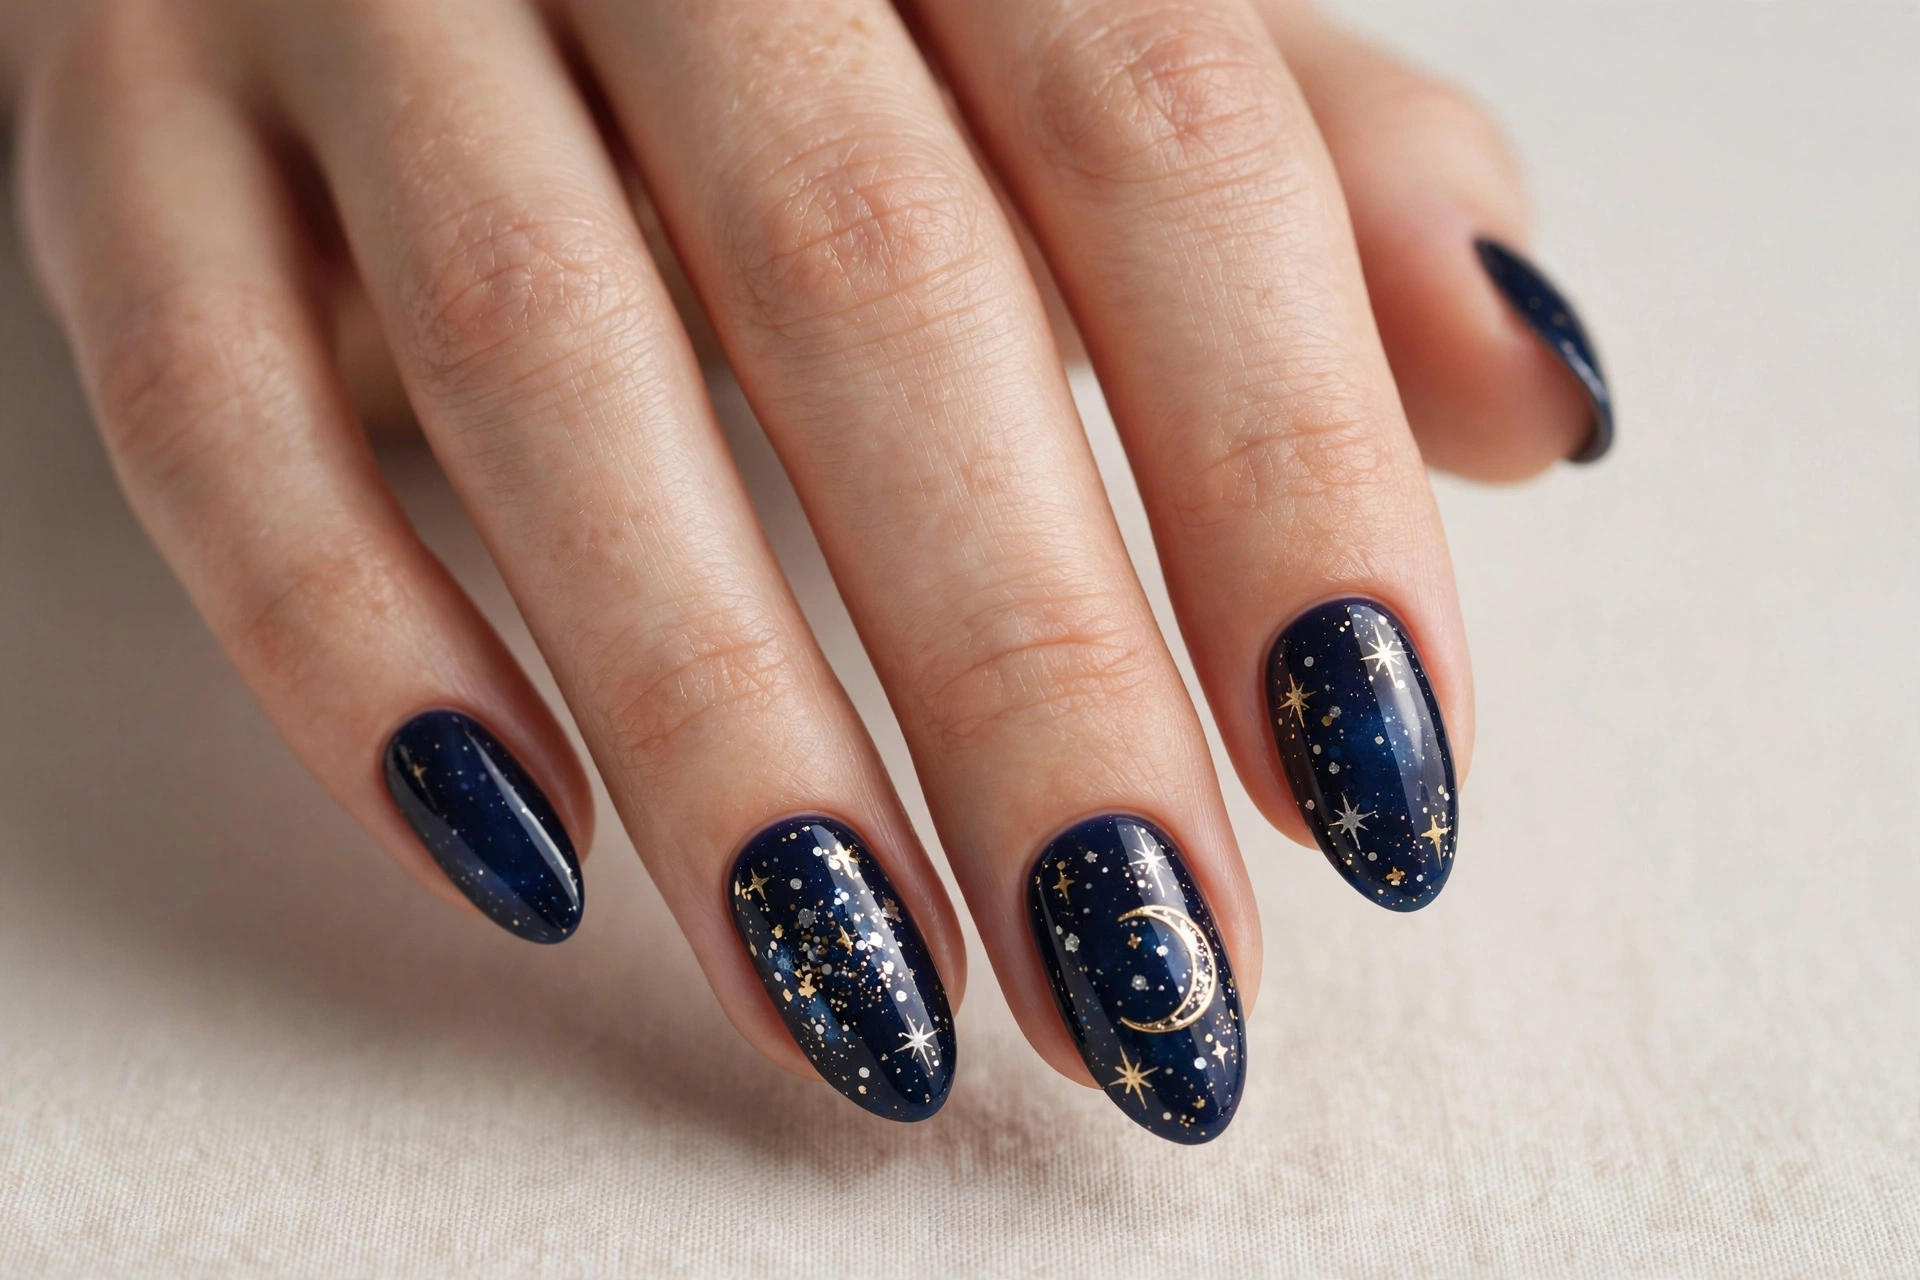
If you want the full cosmic effect, a starry night sky manicure is the way to go. Deep navy polish becomes your canvas, and hand-painted white and gold stars turn your nails into a miniature galaxy. This design looks stunning on almond or coffin shapes, where the longer nail gives the night sky room to breathe. It is dramatic, moody, and perfect for anyone who loves a bold manicure.
Start with two coats of a rich navy polish and let it dry fully. Then use a thin nail art brush or a dotting tool to paint stars in white and gold, varying the sizes so it looks like a real sky. Add a few tiny dots around the stars for distant sparkle. Finish with a glossy top coat to make the colors pop. If freehand painting feels intimidating, star stencils or stamping plates can give you the same galaxy effect with much less effort.
3. Constellation Lines
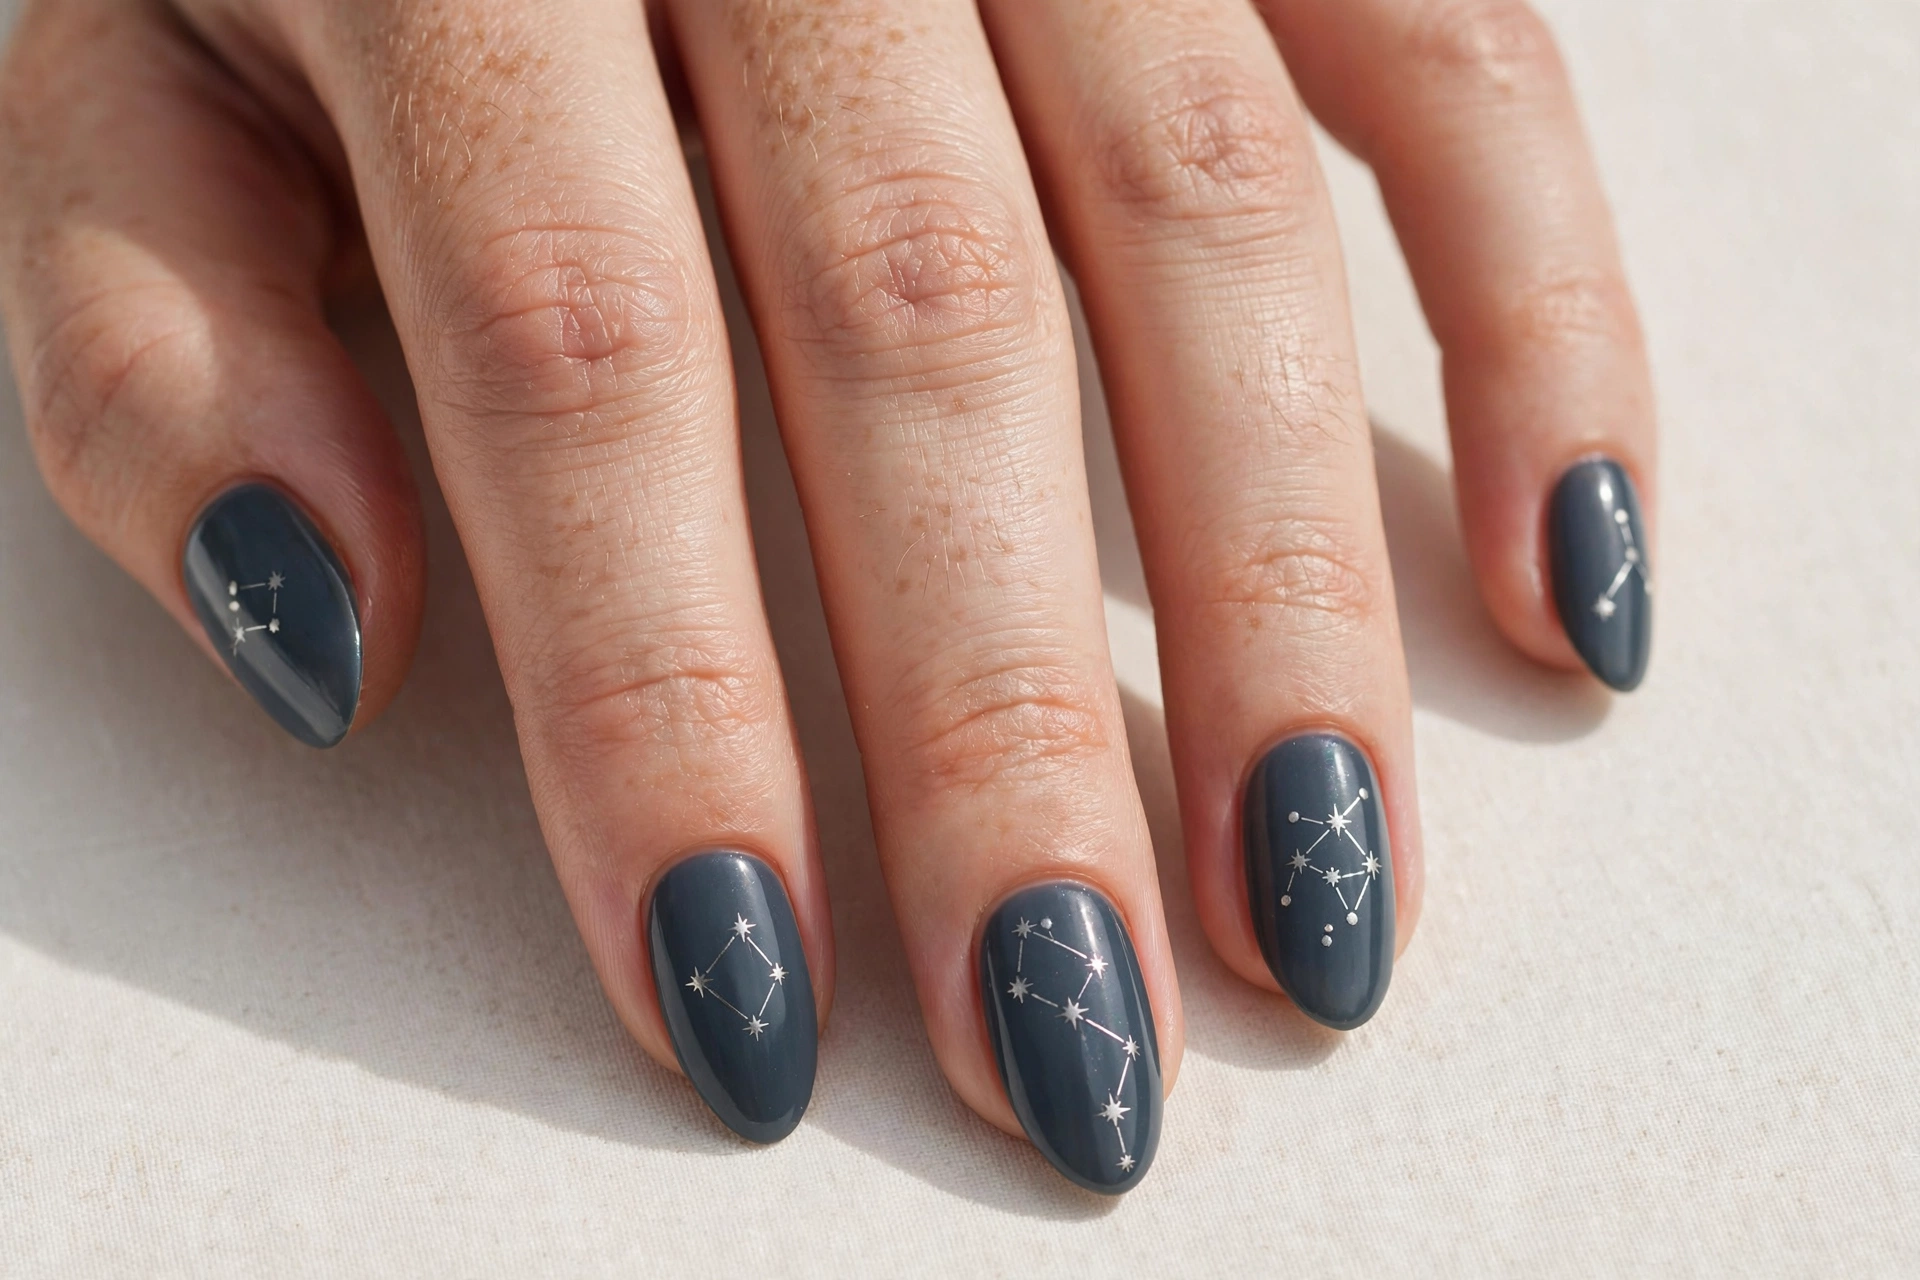
Constellation nails are star nail art for the thoughtful, artsy types. Thin silver lines connect tiny star dots across a dark slate base, mimicking the constellations you see on a clear night. It is subtle enough for everyday wear but interesting enough that people will lean in for a closer look. This design works beautifully on medium to long nails, where the lines have space to stretch out.
Paint your nails with two coats of dark slate or charcoal polish. Once dry, use a striping brush and silver polish to draw thin connecting lines between small dots, forming simple constellation shapes like triangles or zigzags. You can copy a real constellation or just invent your own pattern. A matte top coat gives this look a modern, editorial finish, while a glossy top coat keeps it classic. Either way, it is a conversation starter.
4. Silver Glitter Stars on Black
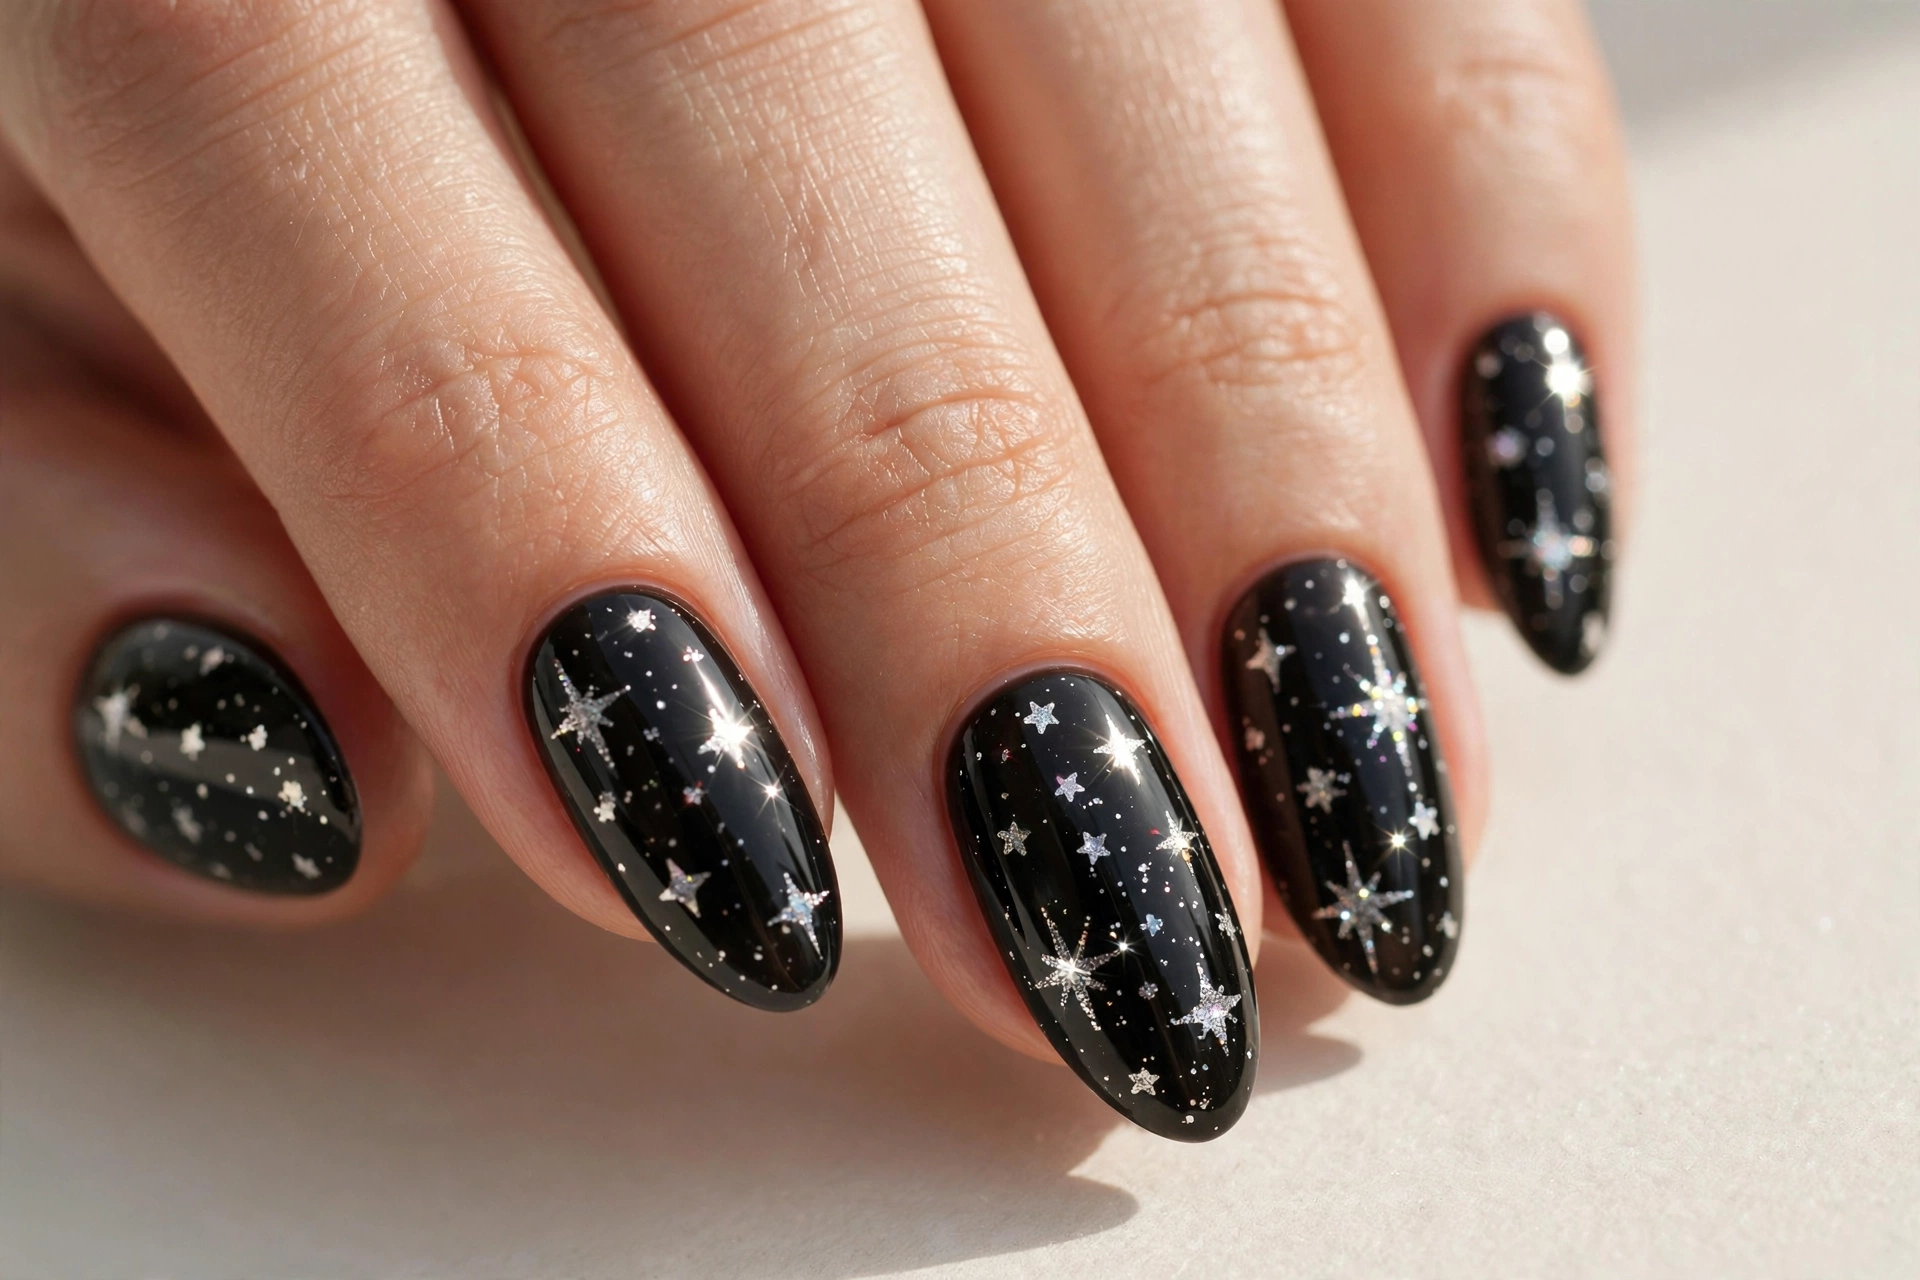
Nothing says drama like silver glitter stars on a glossy black base. The contrast is striking, the glitter catches every bit of light, and the whole look feels like a night out in the city. This is the design to pick for parties, concerts, or New Year’s Eve, when you want your nails to do some of the talking. It suits all nail shapes, but it looks especially fierce on sharp stilettos or long coffins.
Apply two coats of true black polish as your base. While the second coat is still tacky, press silver glitter star sequins or chunky glitter onto each nail, concentrating them near the tips or scattering them evenly. You can also use a glitter topper with star-shaped pieces for a quicker version. Seal with two layers of glossy top coat to lock the glitter in place and smooth the surface. The result is pure sparkle that lasts for days.
5. Star French Tips
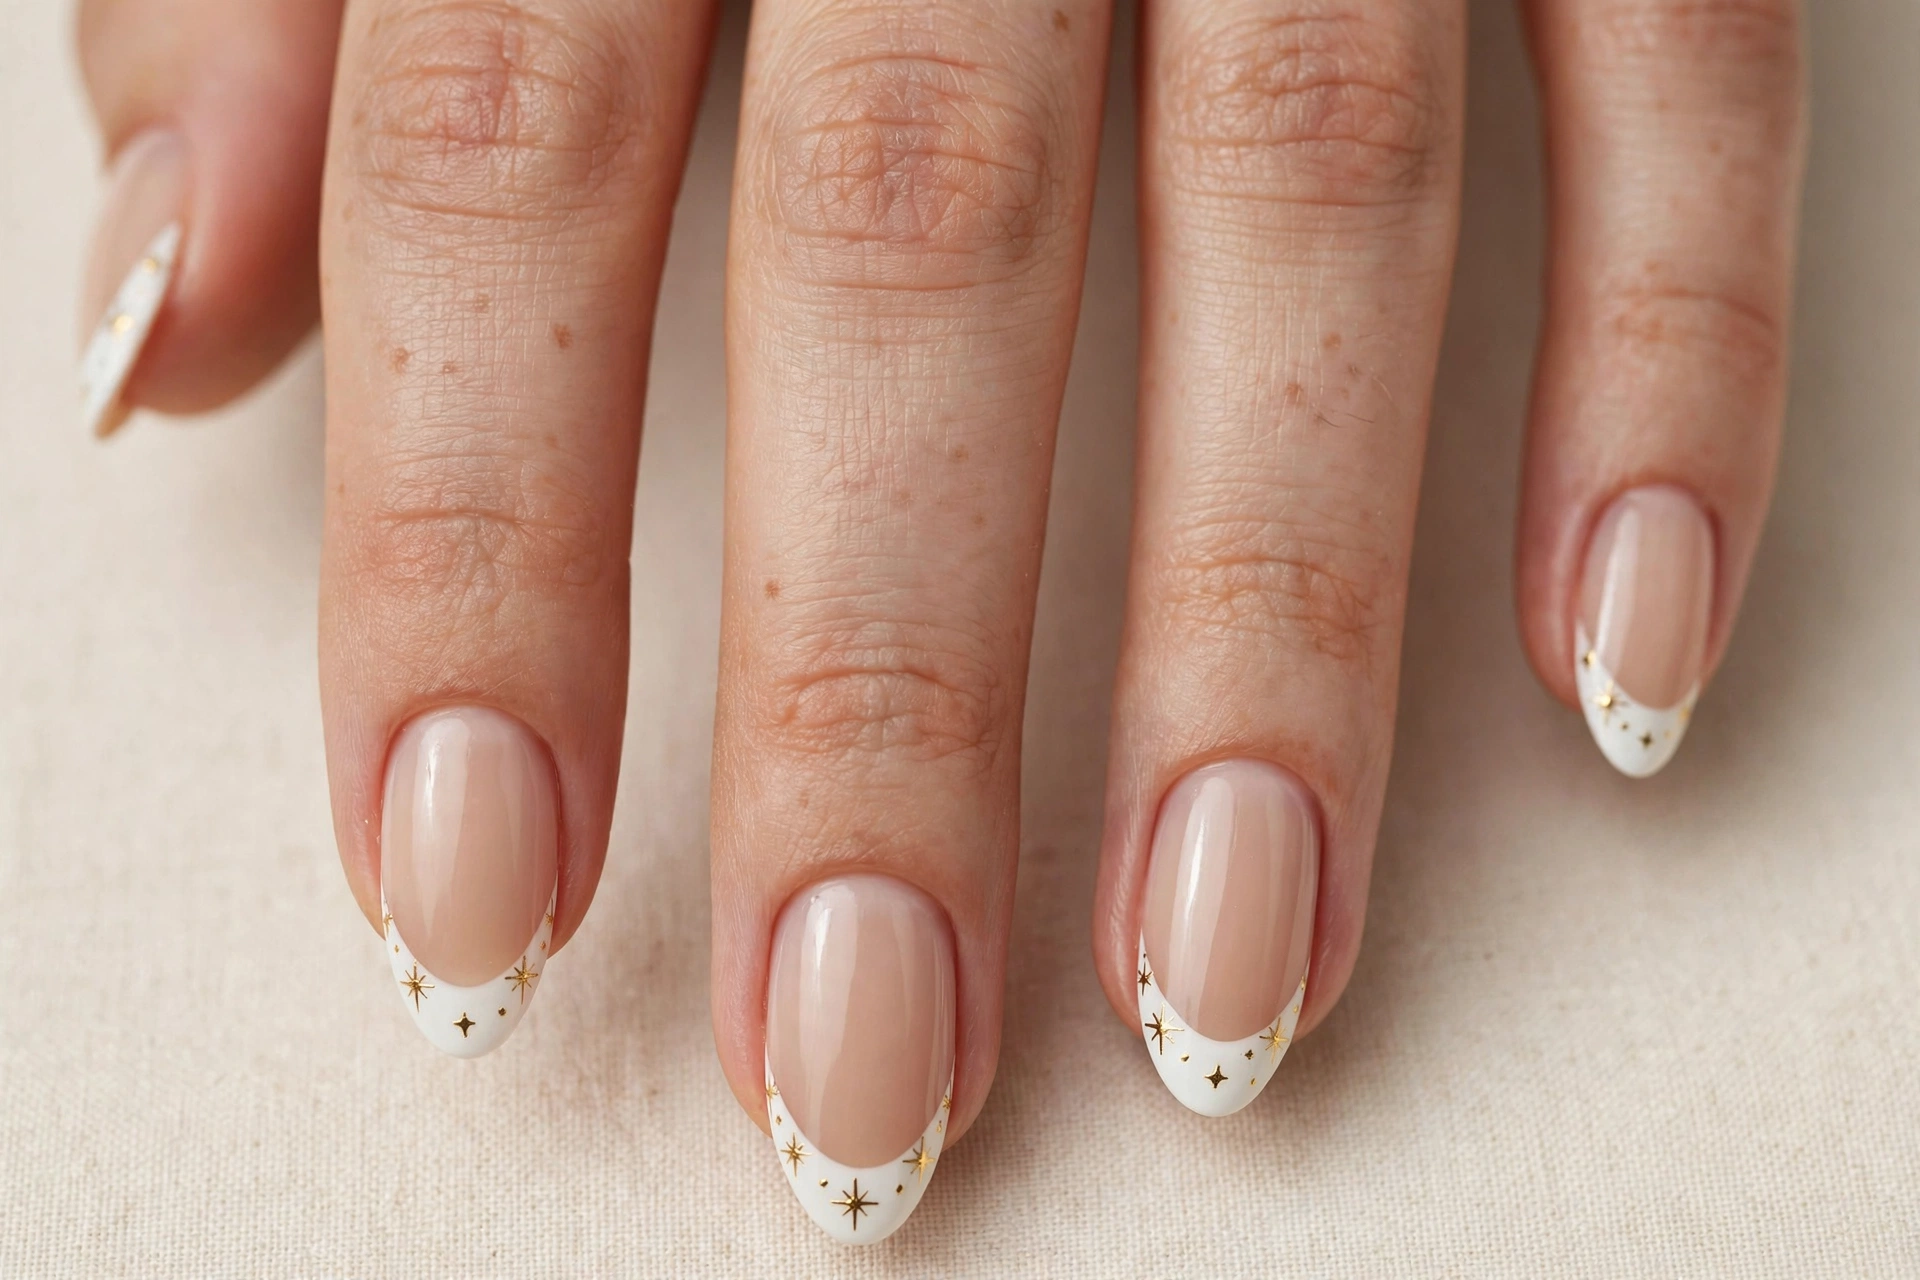
Star french tips are a fresh twist on the most classic manicure of all time. Instead of a plain white tip, tiny gold stars decorate the smile line, giving the traditional french a playful, modern update. It keeps the elegance of a french manicure but adds personality, which makes it perfect for weddings, brunches, or anyone who wants classic with a wink.
Start with a sheer nude or pink base on all nails. Paint your french tips in white, then while the white is still slightly wet, place tiny gold star decals along the tip edge. One or two stars per nail is plenty. Clean up the smile line with a small brush dipped in polish remover for that crisp french look. A glossy top coat ties it all together. This design also works on short nails, since the stars draw the eye to the tips.
6. Celestial Moon and Stars
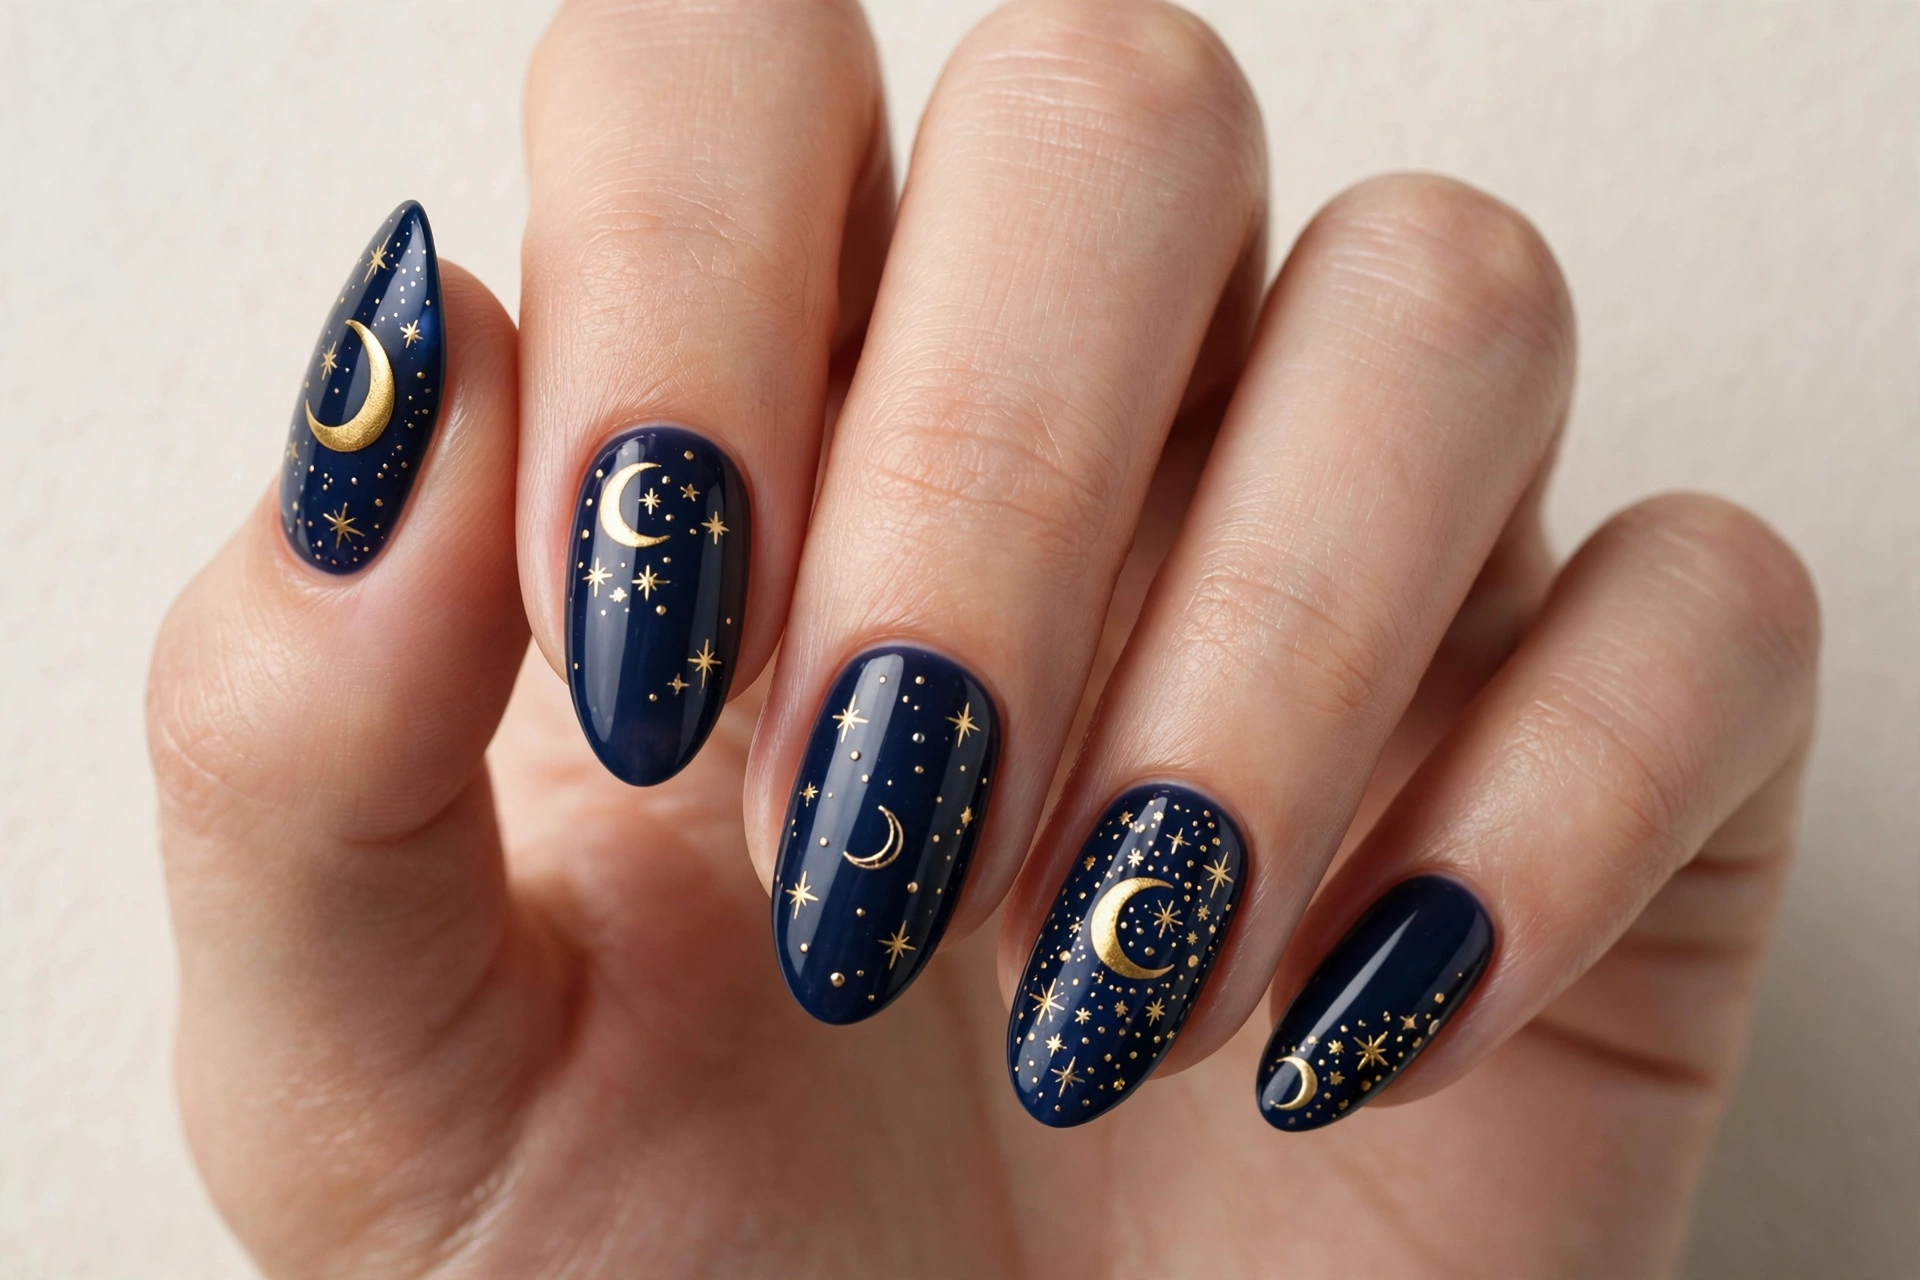
Moons and stars are a match made in celestial heaven. Gold crescent moons paired with tiny stars on a midnight blue base create a dreamy, almost mystical manicure that feels straight out of a tarot deck. This design suits anyone drawn to astrology, spirituality, or just really pretty nails. It looks gorgeous on almond nails, where the curved shape echoes the crescent moons.
Paint two coats of midnight blue and let them dry. Add gold crescent moon decals as the focal point on one or two nails per hand, then scatter tiny gold and white stars around them. Mixing decal moons with hand-painted star dots gives the design depth. Finish with a glossy top coat. For an extra magical touch, add a tiny rhinestone at the center of one moon, like a glowing planet in your personal night sky.
7. Pastel Pink Tiny Stars
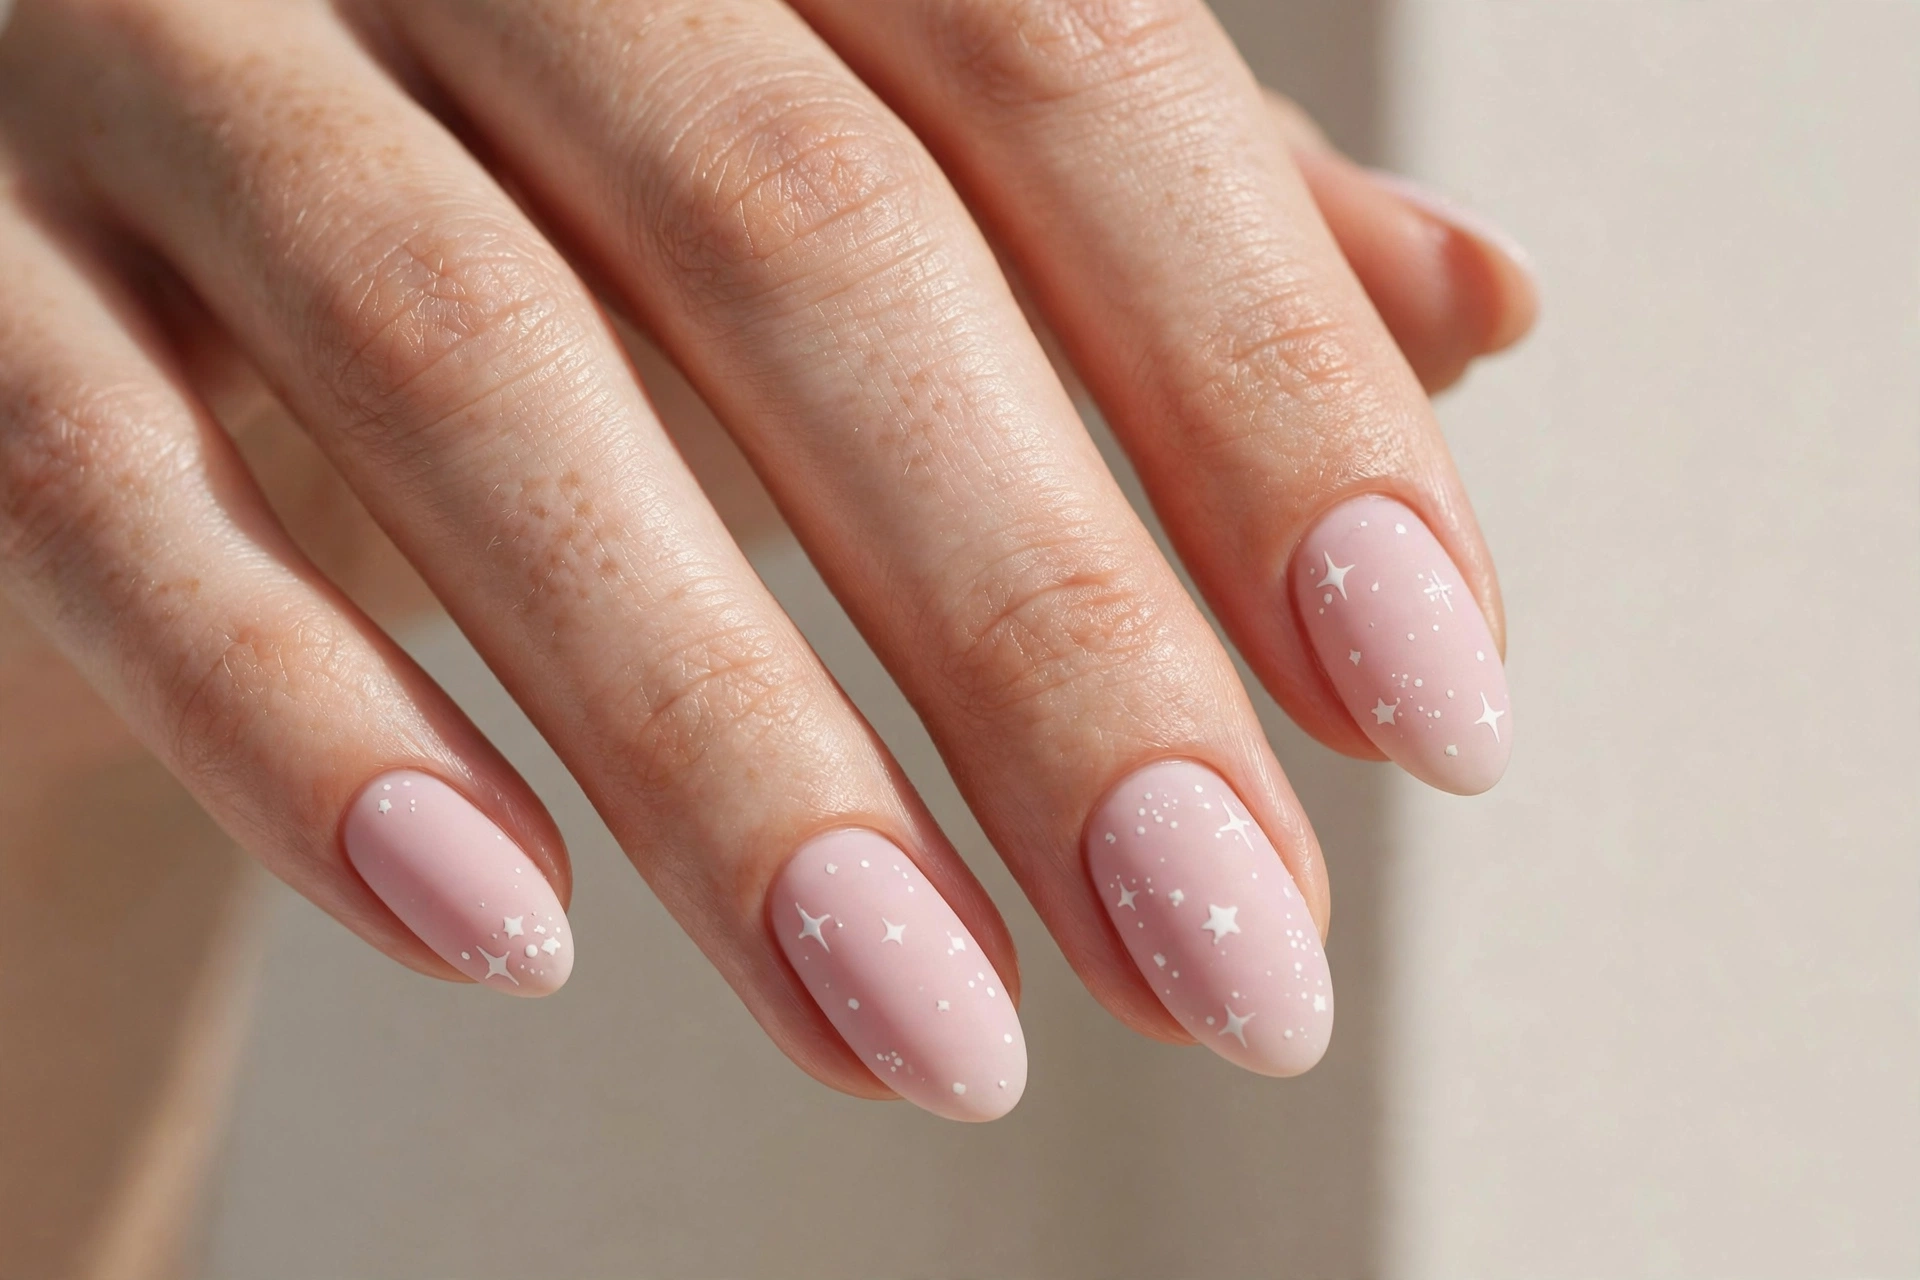
Soft, sweet, and a little bit dreamy, pastel pink nails with tiny white stars are the definition of cute. This design has a gentle, romantic feel that works for spring, Valentine’s season, or any time you want your nails to look soft and feminine. The light base makes it office-friendly too, since the stars read as a delicate detail rather than a bold statement.
Apply two coats of pastel pink polish. Once dry, use a dotting tool or the tip of a bobby pin dipped in white polish to paint tiny four-pointed stars on each nail. Keep them small and sparse for the dreamiest effect. If freehand stars feel tricky, white star stickers work just as well. Seal with a glossy top coat. This design is also lovely on short nails, where the pastel color keeps everything looking neat and fresh.
8. 3D Gold Star Charms
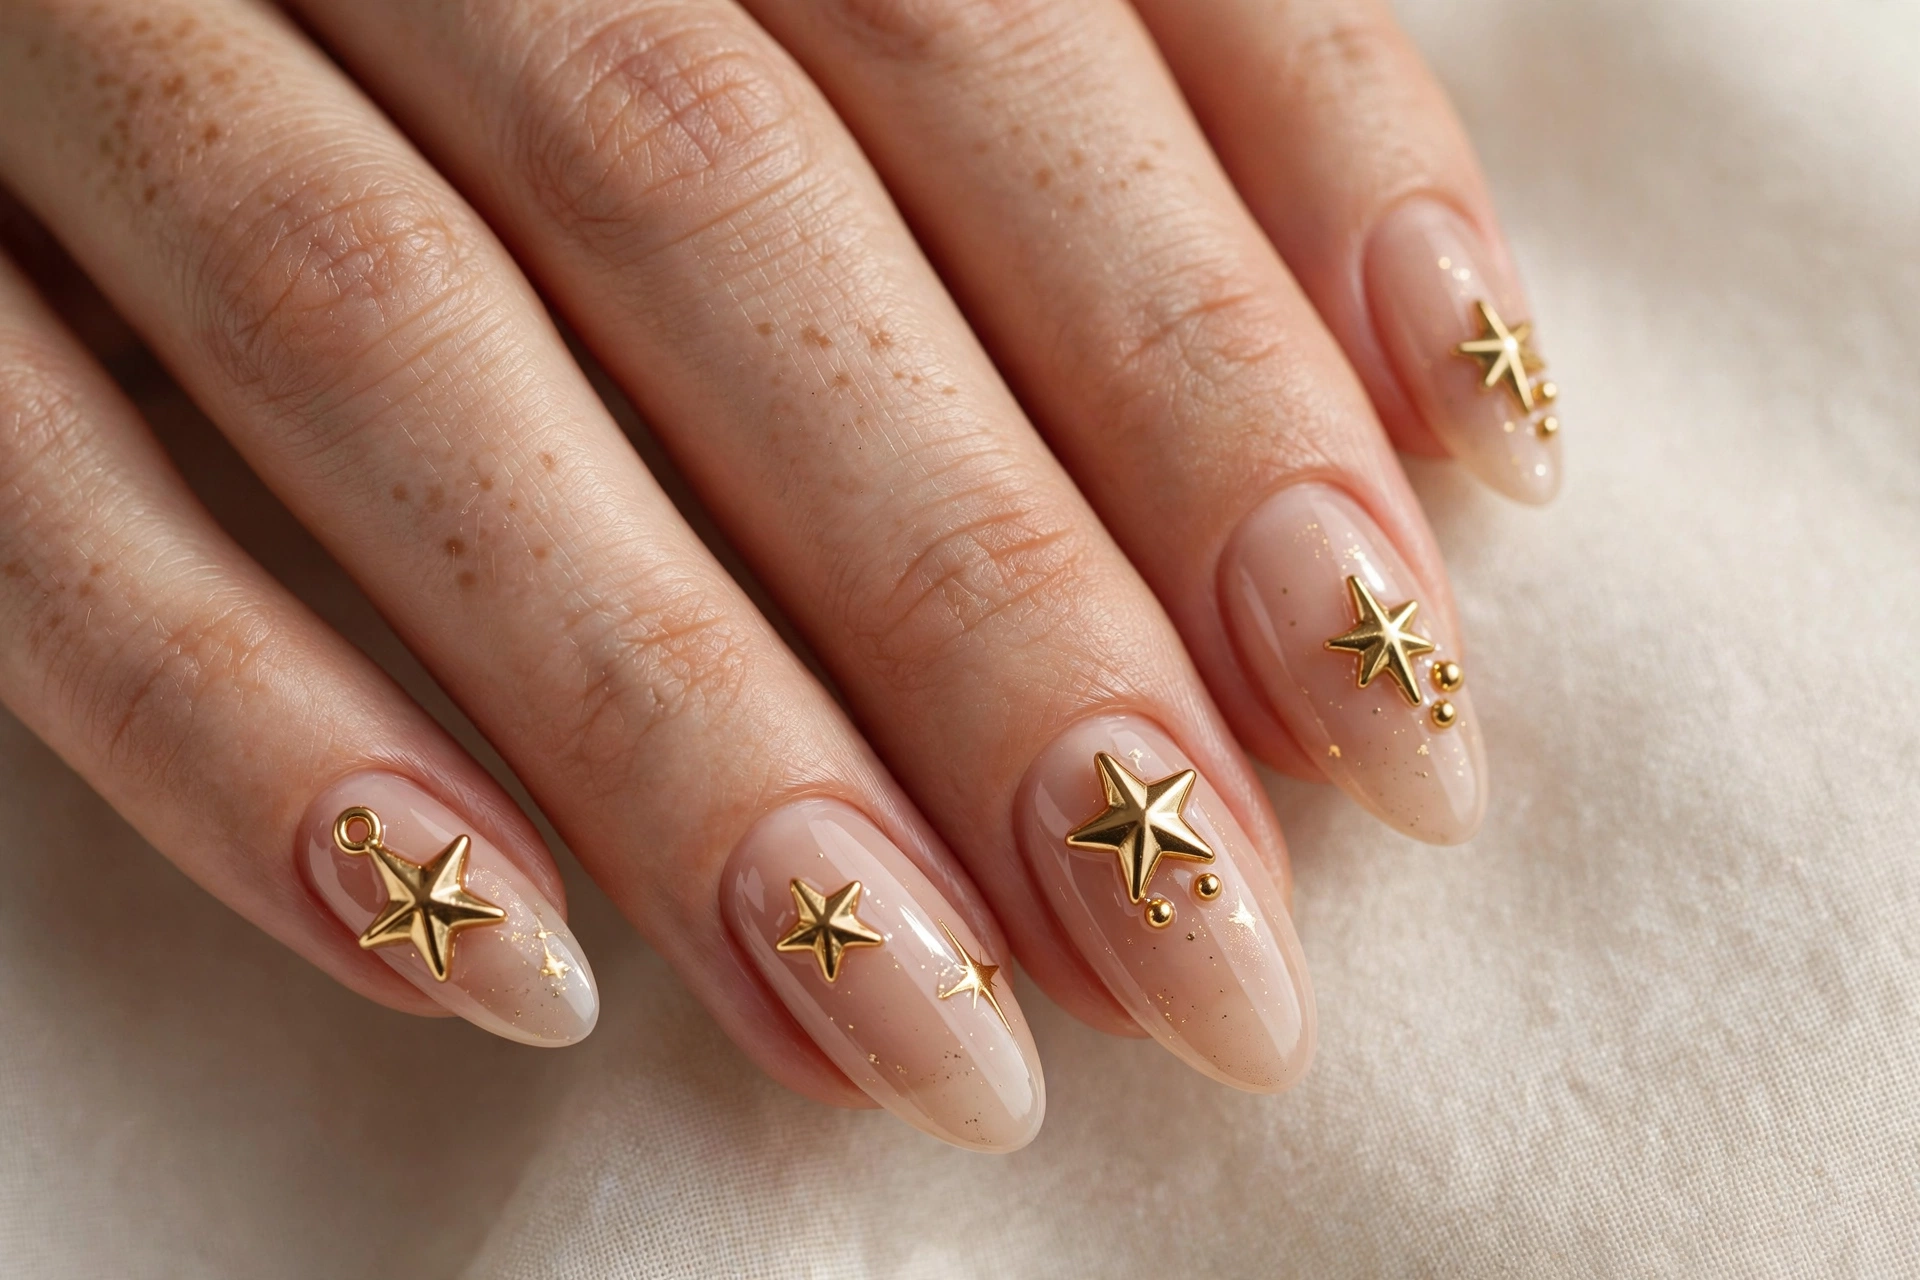
For maximum impact, nothing beats 3D gold star charms sitting on top of a glossy nude base. These little charms catch the light from every angle and give your manicure a jewelry-like quality that flat nail art just cannot match. It is bold, luxurious, and perfect for special occasions when you want your nails to feel like accessories. If you love the idea of nails as jewelry, you will also love these charm nail designs that turn your manicure into jewelry.
Start with two coats of a glossy nude polish. While the top coat is still wet, gently press small gold star charms onto one or two accent nails per hand, usually the ring finger. Use a tiny dot of nail glue under each charm for extra hold, then seal around (not over) the charms with top coat so they stay shiny. Keep the remaining nails simple so the charms stay the star of the show. Fair warning: charms can catch on things, so this is best for a weekend rather than a work week.
9. Starry Ombre
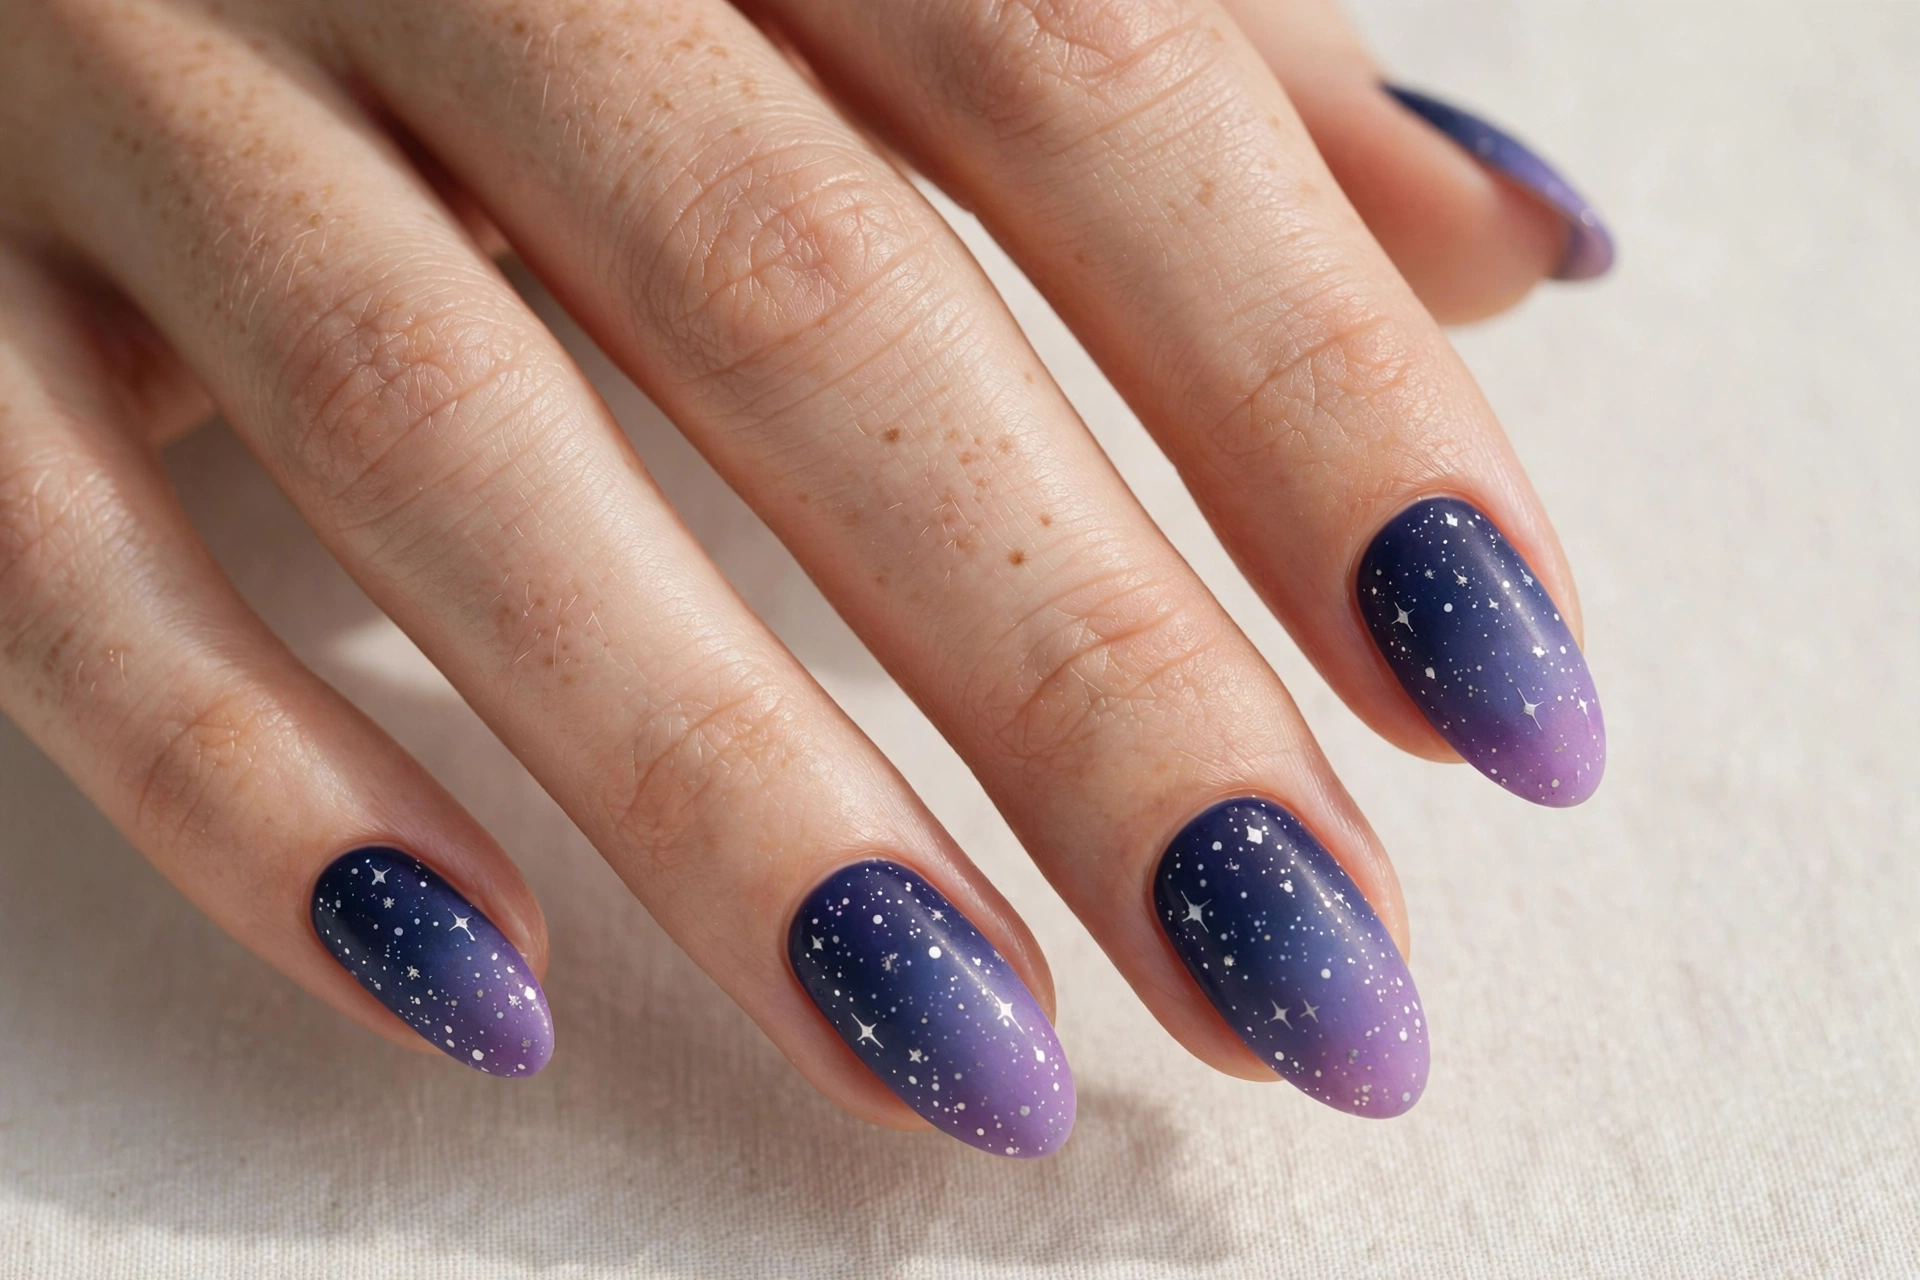
A starry ombre blends two trends into one gorgeous manicure. The base fades from deep navy at the cuticle to soft purple at the tips, and tiny white stars scattered throughout make it look like a real twilight sky. The gradient adds depth that a flat color cannot, and the stars tie the whole cosmic theme together. This design looks best on medium to long nails, where the ombre has room to blend.
Create the ombre with a makeup sponge: paint navy and purple stripes side by side on the sponge, then dab it onto each nail, repeating until the blend is smooth. Once dry, add tiny white stars with a dotting tool or thin brush. A glossy top coat smooths the sponge texture and makes the gradient look seamless. Take your time with the blending, since a smooth ombre is what makes this design look professional rather than messy.
10. Shooting Stars
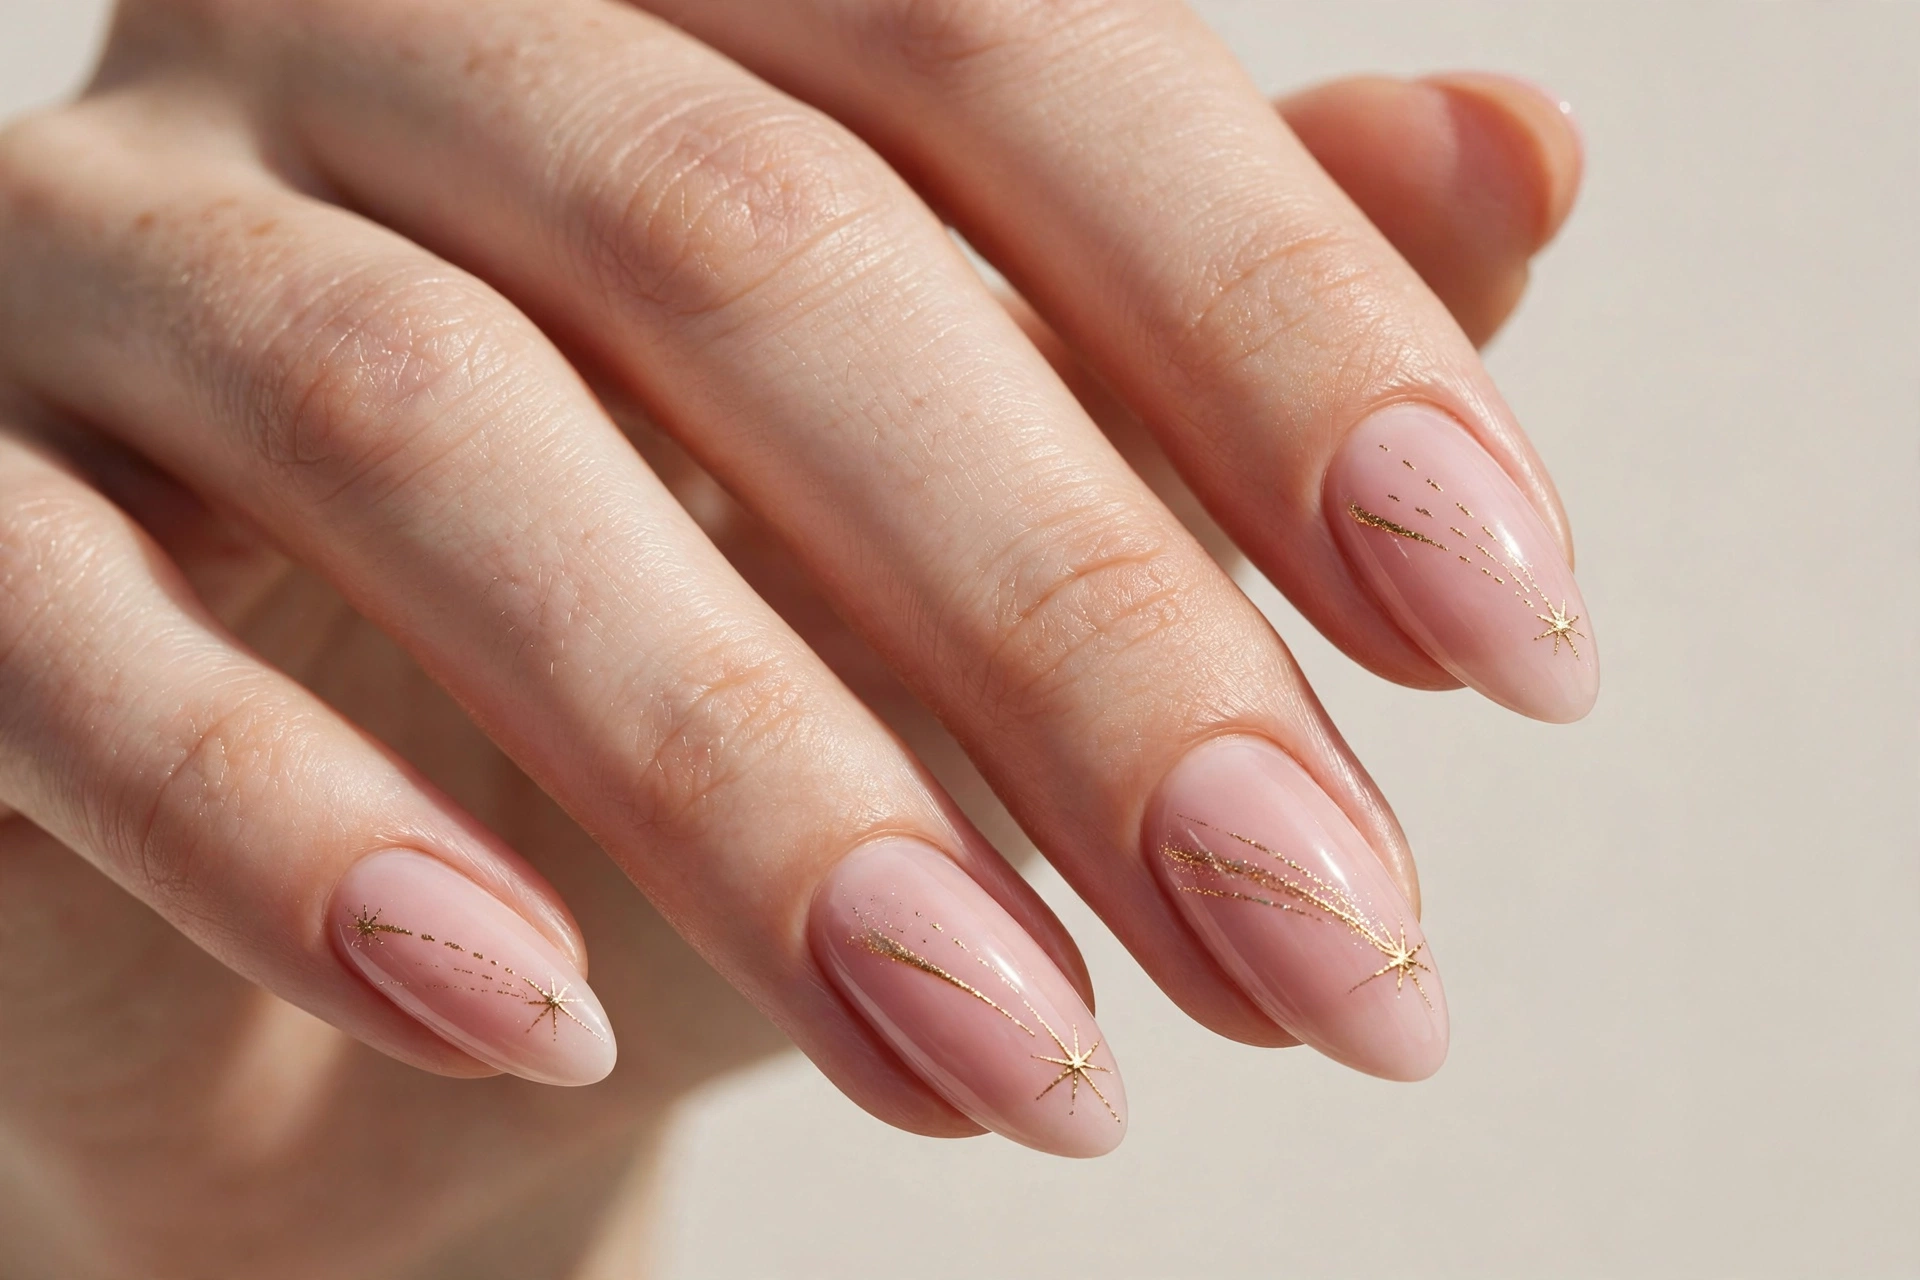
Shooting stars bring movement and whimsy to your manicure. Delicate gold comet trails with star heads streak across a blush pink base, looking like wishes caught mid-flight. This design feels romantic and hopeful, and the soft pink base keeps it wearable for everyday life. It suits almond and oval shapes, where the curved nail follows the arc of the shooting stars.
Paint two coats of blush pink as your base. With a thin striping brush and gold polish, draw a curved trail across each nail, then add a small star at the head of the trail. Vary the direction of the trails so they look natural, like real meteors. Keep the trails thin and delicate for the prettiest result. A glossy top coat finishes the look. This is a lovely choice for birthdays or celebrations, since shooting stars feel like good luck.
11. White Stars on Burgundy
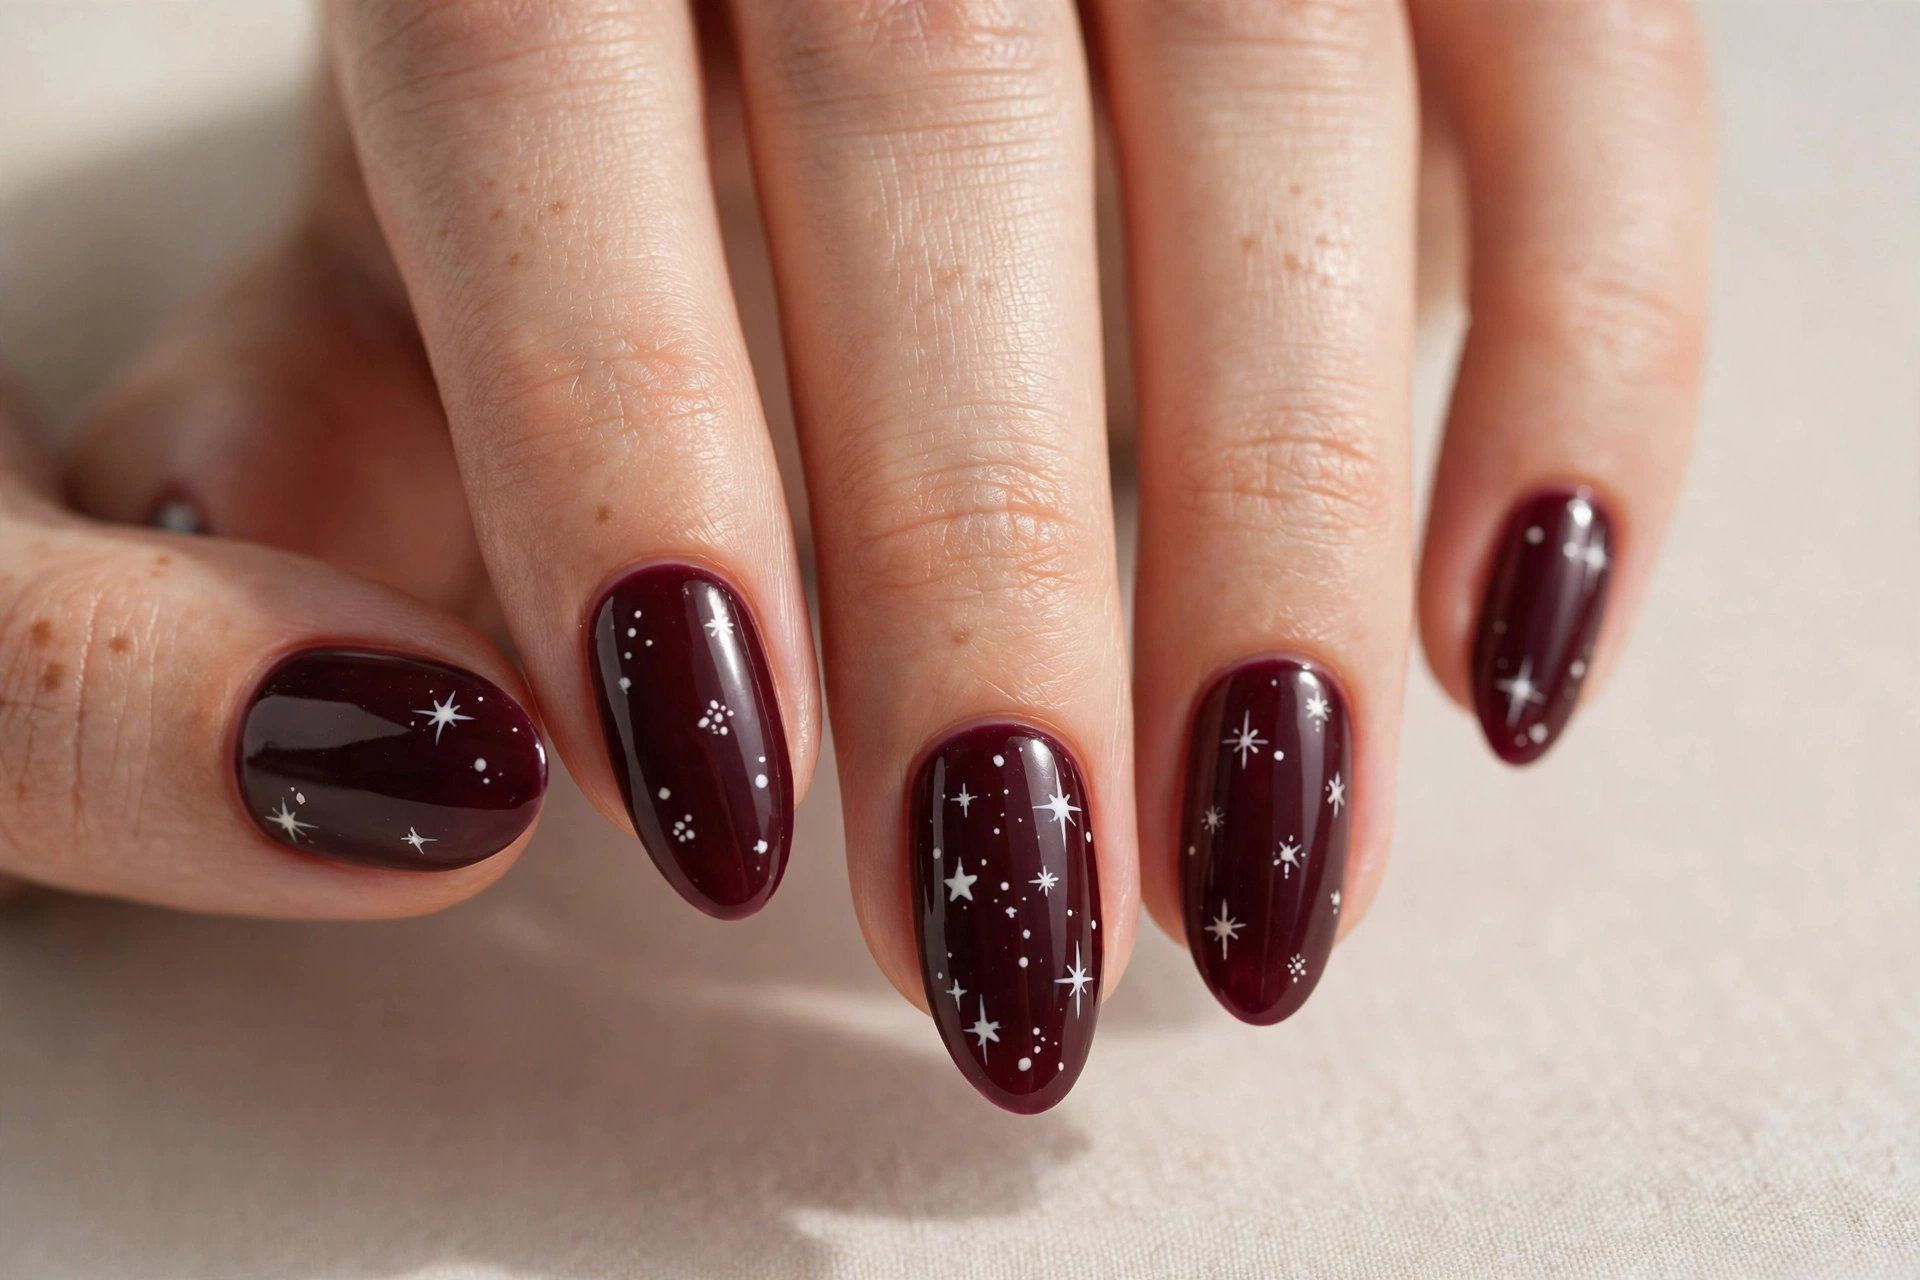
Deep burgundy with white stars is elegance with an edge. The rich wine color feels luxurious and perfect for fall and winter, while the small white stars keep it from looking too serious. It is a great evening manicure that works for holiday parties, date nights, or any time you want to look polished with a twist. The dark base also makes short nails look longer and more refined.
Apply two coats of a deep burgundy polish and let them dry completely. Using white polish and a dotting tool, paint small stars across each nail, keeping them evenly spaced. A thin brush helps sharpen the star points if you want a crisper look. Finish with a glossy top coat to make the burgundy look rich and the stars pop. This design also looks beautiful with a matte top coat if you prefer a velvety, modern finish.
12. Holographic Star Decals
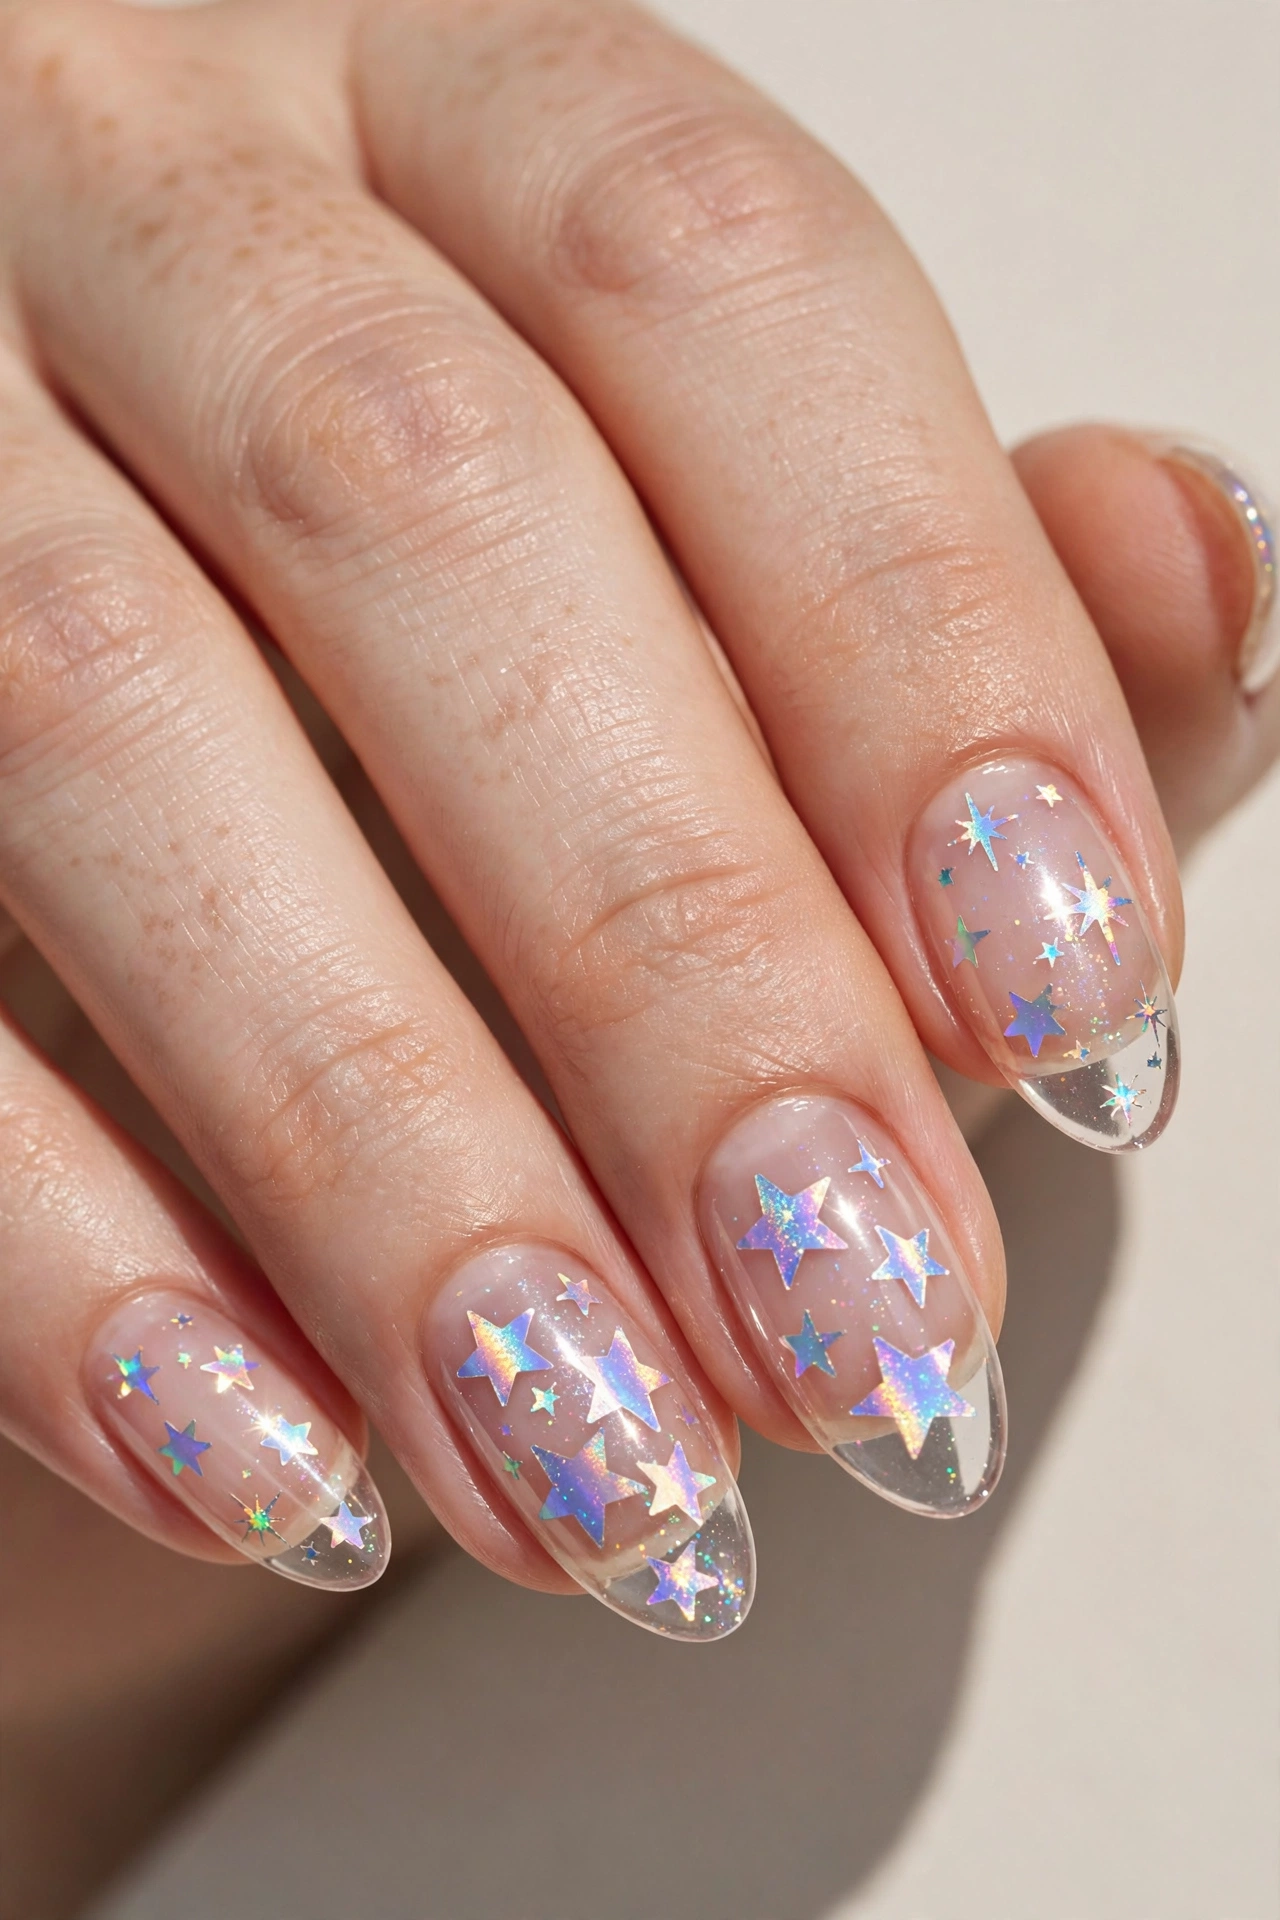
Holographic star decals over a clear base are pure magic. The stars shift colors as they catch the light, flashing pink, green, and blue depending on the angle. On a glass-like clear base, the effect is futuristic and eye-catching, perfect for festivals, concerts, or anyone who loves an otherworldly vibe. It is also surprisingly versatile, since the clear base goes with everything.
Apply a clear base coat or one coat of sheer milky polish. Place holographic star decals on each nail while the base is tacky, pressing them down gently so they lie flat. You can cover the whole nail for full impact or cluster a few stars near the cuticle for a subtler look. Seal with two coats of glossy top coat to protect the decals and boost the glass-like shine. The holographic effect does all the work here, so keep the rest simple.
13. Gold Starburst on Emerald
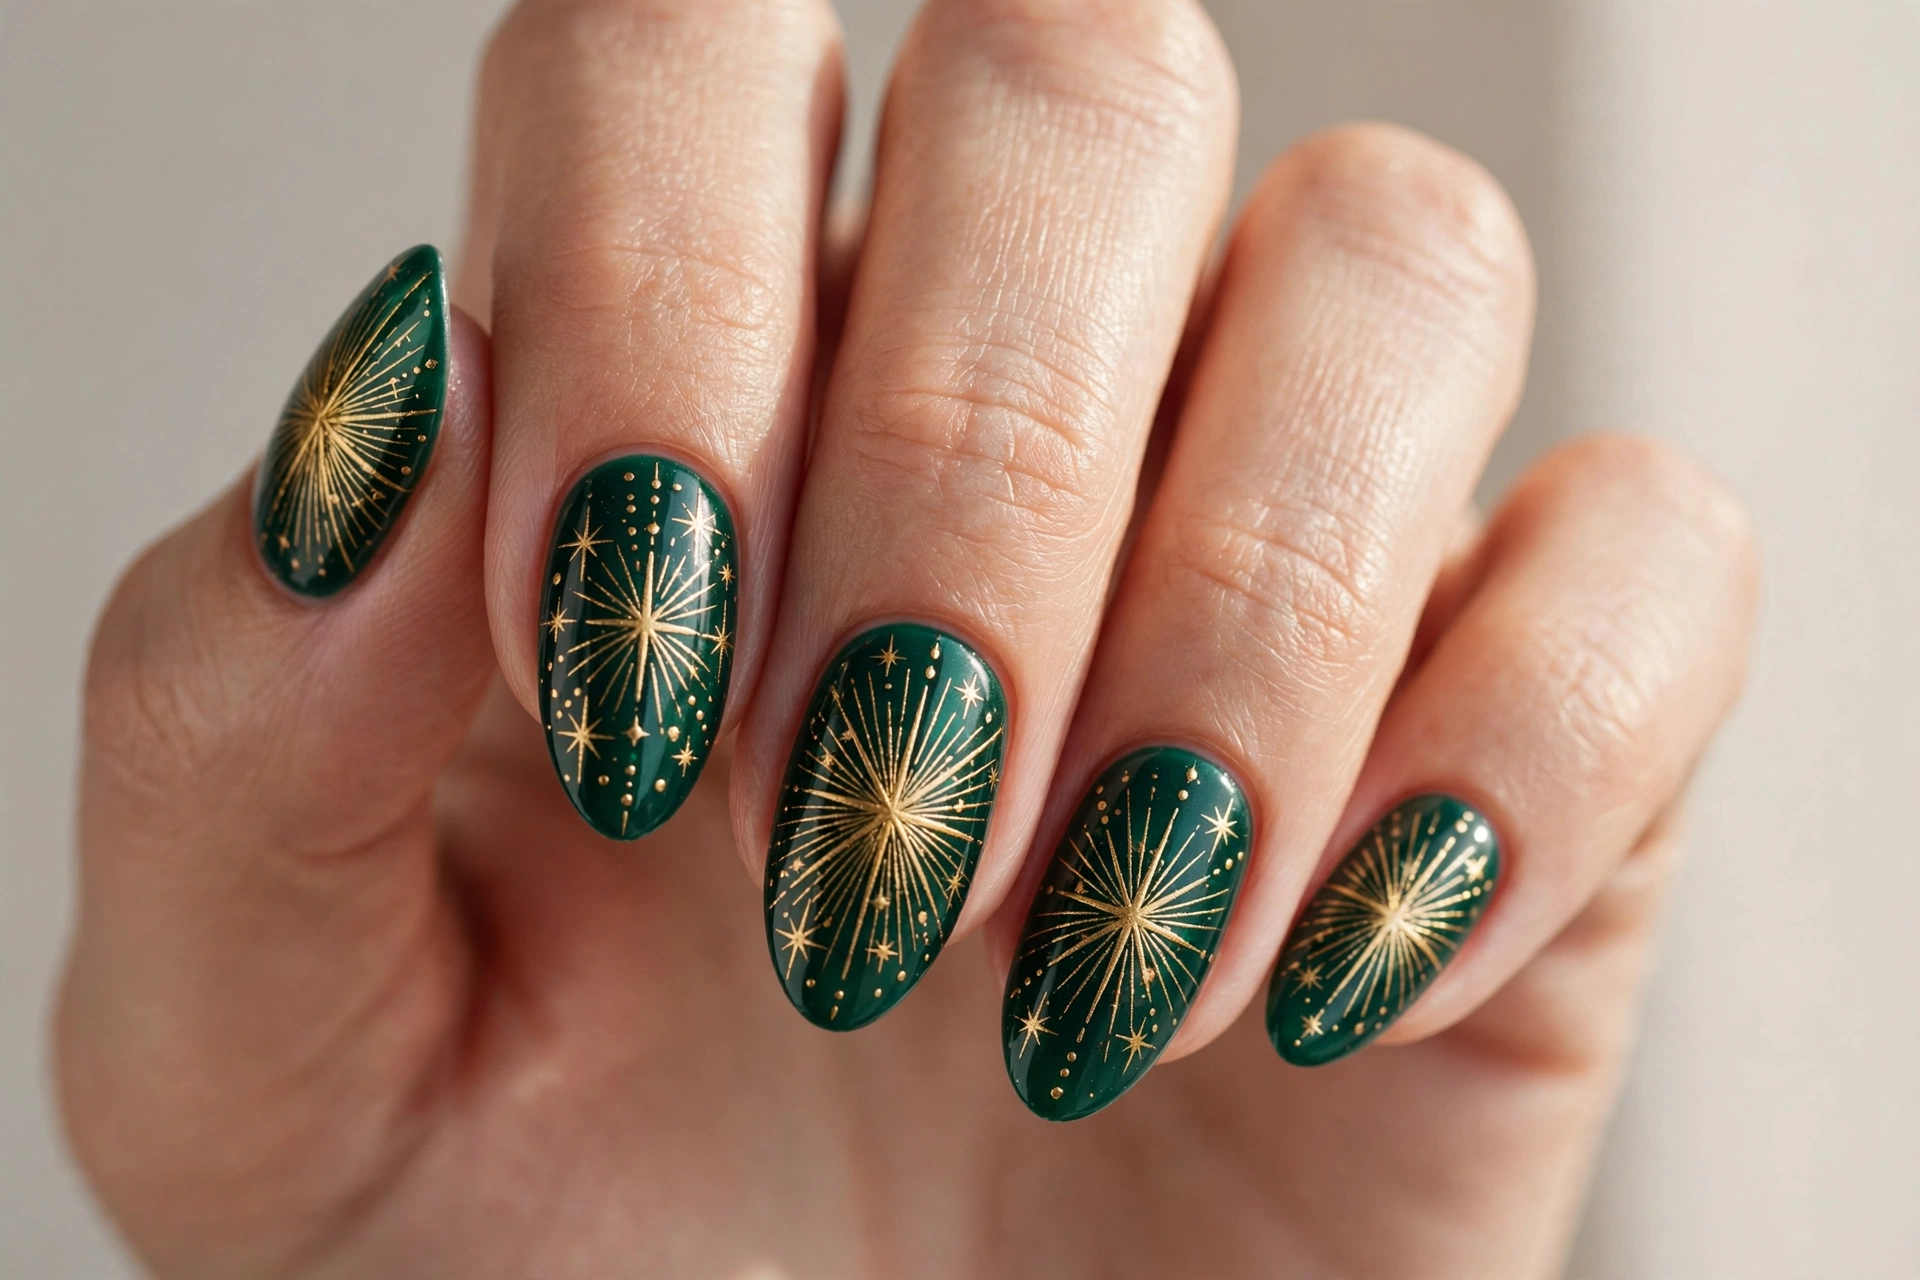
Gold starbursts radiating over deep emerald green make a manicure that feels rich and regal. The jewel-toned base is striking on its own, and the radiating starbursts add an art-deco glamour that is hard to ignore. This is a statement design for confident nail wearers, perfect for holiday season or any event where you want to stand out. It looks especially stunning on longer nails with a glossy finish.
Paint two coats of deep emerald green polish. Once dry, use a thin brush and gold polish to draw starburst shapes radiating from a central point on each nail, like tiny fireworks. Keep the lines thin and even for the most elegant result. You can do one large starburst per nail or several small ones. A glossy top coat makes the gold shine against the green. This design takes a steady hand, so practice on paper first if you are new to nail art.
14. Milky Way Galaxy
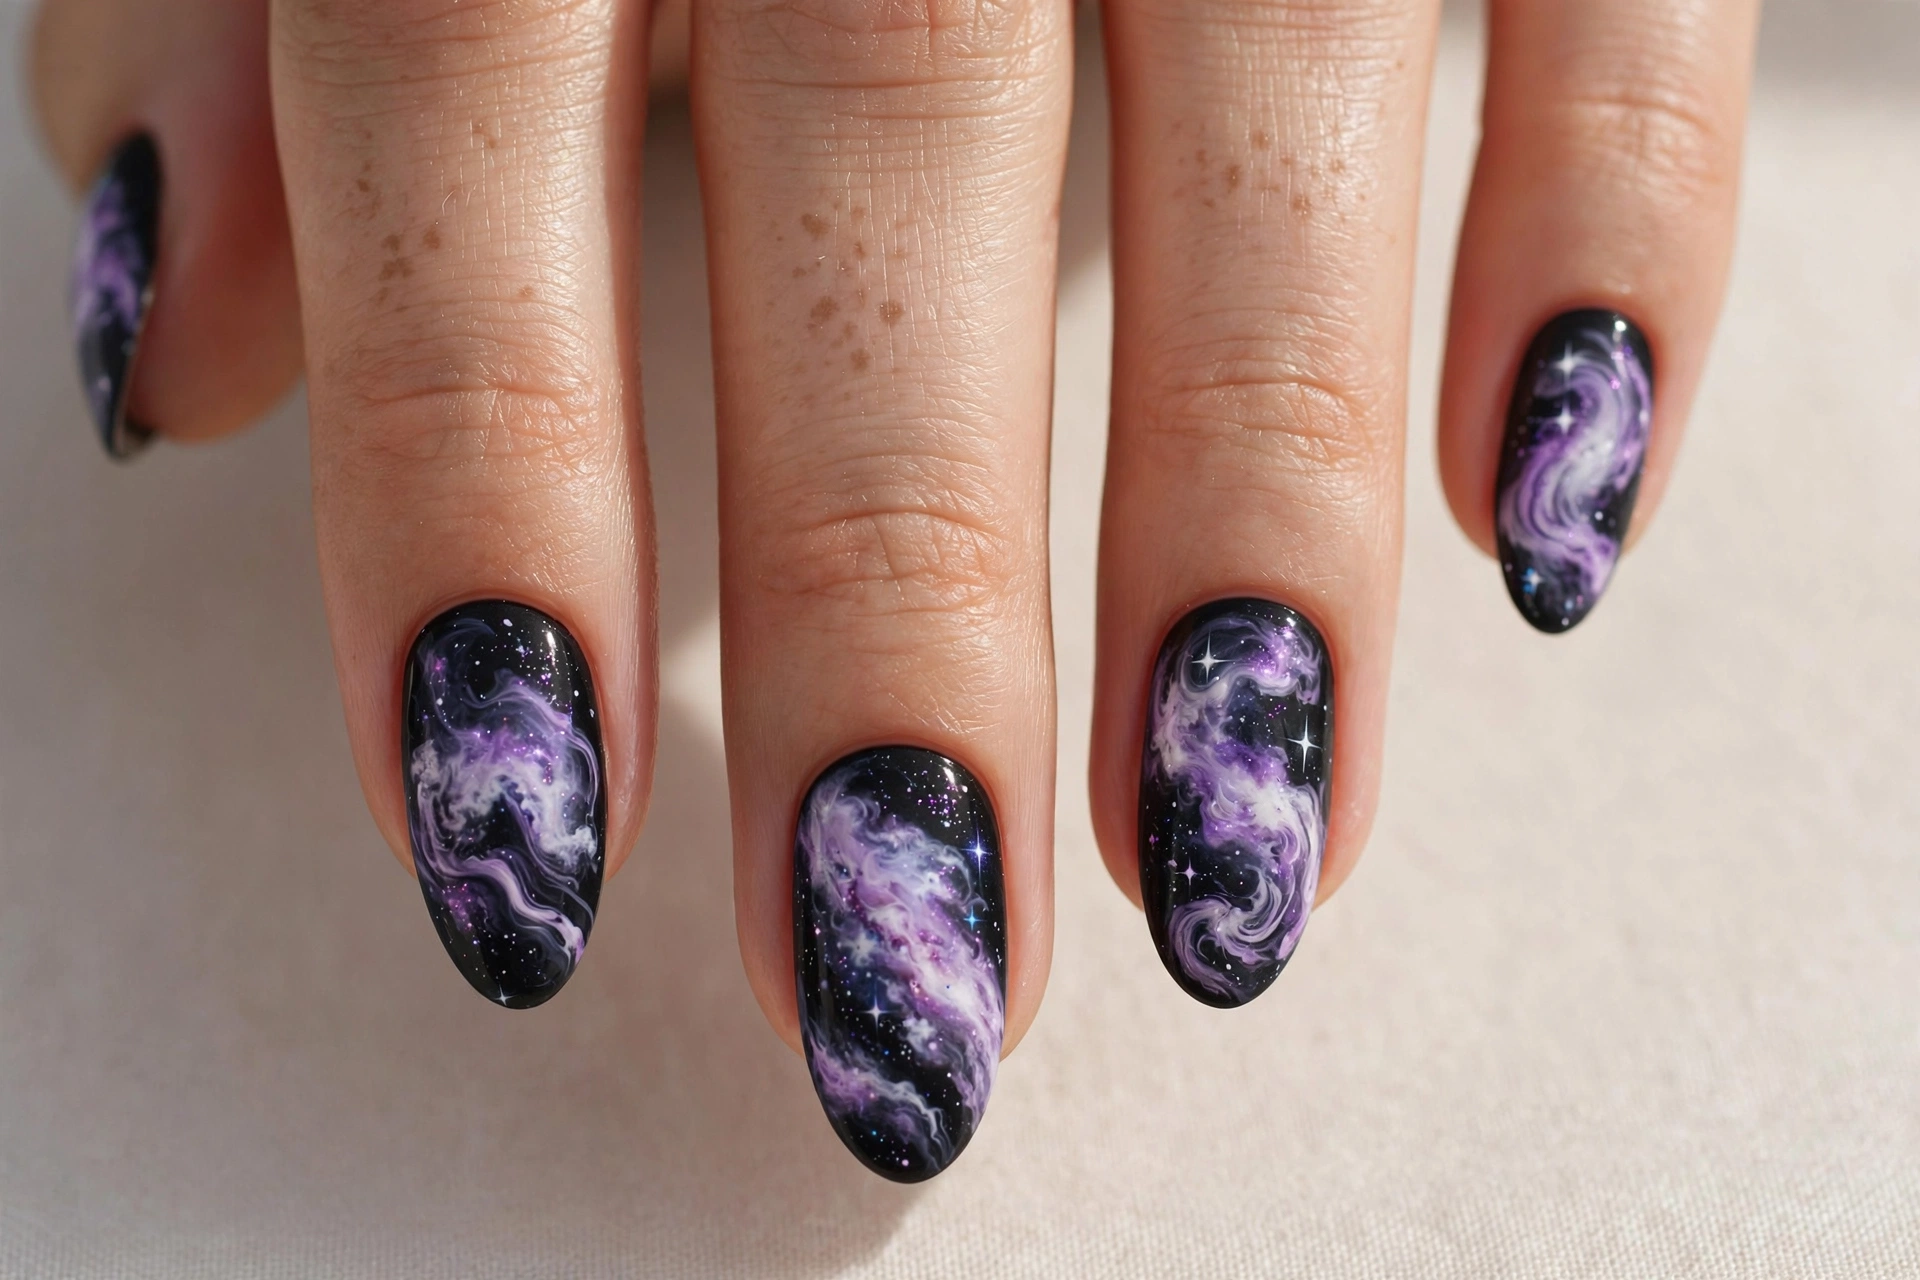
A milky way galaxy manicure is the ultimate cosmic nail art. Swirling white and lavender nebula clouds drift across a black base, dotted with tiny stars for depth. It looks like you captured a piece of the universe on your fingertips. This design is made for galaxy lovers and looks incredible on long almond or coffin nails, where the swirls have room to flow. For more ideas worth saving, browse these nail inspo ideas that always get compliments.
Start with a black base. Using a small sponge, dab on white and lavender polish in soft swirls to create the nebula effect, building up layers slowly. Then add tiny white and silver dots for stars, plus a few larger star shapes for focal points. The key is layering: sheer, buildable layers look like a real galaxy, while thick blobs do not. Seal with a glossy top coat. This one takes patience, but the result is absolutely worth it.
15. Silver Stars on Milky White
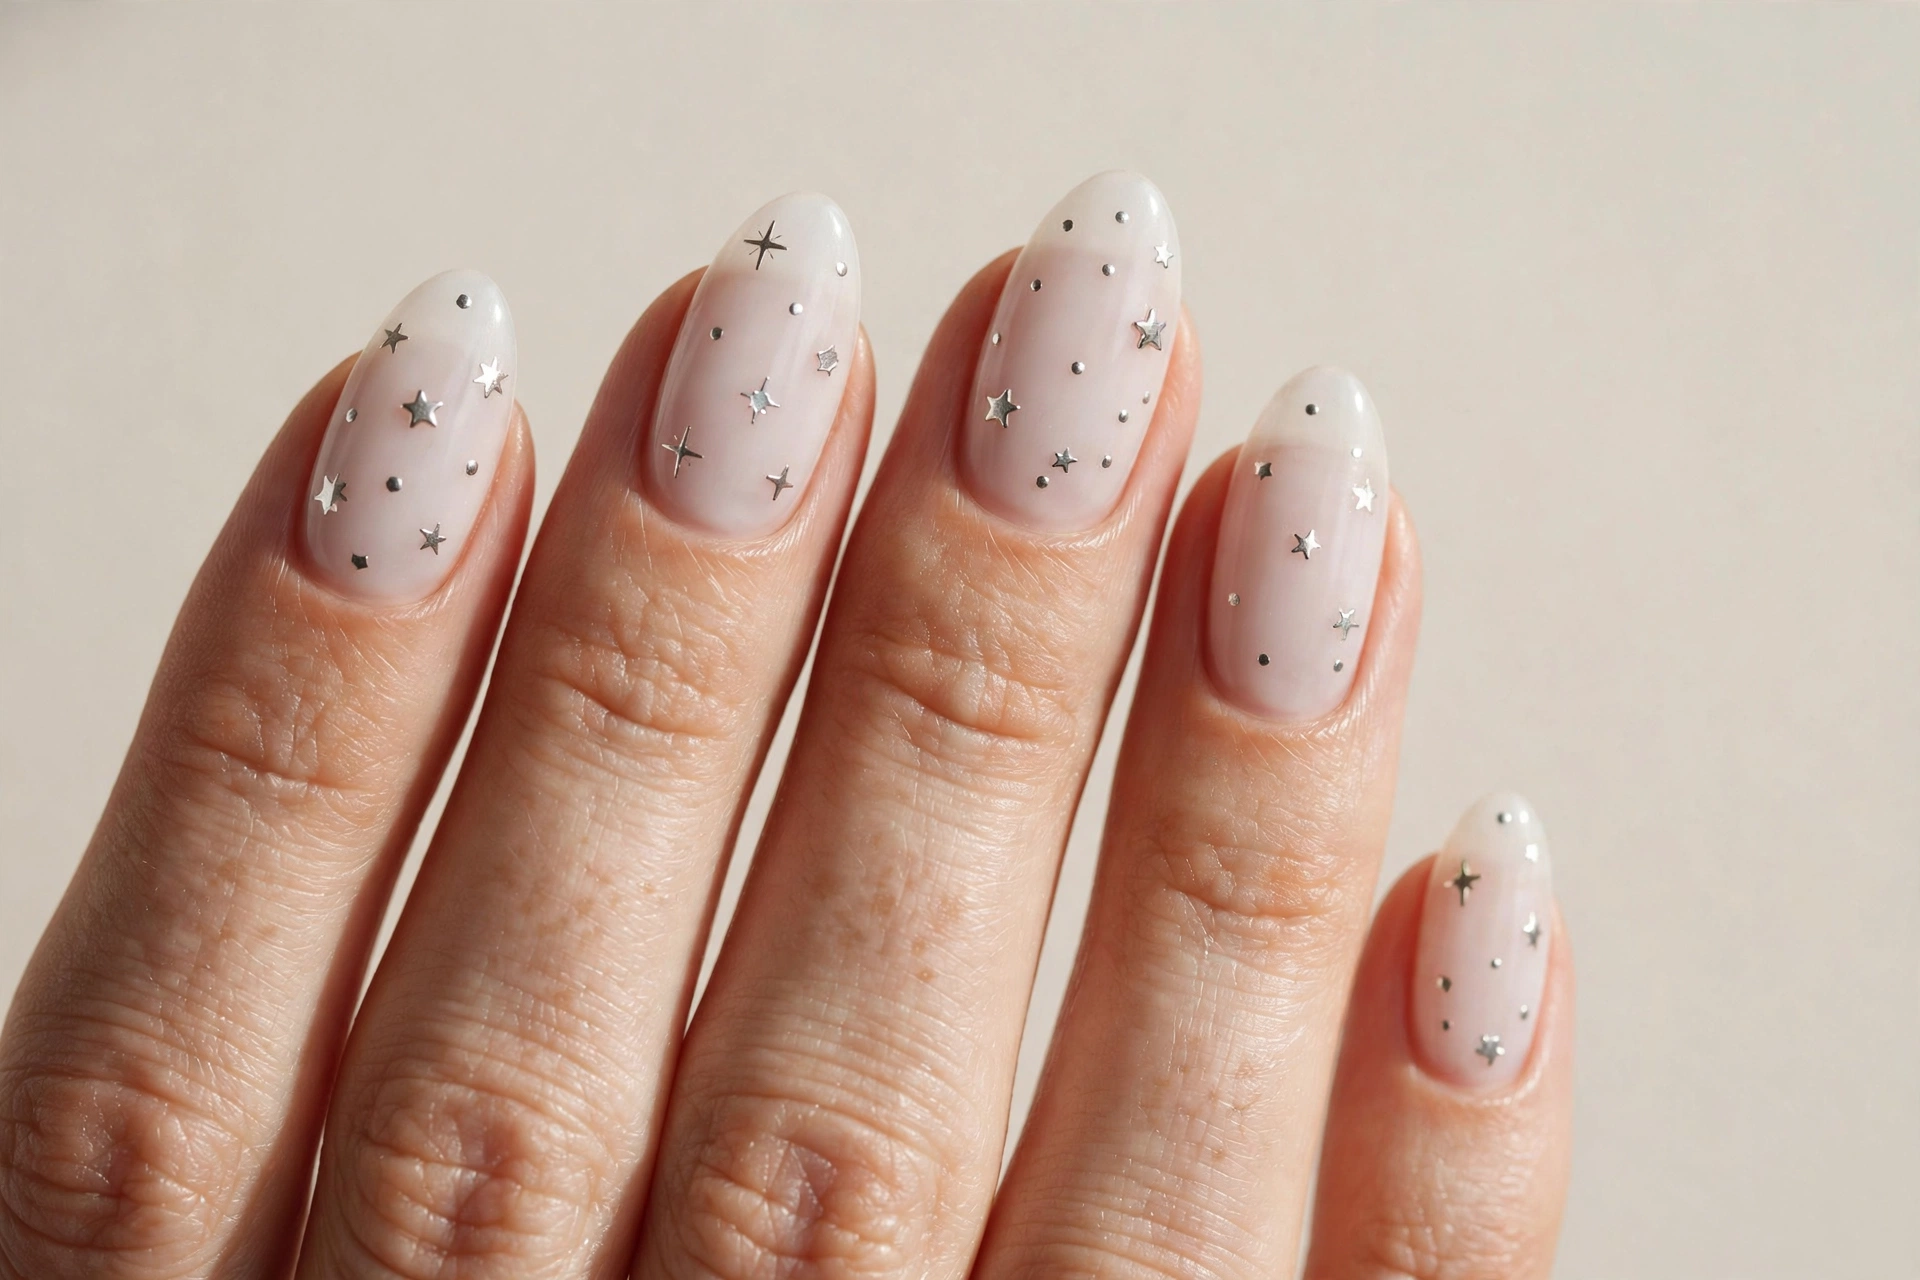
Sheer milky white with tiny silver star studs is the quiet luxury version of star nails. The milky base is soft and clean, and the delicate silver stars add just a whisper of sparkle. It is bridal-adjacent, office-safe, and beautiful on every skin tone. This design suits short nails perfectly, since the sheer base elongates the nail and the small stars do not crowd the space.
Apply two to three thin coats of milky white sheer polish for an even, translucent finish. While the last coat is tacky, place tiny silver star studs or micro star sequins on each nail, keeping them sparse. One or two stars per nail is enough. Press them gently into the polish, then seal with a glossy top coat. The result is understated and elegant, the kind of manicure that gets noticed without shouting.
16. Rose Gold Stars on Mauve
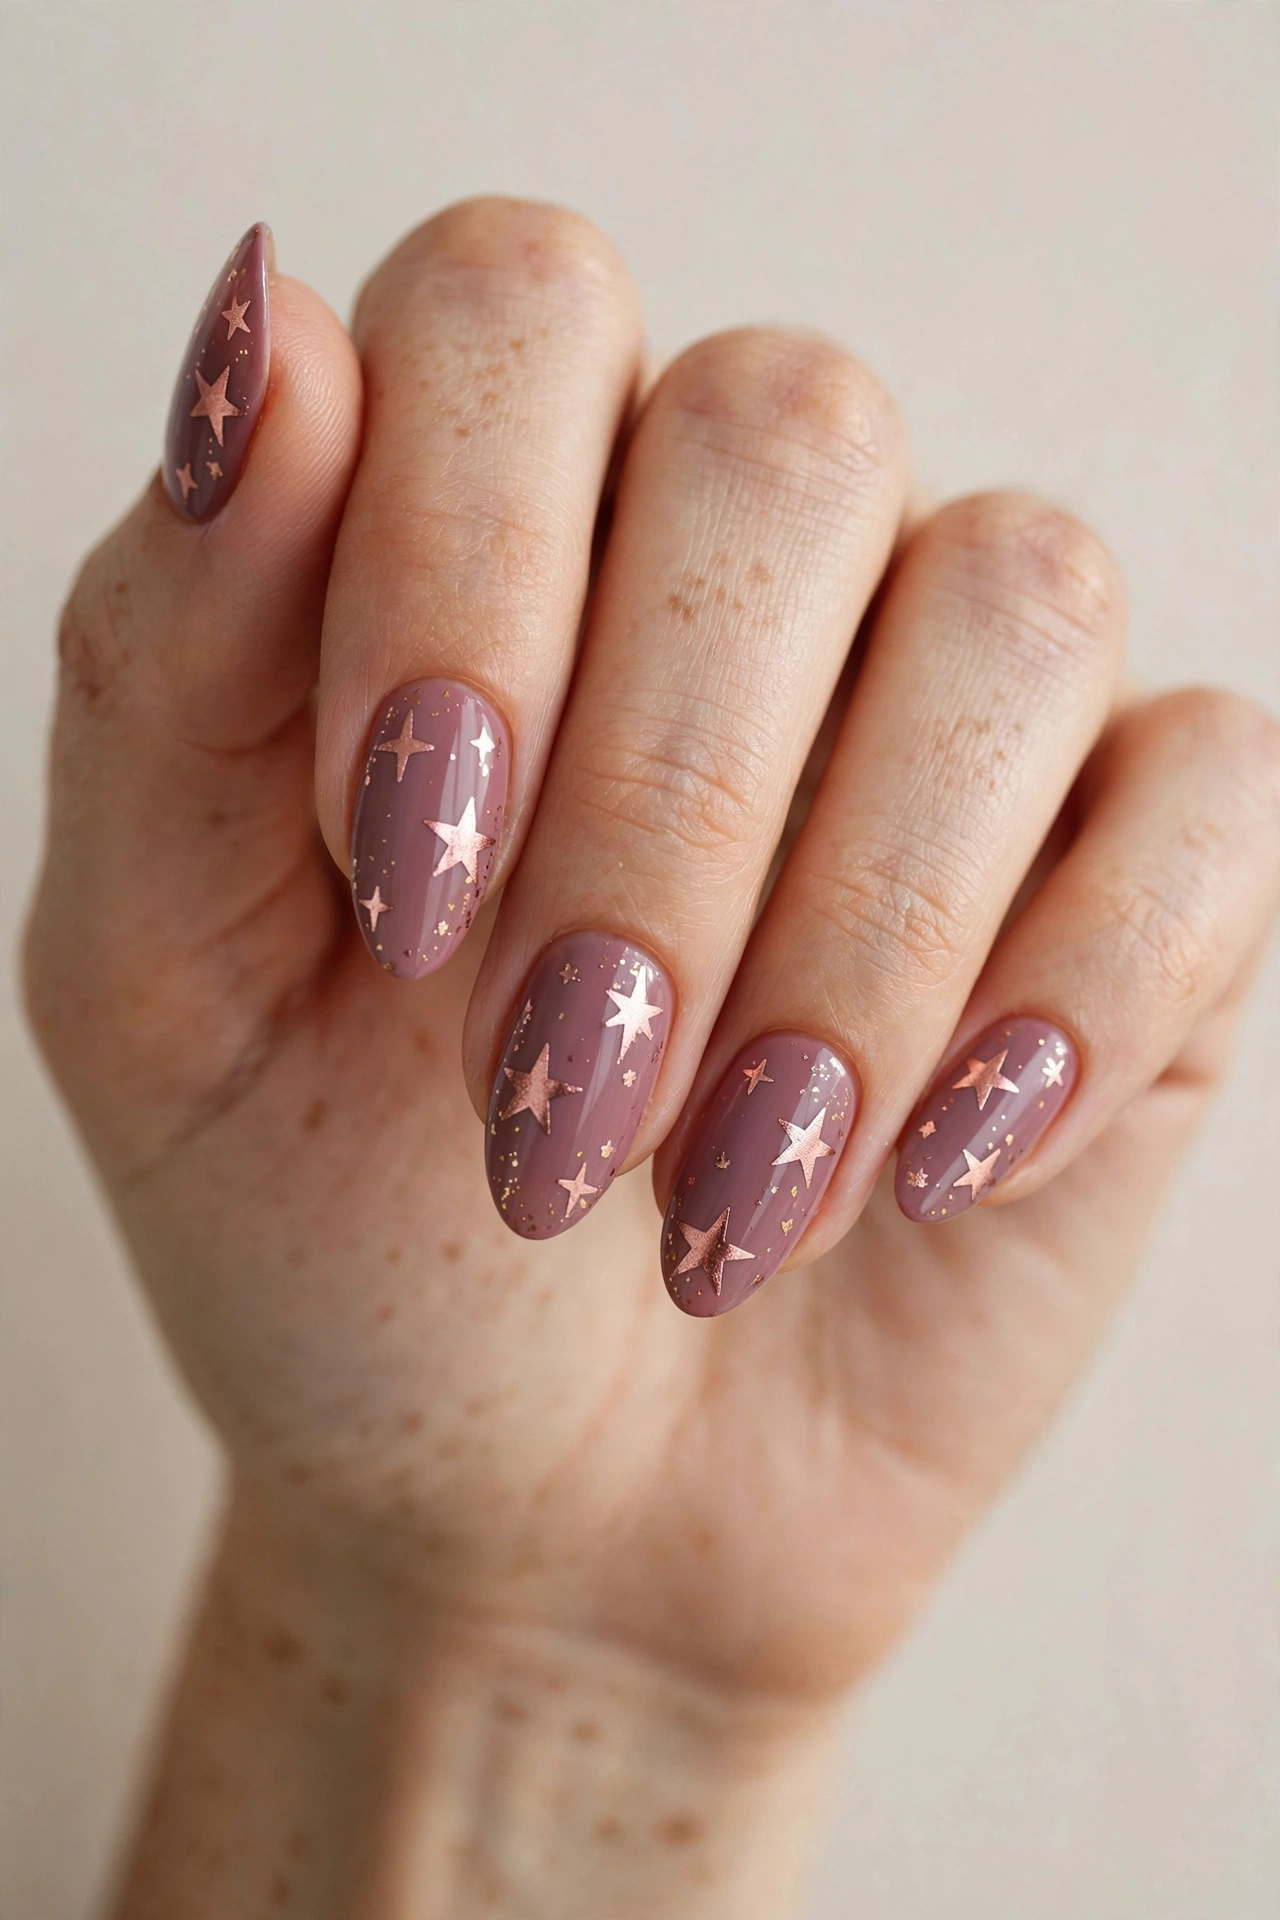
Rose gold stars on dusty mauve are romance in manicure form. The warm metallic stars glow against the muted purple-pink base, creating a soft, feminine look that feels modern and a little bit dreamy. This color combination flatters most skin tones and works year-round, from spring weddings to cozy fall days. It is pretty without being precious, which is a hard balance to strike.
Paint two coats of dusty mauve polish. Add rose gold star decals or hand-painted stars in a metallic rose gold polish, scattering them across each nail. Mixing a few larger stars with tiny ones adds visual interest. A glossy top coat brings out the metallic shine. If you cannot find rose gold star decals, regular gold ones still look lovely on mauve, so do not stress about an exact match.
17. Periwinkle Moon and Stars
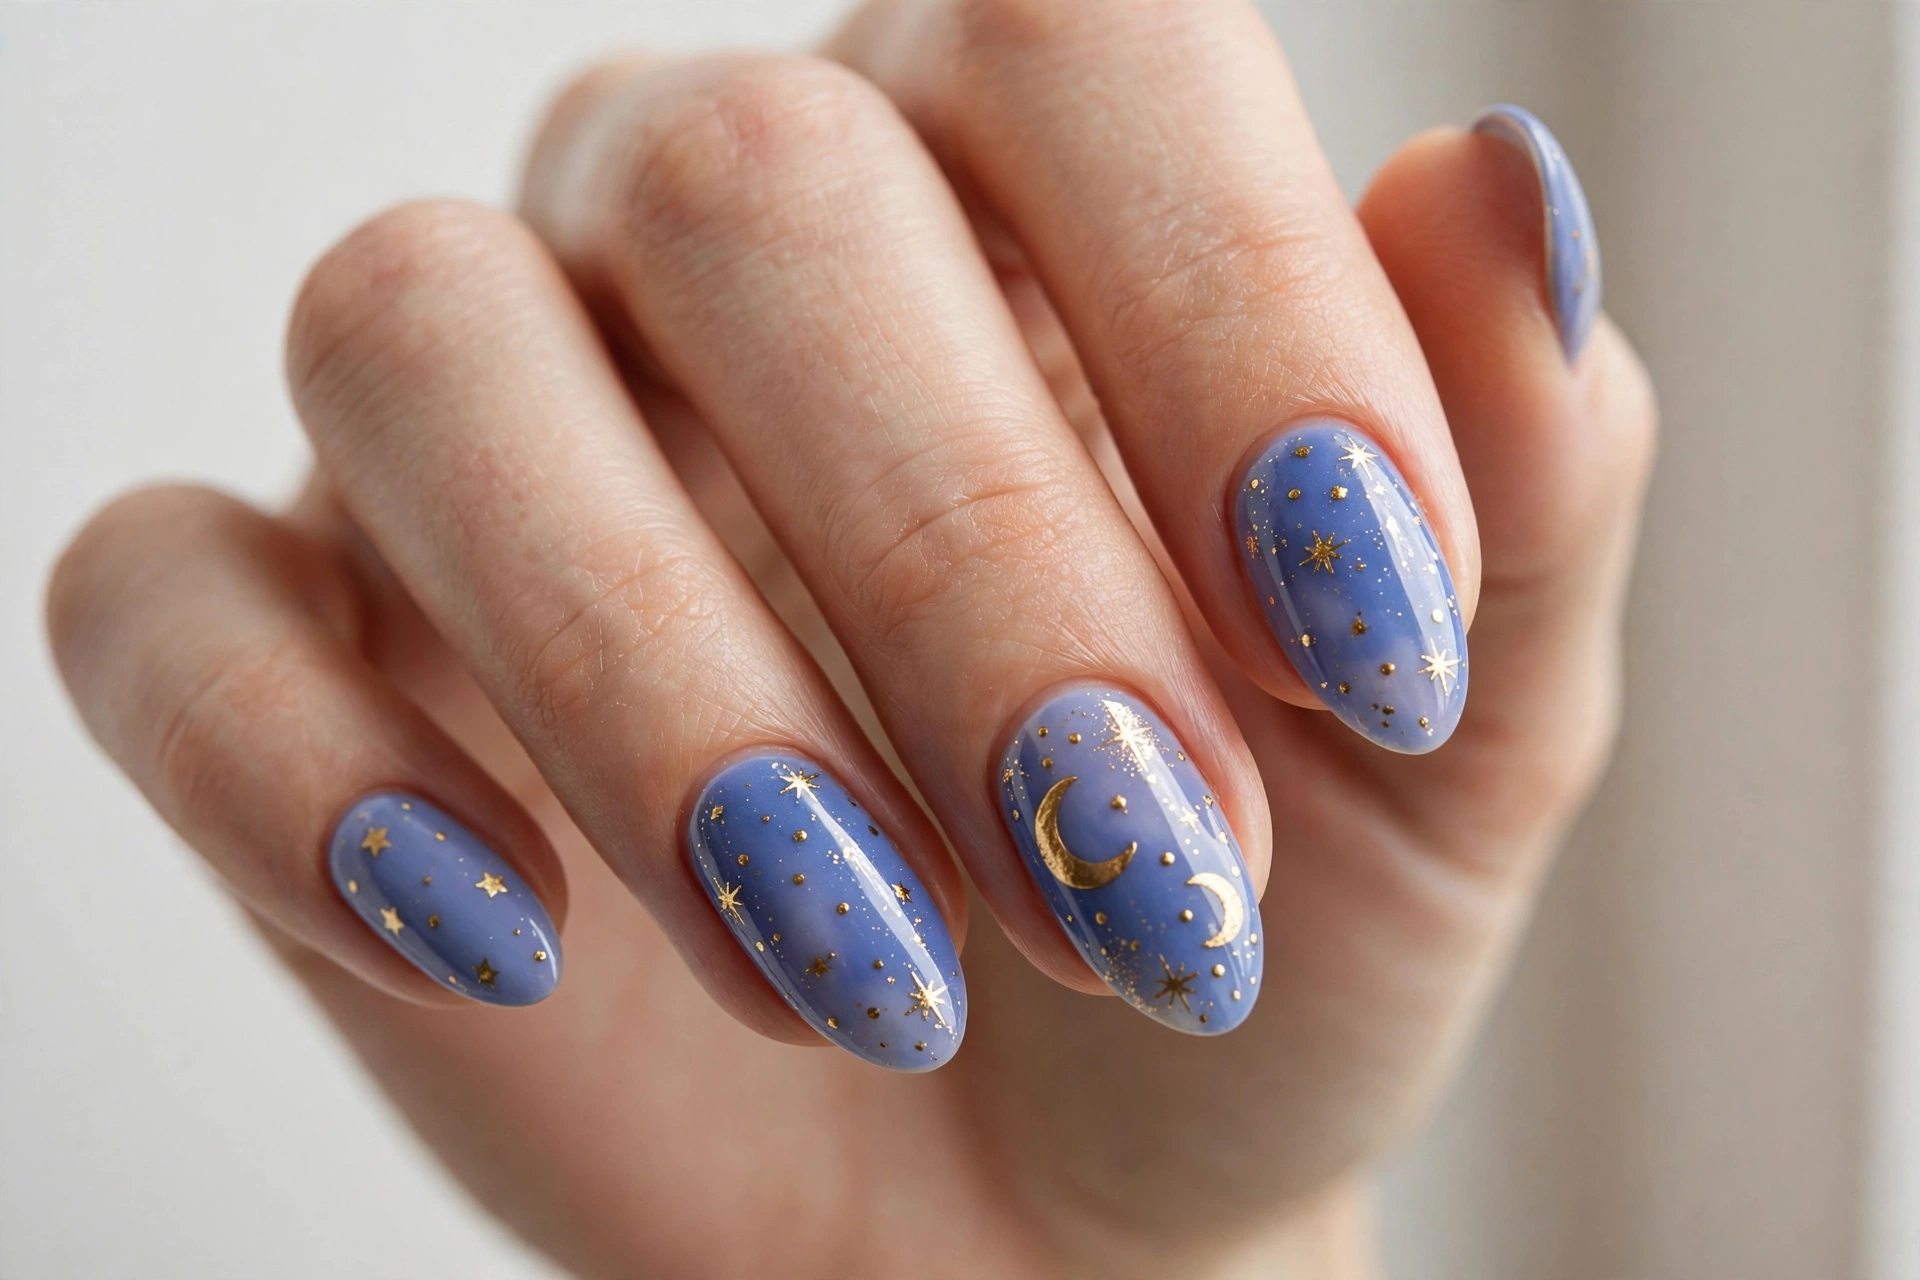
Periwinkle blue with golden crescent moons and tiny stars is a fresh, cheerful take on celestial nails. The soft blue-purple base feels light and airy compared to the usual midnight palettes, and the gold accents keep it warm and inviting. This design is perfect for spring and summer, and it looks adorable on short to medium nails. It is celestial nail art with a sunny disposition.
Apply two coats of periwinkle polish as your base. Add gold crescent moon decals on one or two accent nails, then dot tiny gold and white stars around them with a dotting tool. The light base means your stars need to be opaque, so use a good quality metallic gold. Finish with a glossy top coat. This is a happy, uplifting manicure that is guaranteed to make you smile every time you look at your hands.
Tips to Make Your Star Nails Last Longer
Star nail art deserves to last, so a little care goes a long way. Always start with clean, dry nails and a good base coat, since nail art sticks better to a smooth foundation. Seal your design with two thin layers of top coat rather than one thick one, and reapply top coat every two to three days to keep the stars sealed and shiny. When you are ready to stock up on supplies, this nail polish kit has everything you need for celestial designs and more. As an Amazon Associate, I may earn a small commission if you purchase through this link, at no extra cost to you.
Be gentle with your hands for the first few hours after painting, and wear gloves for dishes and cleaning to protect your manicure. If a star decal starts lifting at the edge, a tiny drop of top coat underneath can glue it back down. And when it is time for a change, soak rather than peel your polish off, since peeling can damage the nail surface and make your next manicure look rough.
Final Thoughts
Star nail designs prove that a simple shape can create endless magic on your nails. Whether you go minimal with tiny gold stars on nude or all-in with a milky way galaxy, there is a celestial look here for every mood and occasion. Pick your favorite, grab your polishes, and give your nails their moment among the stars.