19 Red and Black Nail Designs for a Bold, Edgy Manicure
Red and black is the color pairing that never has to ask for attention — it commands it. Whether you’re heading to a concert, a date night, or just want your everyday manicure to feel a little more powerful, red and black nail designs strike that perfect balance between classic and daring. Red brings the passion and energy; black brings the edge and drama. Together, they create a look that’s bold without ever being messy.
If you love a bold manicure, you’re in the right place. Below you’ll find 19 red and black nail designs, from simple two-tone ideas you can do at home to salon-level art that stops people mid-sentence. And if you want to explore the softer side of one half of this duo first, our guide to red nail designs has 25 classic looks to get you started.
Why Red and Black Nail Designs Always Turn Heads
Some color combinations come and go with the seasons, but red and black are permanent fixtures in fashion for a reason. Red is the color of confidence — studies on color psychology have long linked it with energy, attraction, and assertiveness. Black adds mystery and sophistication, grounding the red so it reads as deliberate rather than loud. On nails, that contrast reads beautifully: the two shades sharpen each other, making even a simple design look intentional and polished.
Red and black also happen to be one of the most versatile pairings you can wear. They work for Halloween and the holidays, they fit right in at a rock concert or a formal dinner, and they pair with practically everything in your closet. Unlike trendier combinations, this one won’t look dated in photos a year from now. If dark, dramatic manicures are your thing, you’ll also love our roundup of black nail designs — 20 looks that prove how much range a single dark shade can have.
1. Classic Red-to-Black Ombré Fade
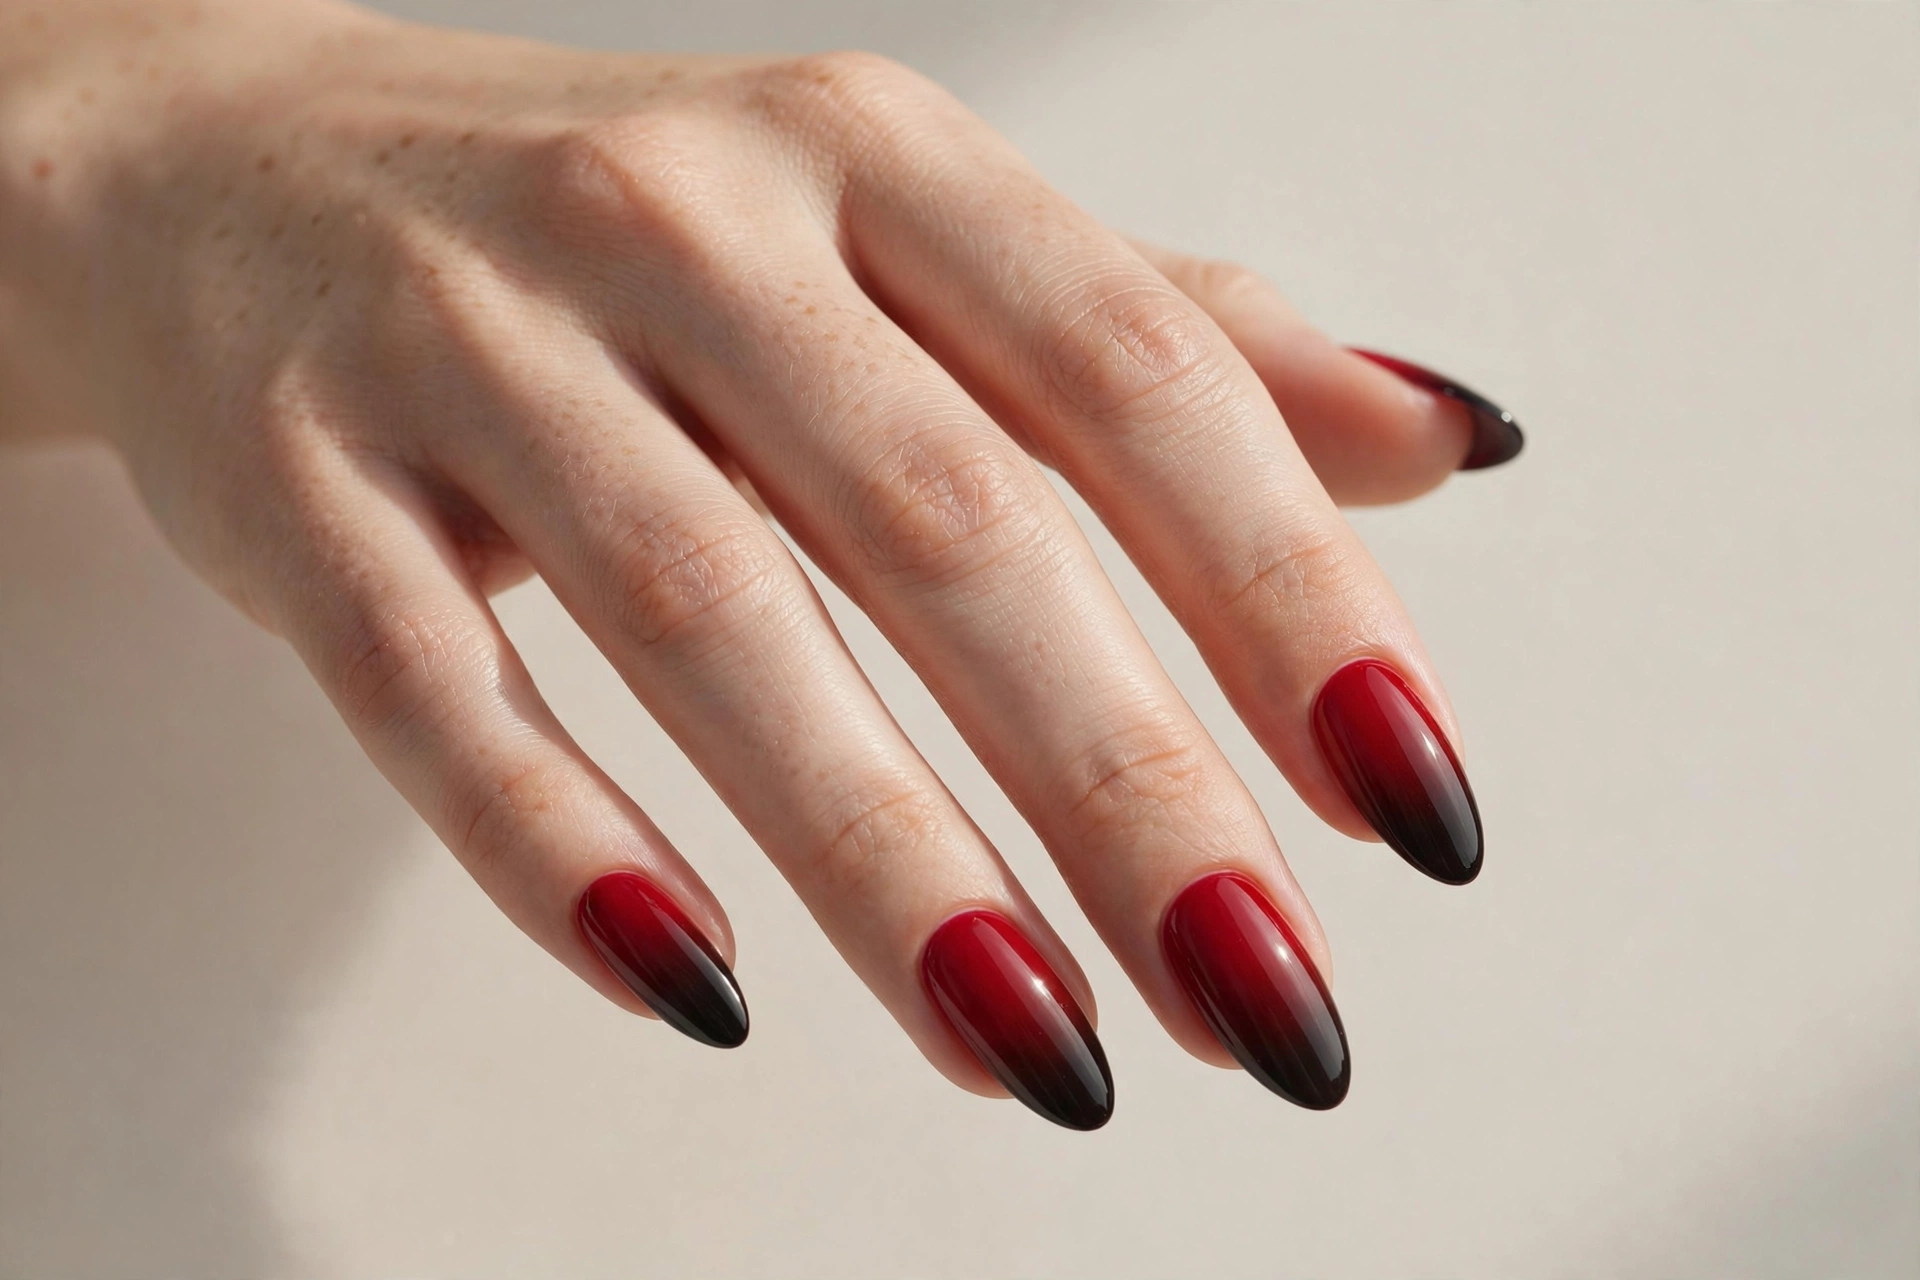
The ombré fade is where most people start their red-and-black journey, and for good reason — it’s stunning from across the room and surprisingly forgiving to do at home. This look melts a vivid cherry red at the cuticle into a deep, inky black at the tip, with a seamless smoky transition in the middle. The gradient softens the contrast between the two shades, so you get drama without hard edges.
It suits just about everyone, but it’s especially flattering on medium to long almond or coffin nails, where the fade has room to breathe. To get it, sponge-blend two polishes on a makeup sponge and dab onto the nail, repeating until the blend looks smooth. Clean up the edges with a flat brush dipped in acetone, then seal with a glossy top coat to make that gradient glow.
2. Red Nails with Black French Tips
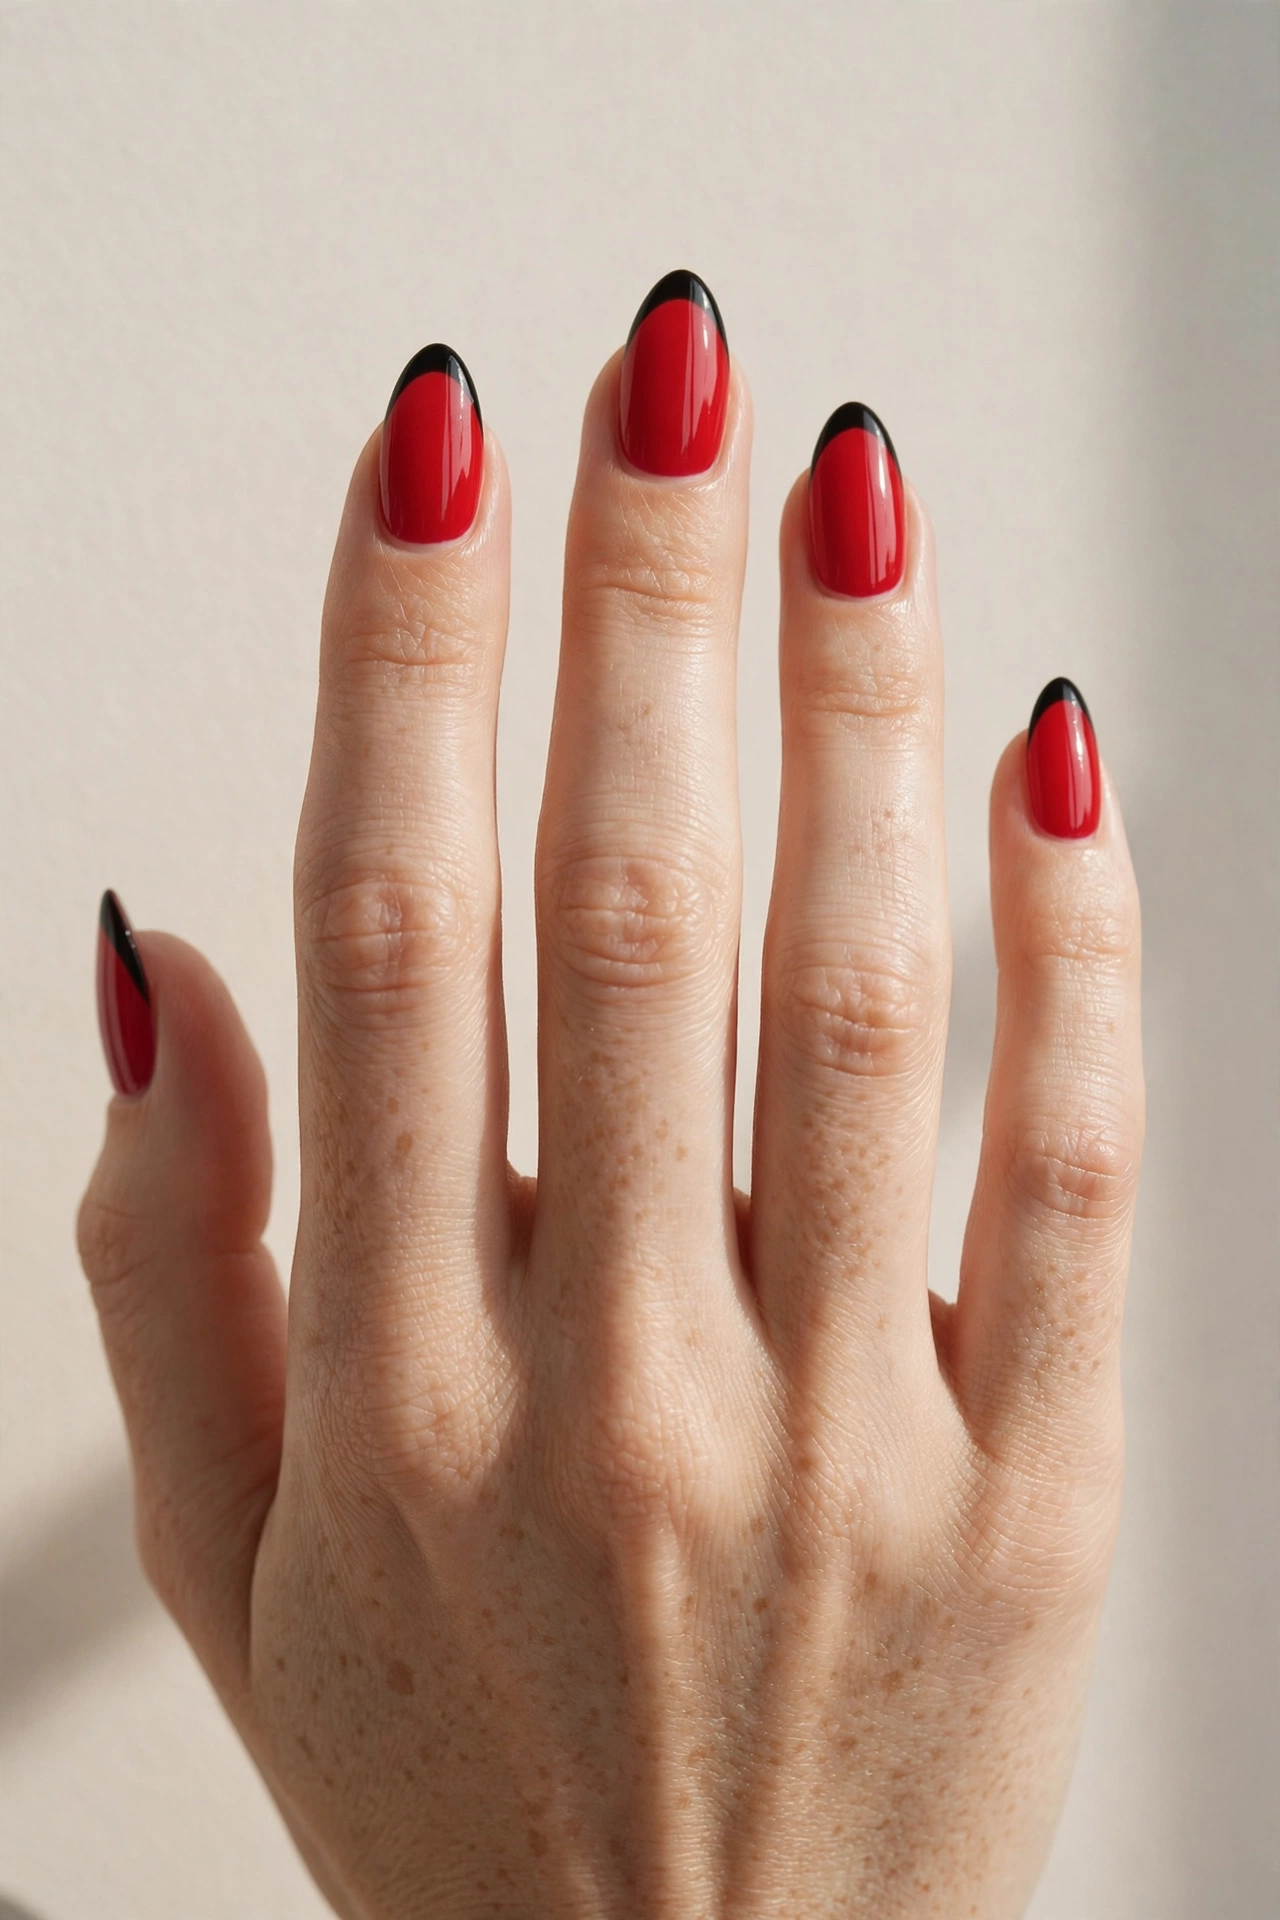
French tips get a rebellious makeover in this design: a rich red base with crisp black tips instead of the usual white. The effect is polished and grown-up, but with a wink — like a little black dress with red lipstick. It keeps the elegance of the classic French while adding the kind of edge that makes people ask where you got your nails done.
This one suits anyone who wants a statement manicure that still works at the office. Square or squoval nails show off the tip line best. You can paint the tips freehand with a steady hand, or use French tip guides for a clean smile line. Two thin coats of black give the best opacity without going lumpy, and a shiny top coat ties the two colors together beautifully.
3. Black Nails with Red French Tips
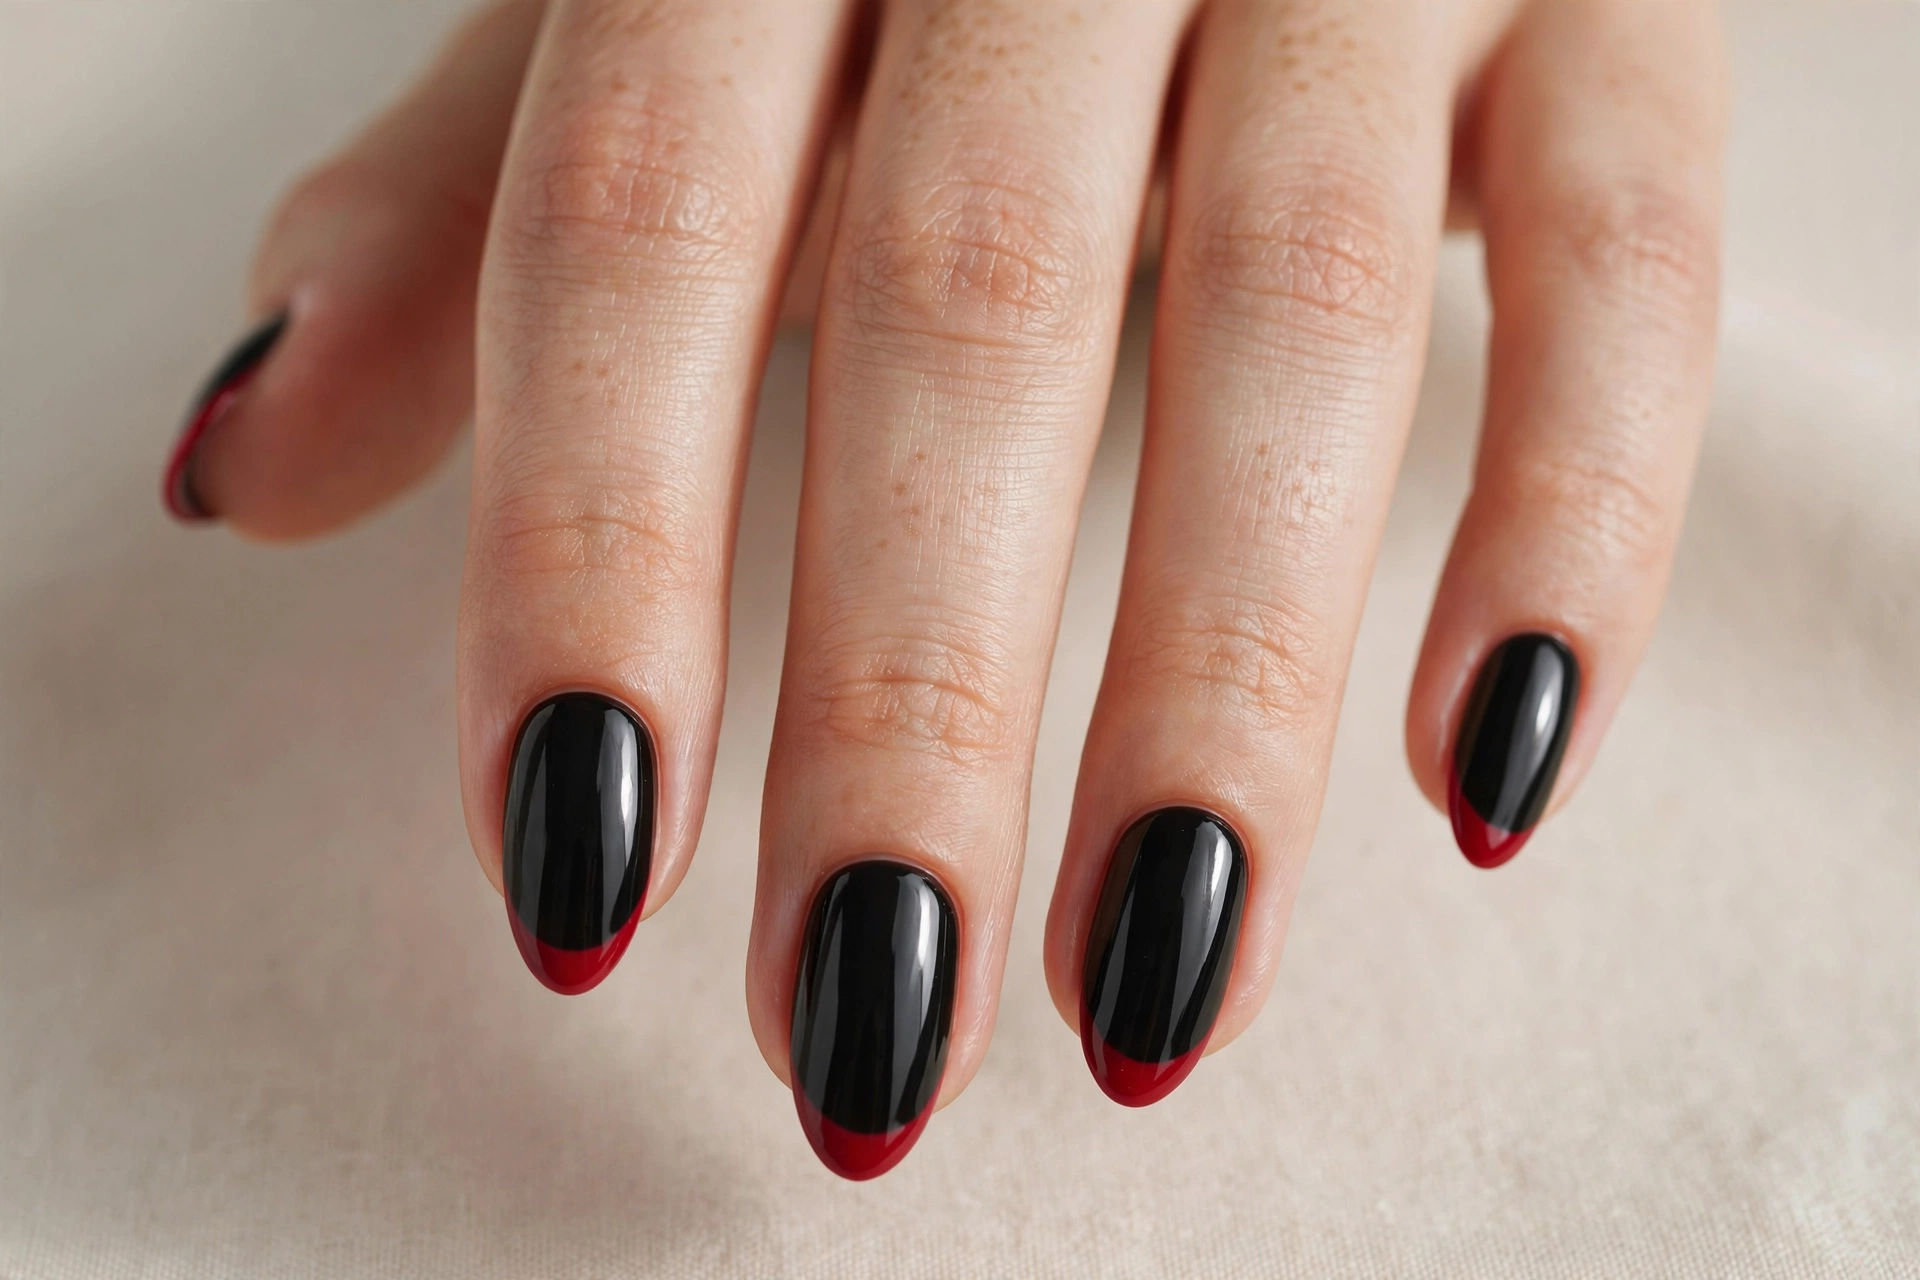
Flip the script with the reverse: a jet-black base with fiery red tips. Where the previous design feels polished, this one feels like a statement — the red tips read almost like embers against the dark base. It’s a favorite for evening looks, and it photographs incredibly well, which is why you see it all over social media.
It’s ideal for anyone who wears a lot of black and wants their nails to add the pop of color. Short to medium lengths work perfectly here, so you don’t need long extensions to pull it off. Paint the black base first and let it dry completely, then sweep the red tip across — patience between coats is what keeps the line crisp. Finish with top coat to protect the contrast.
4. Red Nails with Black Lace Overlay
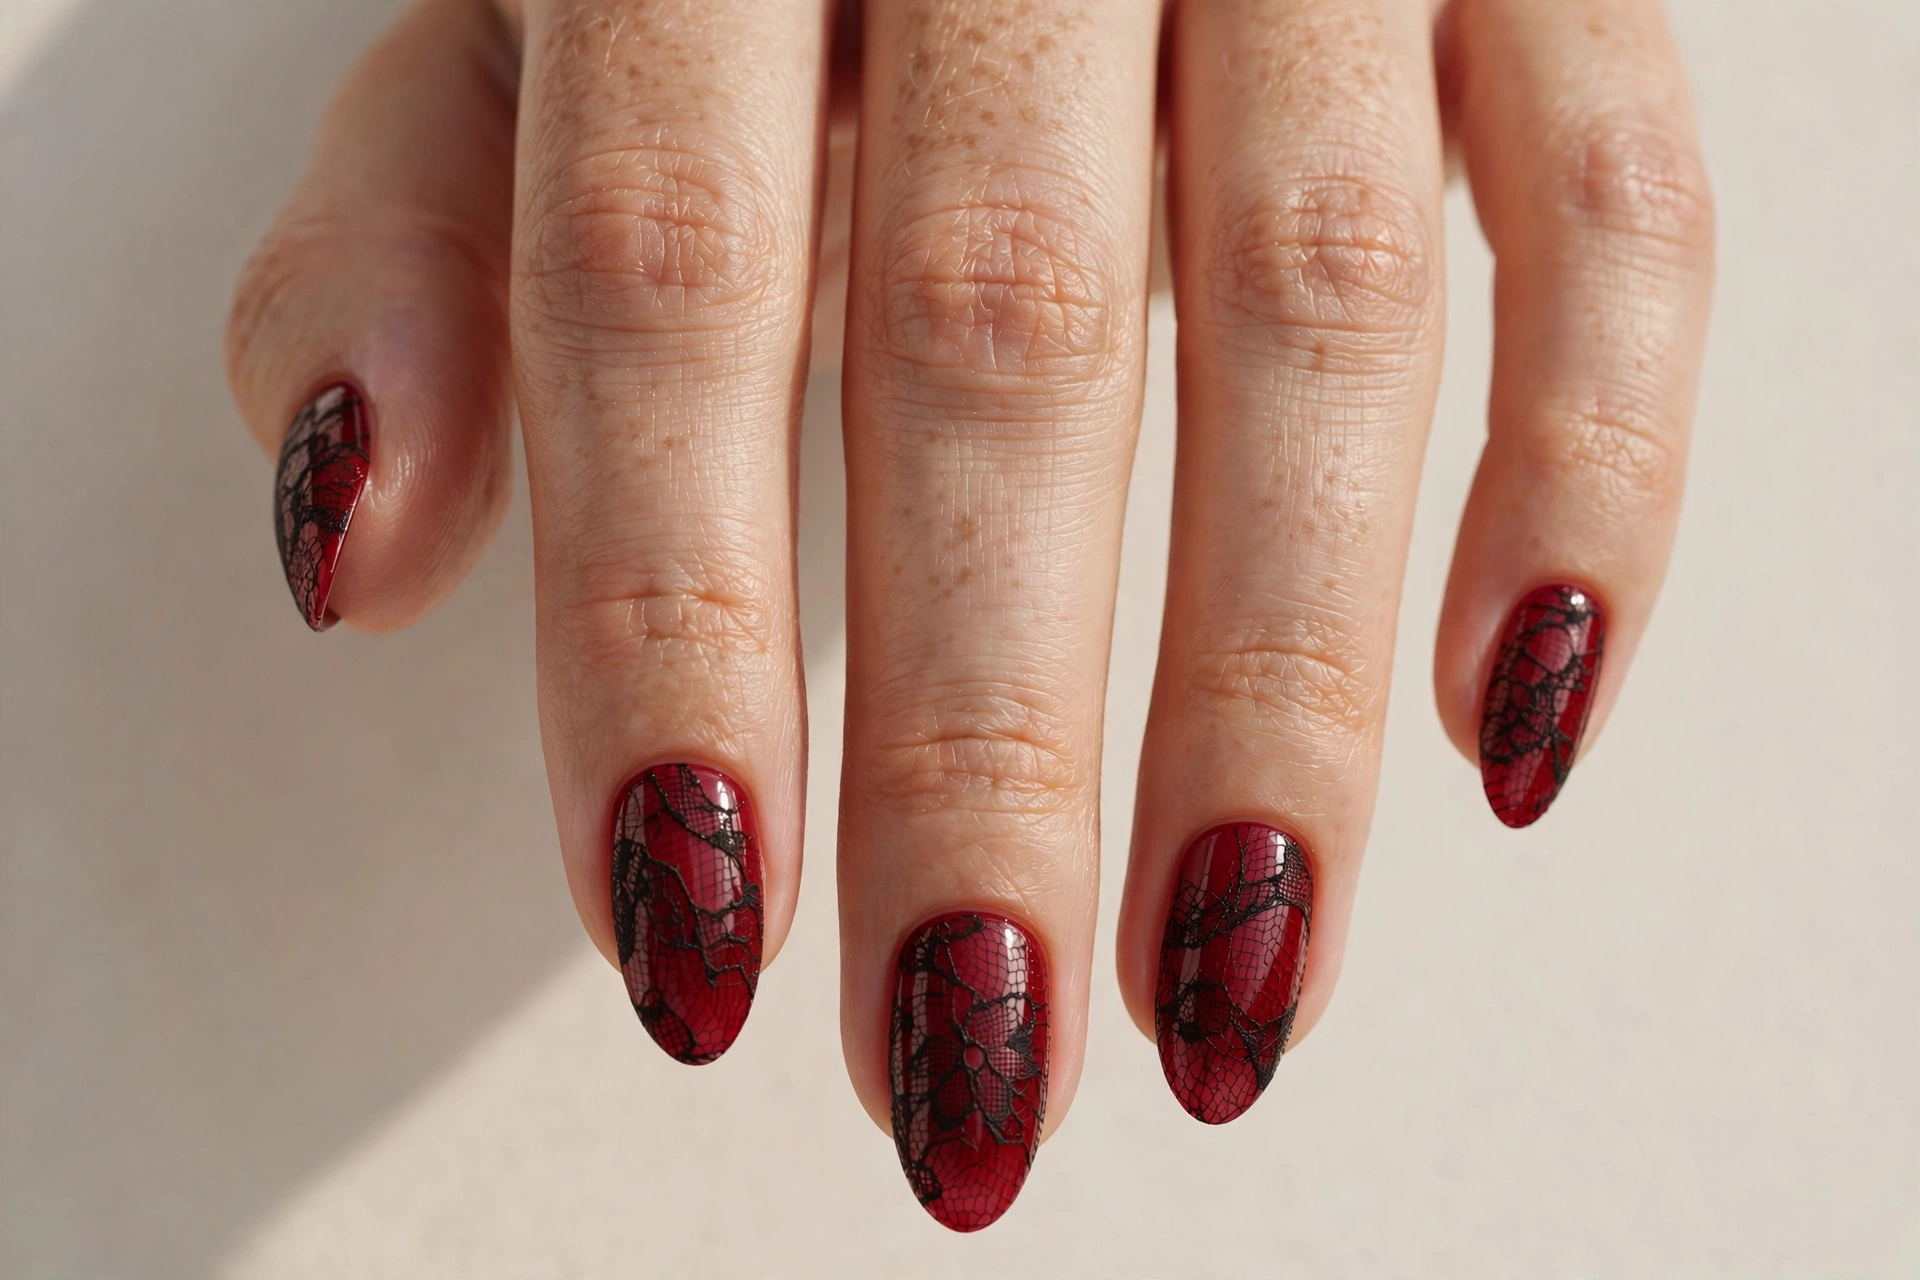
For a look that’s equal parts romantic and rock-and-roll, layer delicate black lace over a red base. The lace pattern — tiny florals, mesh, and scalloped edges — softens the red underneath while the black detailing adds intrigue. It’s a manicure that feels expensive, like something you’d wear to a winter gala or a gothic wedding.
This design suits anyone who loves detail work and vintage-inspired beauty. It’s easiest to achieve with lace nail stickers or stamping plates — freehand lace is possible but tests even steady hands. Apply the red base, place your lace decals once it’s dry, and press gently to smooth out air bubbles. A thick glossy top coat melts the decal edges into the polish so it looks hand-painted.
5. Black Nails with Red Hearts
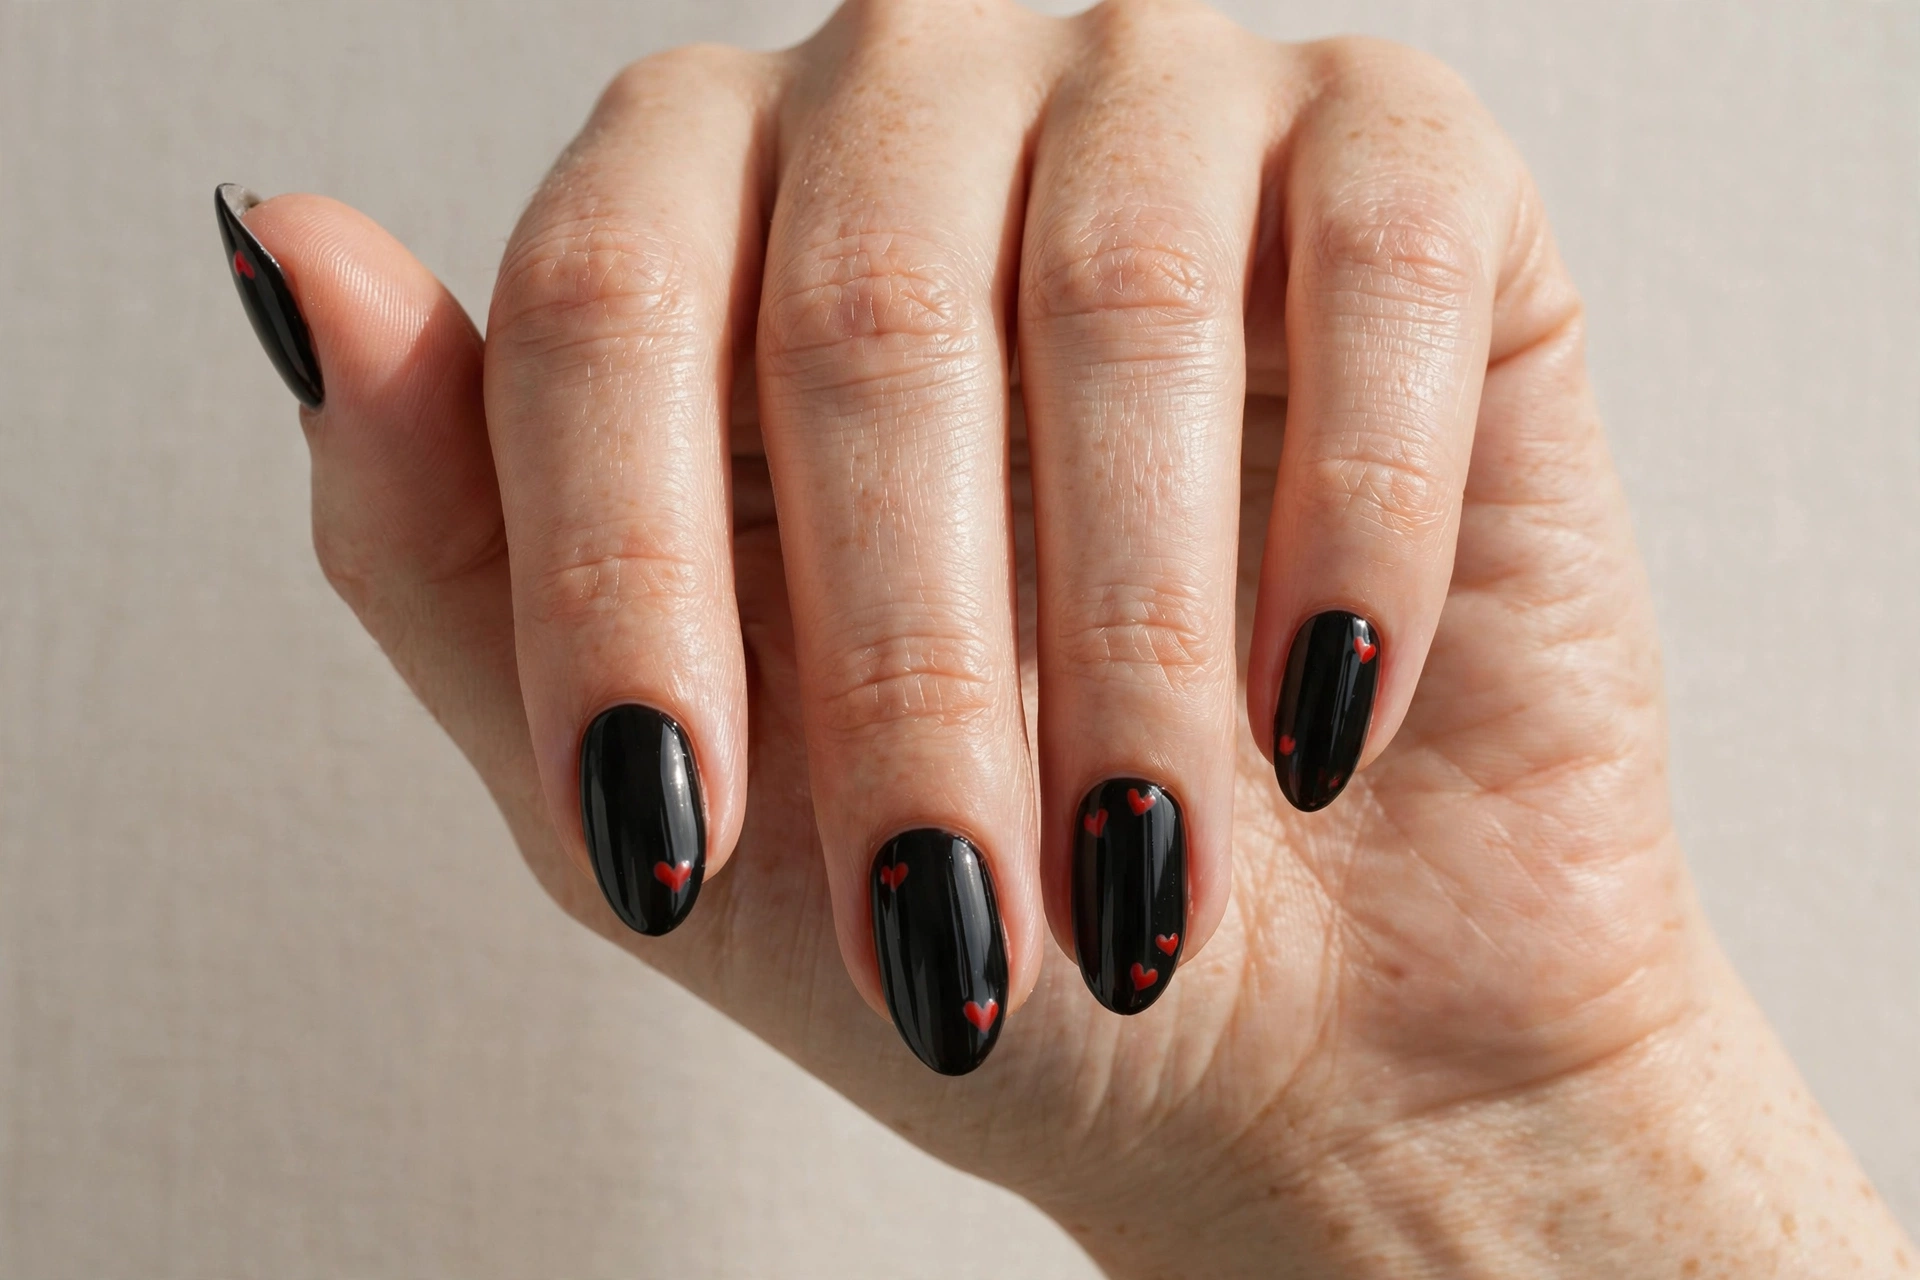
Sweet meets sinister in this playful design: tiny red hearts scattered over a glossy black base. It’s the perfect Valentine’s Day alternative for anyone who finds pink hearts too saccharine, and it works just as well year-round as a flirty everyday look. The hearts can be as neat or as scattered as you like — a single heart on each ring finger is subtle, while all-over hearts make a bolder statement.
This one suits romantics with an edge, and it’s very beginner-friendly. A dotting tool (or the end of a bobby pin) makes perfect little hearts: place two dots side by side, then drag them together into a point. Vary the sizes for a hand-drawn feel. Seal with top coat so the hearts stay put through hand washing and daily wear.
6. Half-and-Half Red and Black Split Nails
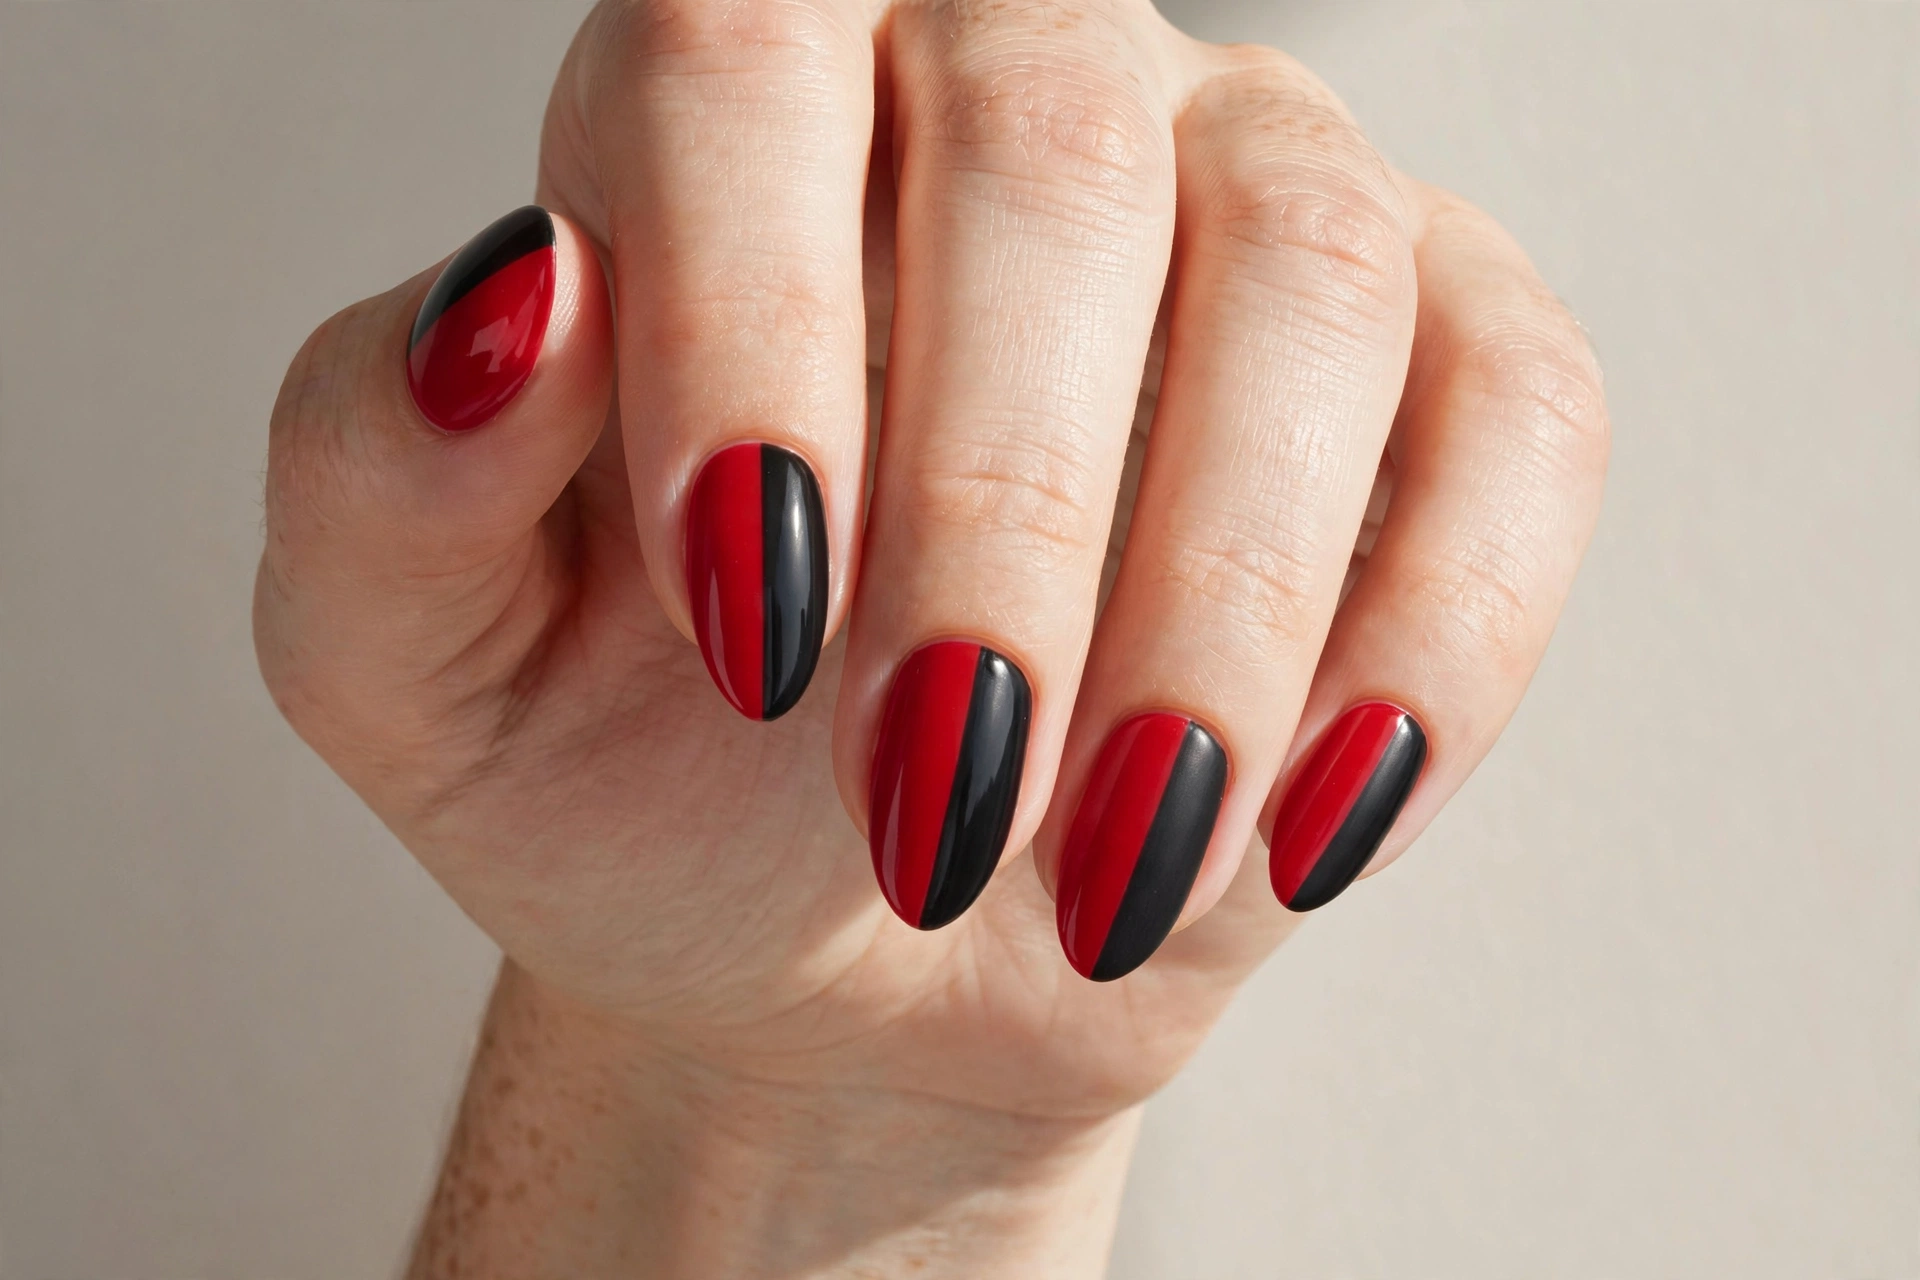
Sometimes the boldest move is the simplest one: paint one half of each nail red and the other half black, split straight down the middle. This graphic two-tone look has a modern-art feel — clean, striking, and impossible to ignore. The hard dividing line is what makes it work, so precision matters more than fancy technique here.
It suits minimalists who still want a statement, and it looks fantastic on short nails where the split is easy to see. Use striping tape or a thin nail vinyl down the center of each nail to get a razor-sharp line. Paint one side red, remove the tape while the polish is still slightly tacky, let it dry, then do the black side. A glassy top coat blends the ridge where the two colors meet.
7. Red and Black Checkerboard Pattern
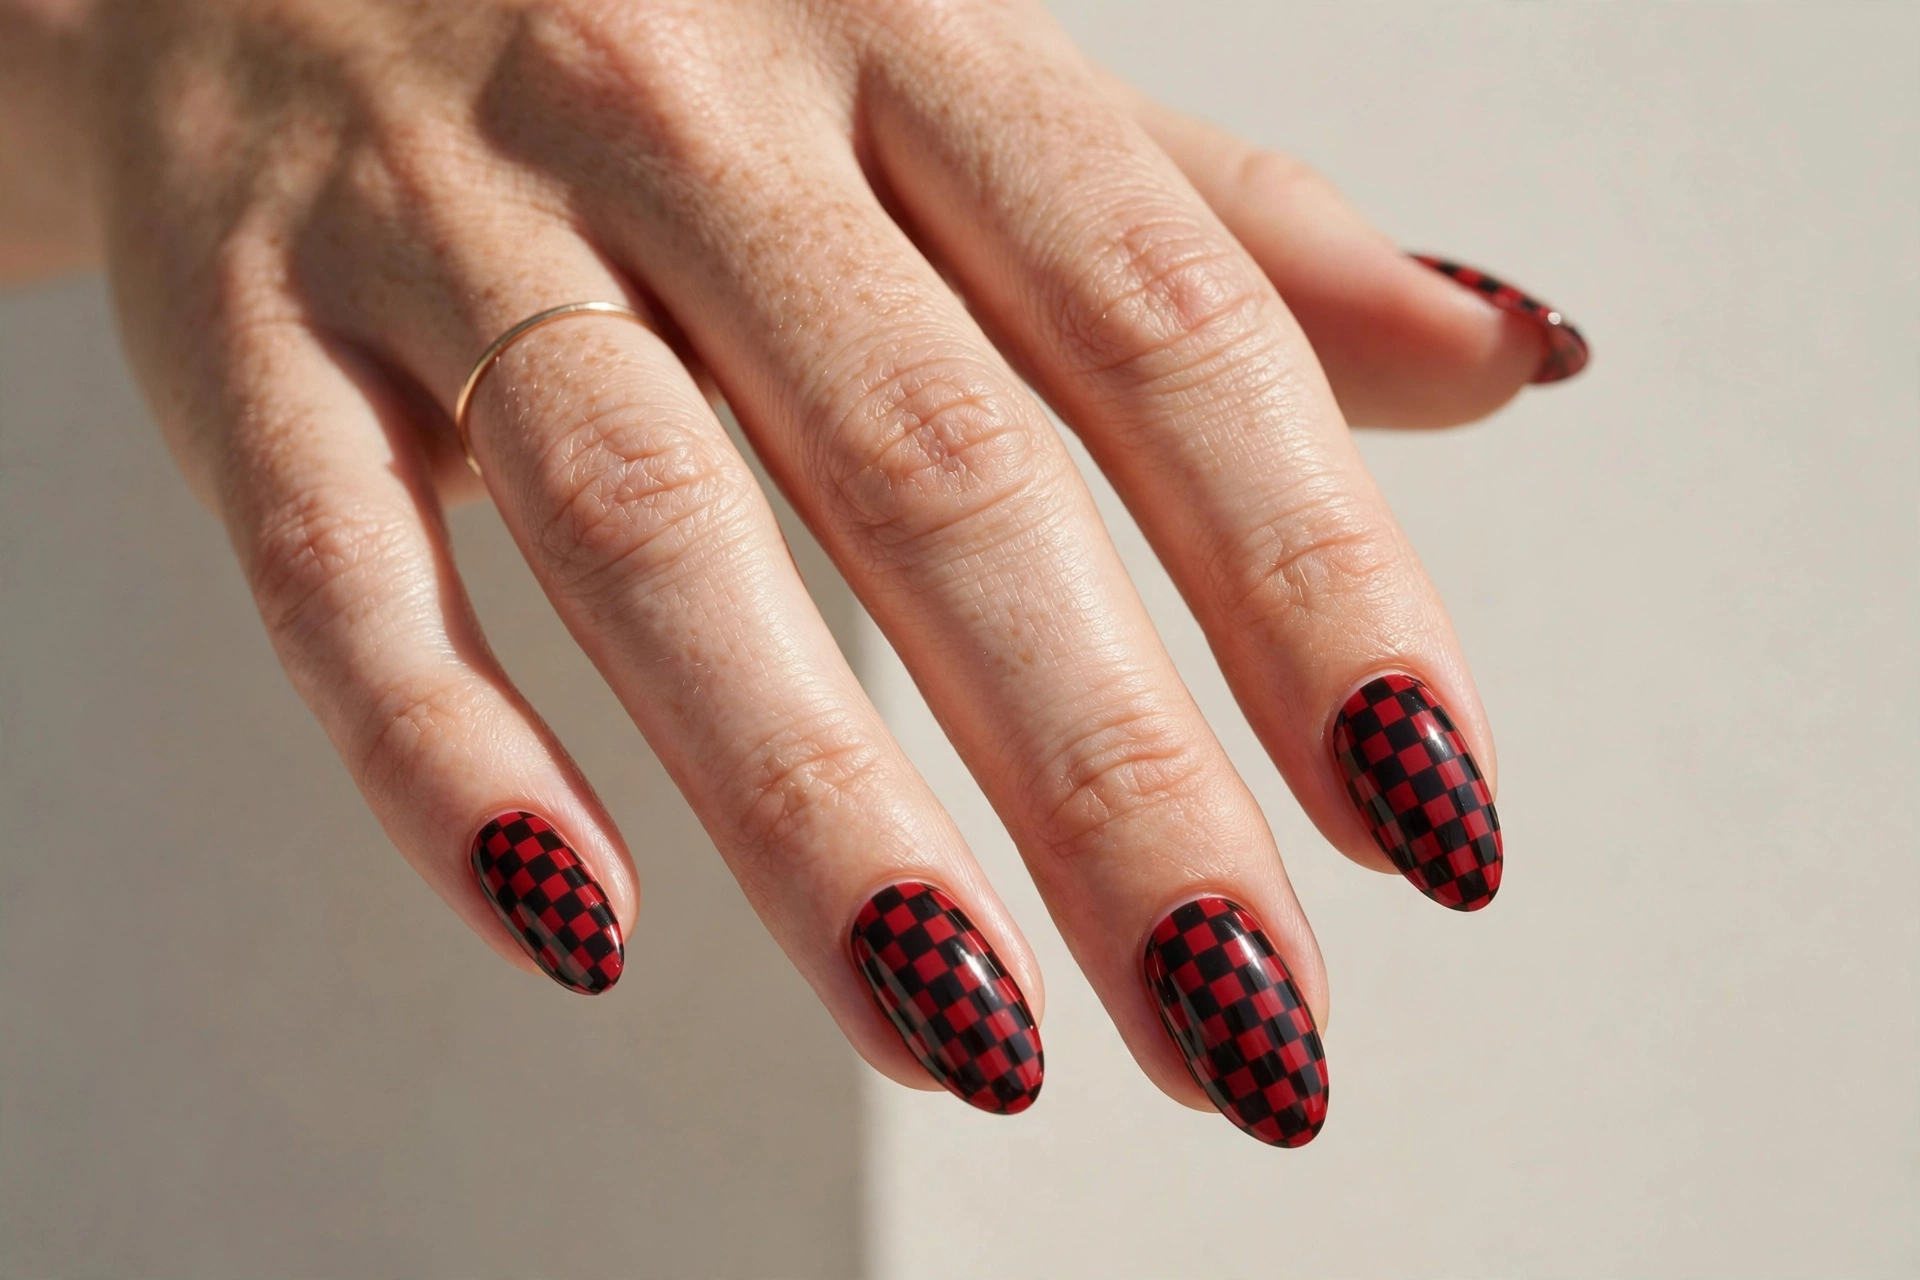
The checkerboard print has had a major moment in fashion, and on nails it’s pure fun — retro, a little skater-inspired, and endlessly eye-catching. Alternating red and black squares turn each nail into a tiny game board. You can go full checkerboard on every nail, or use it as an accent on two fingers with solid red and black on the rest.
This design suits playful personalities and anyone who loves a retro aesthetic. Nail art brushes or striping tape make the squares far easier — freehand checks tend to wobble. Start with a red base, then paint black squares in a grid pattern, keeping them roughly even. It doesn’t have to be perfect; slight irregularities add to the hand-drawn charm. Top coat smooths everything out.
8. Matte Black with Glossy Red Accents
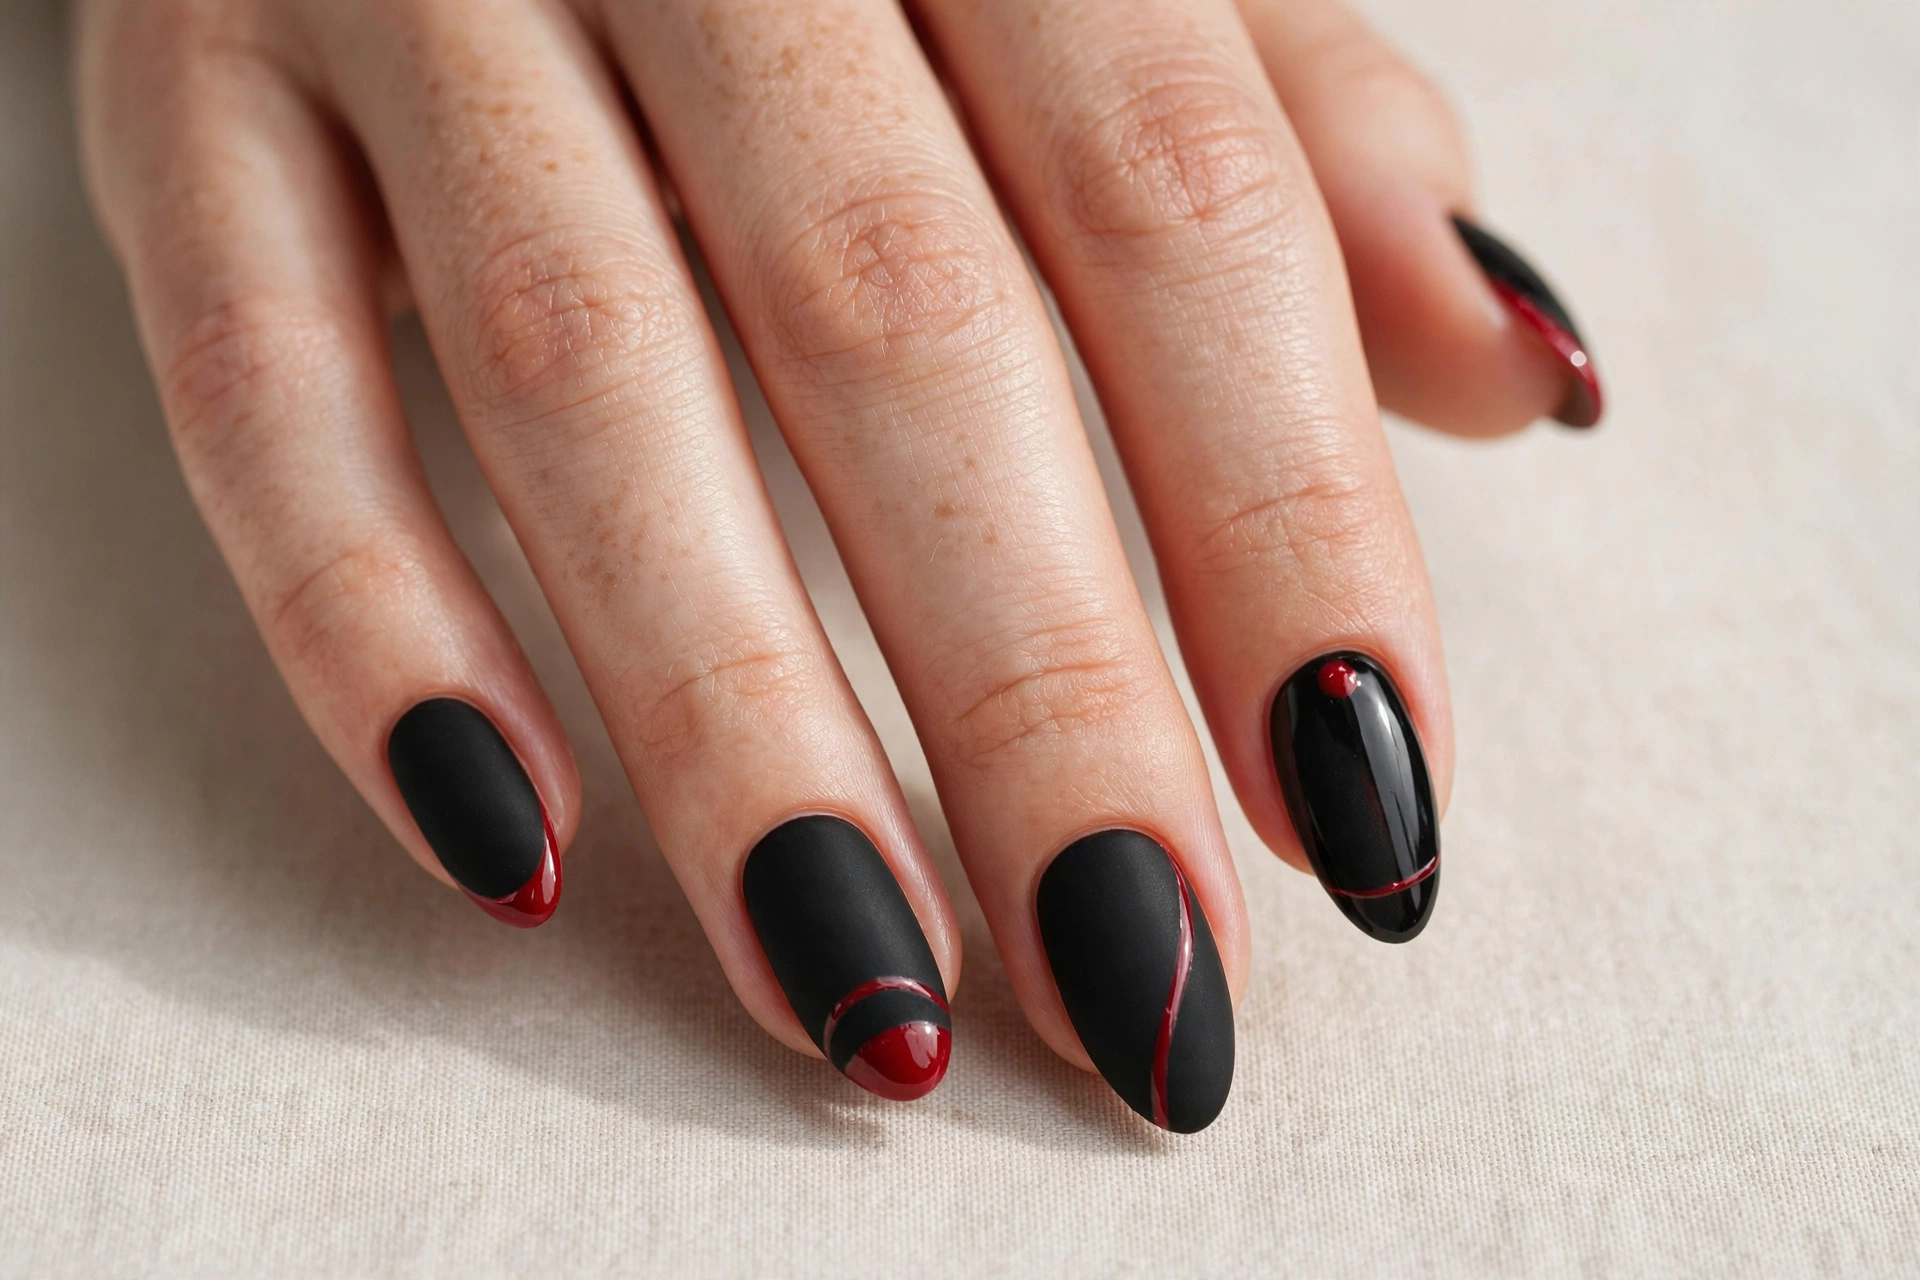
If you love texture play, this design is for you: a velvety matte black base with glossy red details — a single stripe, a dot, a crescent moon — that catch the light differently as you move your hands. The contrast between flat and shine is subtle from a distance but mesmerizing up close, giving the manicure real depth.
It suits anyone who prefers understated drama over loud patterns. After your black base is fully dry, add the red accents with a fine brush, then apply a matte top coat over the whole nail — but here’s the trick: go back over just the red accents with a glossy top coat so they stay shiny against the matte background. The two finishes side by side create that rich, layered effect.
9. Red and Black Marble Swirl
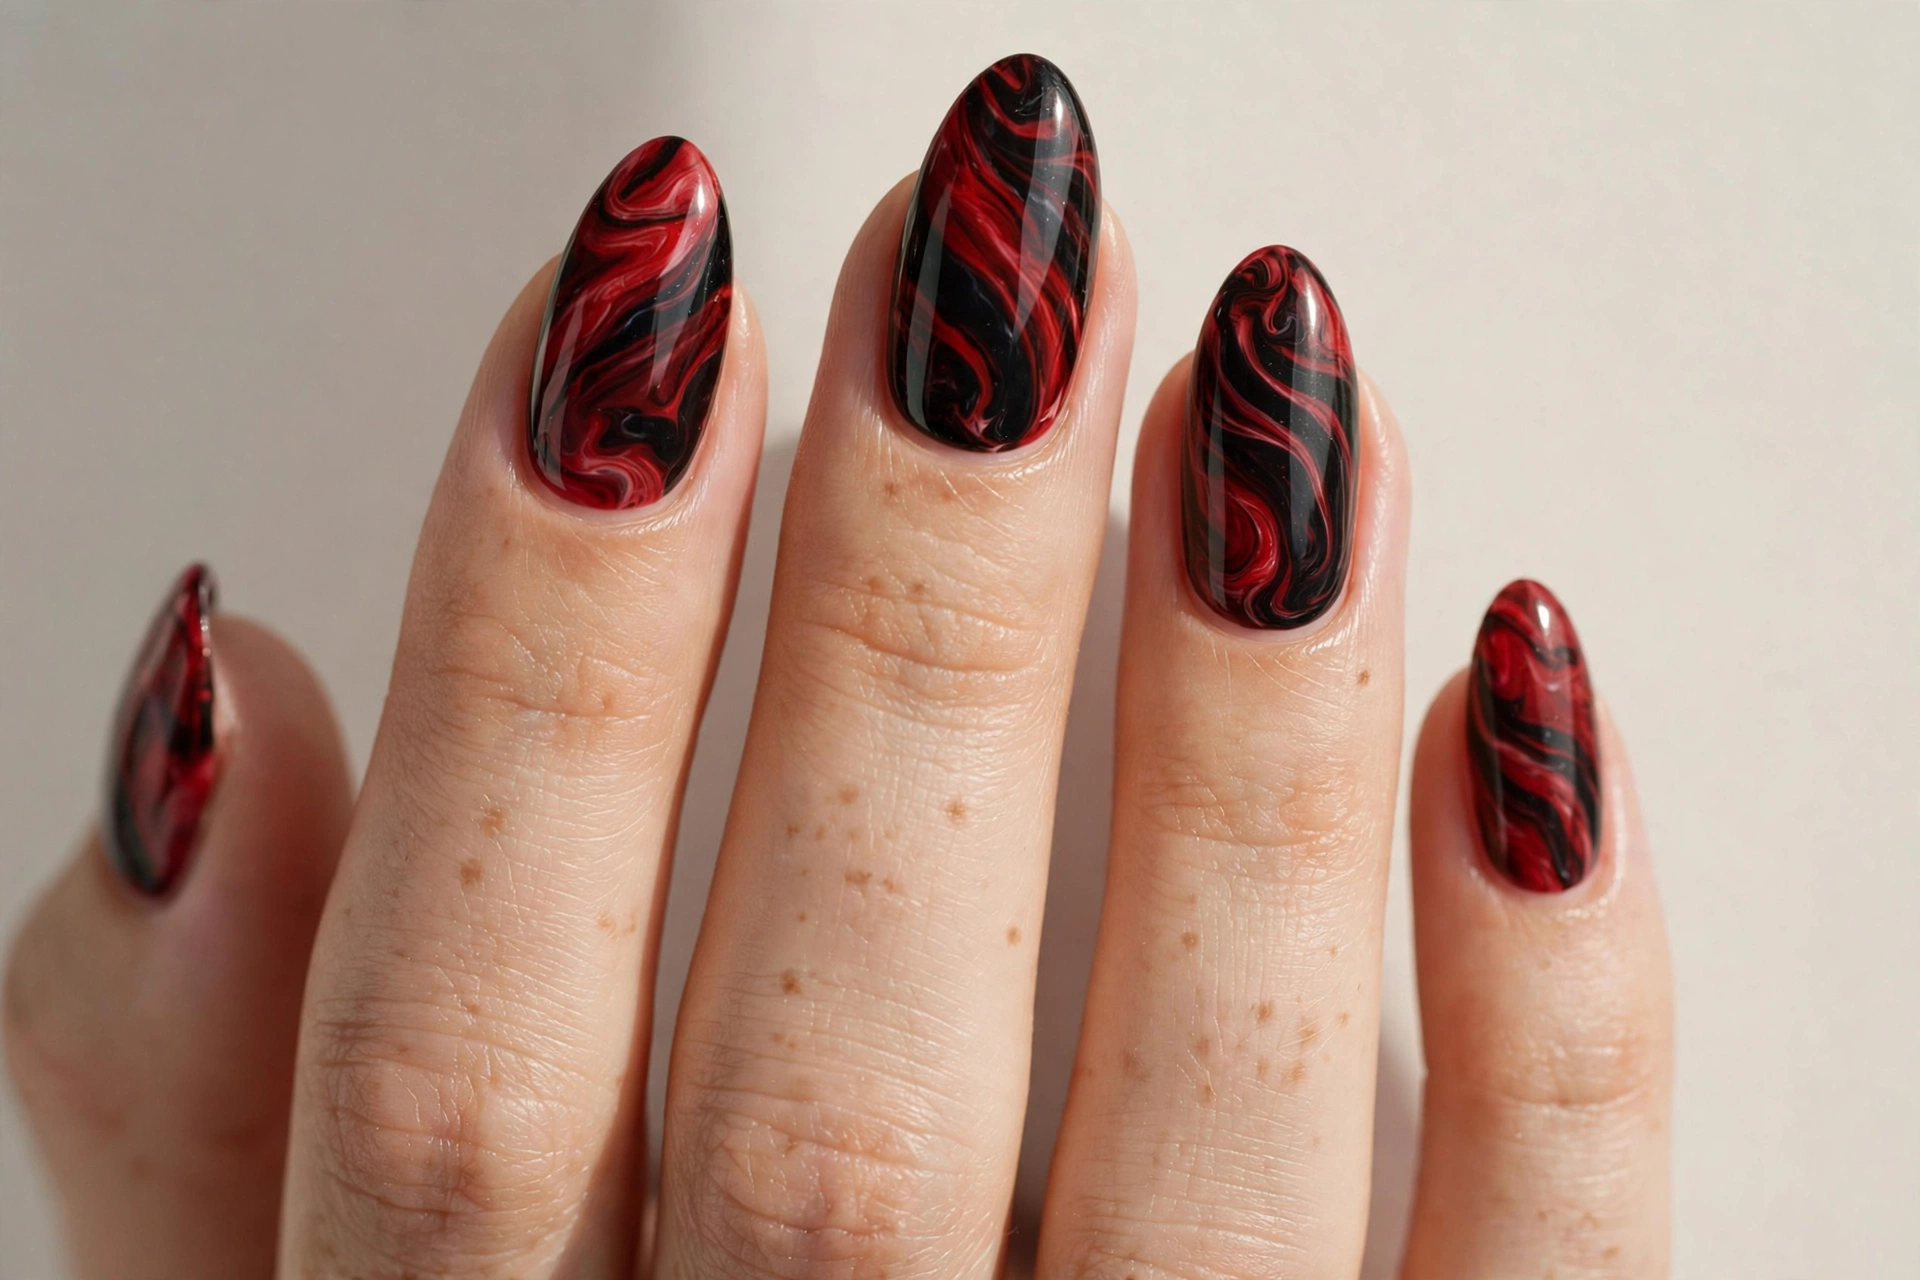
Marble nails look like they cost a fortune at the salon, but the water-marble technique is genuinely doable at home with a little practice. Red and black swirled together create a smoky, stone-like effect — no two nails ever look exactly alike, which is part of the appeal. It’s dramatic, artistic, and a little bit moody.
This suits anyone who loves one-of-a-kind art and doesn’t mind a slightly messy process. Drop alternating dots of red and black polish into room-temperature water, swirl with a toothpick, then dip your nail through the film. The learning curve is real — your first attempts may go in the trash — but once the technique clicks, the results are gallery-worthy. Clean up with acetone and seal with top coat.
10. Black Stilettos with Red Flames
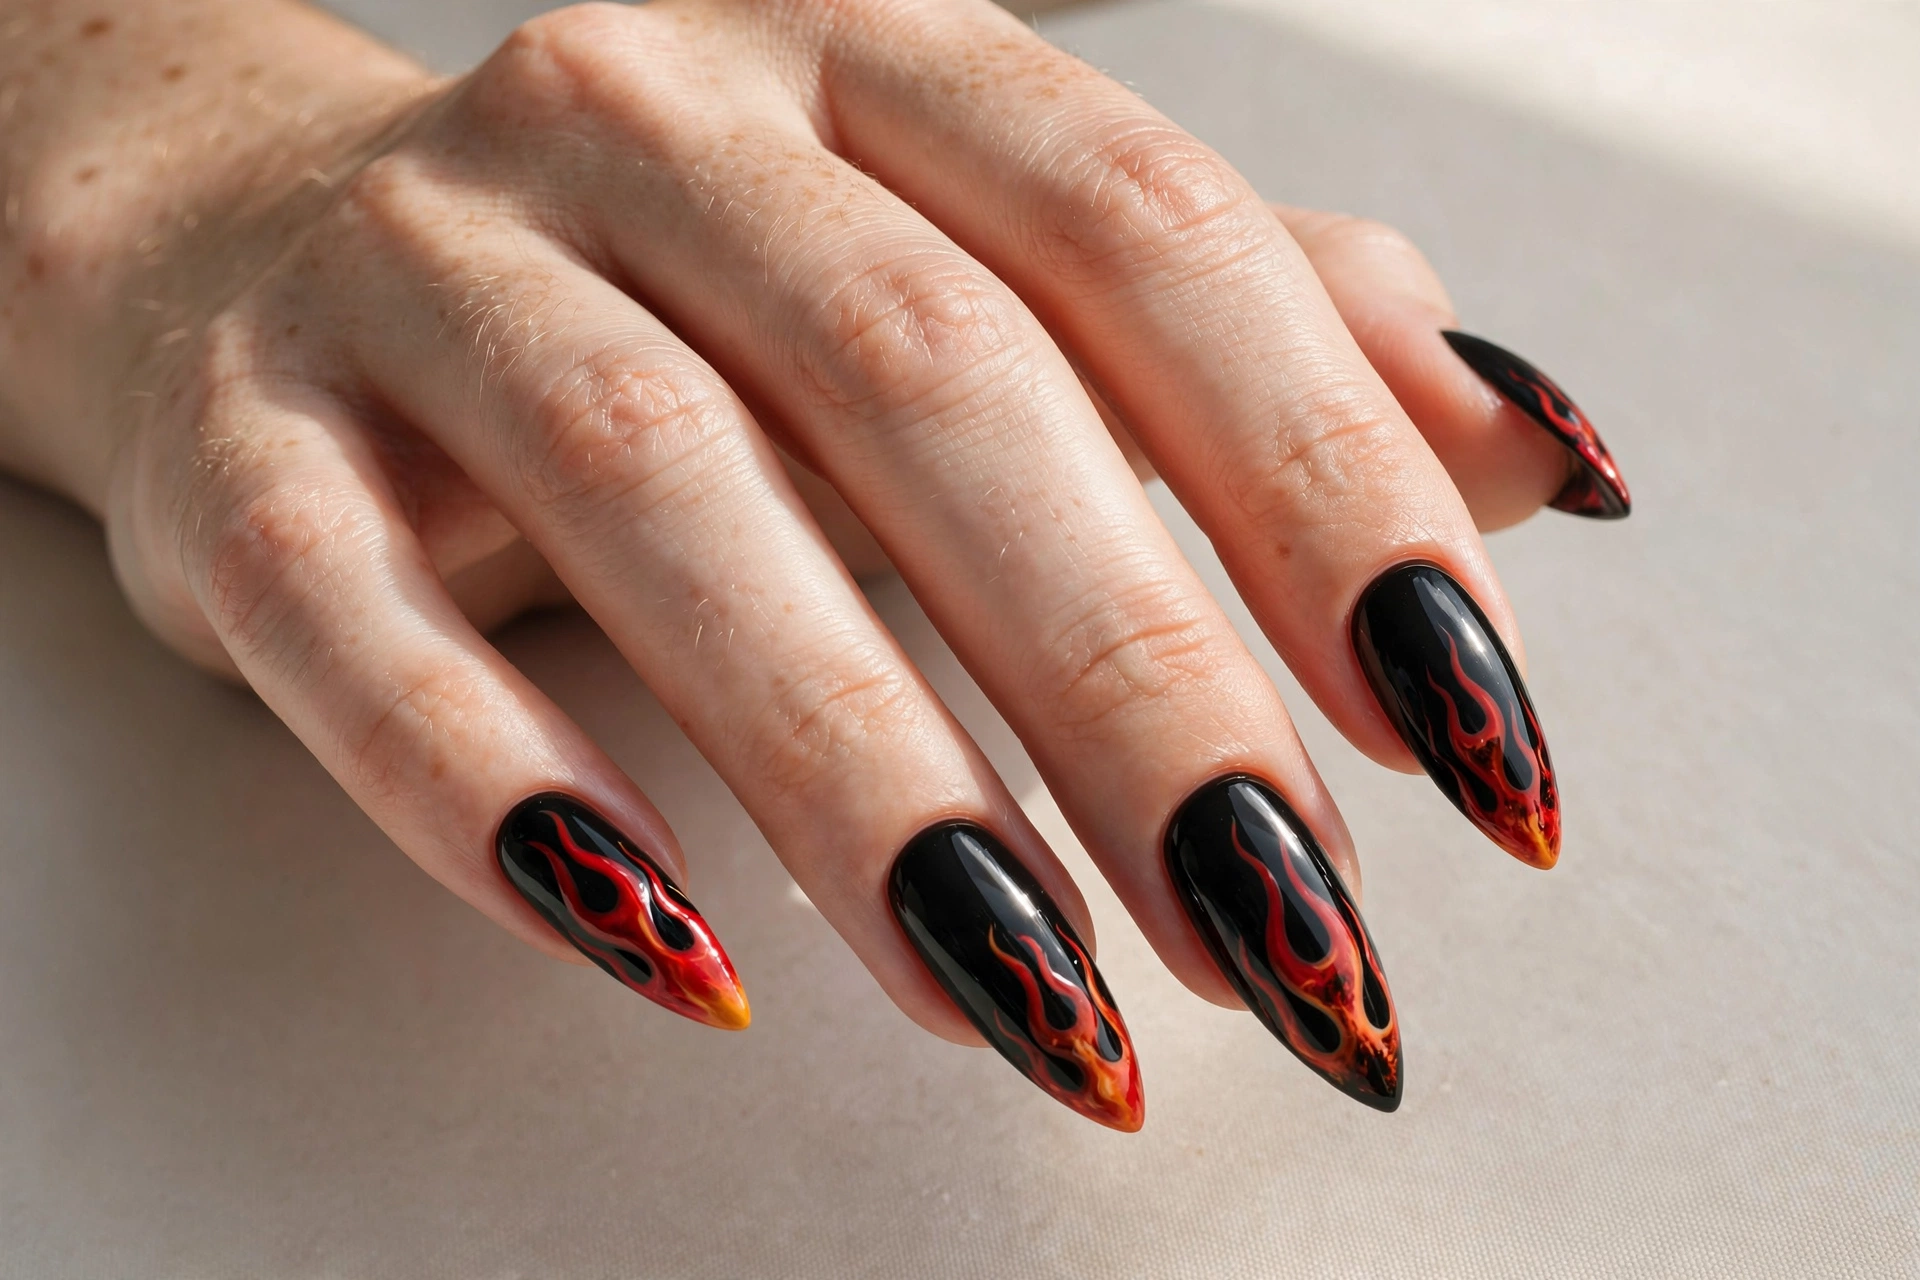
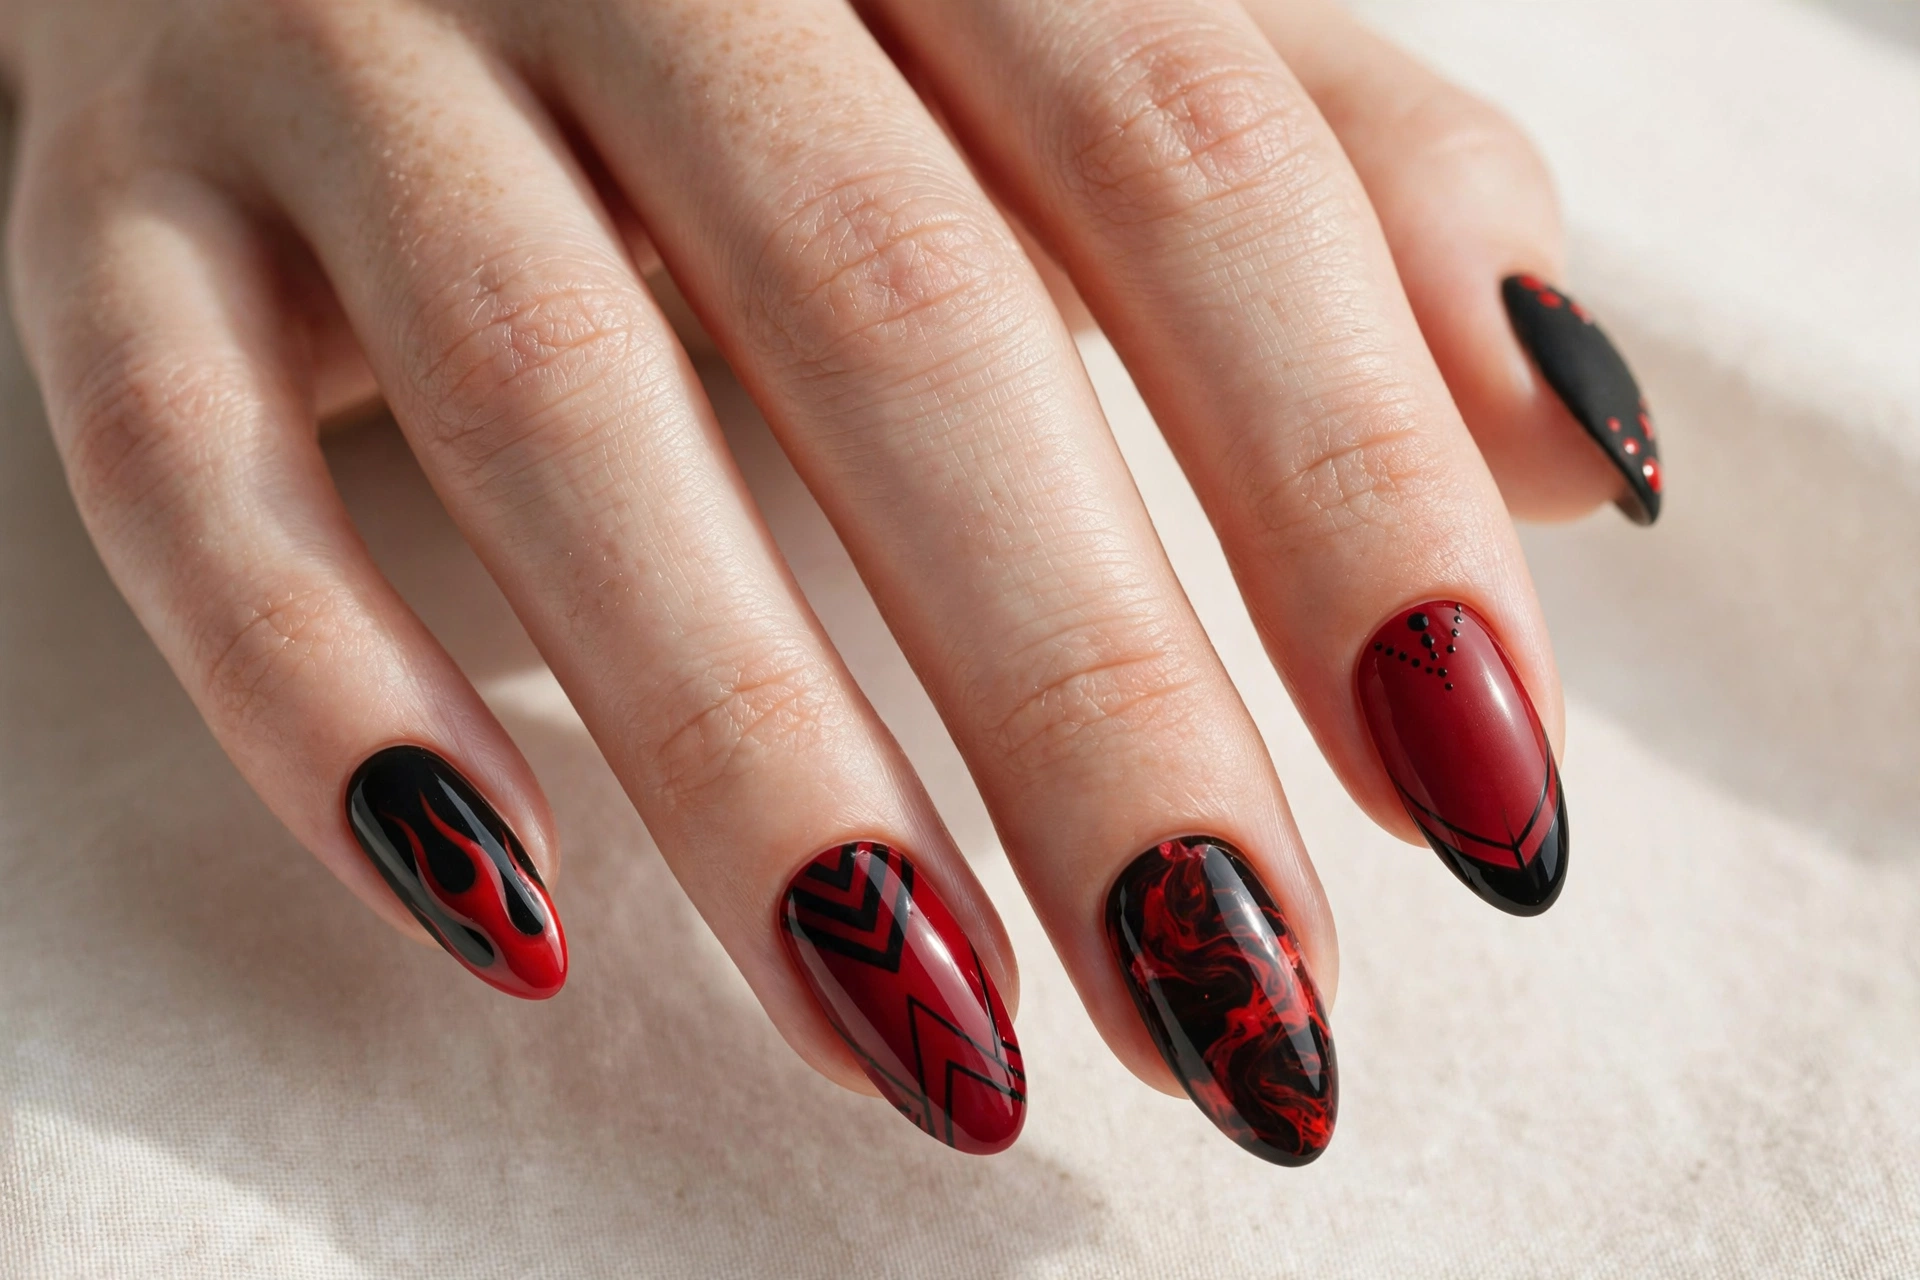
Nothing says bold like stilettos with flames. The sharp, pointed shape already brings attitude, and red flames licking up from the cuticle over a black base turn the volume all the way up. It’s the manicure equivalent of a leather jacket — rebellious, confident, and not for the faint of heart.
This design suits long nail lovers and anyone heading to a concert, festival, or themed party. Stiletto shape is a must to sell the flame effect. Paint the black base, then use a fine detail brush to flick red flame tongues upward, layering a brighter red-orange in the center for depth. Keep the flames organic — real fire isn’t symmetrical. A glossy top coat makes the whole thing look lit from within.
11. Red Nails with Black Polka Dots
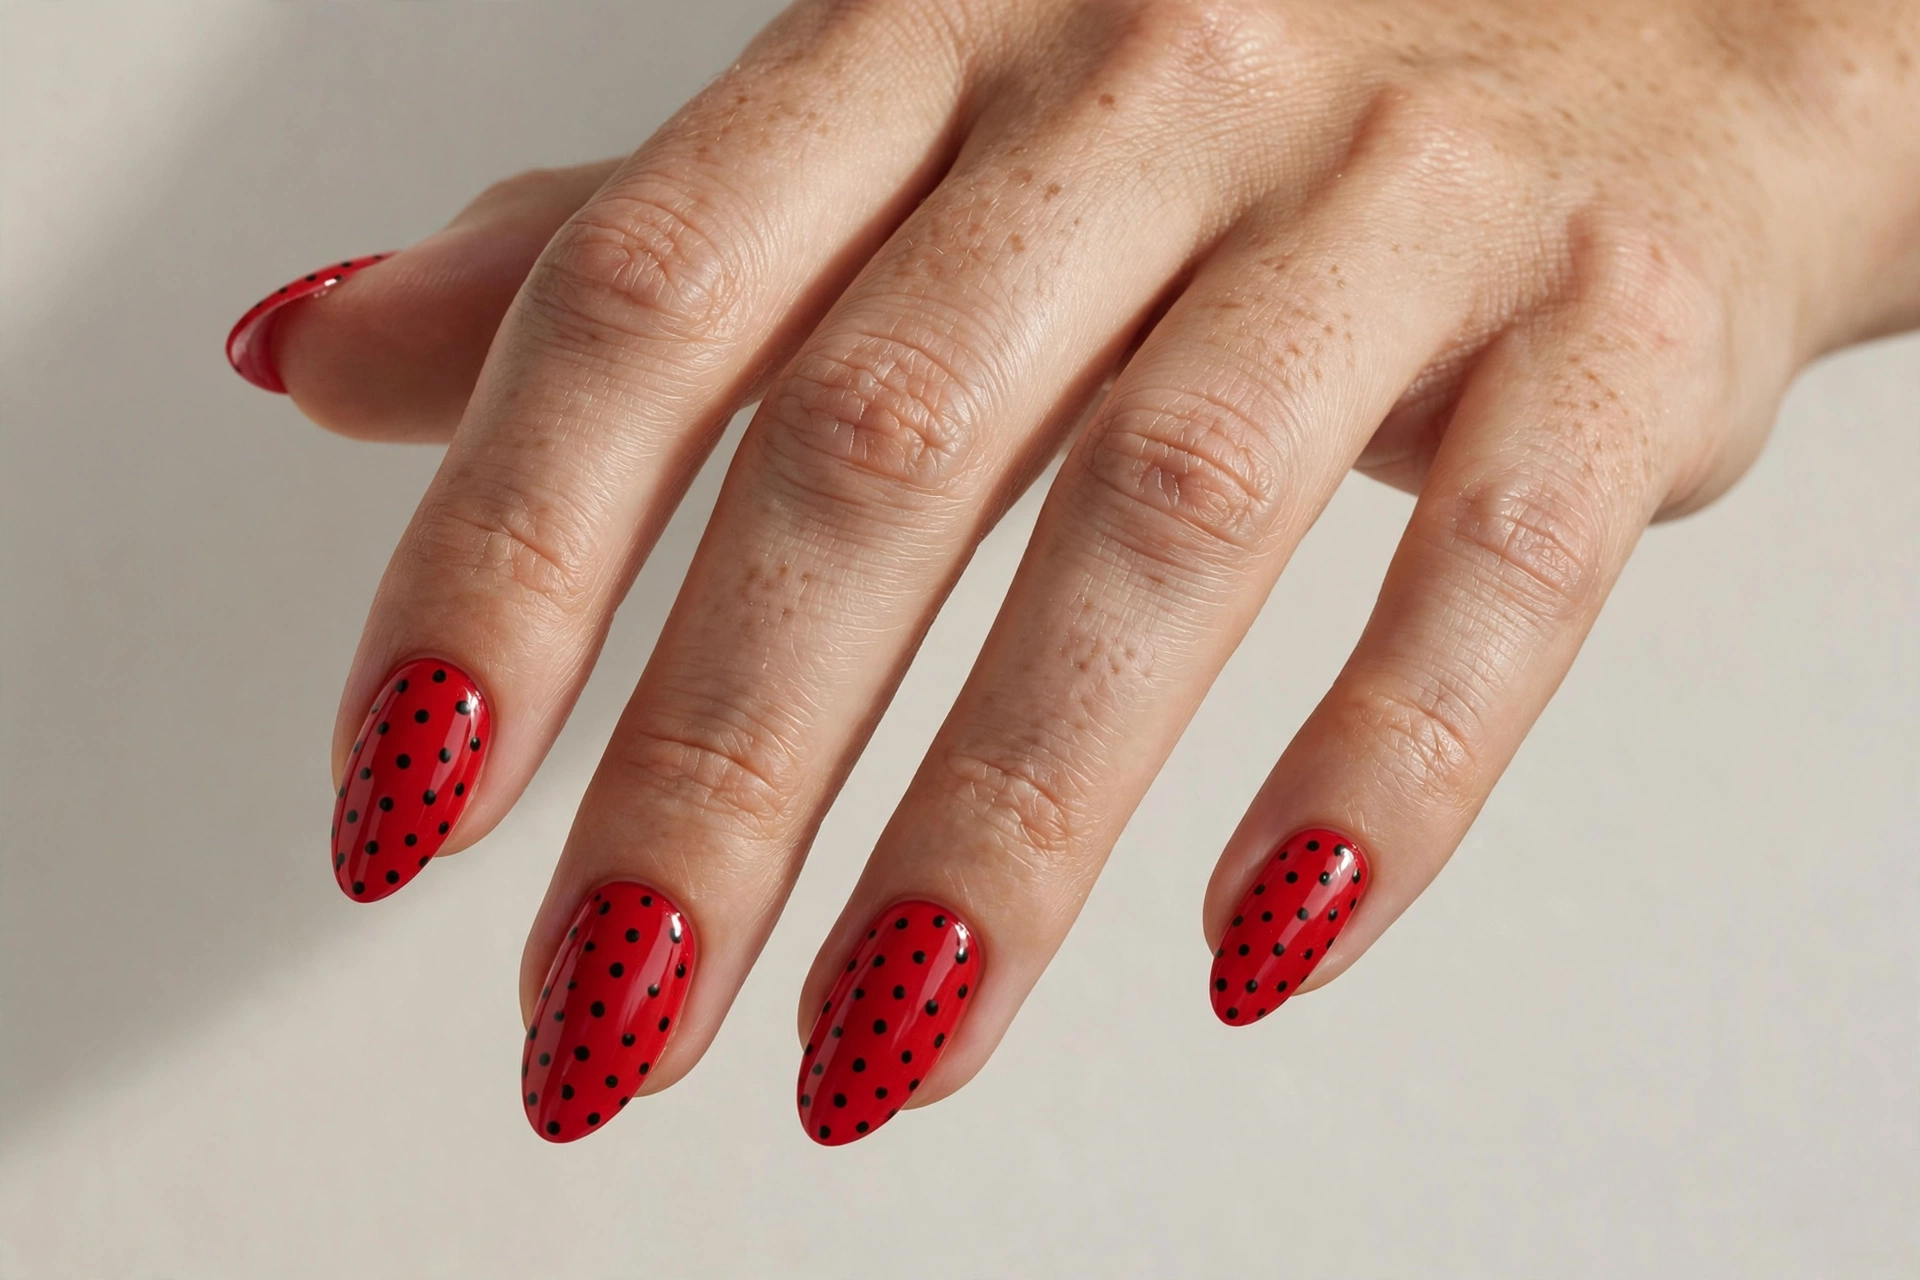
Polka dots are the friendliest pattern in nail art, and in red and black they take on a vintage pin-up vibe. A glossy red base dotted with neat black spots feels retro and fun — think 1950s dresses and old Hollywood glamour. You can keep the dots uniform for a classic look or scatter them in different sizes for something more modern.
This suits just about everyone, and it’s one of the easiest designs on this list, making it perfect for beginners. A dotting tool gives the cleanest circles — dip, dot, and lift straight up for round spots. Space them evenly in rows or go random; both work. Let the dots dry fully before top coat, or they’ll smear. Two minutes of patience is all it takes.
12. Red and Black Geometric Line Art
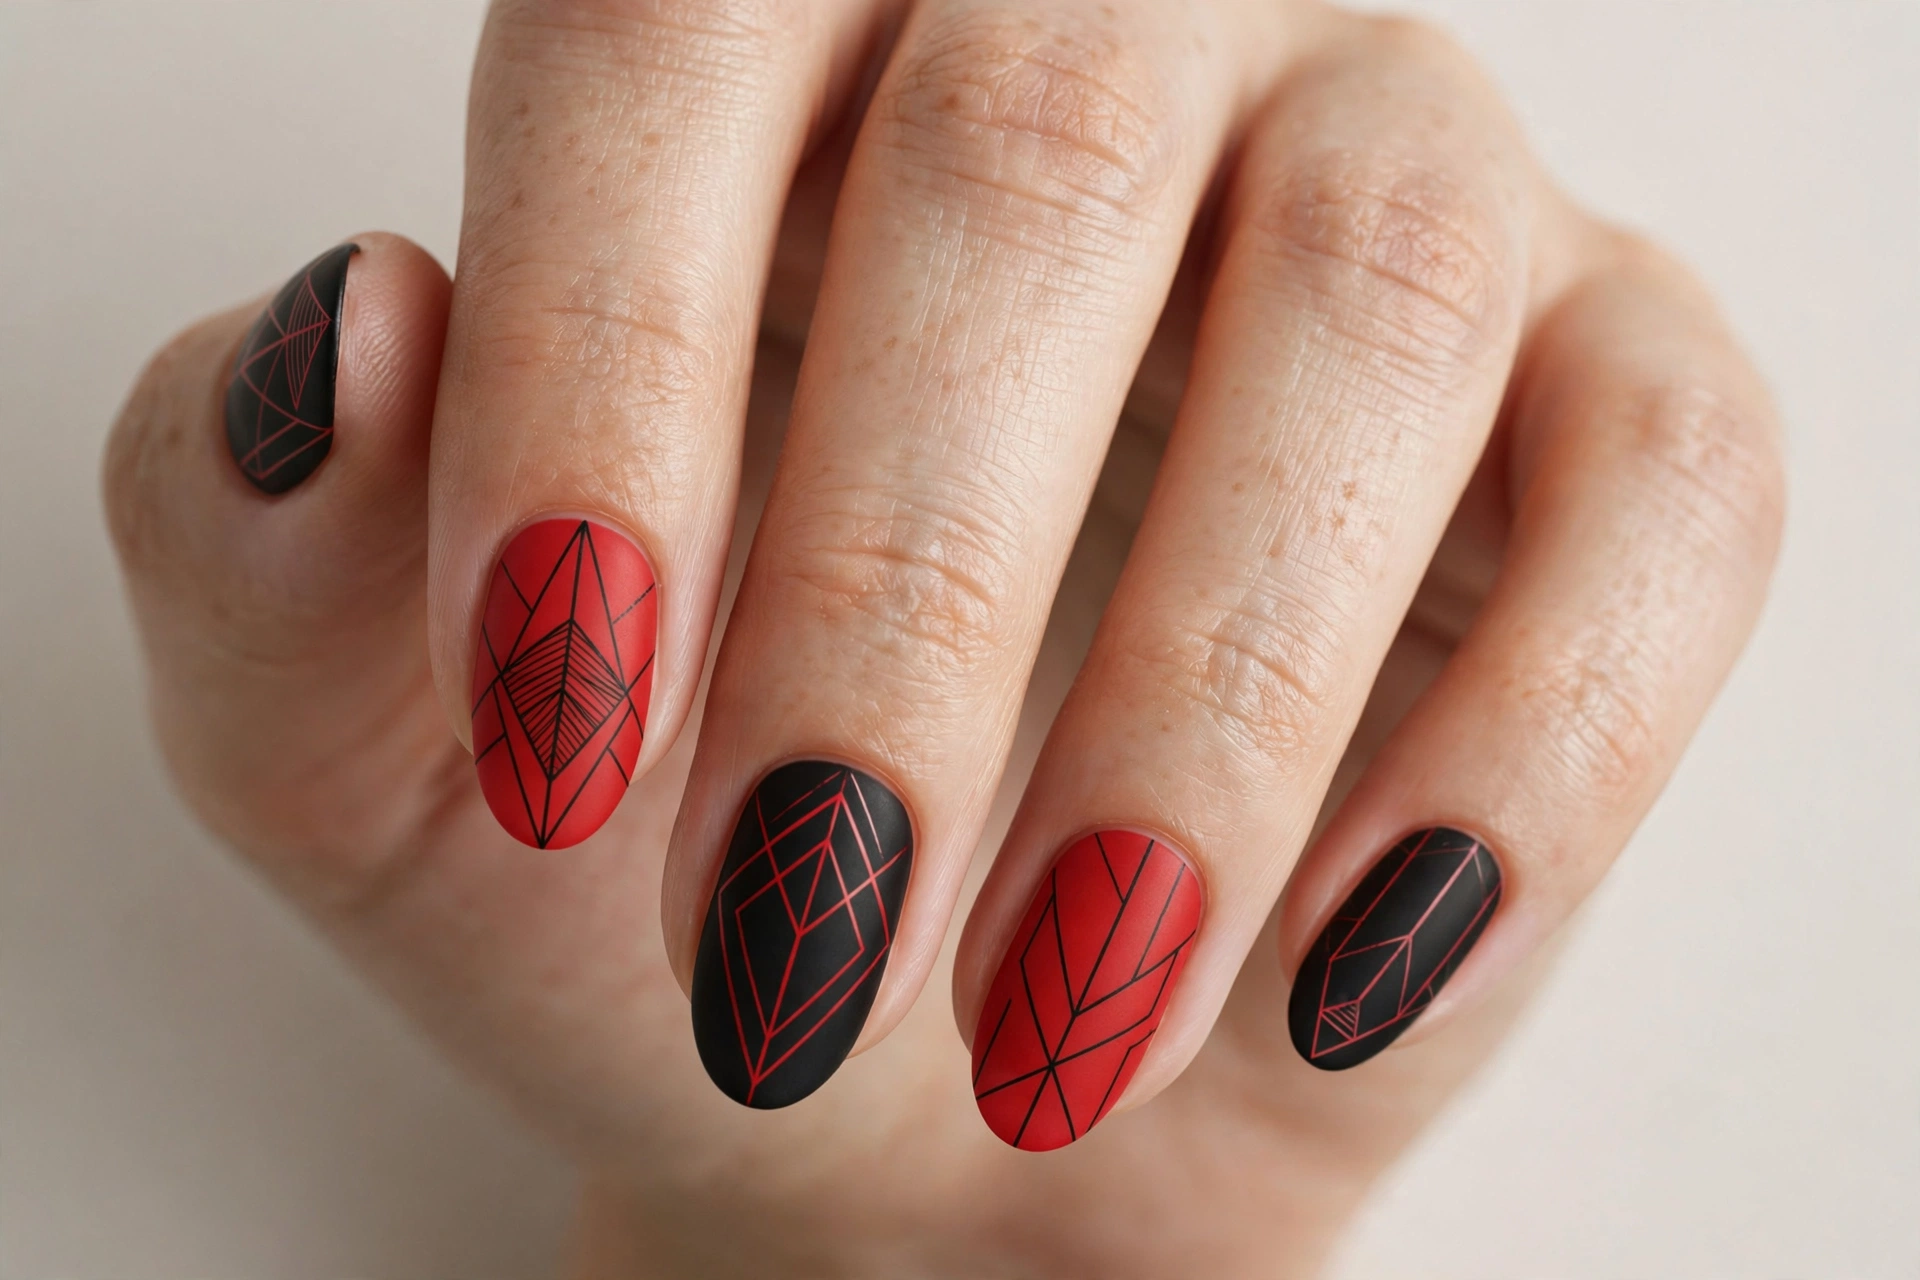
For a modern, architectural feel, try geometric line art: thin black lines, triangles, and negative-space shapes over a red base — or red lines over black. The precision of the geometry against the boldness of the colors creates a look that’s very now, like something straight off a runway. Each nail can carry a different motif for an editorial, mix-and-match set.
It suits anyone with a minimalist, fashion-forward style. Striping tape is your best friend here — it gives you those crisp straight lines that make geometric art look professional. Plan your layout before you start, work one nail at a time, and pull the tape while the polish is still tacky for the cleanest edges. A matte or glossy top coat both work; matte makes it look especially modern.
13. Black Nails with Red Glitter Gradient
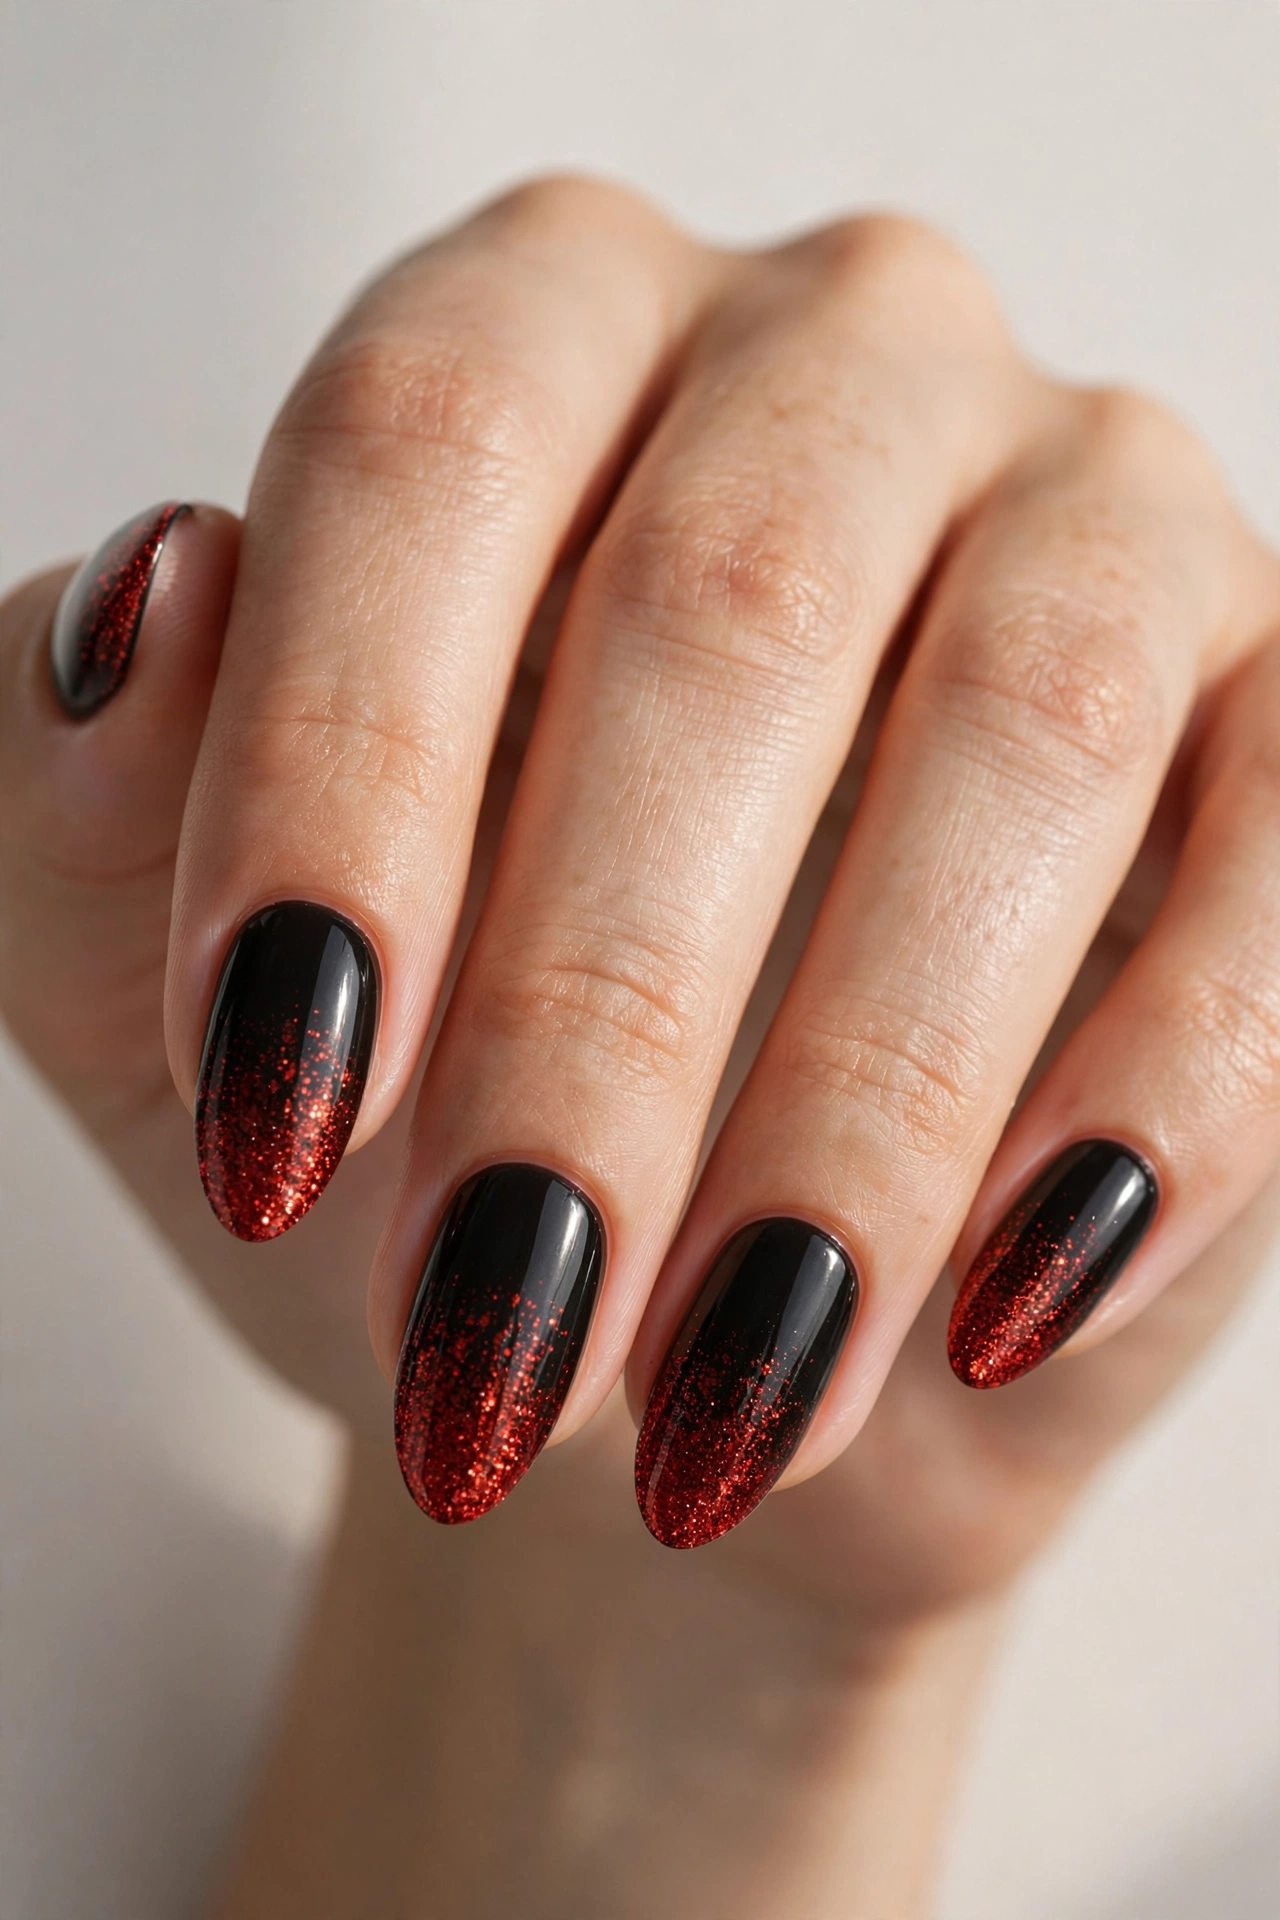
Glitter gradients are the party trick of nail art: a black base that dissolves into sparkling red glitter at the tips, like embers rising. It’s glamorous without being gaudy, and the glitter catches light beautifully in the evening. This is a go-to for New Year’s Eve, holiday parties, or any night you want your hands to sparkle.
It suits glitter lovers who still want a dark, moody base. The technique is simple: paint the black base, then dab red glitter polish from the tip downward with a sponge, fading it out toward the middle. Build it in thin layers rather than one thick one for a smooth gradient. Glitter eats top coat, so use two coats to get a perfectly smooth, glassy finish.
14. Red and Black Diagonal Color Block
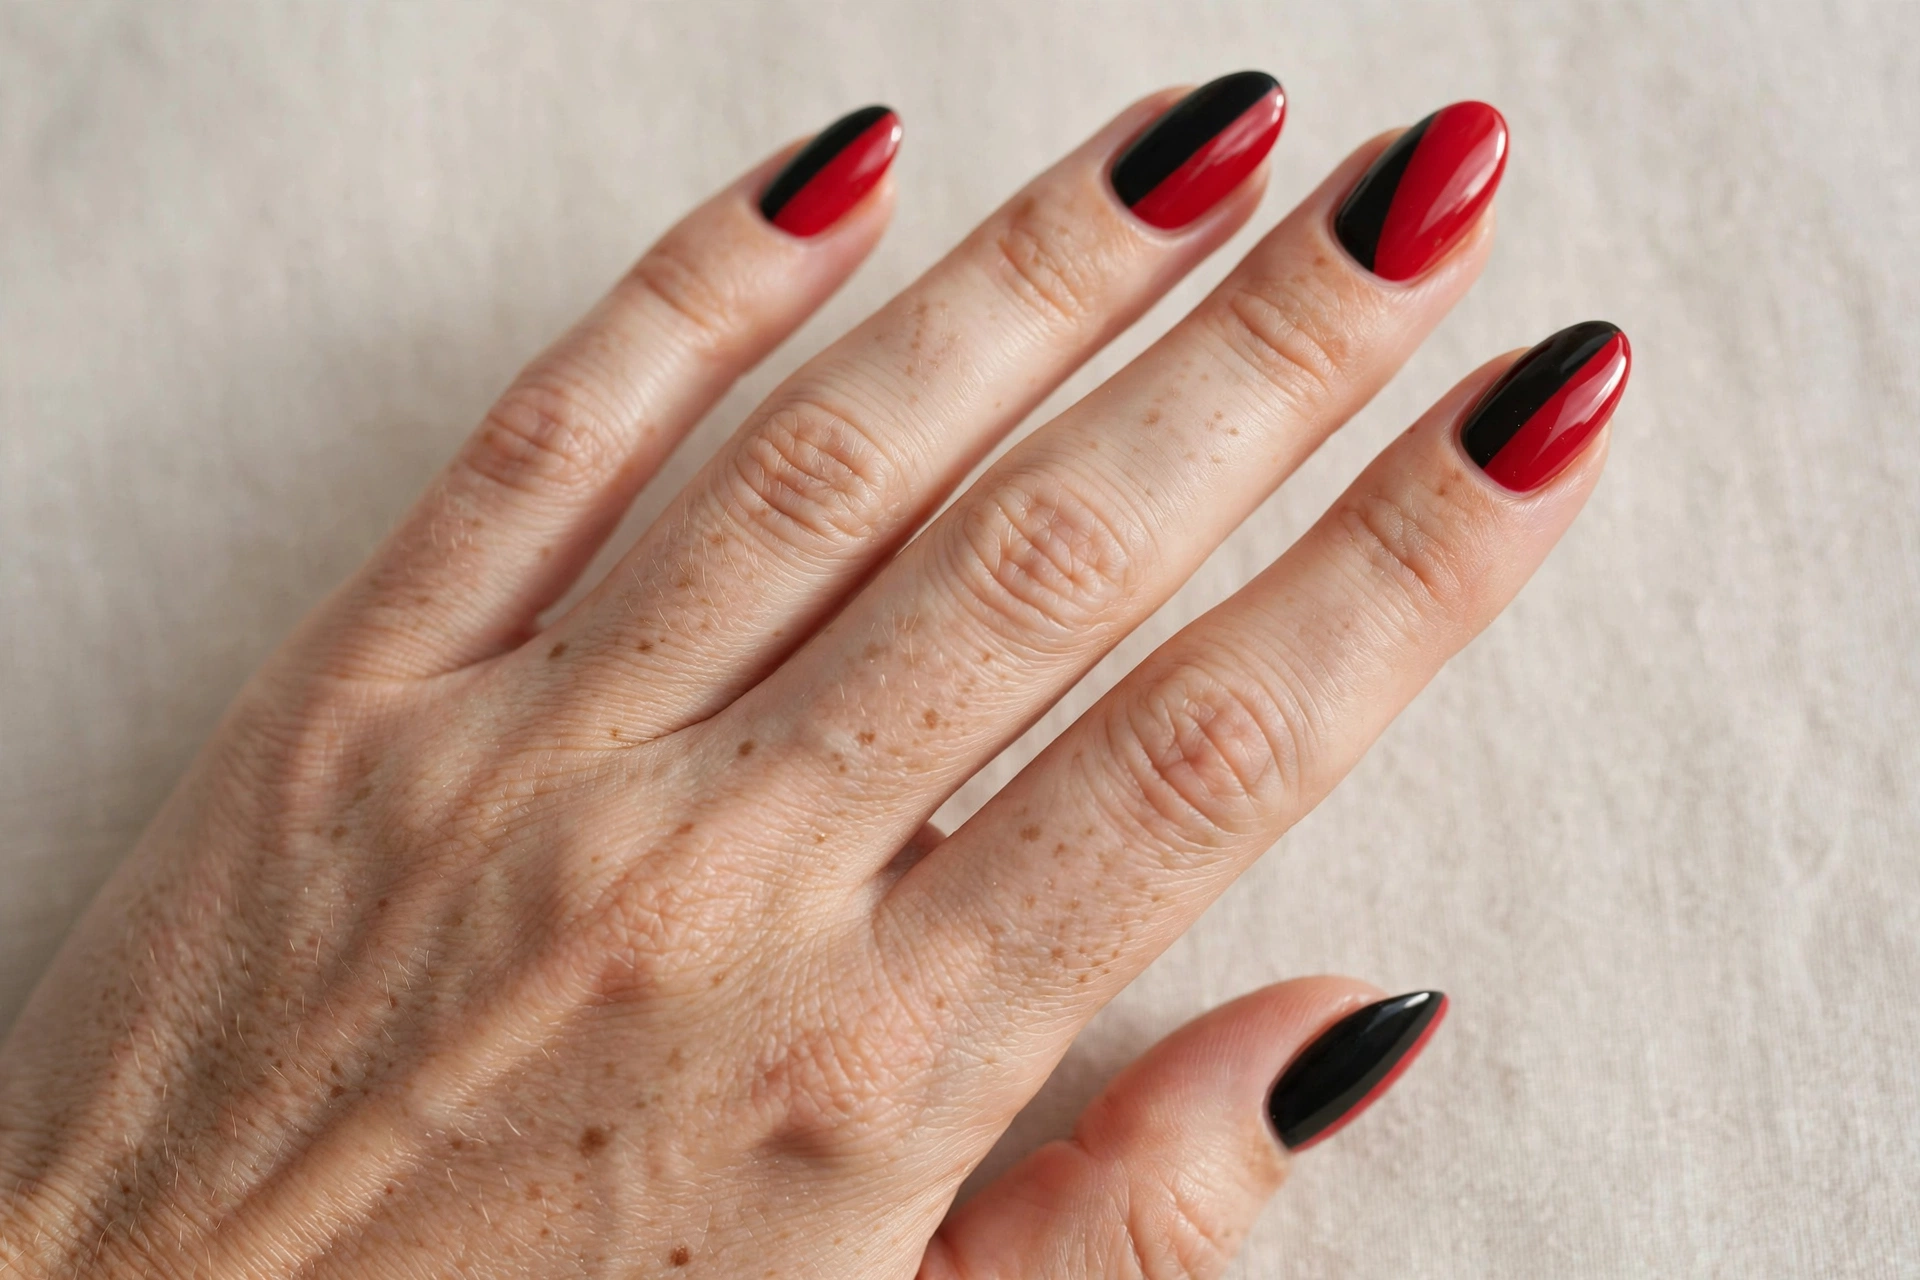
Color blocking takes the split-nail idea and tilts it: each nail divided on a bold diagonal, red on one side and black on the other. The angled line adds movement and energy that a straight split doesn’t have — it feels dynamic, almost sporty. Alternate the direction of the diagonal across nails for extra visual interest.
This suits anyone who likes graphic, confident designs but wants something a little different from the usual half-and-half. Nail vinyls cut on the diagonal (or striping tape placed at an angle) make the line easy. Paint the full nail red first, let it dry, then mask the diagonal and fill in black. Pull the tape carefully and finish with top coat for a seamless, professional edge.
15. Vampire Red with Black Dripping Tips
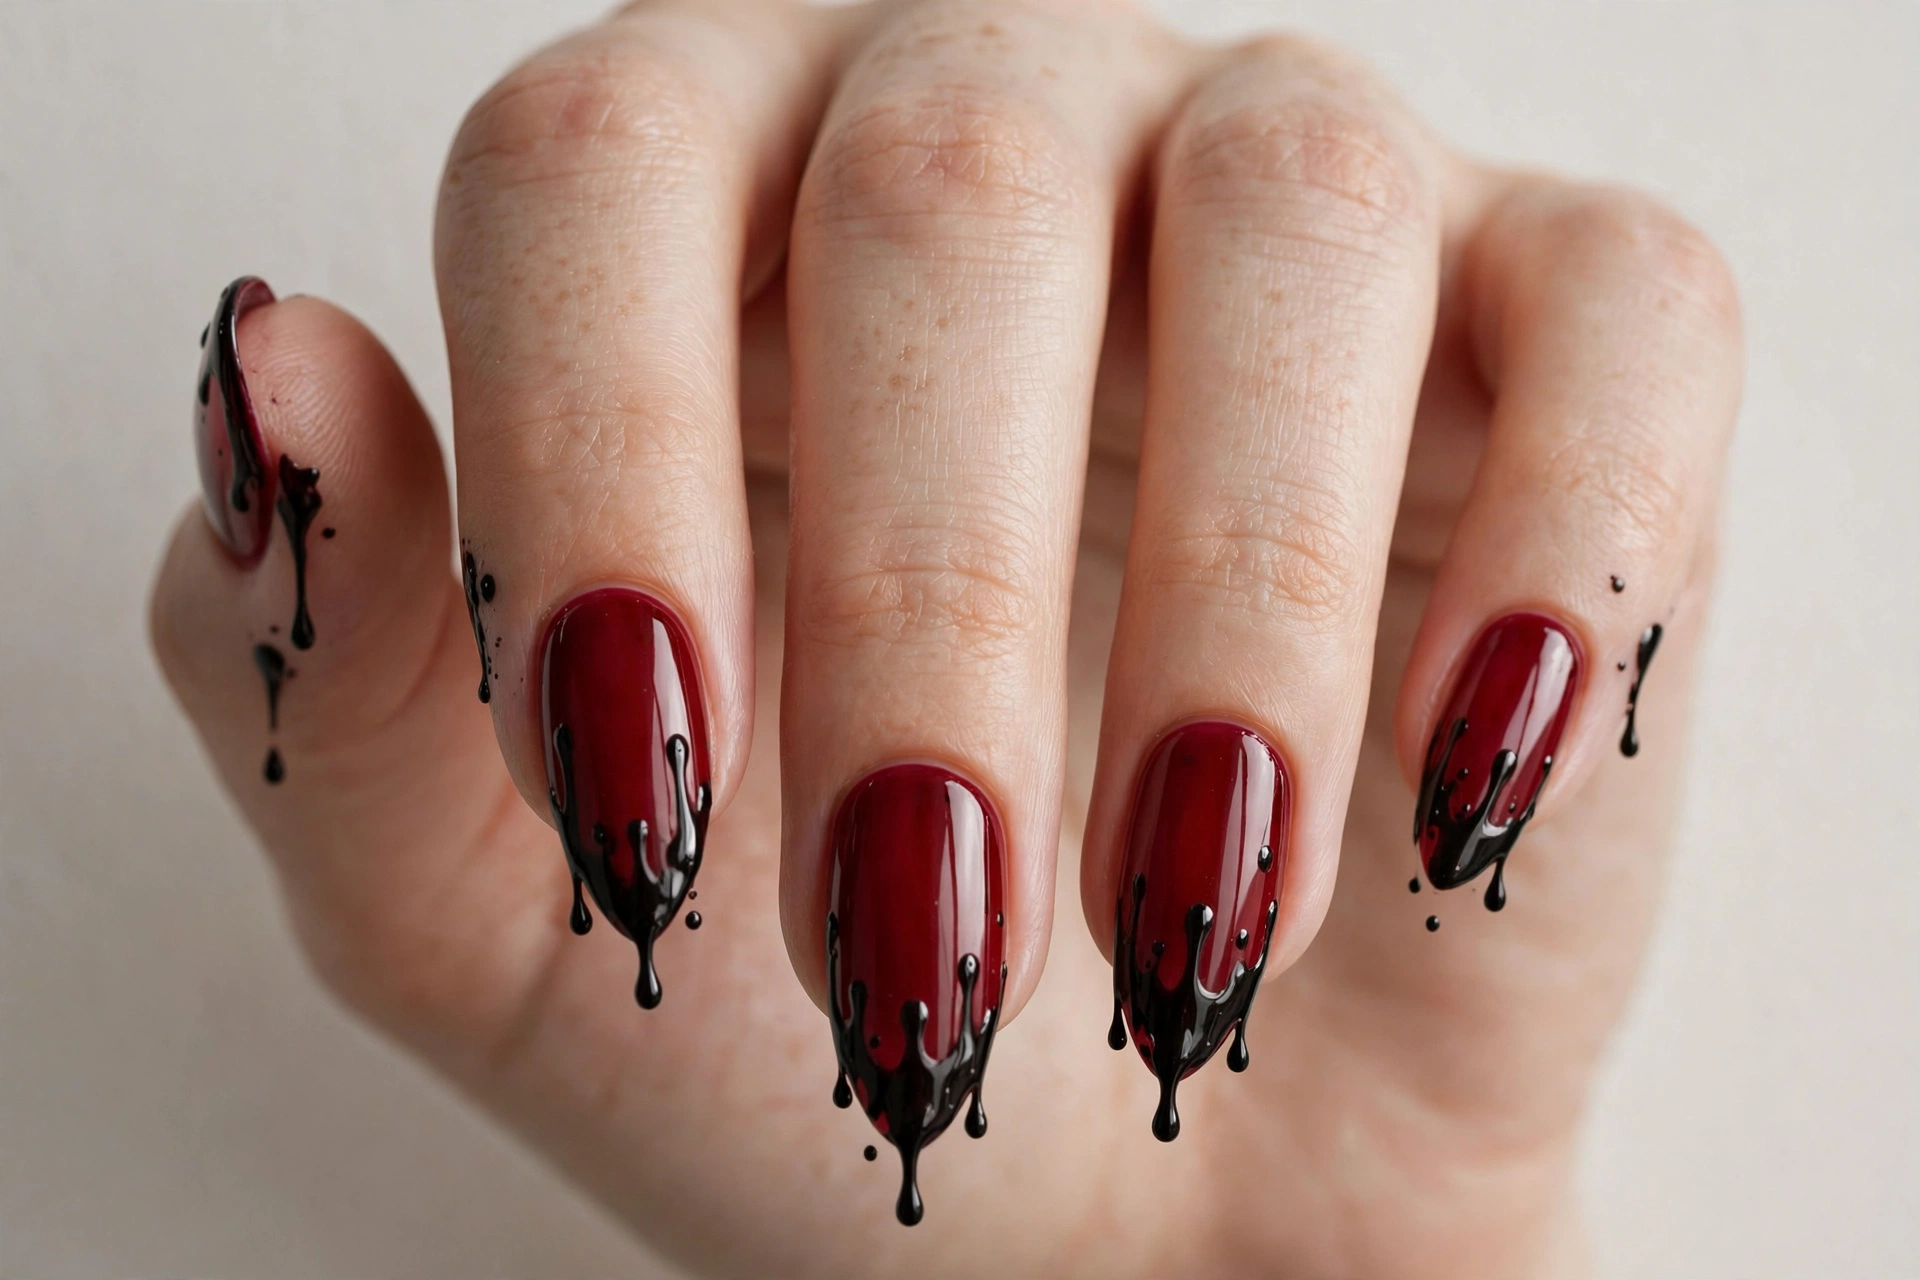
For the goths and Halloween lovers, this is the one: a deep, blood-wine red base with black polish dripping down from the tips like ink — or something spookier. It’s dramatic, a little dark, and absolutely unforgettable. Wear it in October and you’ll fit right in; wear it in April and you’ll stand out, which is kind of the point.
It suits anyone drawn to dark aesthetics — and if that’s you, our collection of gothic nail designs has 20 more looks in the same moody family. For the drips, use a fine detail brush and drag the black polish down from the tip in uneven, organic drips — varying the lengths looks more natural than uniform ones. Let each drip set before adding the next so they don’t bleed together.
16. Red and Black Plaid
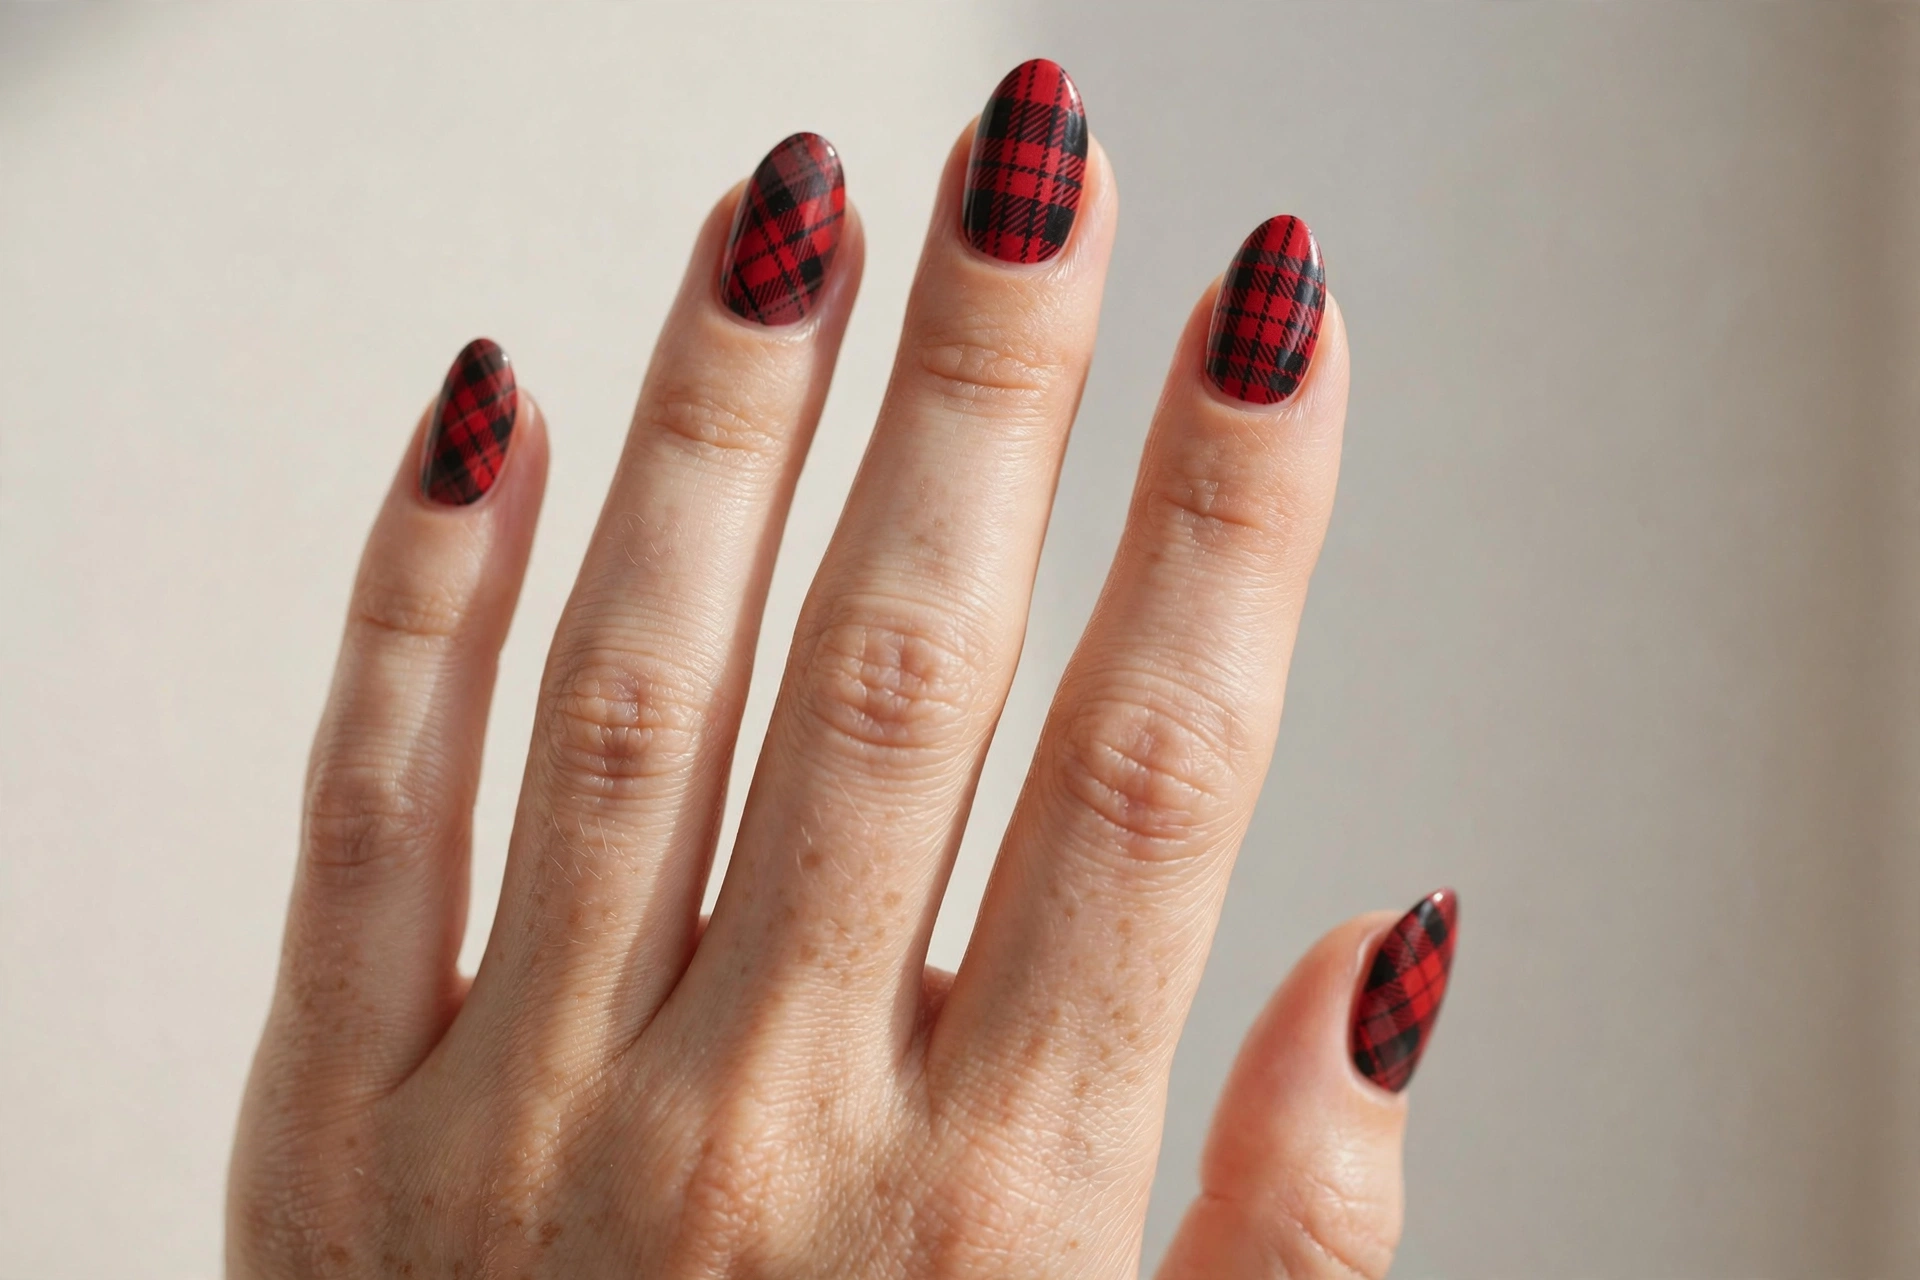
Plaid nails bring cozy-season energy to the red-and-black palette. Thin black and dark-red stripes crossing over a brighter red base create that classic tartan look — think flannel shirts and autumn weekends. It’s a design that feels warm and nostalgic, and it transitions beautifully from fall straight through the holidays.
It suits anyone who loves seasonal, textured patterns. The trick is layering: start with the red base, add wide black stripes in both directions, then overlay thinner lines in a darker red or deep burgundy for that woven fabric effect. Striping tape keeps the lines straight, or a fine brush works if you’re confident. It takes a little time, but the result looks like actual fabric.
17. Black Nails with Red Chrome Shimmer
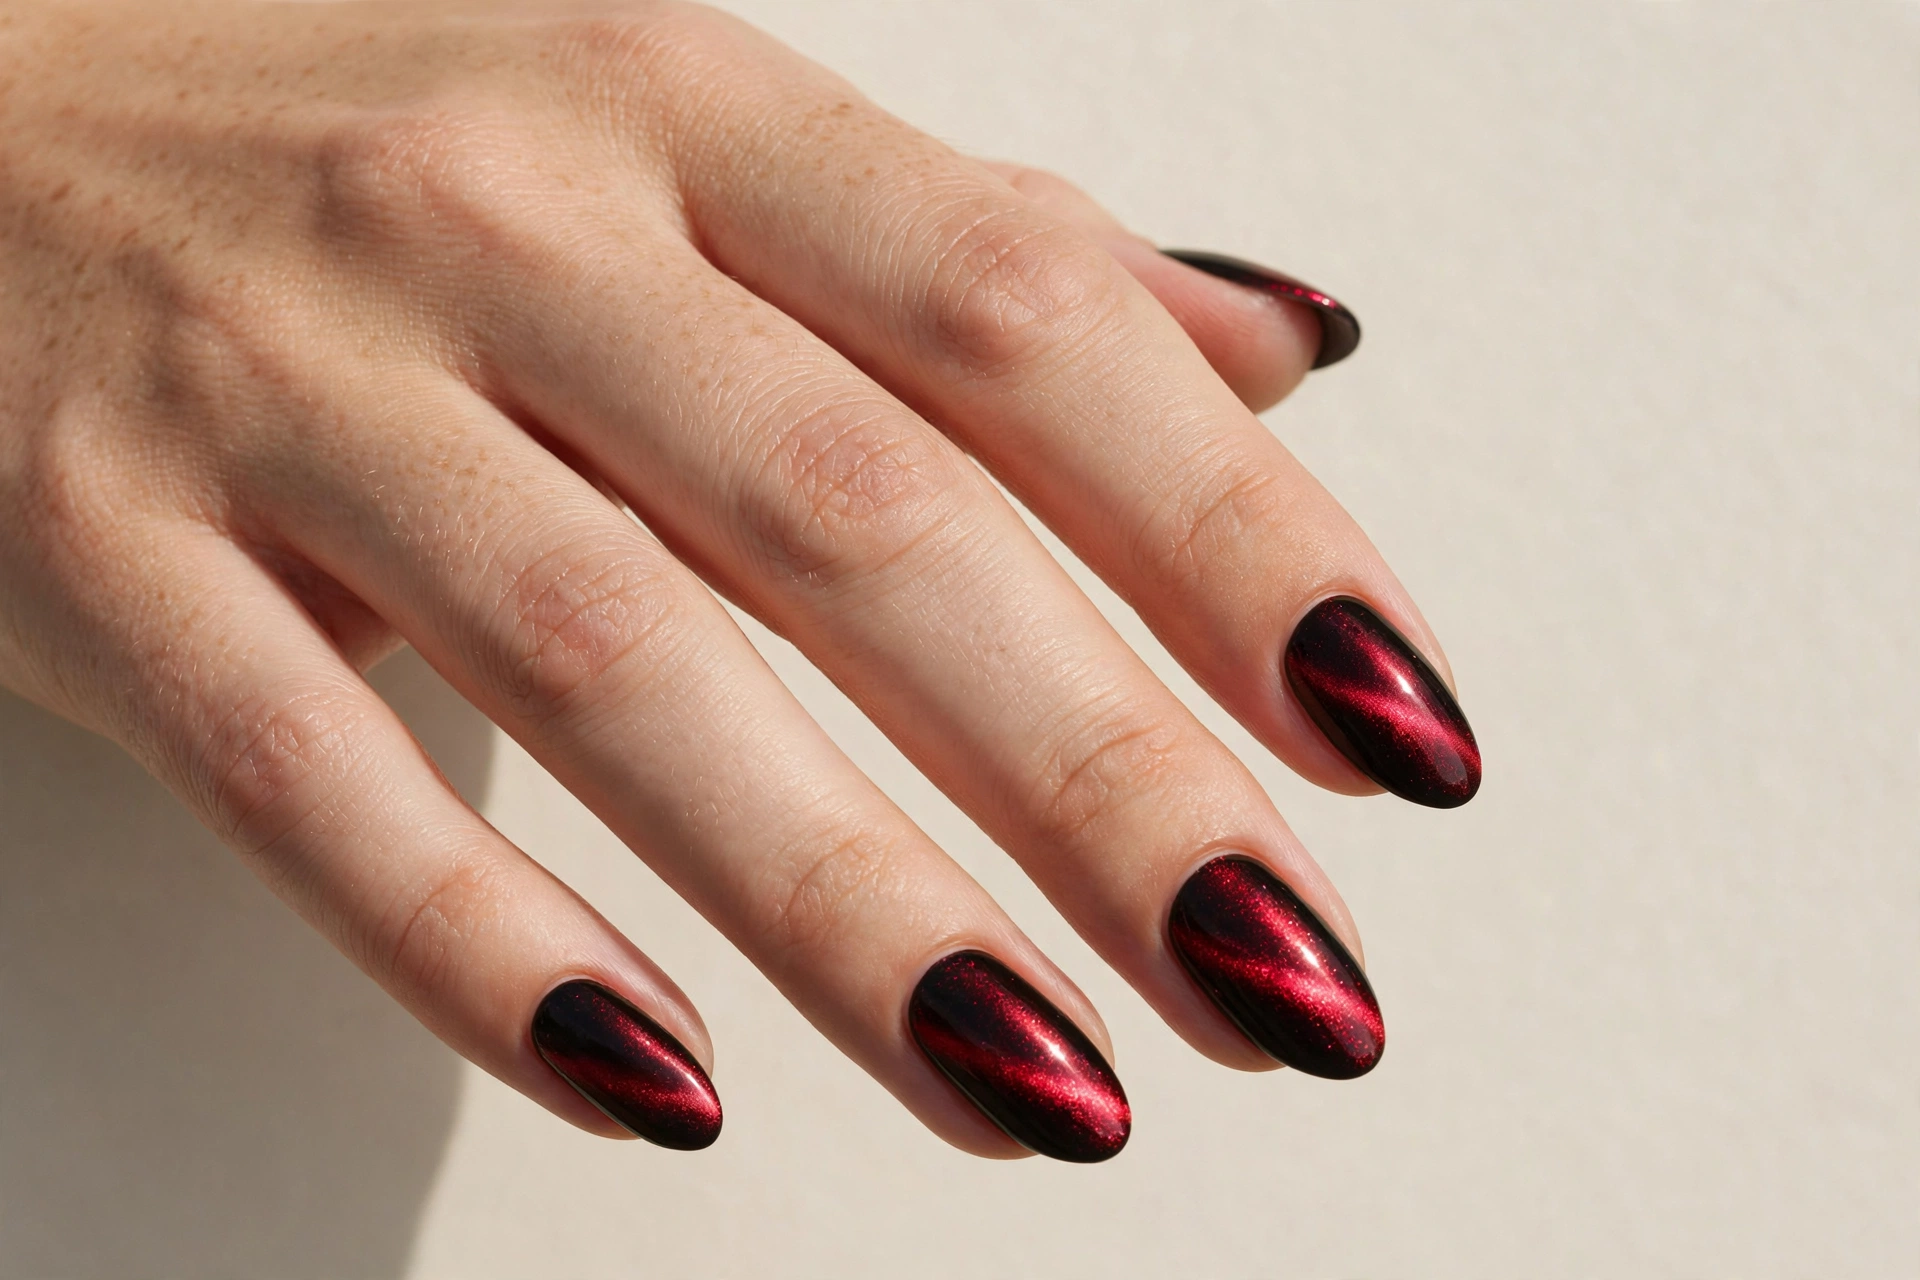
Chrome nails are having a serious moment, and red chrome over black is one of the most striking combinations in the trend. The black base deepens the red chrome powder, creating a molten, liquid-metal effect that shifts as your hands move. It’s futuristic and luxe — the kind of manicure that looks different in every light.
It suits trend-followers and anyone who wants maximum impact with minimal pattern work. Chrome powder is the key: apply it over a no-wipe gel top coat (or a tacky regular top coat) and burnish it in with a silicone applicator. If you fall in love with the mirror finish, our chrome nail designs roundup has 25 more ways to wear the trend. Seal with top coat to lock in the shine.
18. Red Nails with Black Leopard Print
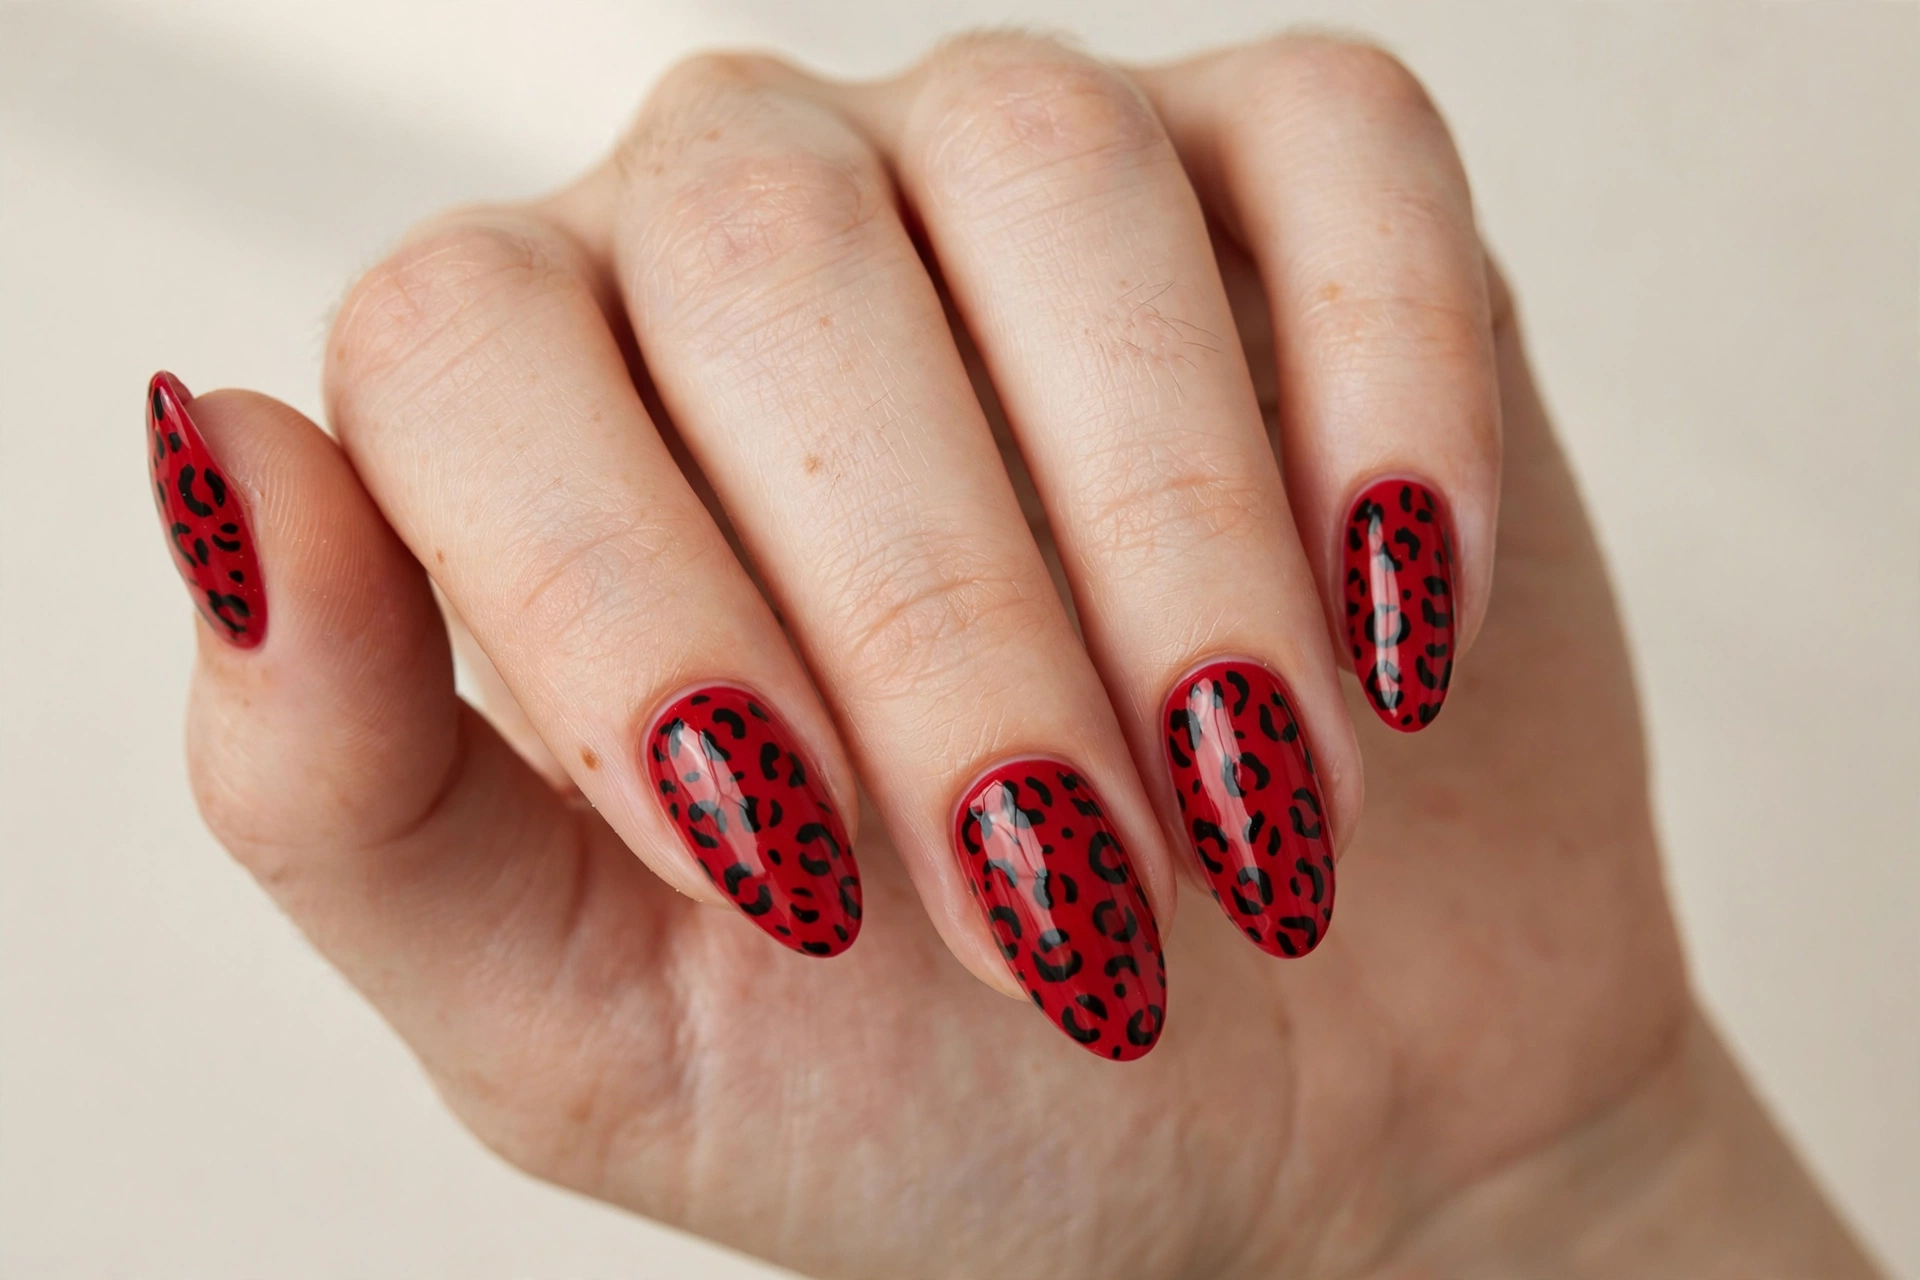
Animal print never really leaves, and leopard spots in black over red are fierce in the best way. The organic, irregular spots soften the boldness of the red while adding a wild, confident energy. It’s a look that pairs perfectly with gold jewelry and a strong lip — full glam, no apologies.
It suits anyone with a bold, maximalist streak. Leopard spots are easier than they look: paint irregular black blobs, then outline parts of each spot with a darker shade or add a small dot in the center for depth. Imperfection is the whole point — real leopard spots aren’t uniform, so yours shouldn’t be either. Use it as an accent on one or two nails with solid red on the rest for a balanced set.
19. Minimal Black Line Art on Red
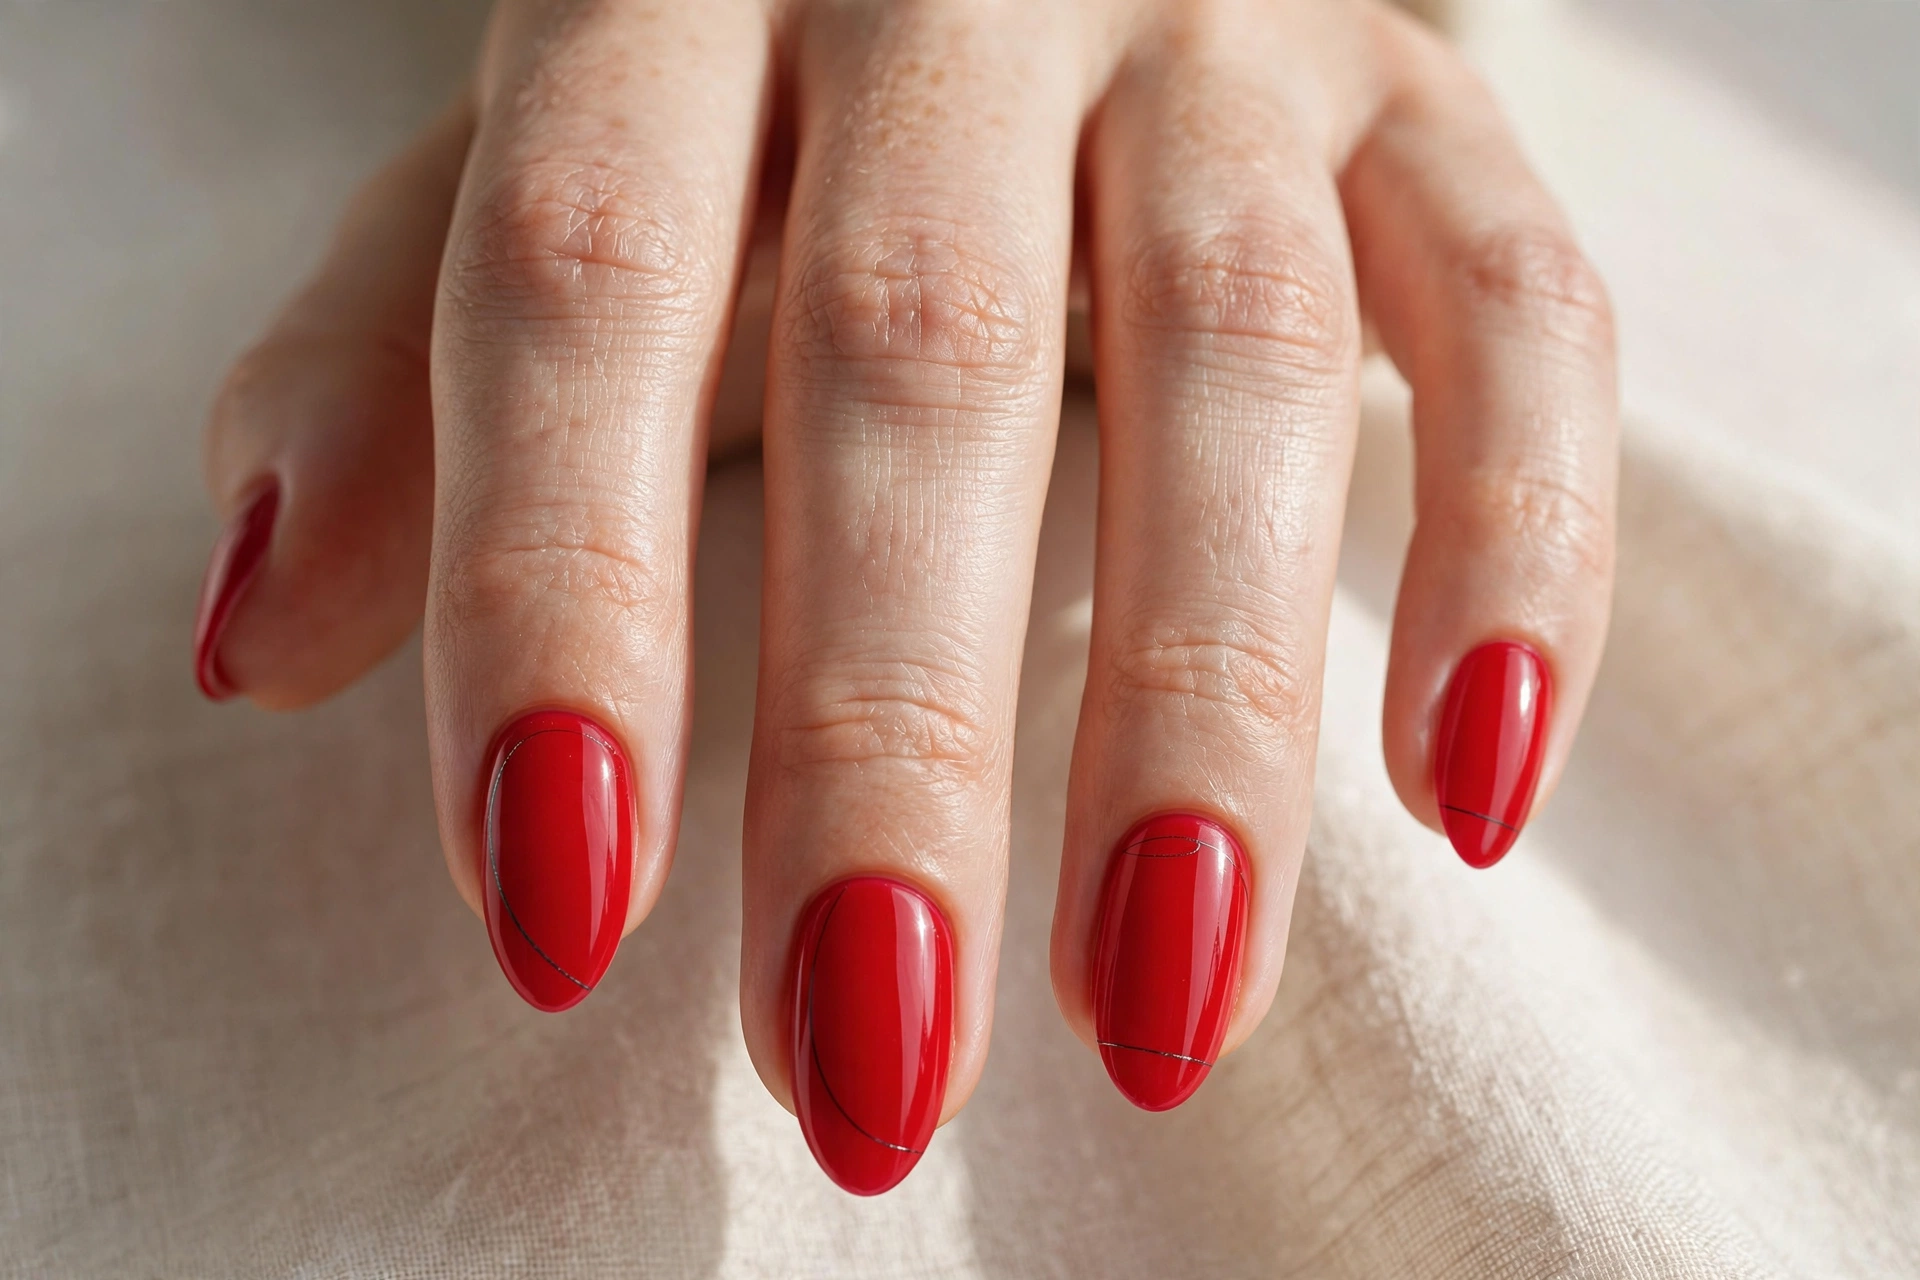
Proof that less can be more: a clean red base with a single thin black line — an abstract squiggle, a tiny heart outline, a delicate branch — on each nail. The restraint is what makes it chic. It’s the kind of design that looks effortless but gets compliments from people who notice details.
It suits minimalists and anyone who wants the red-and-black look without the drama of the bolder designs on this list. A long, thin nail art brush and a steady hand are all you need; keep the lines fine and let the red do the heavy lifting. One motif per nail, plenty of breathing room, and a glossy top coat to finish. Simple, elegant, done.
How to Make Your Red and Black Manicure Last
Dark polishes show chips faster than light ones, so a little care goes a long way with these designs. Start with a quality base coat — it prevents the red and black pigments from staining your natural nails, which is a real risk with these saturated shades. Apply your colors in thin, even coats rather than one thick one; thin layers dry harder and chip less.
Cap the free edge of each nail with every coat, including top coat — this seals the tip where chips start. Reapply a fresh layer of top coat every two to three days to keep the shine alive and add a protective barrier. And when you’re ready to stock up on the essentials, this nail polish kit has everything you need for salon-quality results at home. Wear gloves for dishes and cleaning, since hot water and detergents are the fastest way to kill a manicure.
Final Thoughts
Red and black nail designs are proof that two colors are all you need to make a statement. Whether you go for the drama of dripping tips and flames or the quiet confidence of minimal line art, this pairing delivers a manicure with real personality. Pick the design that matches your mood, take your time with the application, and don’t be afraid to make it your own — the best nail art always has a little bit of you in it.