17 Nail Art Designs for Every Mood and Occasion
Nail art designs have a way of turning an ordinary manicure into something that feels like it was made just for you. Whether you like quiet, polished nails or you love a manicure that gets noticed from across the room, there is a style out there that fits your mood, your plans, and the shape of your nails. The best part is that nail art is no longer reserved for special occasions. People are wearing it to work, to brunch, to weddings, and to the gym.
This list gathers seventeen nail art designs that cover every style from timeless to bold. Each one is easy to ask for at a salon or to try at home with a little practice. If you are drawn to seasonal looks, you may also enjoy browsing these fall nail art designs once you are done here. Pick the ones that speak to you, save them for your next appointment, and have fun with it.
Why Nail Art Designs Are Worth Trying
Nail art is one of the smallest changes you can make with one of the biggest payoffs. A good manicure frames your hands, pulls your whole outfit together, and can genuinely lift your mood. Unlike a new wardrobe, it costs little, takes under an hour, and washes off whenever you are ready for something new.
It is also one of the most personal forms of style. The design you choose says something about you — tidy French tips for the planner, chrome for the night-out crowd, watercolor florals for the romantic. And there is no wrong answer. For a full collection of understated looks, these simple nail art ideas pair well with any of the designs below. The variety is the point: your nails can match your week, not the other way around.
1. Classic French Tips
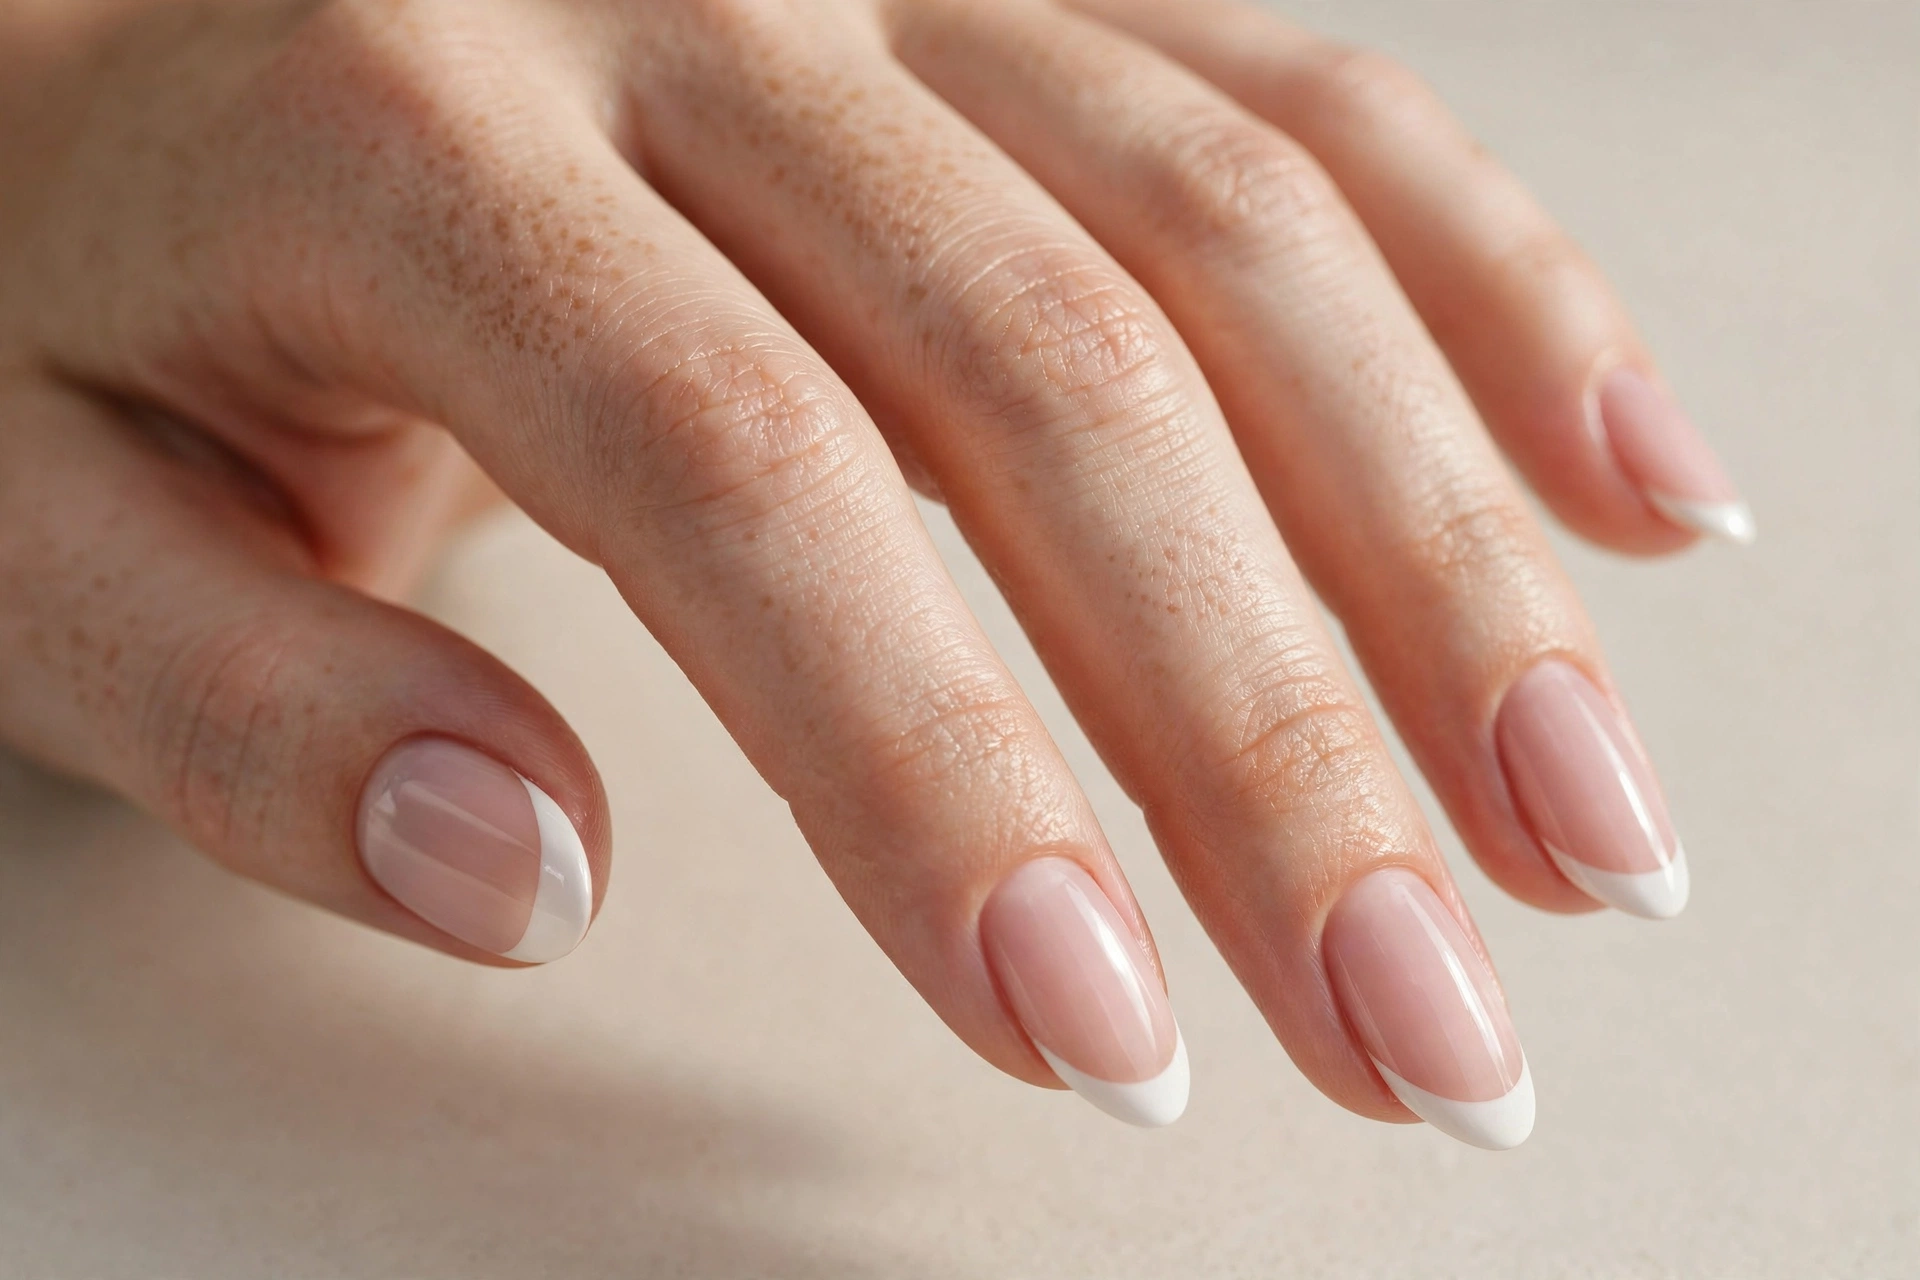
The French tip is the little black dress of nail art. A sheer pink or nude base with crisp white tips, it goes with everything from scrubs to silk dresses. It suits people who want polished nails without committing to color, and it flatters every nail shape — oval, almond, and square all work beautifully. The white tip also makes nails look longer and neater, which is why it photographs so well. To get it at home, paint the base first, let it dry fully, then paint the tips with the white polish loaded only on the corner of the brush. Guides, French tip strips, or a silicone stamper make the smile line much easier. At a salon, ask for a “classic French” or a “pink and white French” if you want a brighter base. Seal with a glossy top coat for that glassy, just-done finish.
2. Daisy Floral
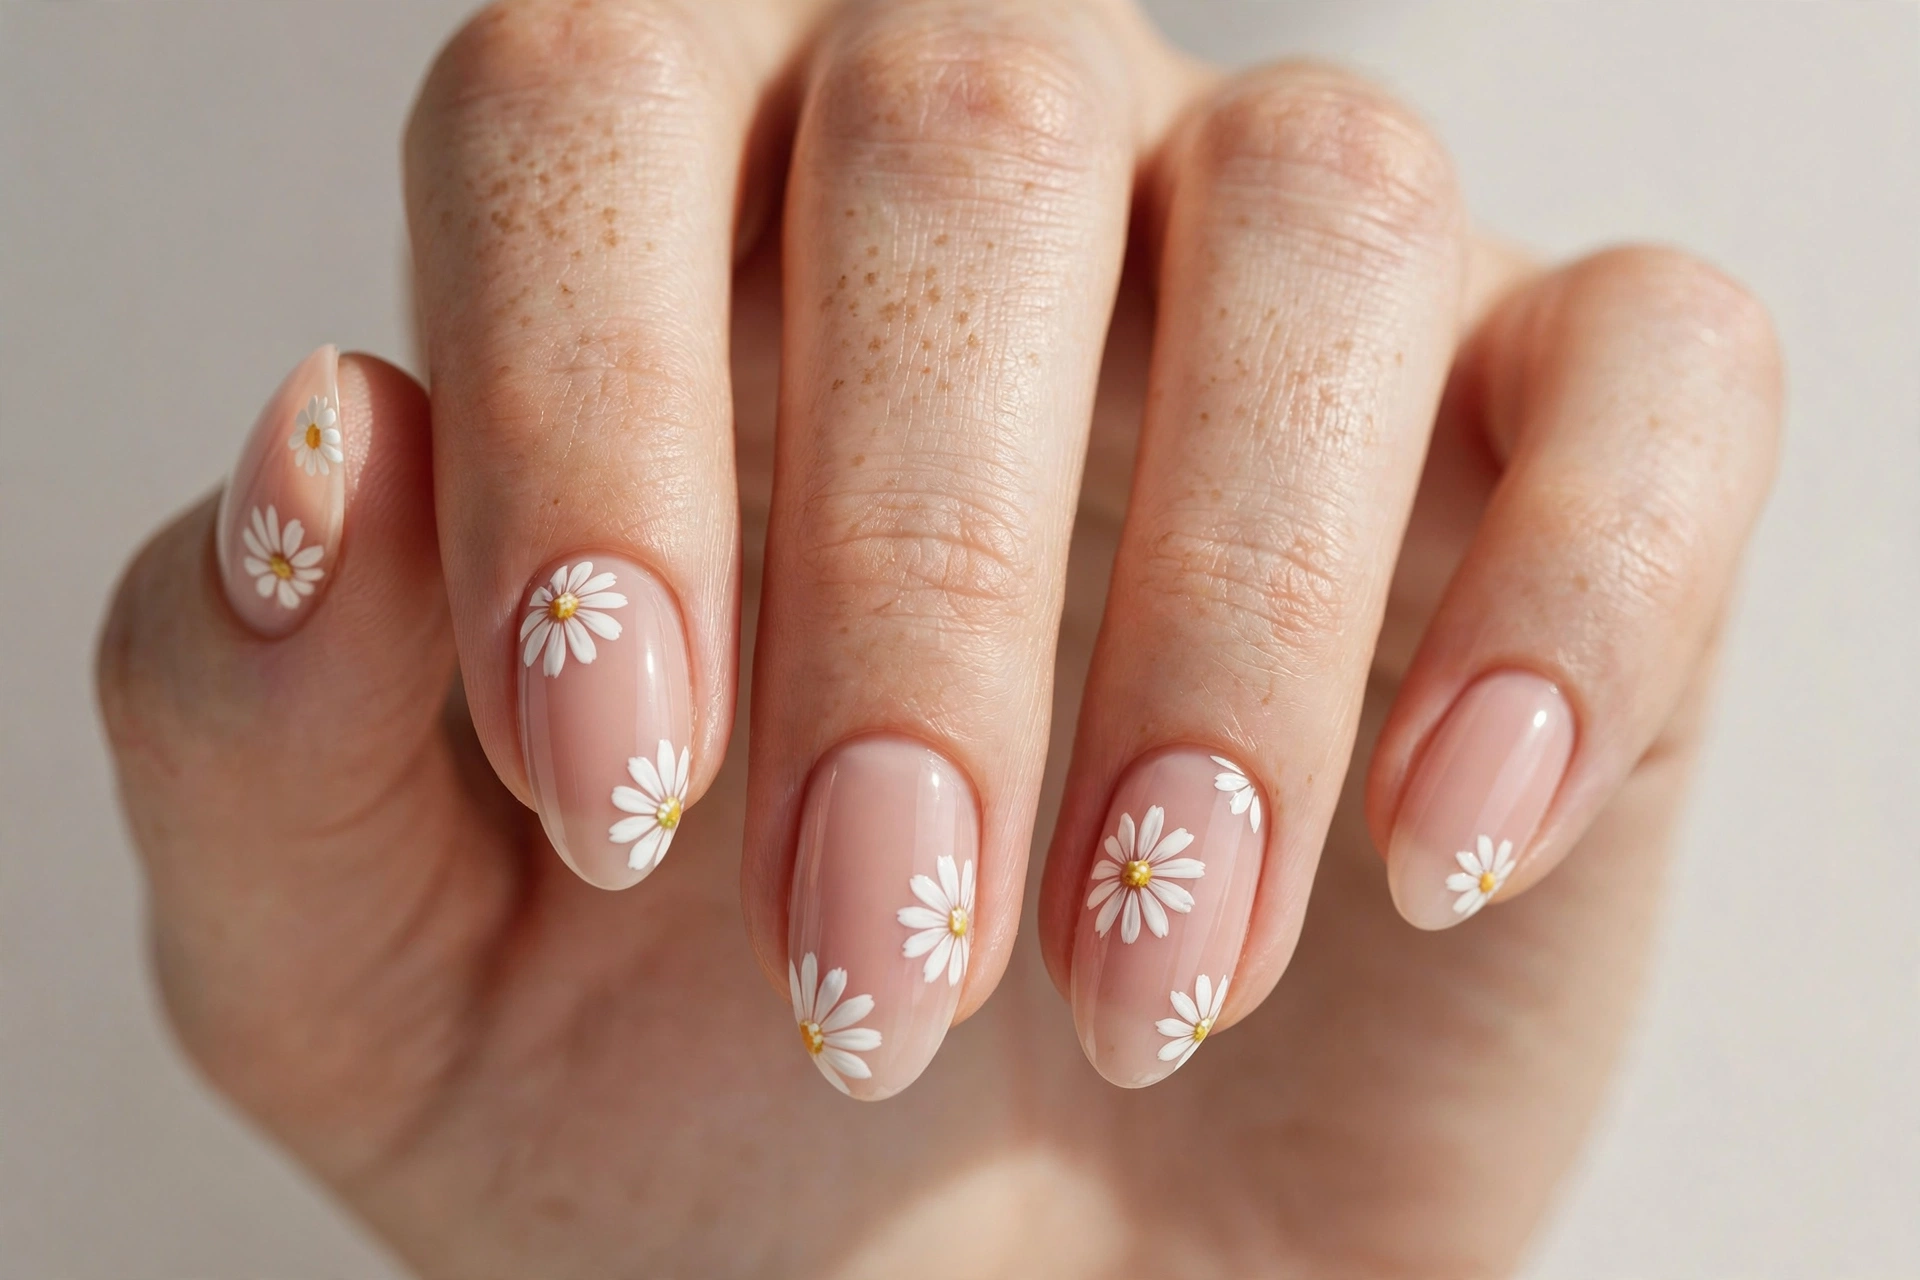
Daisy nails are pure spring, but honestly they work all year if you keep the base neutral. White petals with a yellow center on a nude or blush base read fresh, feminine, and a little playful. This design suits anyone who likes florals but finds full flower bouquets too busy — daisies are simple enough to stay elegant. They look especially pretty on medium-length nails where each flower has room to breathe. The trick to painting them is a dotting tool: five dots in a circle make the petals, one dot of yellow finishes the center. Beginners can start with just one or two daisies as accent nails and leave the rest solid. It is also easy to dress up — add a tiny rhinestone as the center for an evening version of the same look.
3. Pink and White Marble
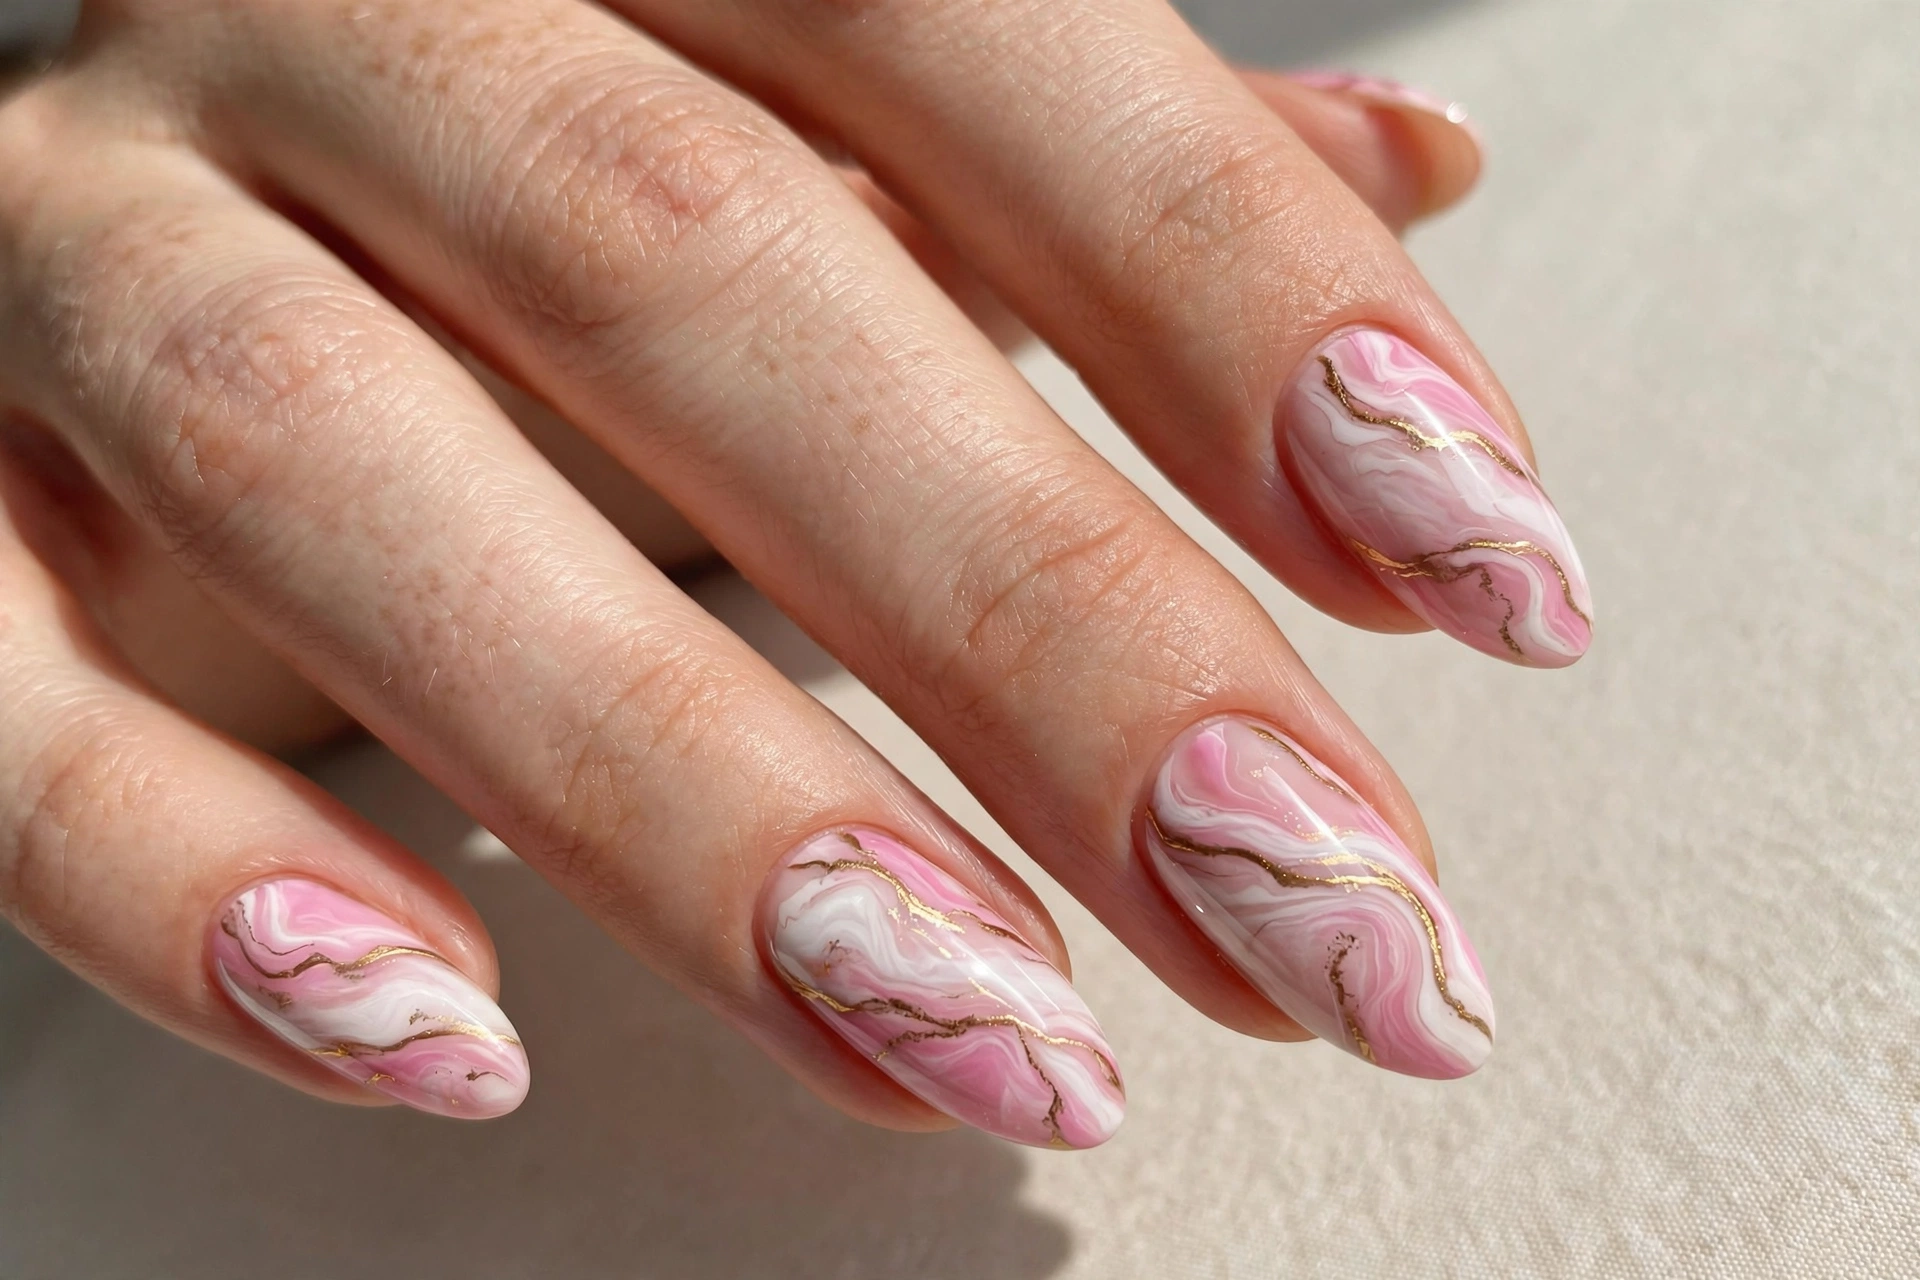
Marble nails look expensive because they mimic real stone — soft veins of white drifting through pink. The effect is romantic and sophisticated, and it suits anyone who loves texture without loud color. Longer nails show the marble best, since the veins need space to spread. The water marble technique takes practice, but the dry version is friendly for beginners: paint a white base, add a drop of pink polish while it is still wet, then drag a thin brush or toothpick through it in light strokes. No two nails will match, and that is the point — real marble is imperfect. At a salon, ask to see marble done with blooming gel, which lets the artist blur the colors into a perfect stone finish with very little effort on your part.
4. Black Geometric Lines
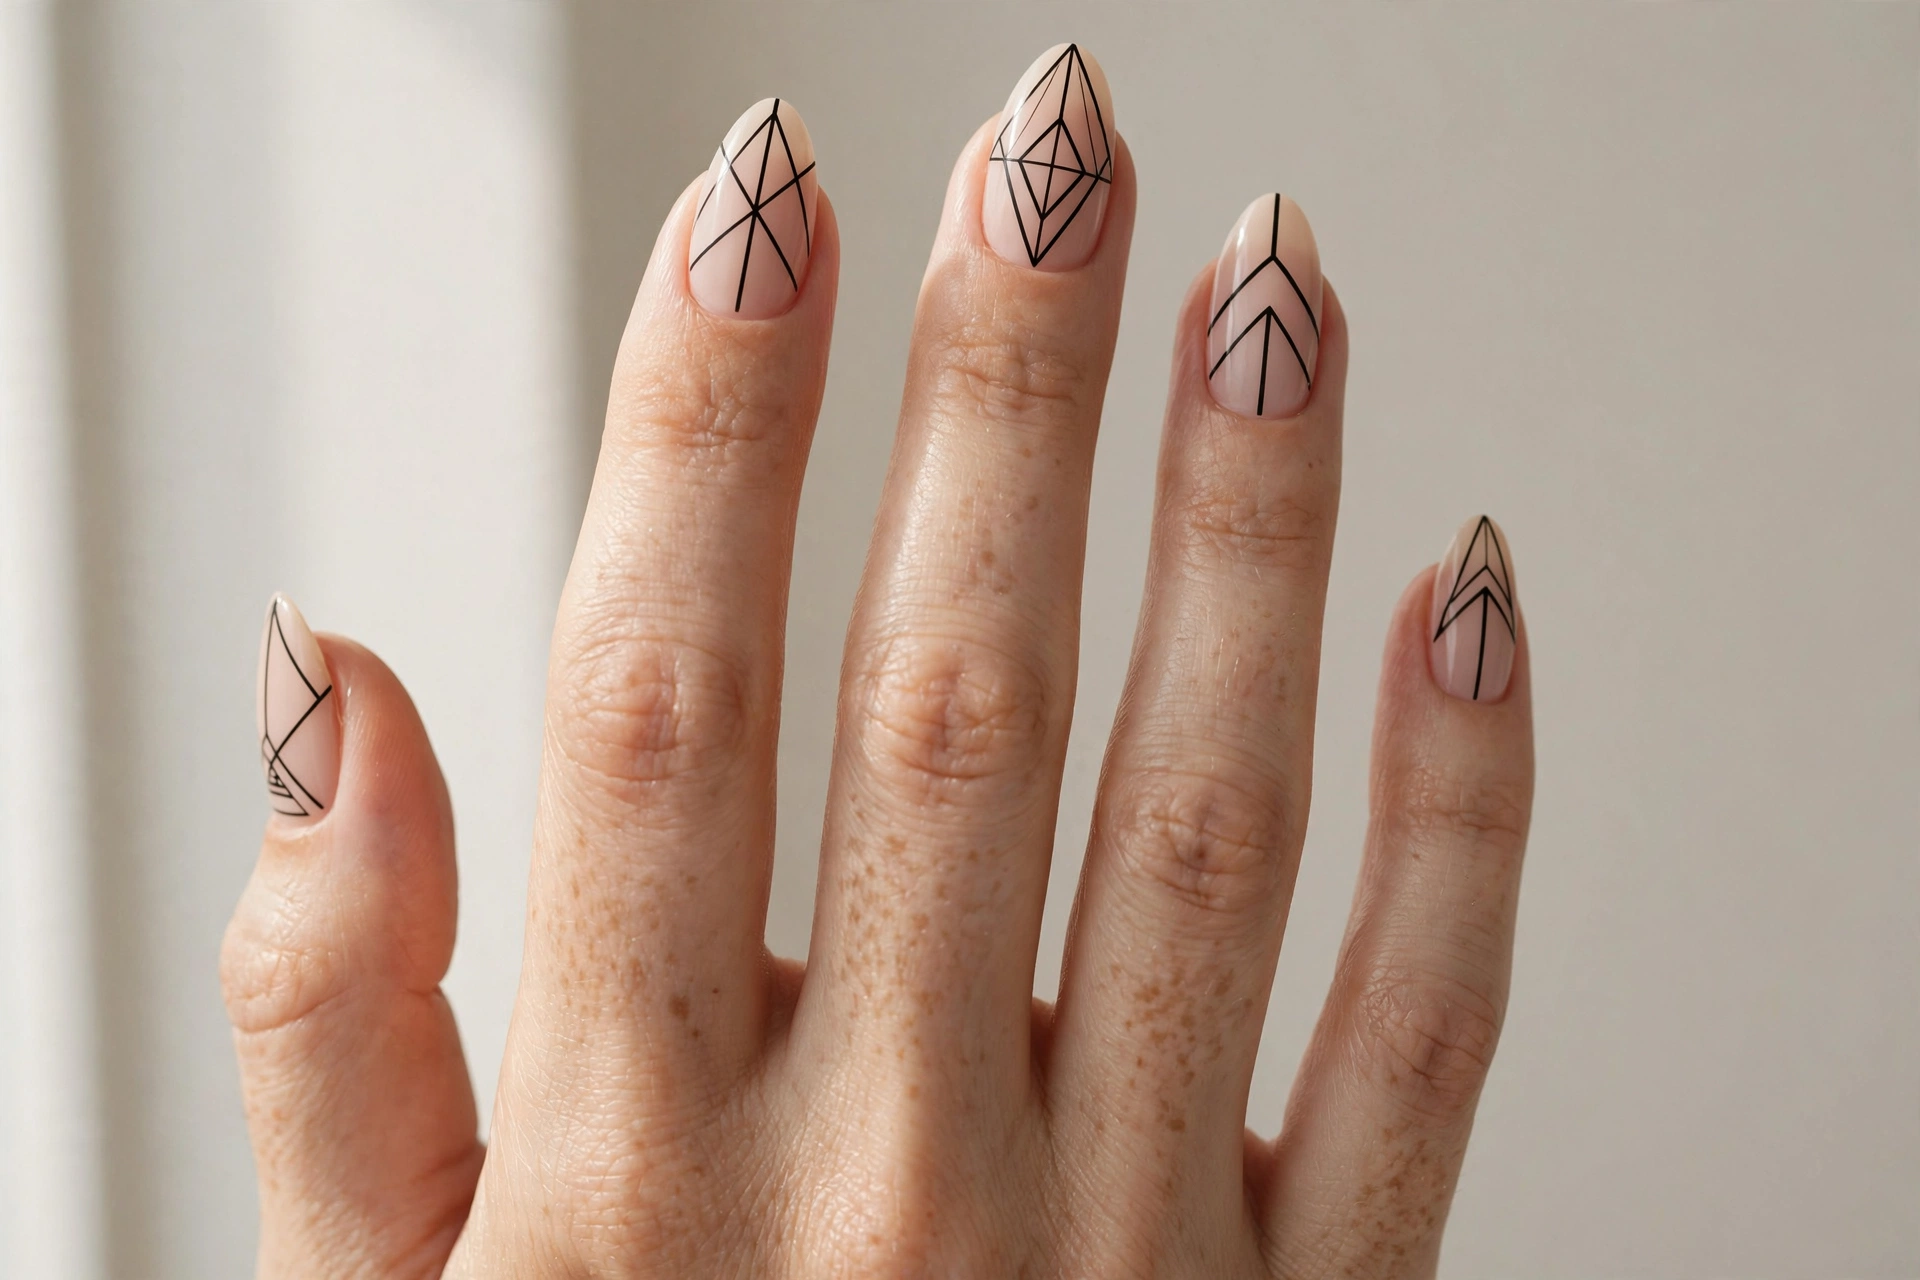
Black lines on a nude base are the modern answer to nail art — architectural, clean, and quietly bold. Thin diagonal lines, grids, and asymmetric triangles all fall in this family. It suits people with a minimal wardrobe who still want an edge, and it looks sharpest on short to medium square nails where the lines stay crisp. Striping tape is the secret to getting it right at home: paint your base, let it dry completely, lay down the tape where you want the line, paint black over it, and peel the tape off while the polish is still wet. One line per nail is enough to make a statement. Keep the rest of the hand simple — no rings competing — and the geometry does all the talking.
5. Pink and White Ombre
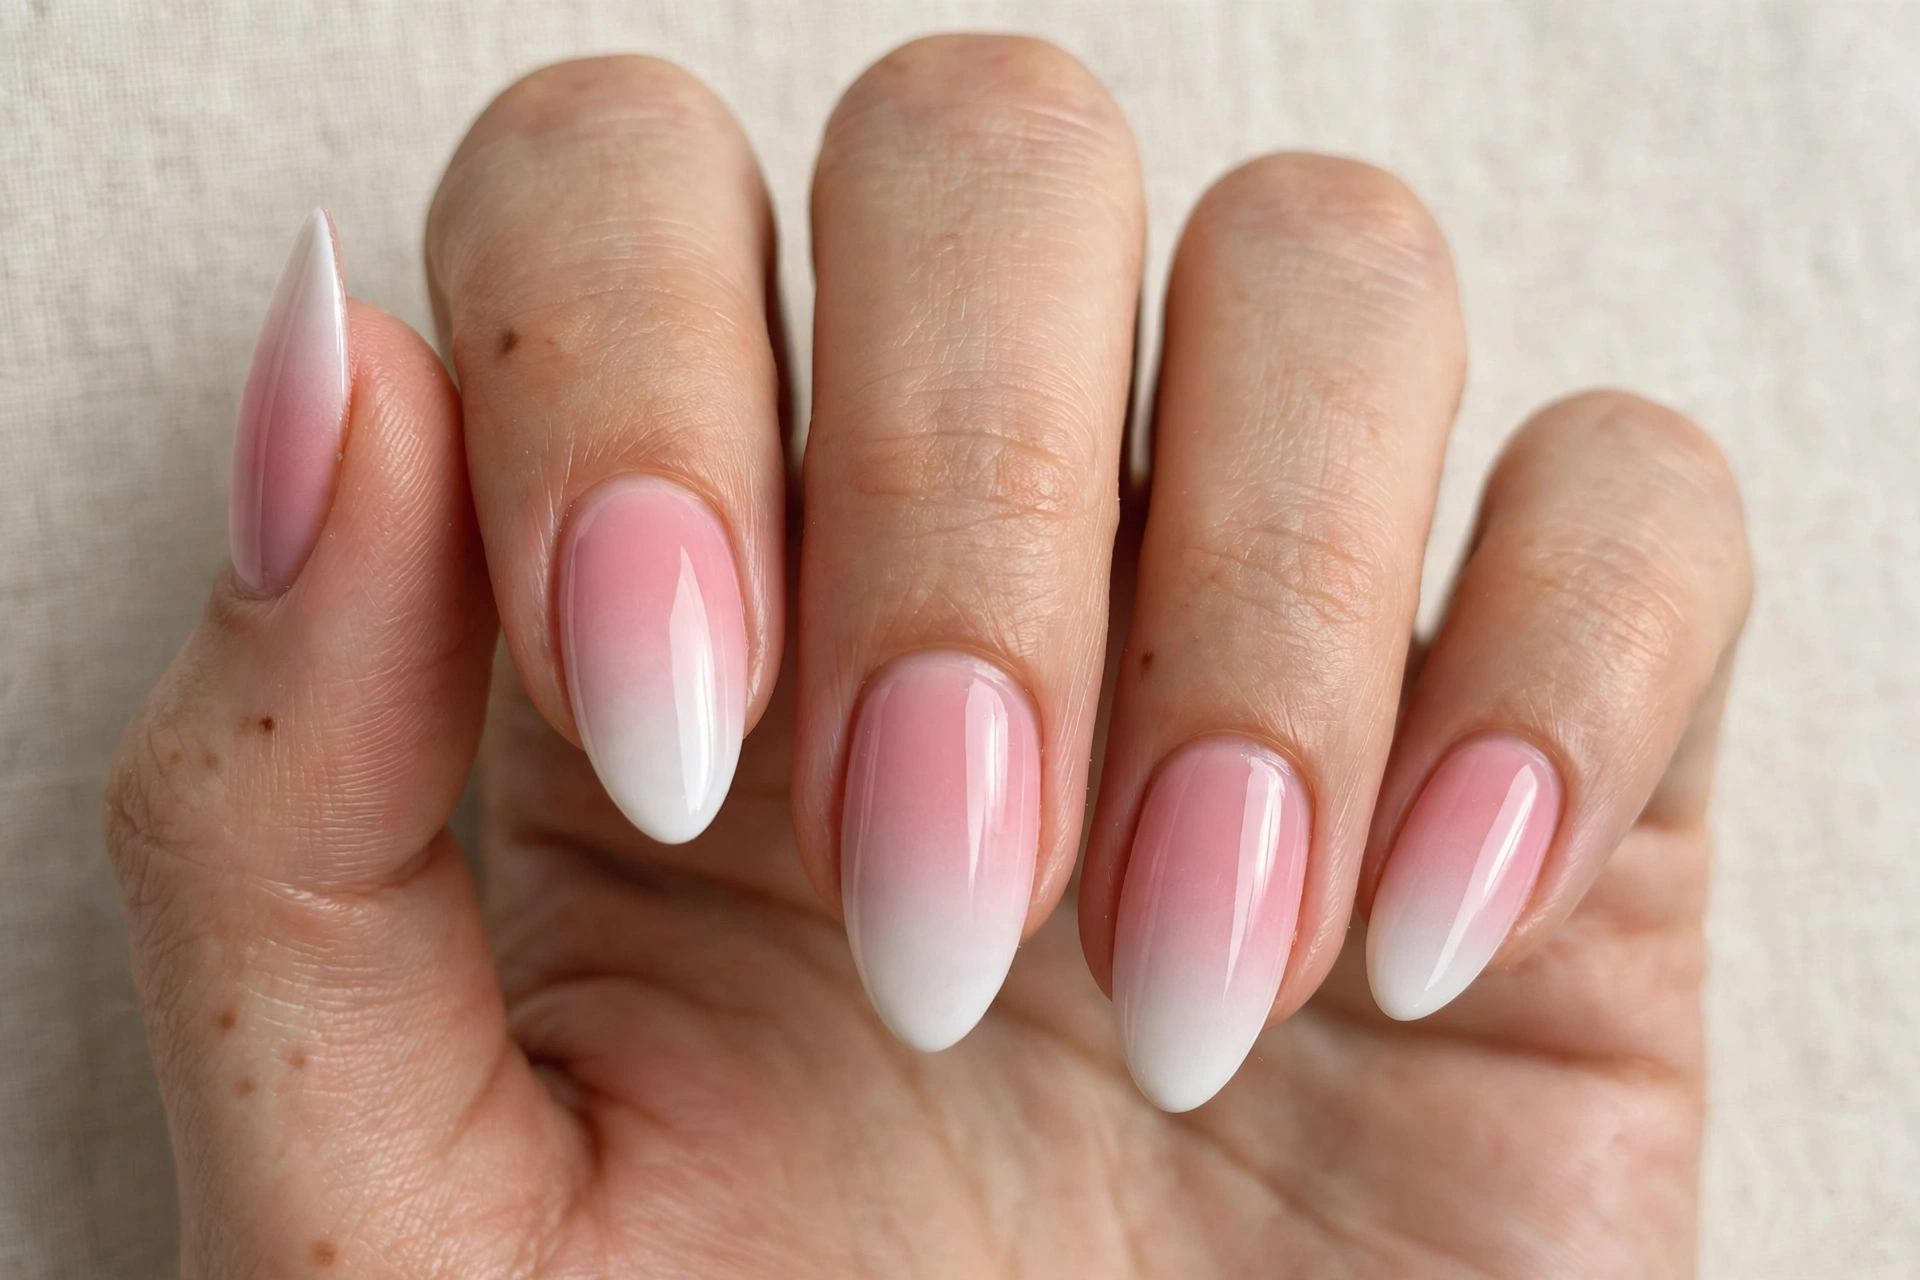
The pink and white ombre — sometimes called “baby boomer” nails — fades a milky white tip into a soft pink base. It is gentler than a French tip and gives the nail a blurred, dreamy gradient that flatters every skin tone. This is a favorite for weddings and bridesmaids because it looks flawless in photos and matches any dress. It suits long nails especially well, since the gradient needs length to show. The sponge method is the easiest way to do it at home: paint the base pink, then dab white onto the tips with a makeup sponge, building thin layers. Salons do it with an airbrush or acrylic powder for a perfectly seamless fade. A matte top coat turns this design unexpectedly modern if gloss feels too traditional.
6. Leopard Print
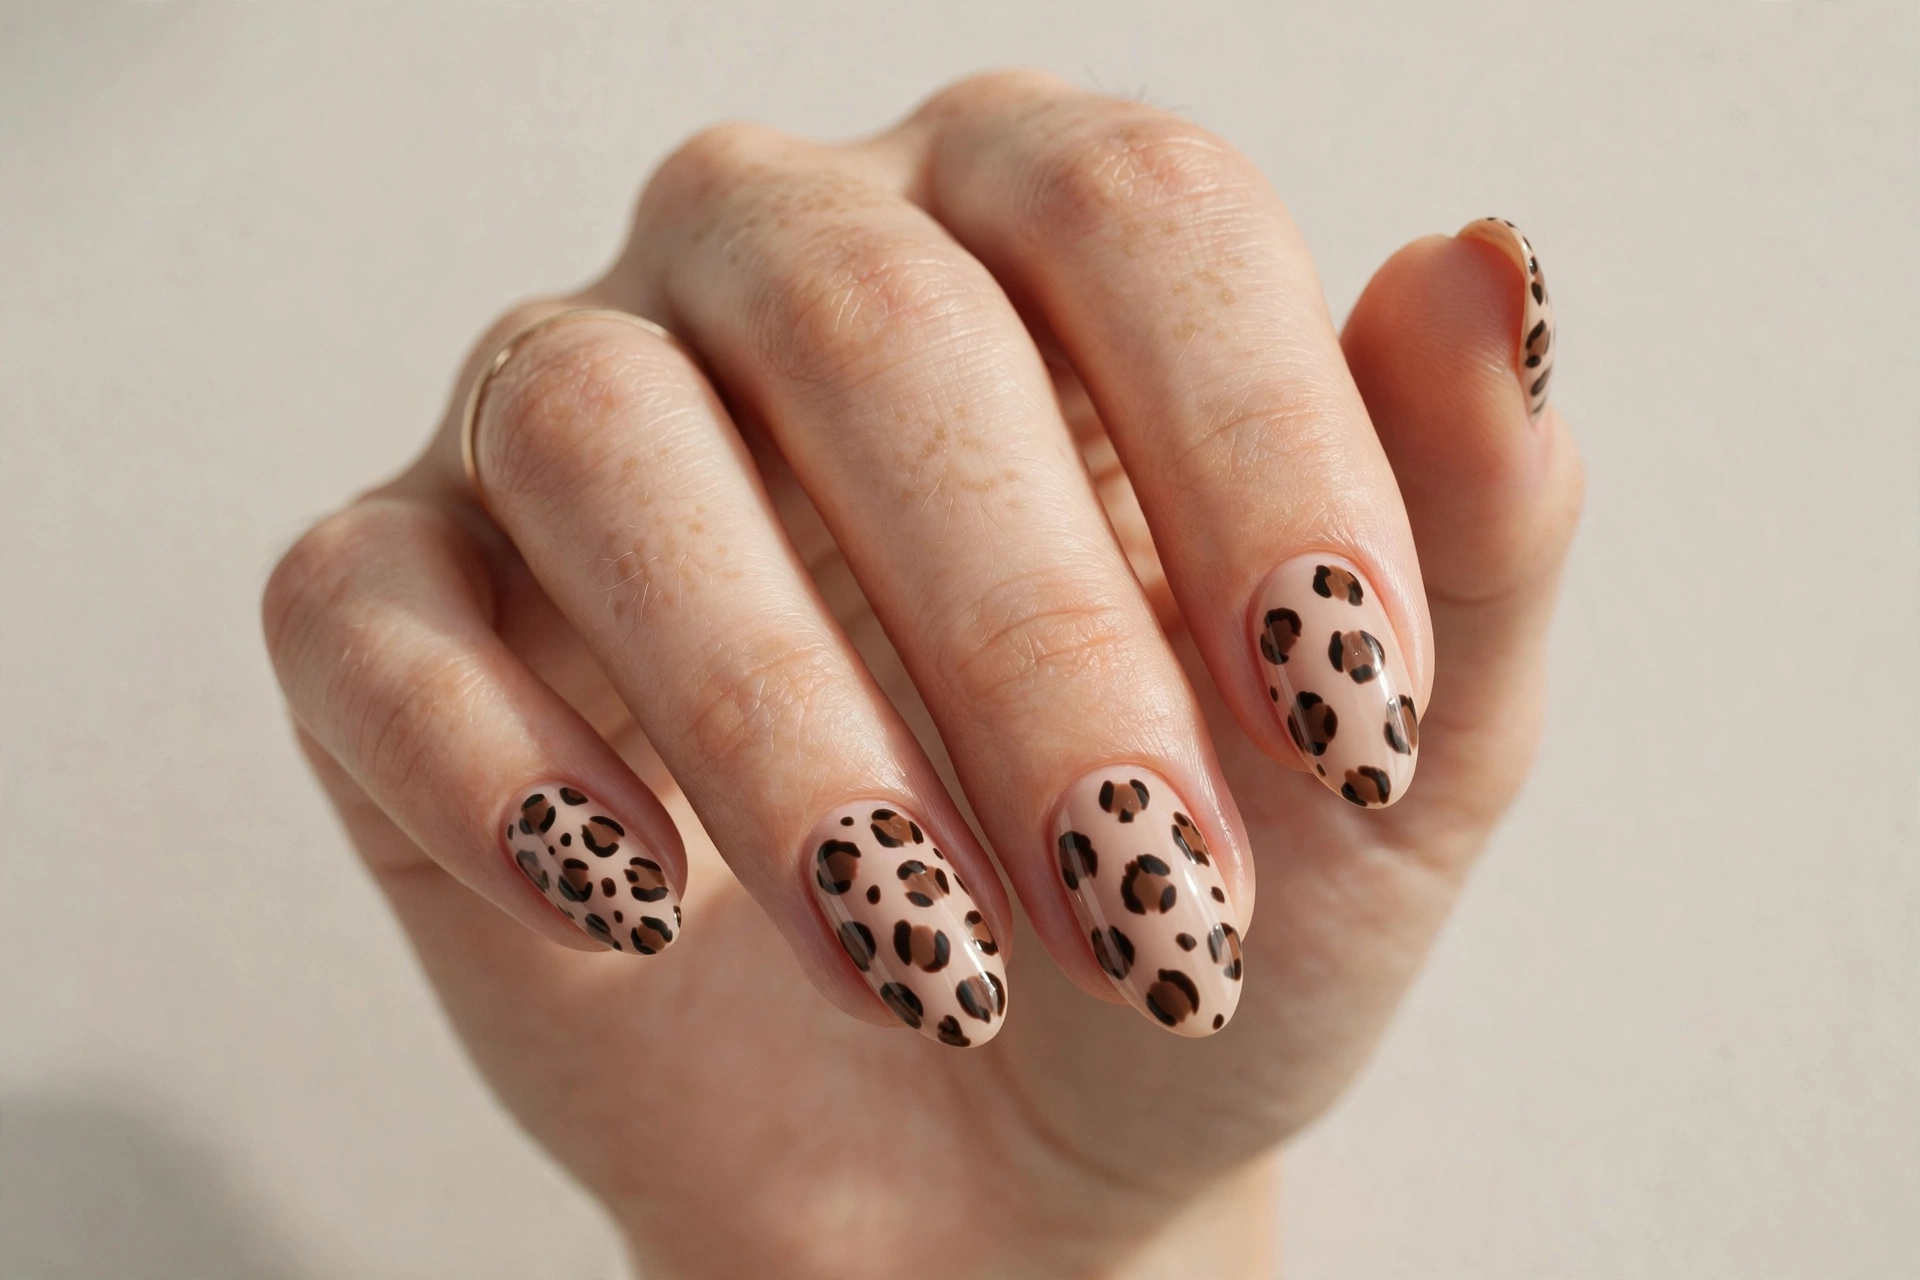
Leopard print nails are the confident choice — fierce, fun, and always in style. A warm tan or caramel base with irregular black spots outlined in gold or bronze reads like the real thing. It suits anyone who wears animal print already, and it pairs beautifully with gold jewelry. The spots do not need to be perfect; real leopard markings are irregular, so wobbly is authentic. Paint the base, then use a thin brush or dotting tool to add black blobs of different sizes, and once dry, trace a broken outline in gold or brown around each. Leave gaps between the spots so the base shows through. Try it on just the accent nails first if full leopard feels like too much, or scale it down to a micro print for a subtler take — micro nail art designs like this one are easier to wear every day.
7. Silver Chrome
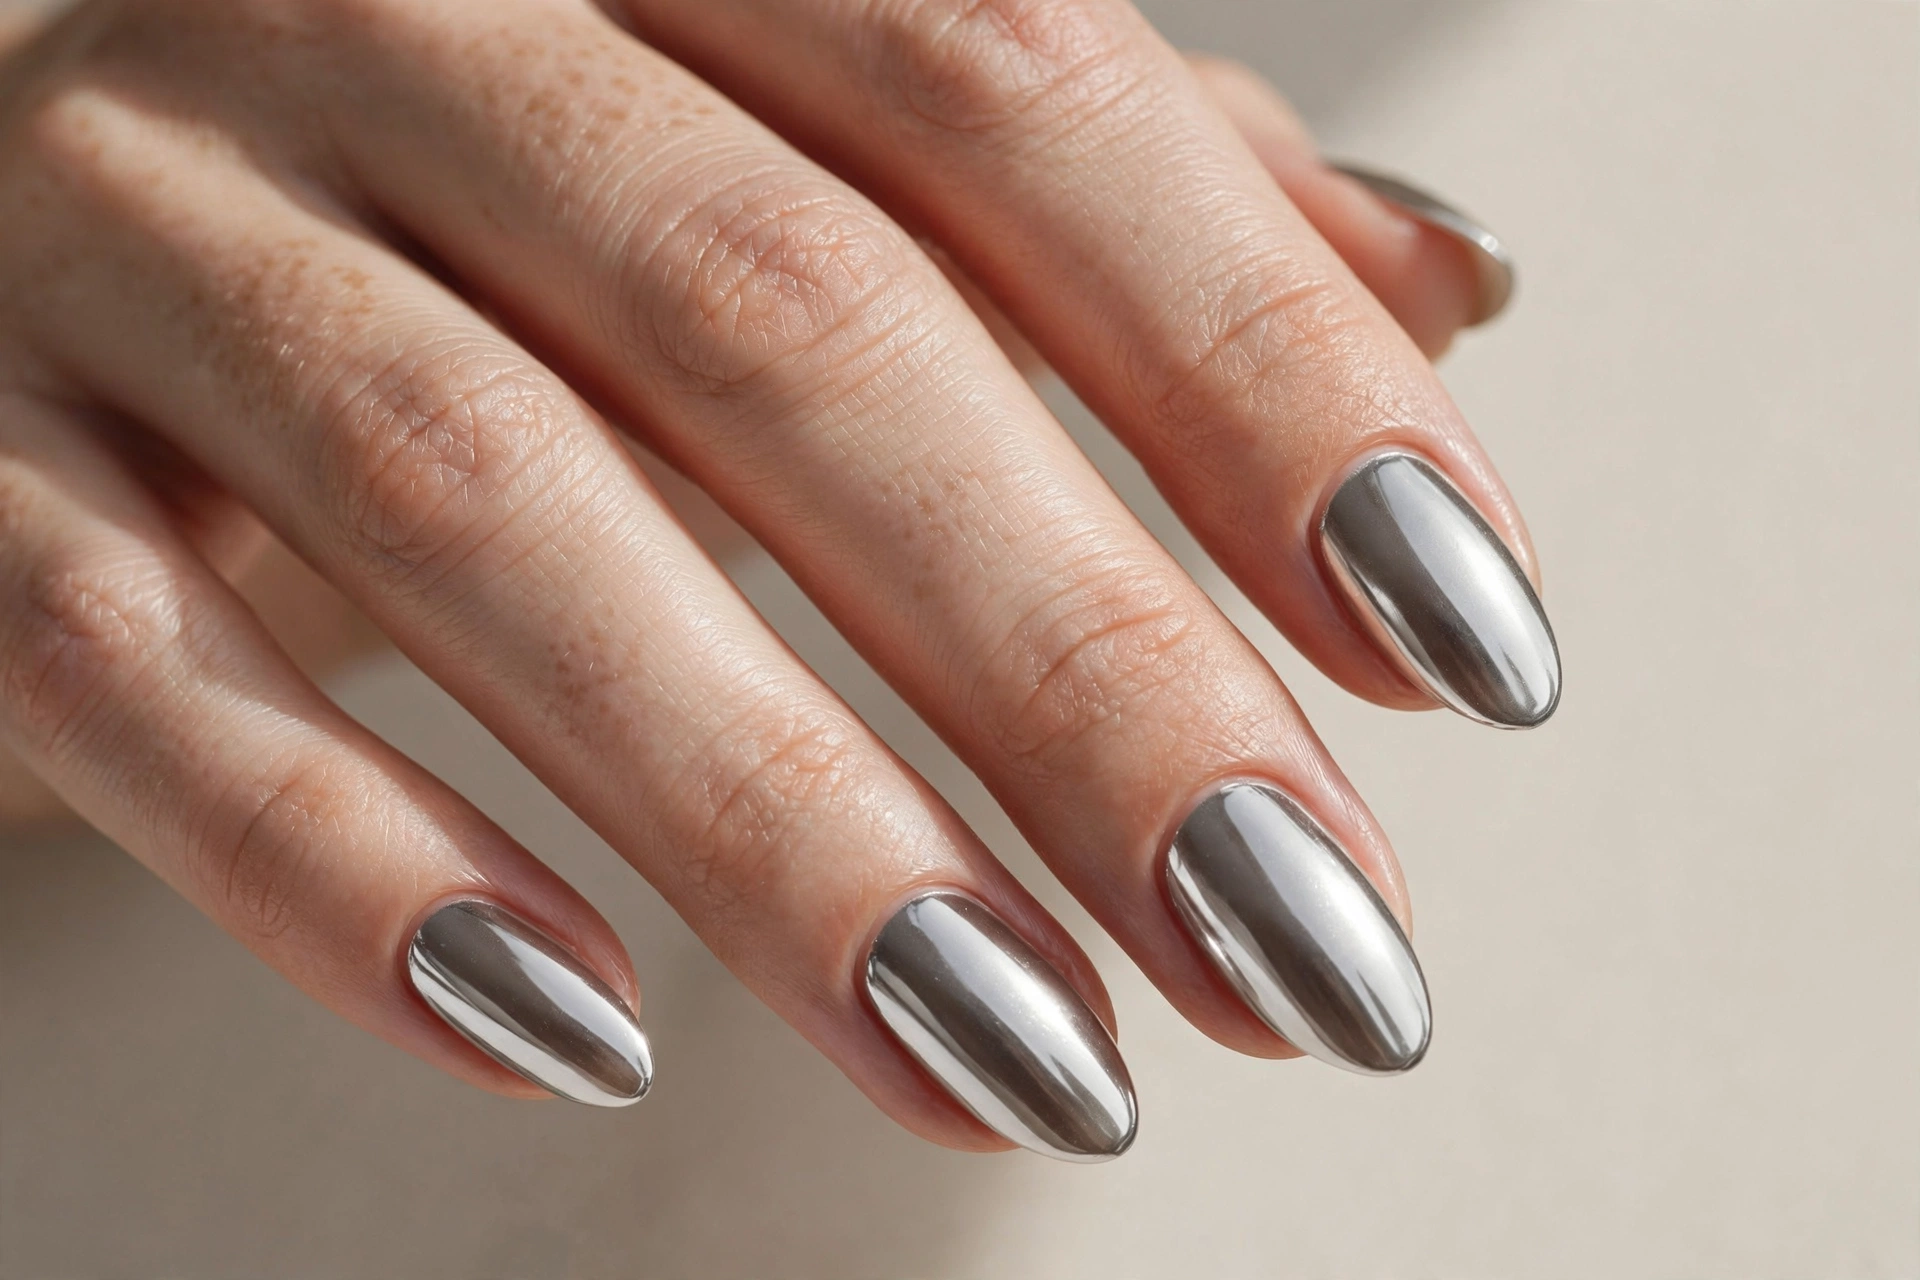
Silver chrome nails are liquid metal on your fingertips — a mirror finish that catches light with every movement. This is the design for nights out, parties, and anyone who wants their nails to be the accessory. It suits all nail shapes, though almond and stiletto amplify the futuristic feel. Getting it right depends on the base: paint a black or dark polish first, cure or dry it fully, then rub chrome powder over the surface with a sponge applicator until it shines. Seal it with a no-wipe top coat, and seal the edges carefully — chrome wears off at the tips first. The upkeep is a little higher than a plain manicure, but the payoff is enormous. If full chrome feels too intense, try it on two accent nails and keep the rest in a matching solid gray.
8. Rose Gold Glitter
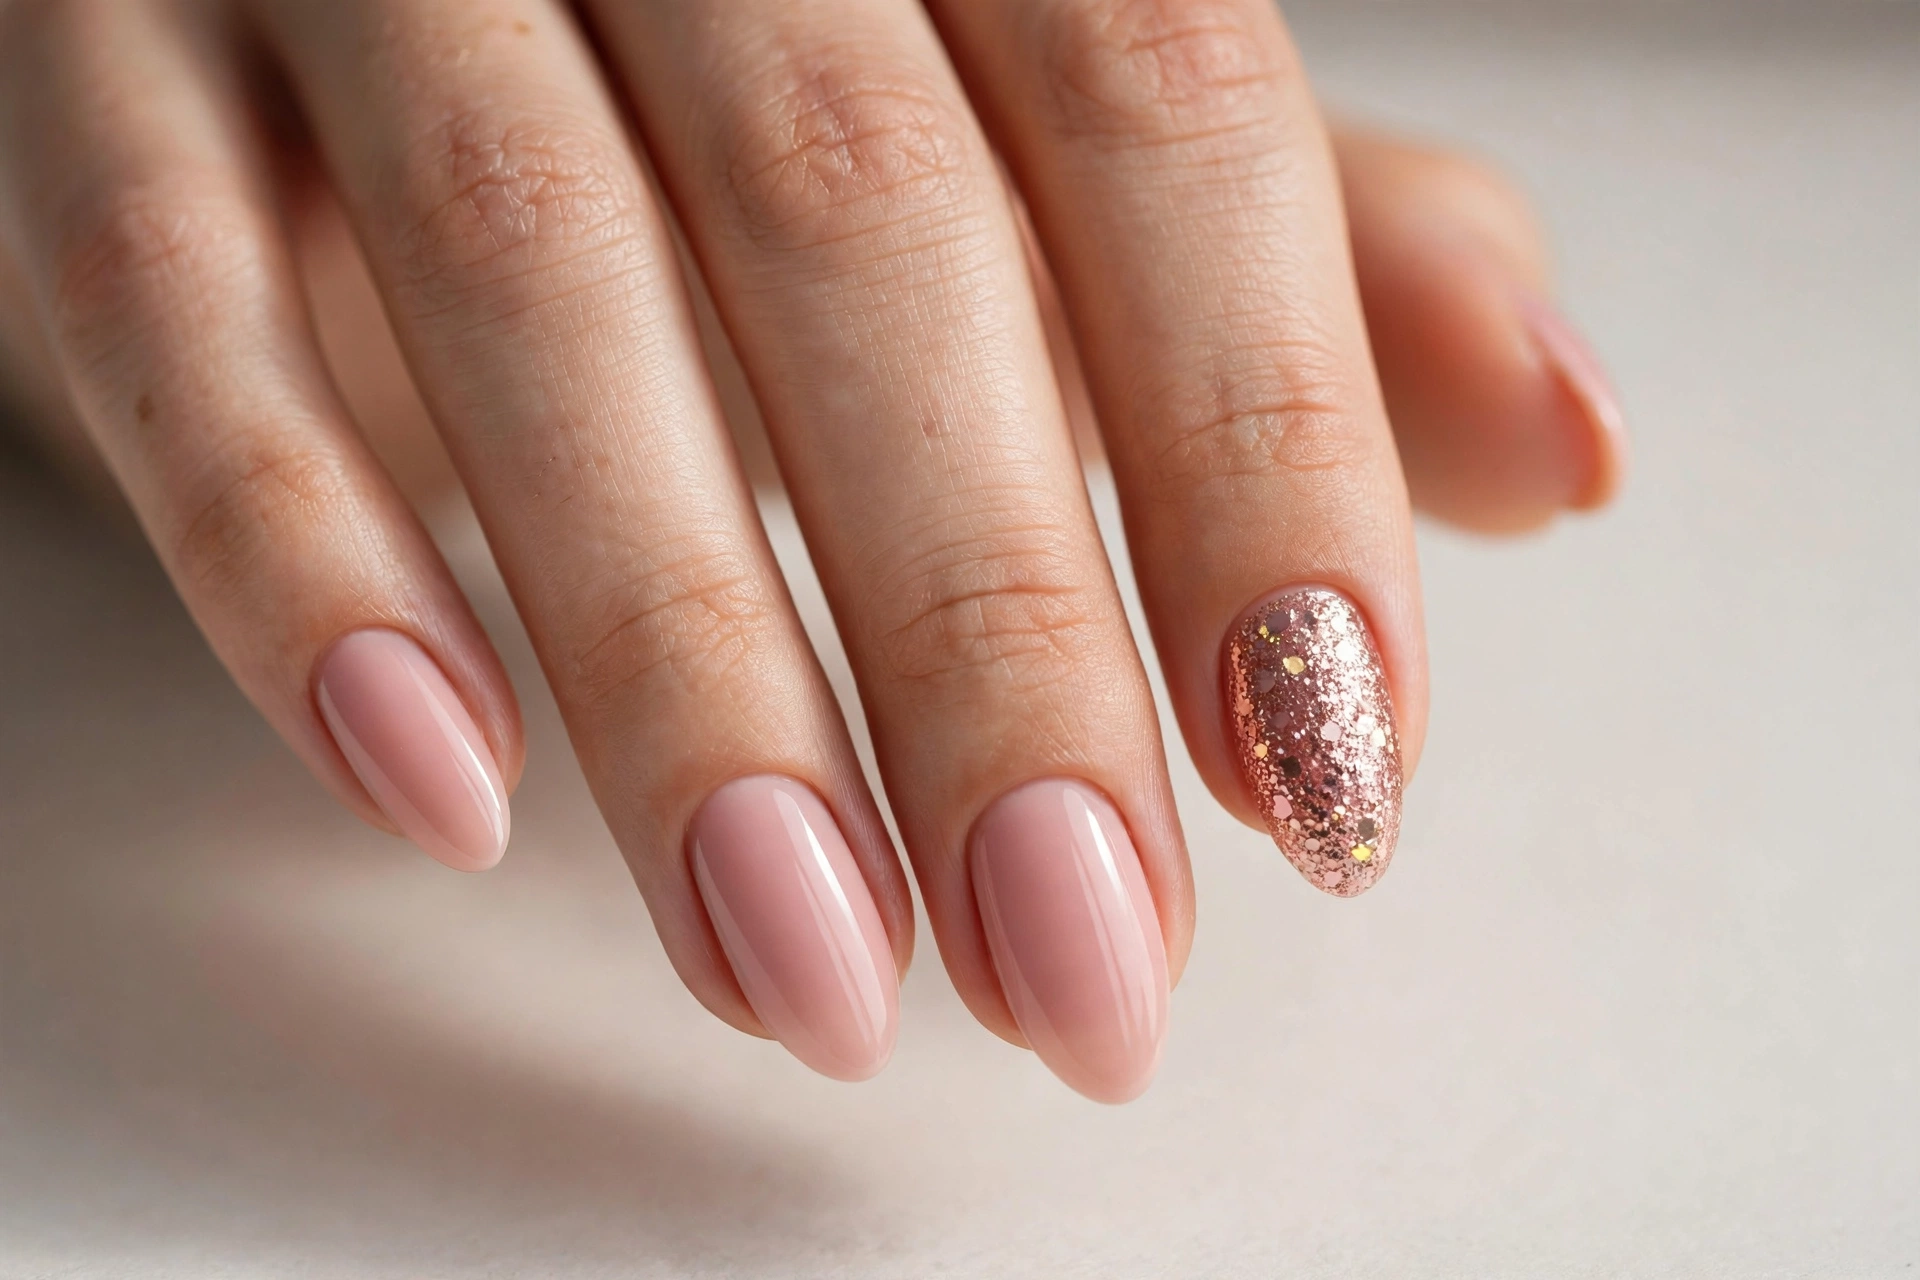
Rose gold glitter is warmth and sparkle in one bottle — pinky gold flecks that feel festive without tipping into costume. It suits holiday parties, date nights, and anyone whose jewelry box leans gold. The beauty of glitter polish is how forgiving it is: it hides uneven application, lasts longer than cream polish, and looks good on every nail length. For a full glitter manicure, use three thin coats and cap the edges well. For something subtler, sponge glitter onto just the tips over a nude base for a gradient that fades into sparkle. Removal is the one downside — soak cotton pads in acetone, wrap each fingertip in foil for ten minutes, and the glitter slides off. Worth it every time.
9. Negative Space with Gold Dots
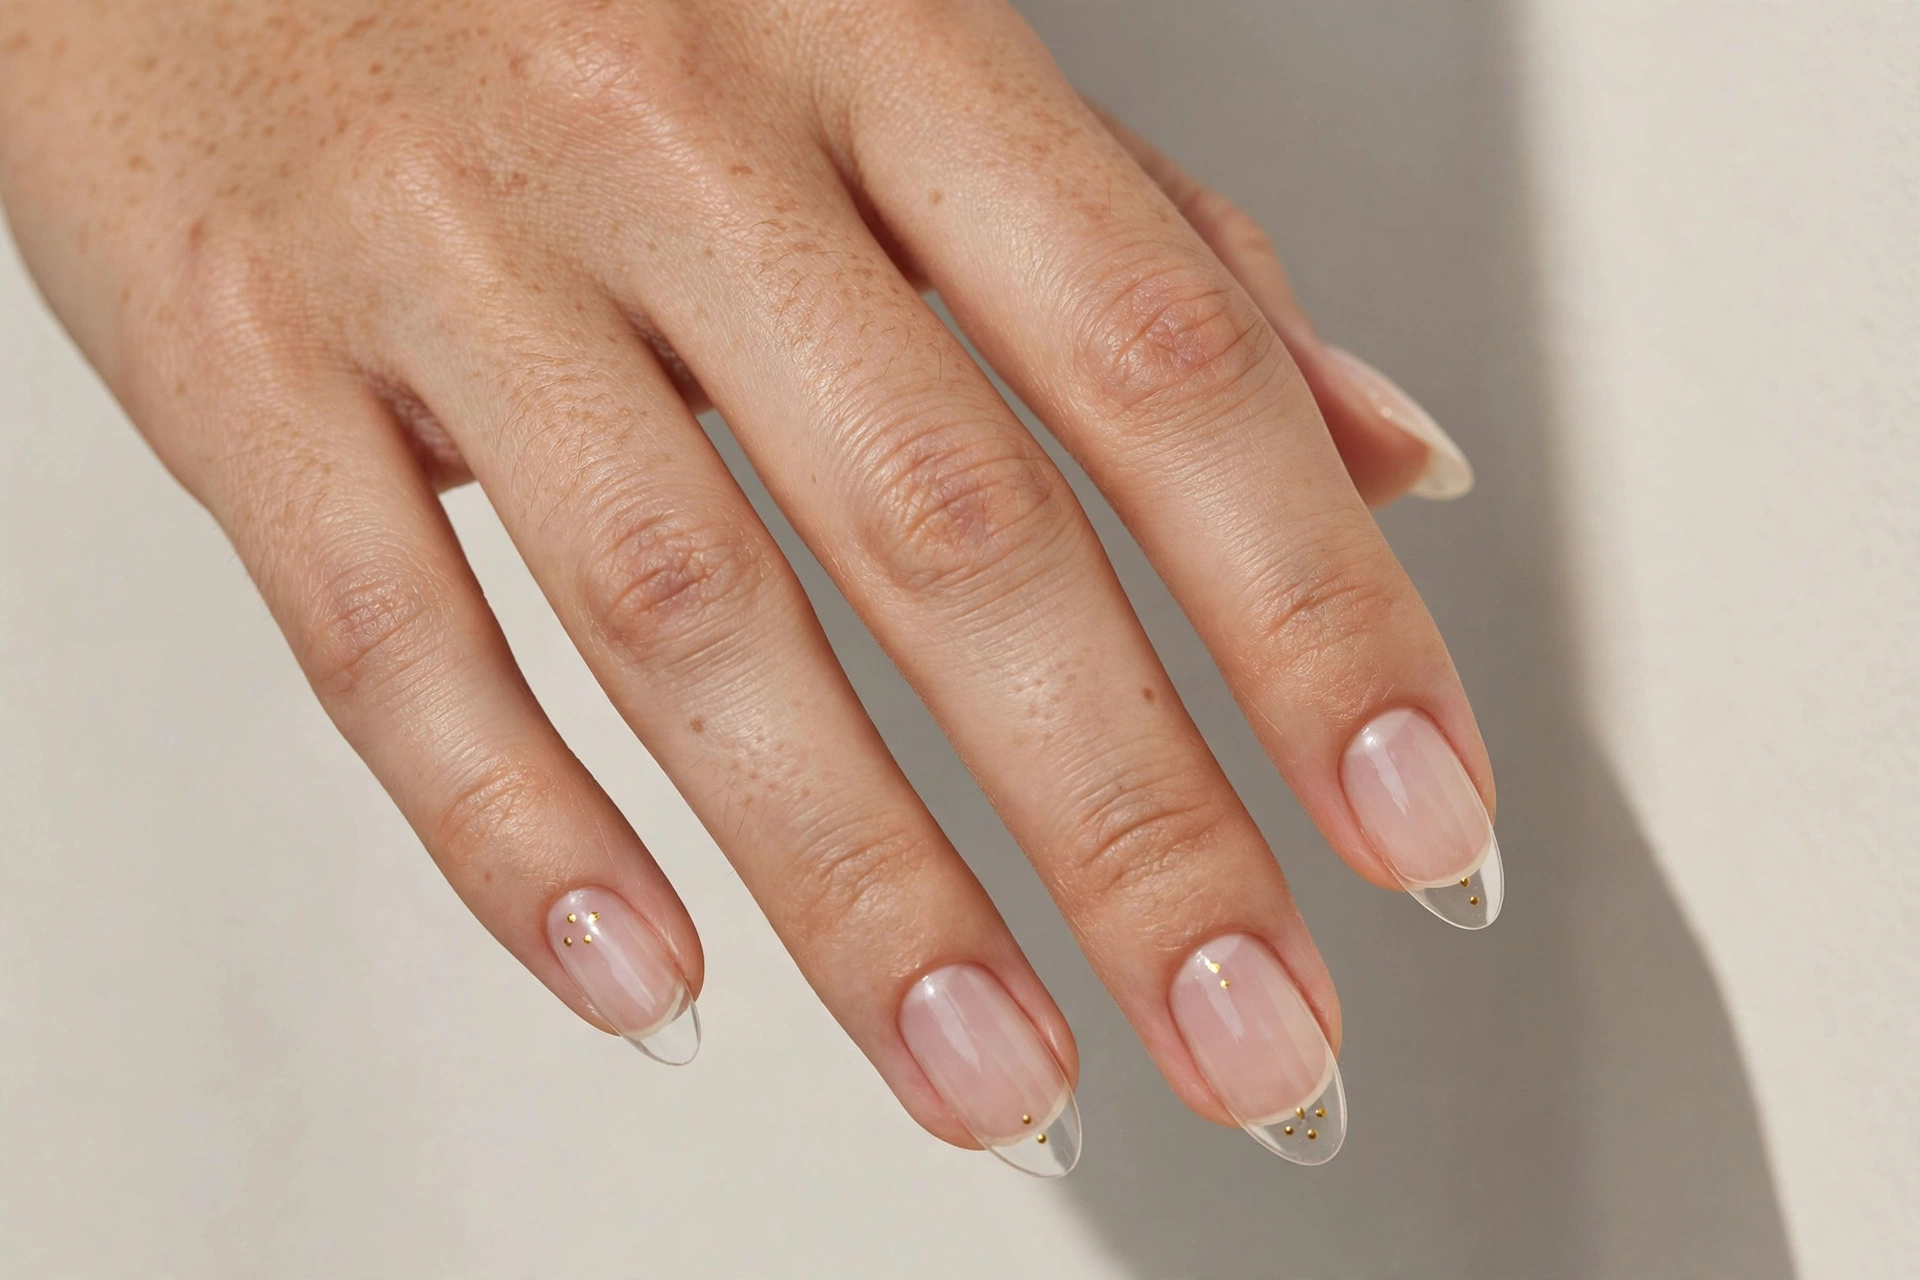
Negative space designs leave part of the natural nail bare, and gold dots on clear nails are the most elegant version. A single tiny gold dot near the cuticle, or a short line of three dots down the center of the nail, reads as deliberate, modern, and impossibly chic. It suits short natural nails best — the bare nail is part of the design, so shape and grooming matter. Use a dotting tool dipped in gold polish or, even easier, flat-back gold studs pressed into a still-tacky base coat. Because so much nail is bare, this manicure grows out gracefully; there is no obvious line where the design ends. It is office-friendly, wedding-friendly, and a great entry point if you have never tried nail art before.
10. Red and White Polka Dots
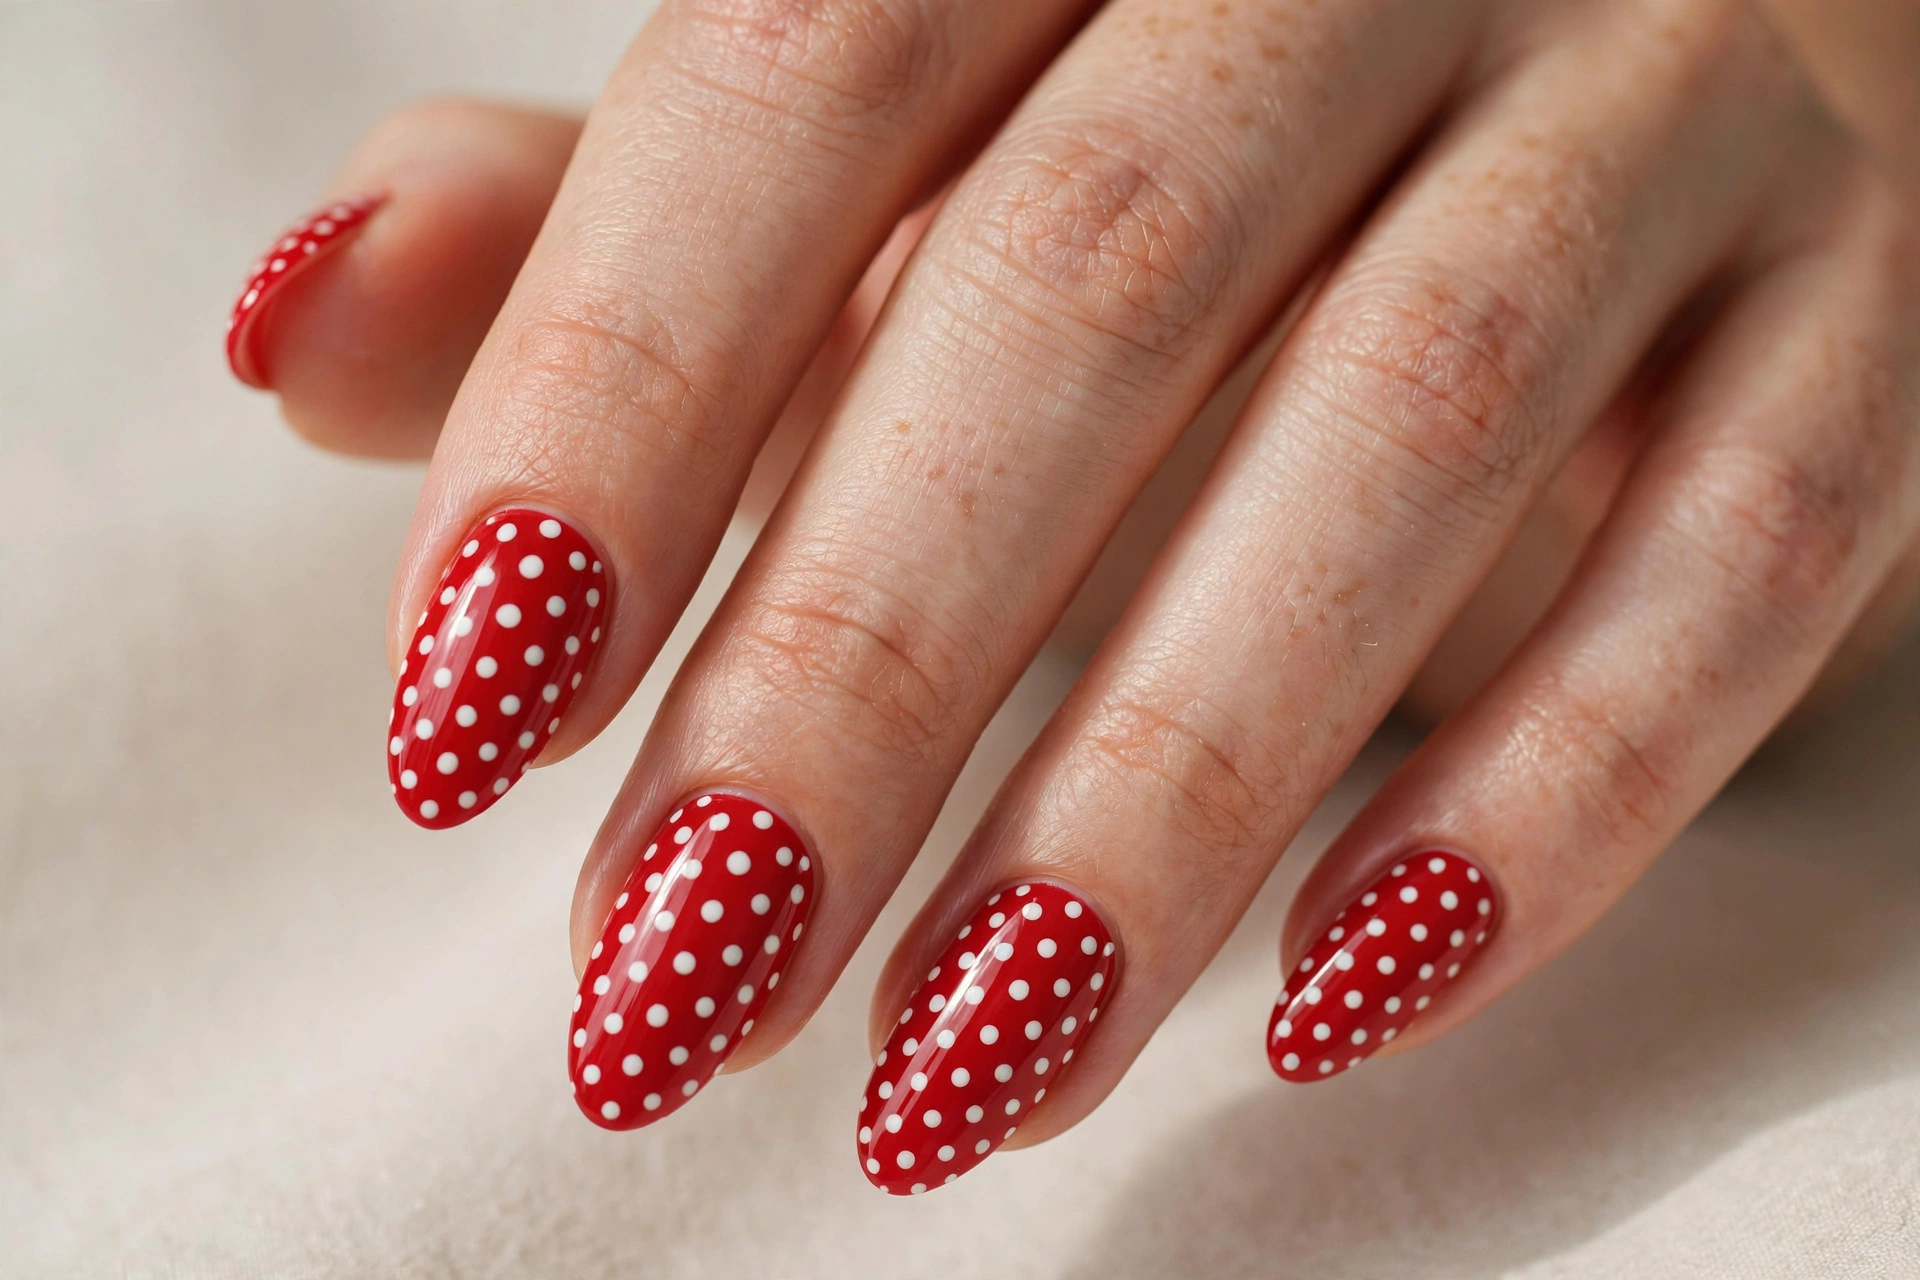
Polka dots in red and white are pure retro joy — think 1950s diners, summer picnics, and pin-up style. The classic version is a red base with white dots, but flipping it to white with red dots is just as charming. This design suits playful personalities and looks adorable on short rounded nails, which keep the vibe sweet rather than dramatic. Even spacing is the whole game, so use a dotting tool with a consistent size and plan your grid before you start: one center dot, then dots around it. Top with a glossy coat to smooth the dots into the base. For a twist, make one accent nail with the dots reversed, or shrink the dots down to a tiny confetti pattern for a more wearable version.
11. Pastel Retro Swirls
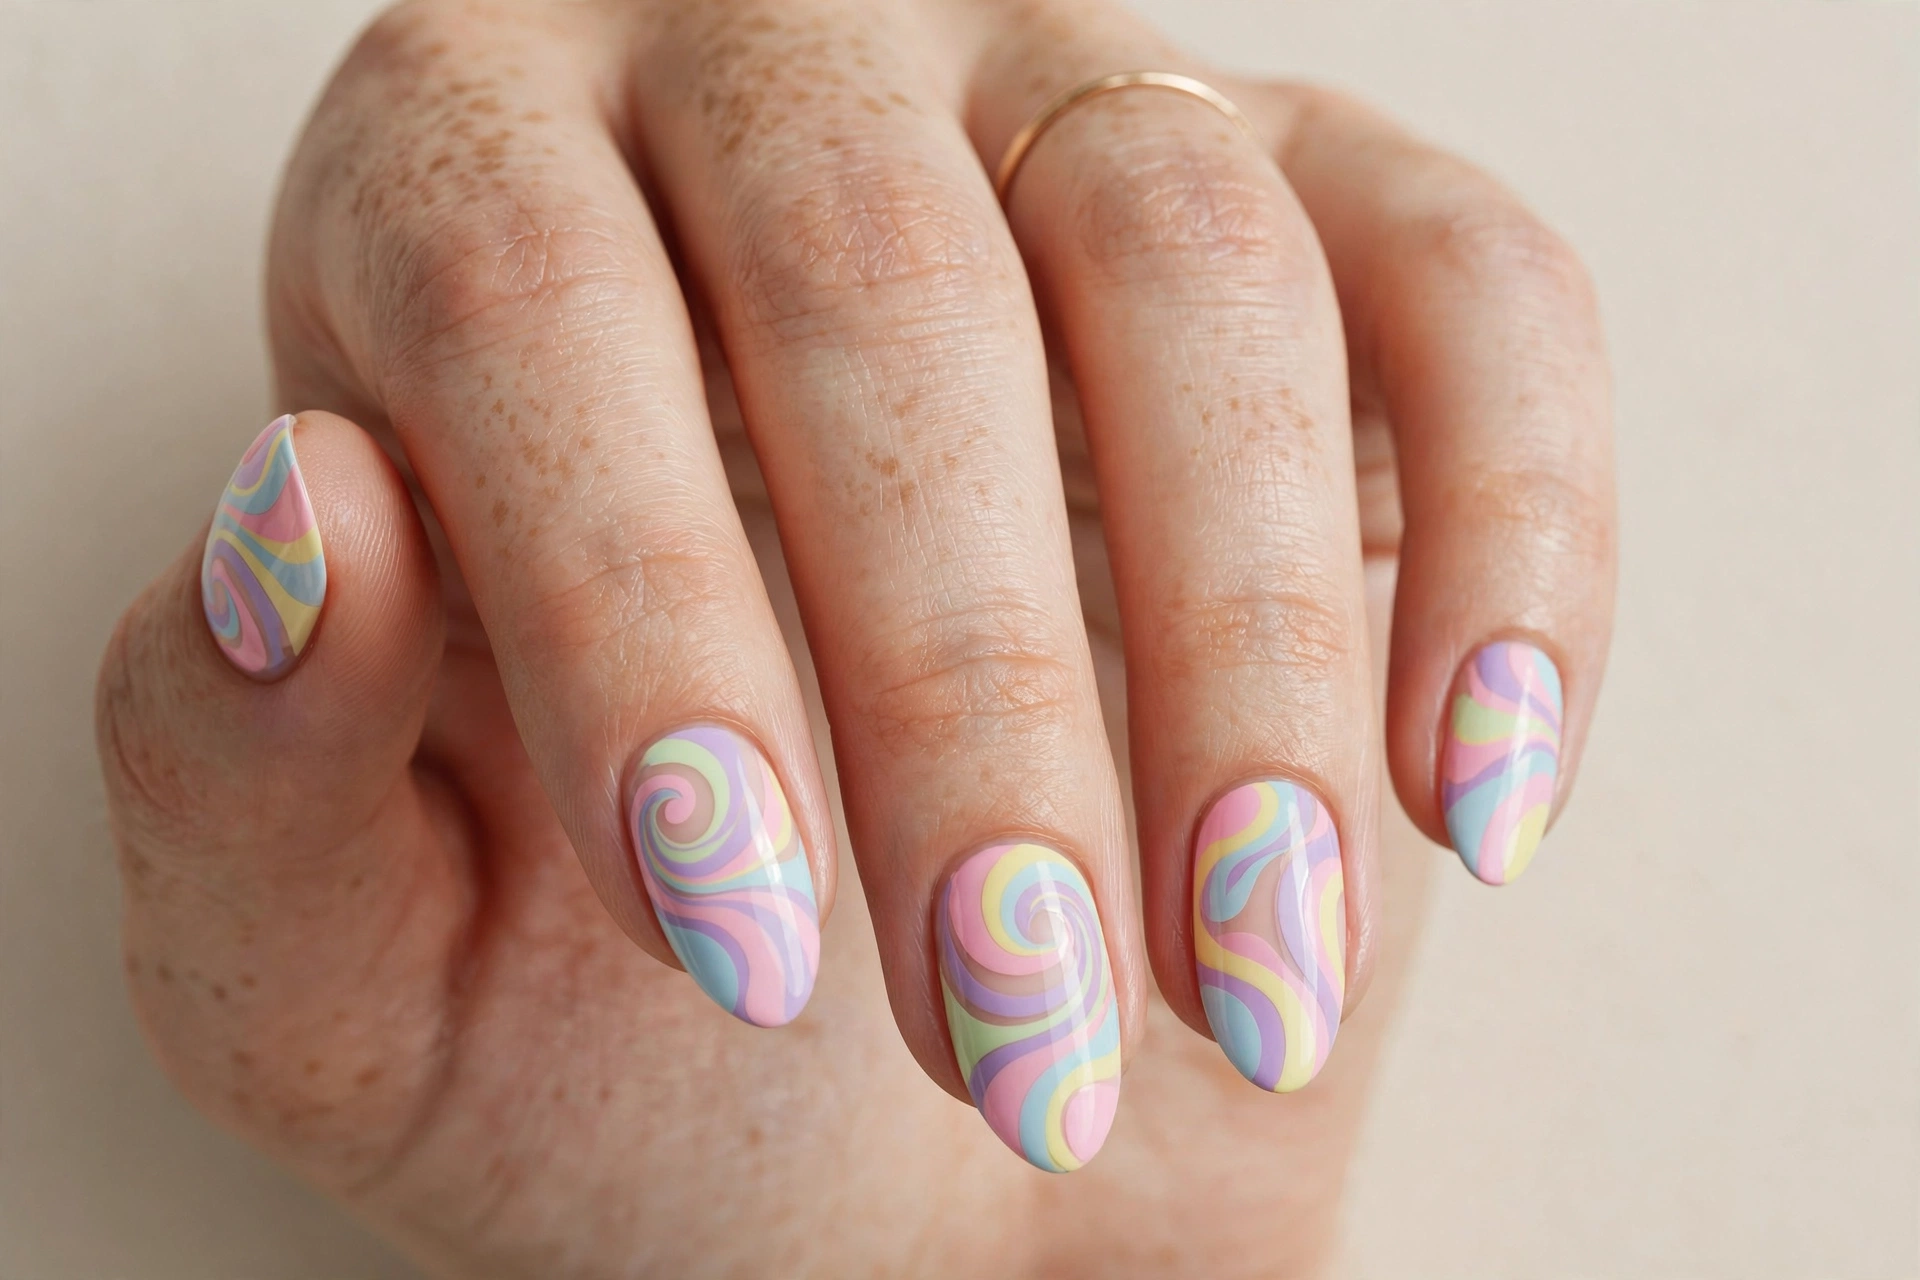
Pastel swirls are the groovy, feel-good design of the moment — wavy lines in lavender, mint, peach, and baby pink on a milky white base. It is a nod to the seventies without looking costume-y, and the soft colors keep it wearable for real life. This suits anyone who likes color but not commitment; no single shade dominates, so it goes with everything. The swirl itself is easy: with a thin brush, drag wavy lines across the nail in any direction — wonky is fine, retro is supposed to look hand-drawn. Do the lines one color at a time, letting each set dry so the pastels do not smudge. Almond and oval shapes echo the curves of the design and make the swirls look intentional rather than random.
12. Black and White Checkerboard
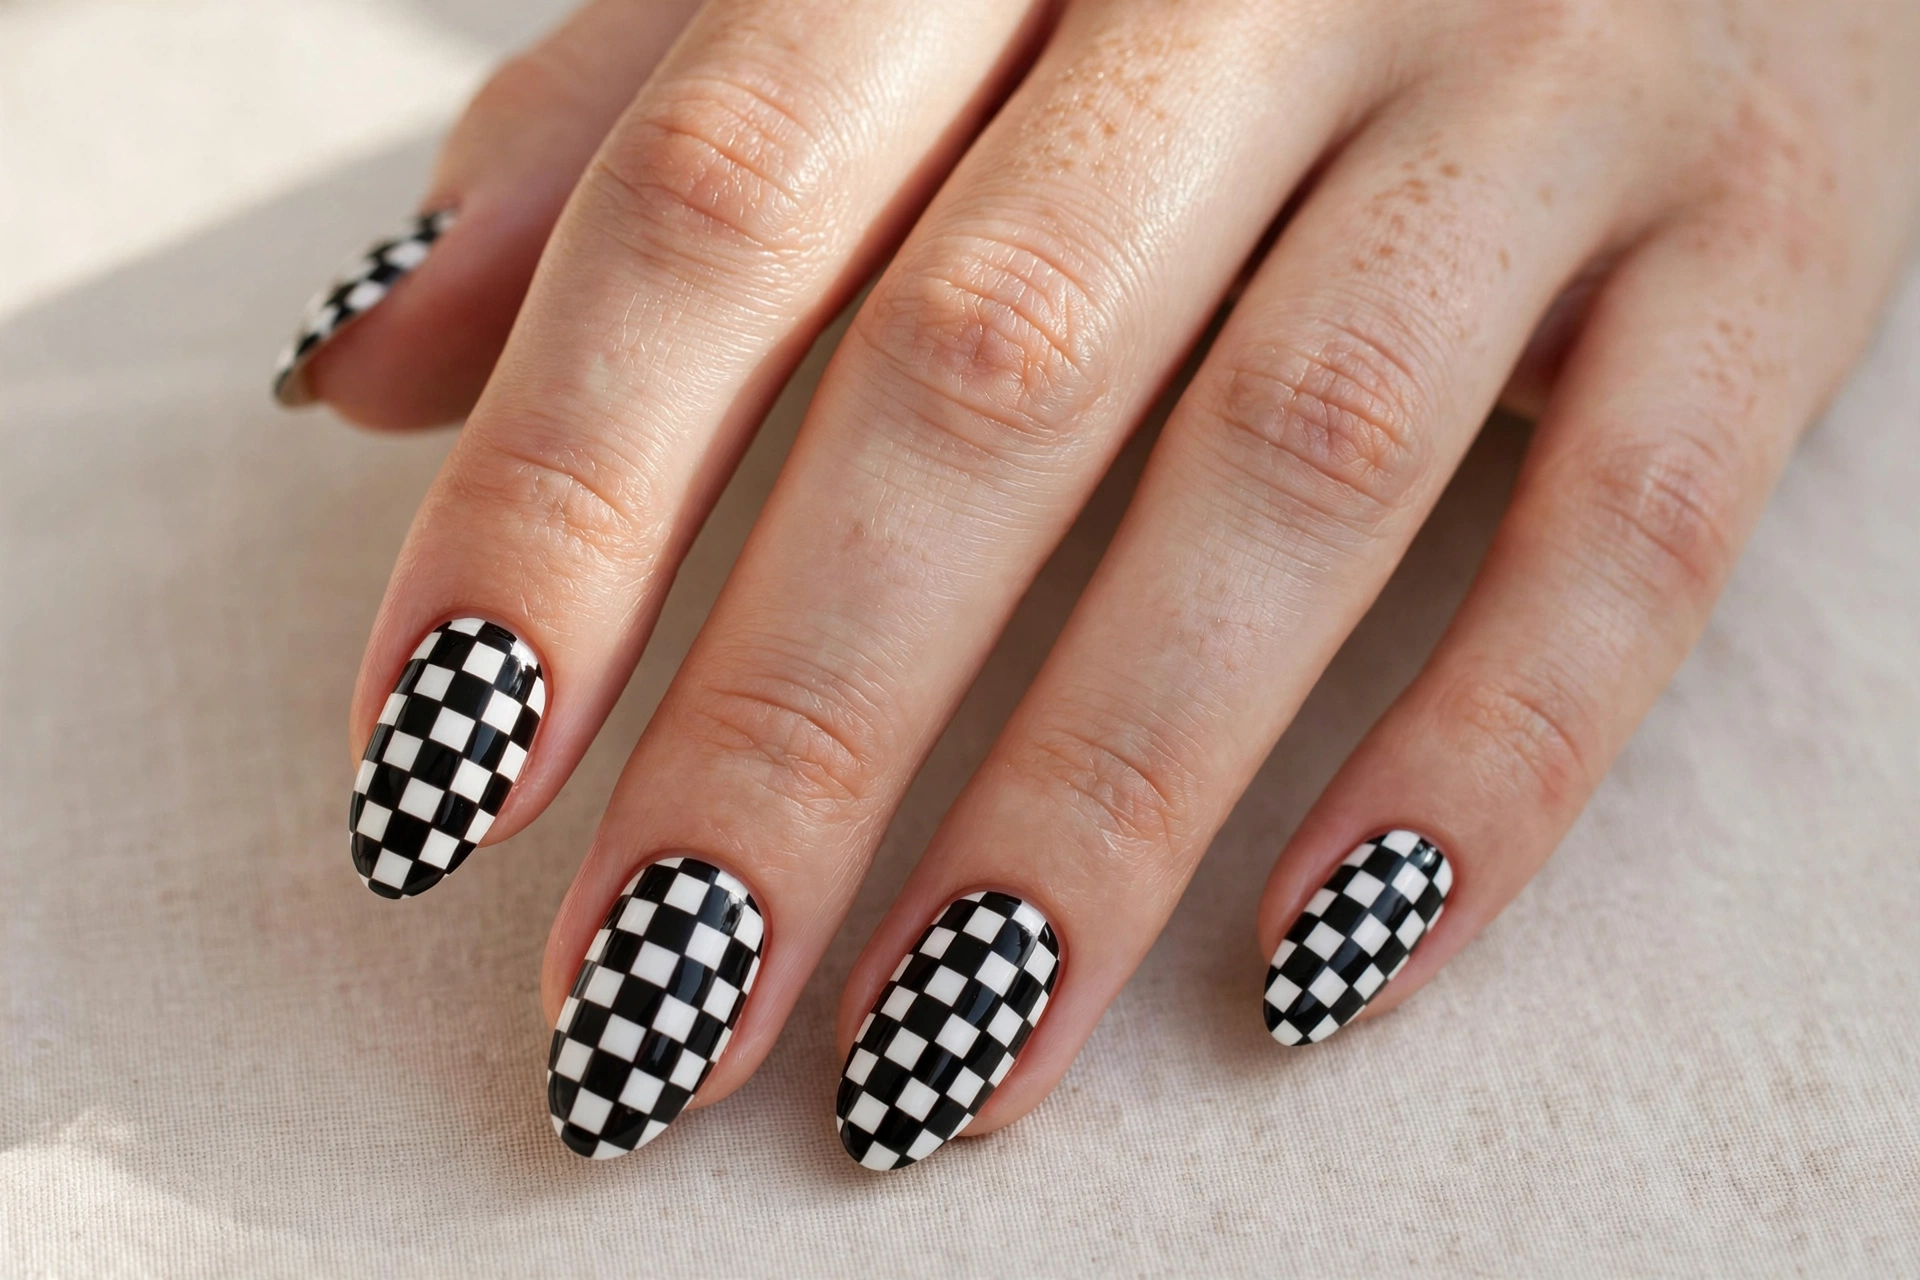
The checkerboard is graphic, high-contrast, and unapologetically cool. Alternating black and white squares give the manicure an almost optical-art energy that stands out without a single extra color. It suits bold dressers and looks incredible with streetwear, monochrome outfits, or red lips. The grid takes patience: paint white first, let it dry hard, then tape off and fill alternating squares with black — or use a thin brush for freehand squares if your hand is steady. Short square nails are the classic canvas for this one, and the pattern looks neat at that length. If the full board feels loud, try the checkerboard on two accent nails and keep the rest in solid black or white.
13. Watercolor Floral
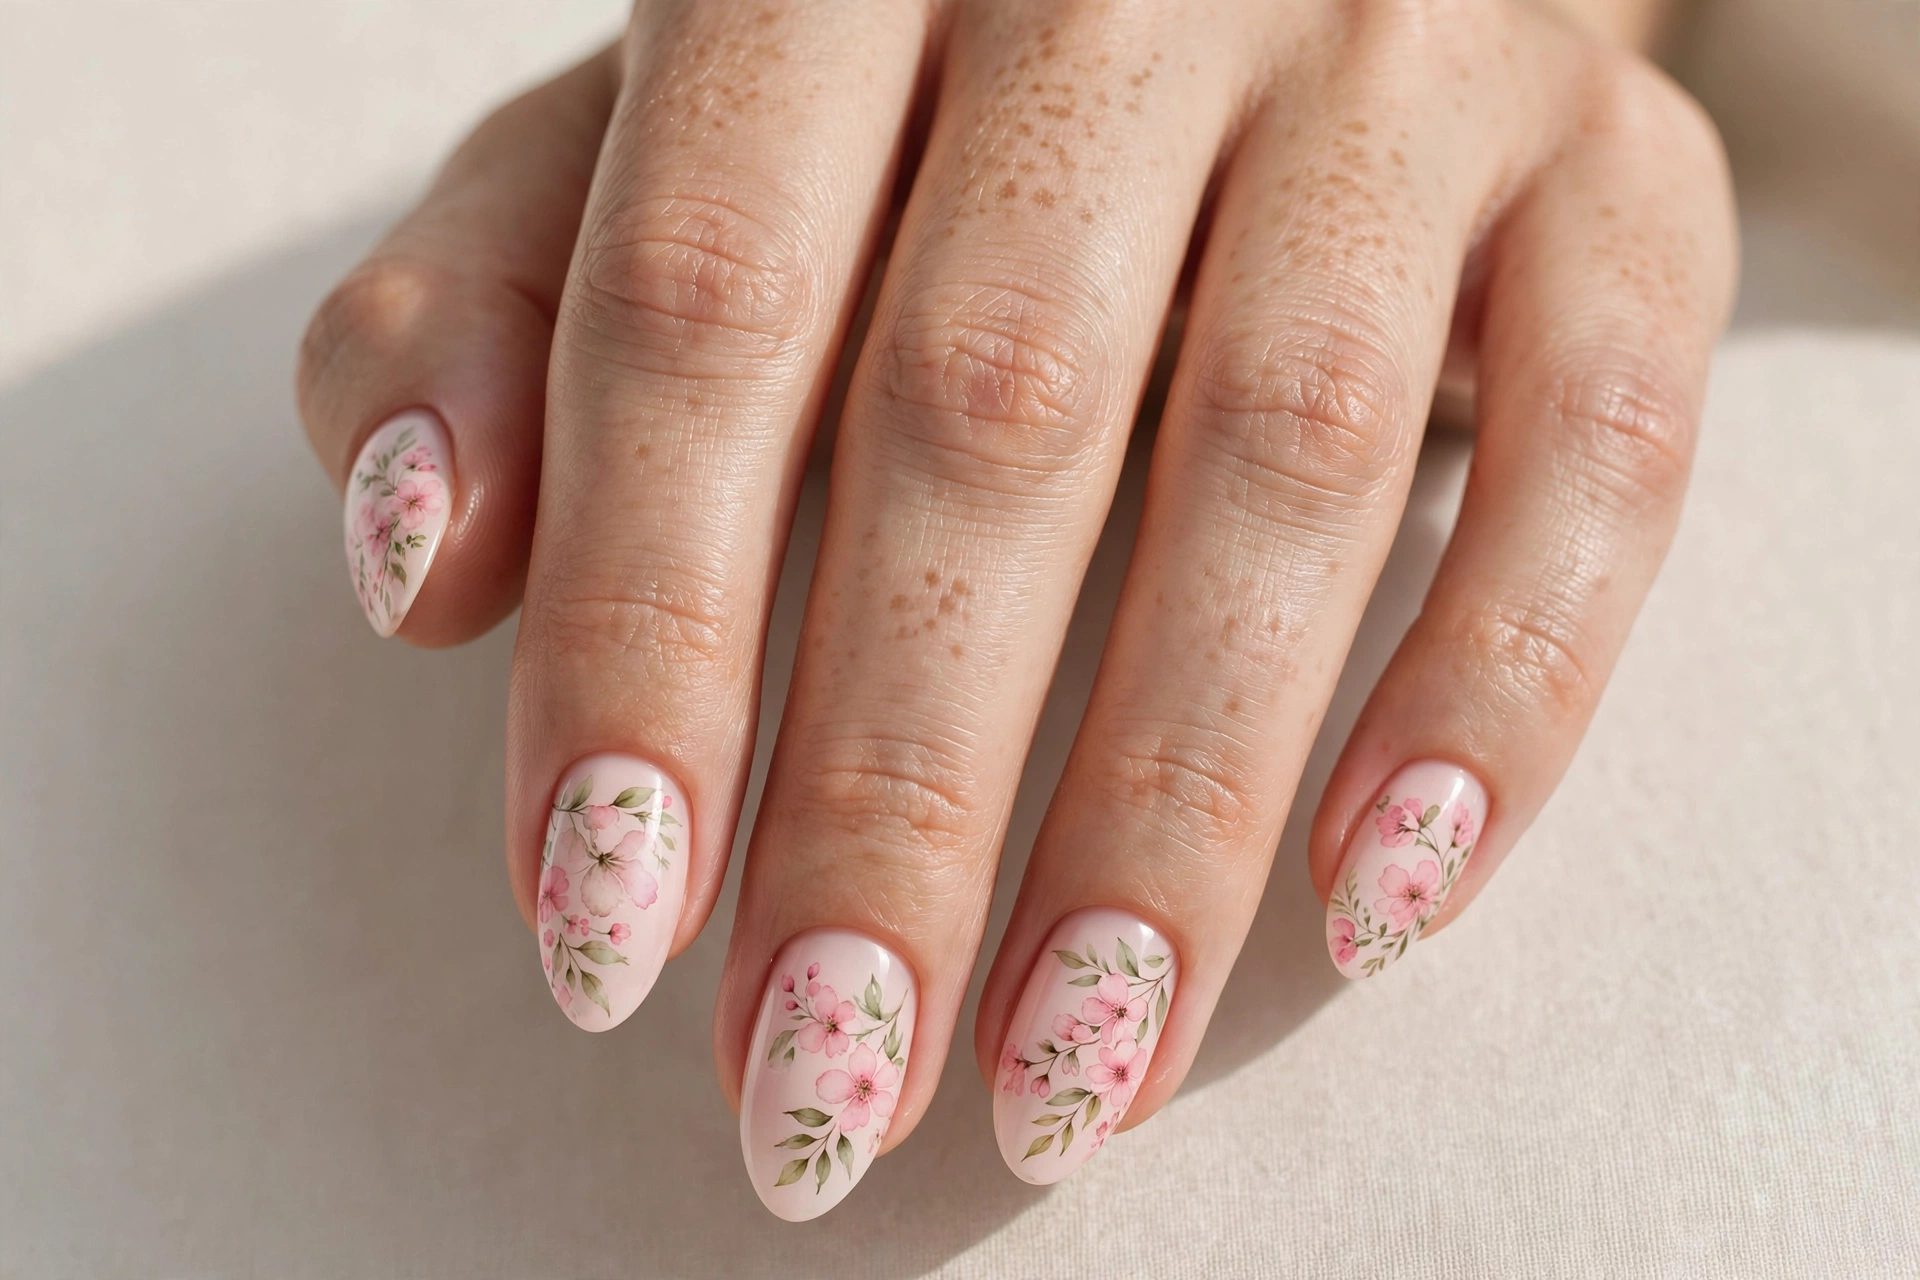
Watercolor florals look like tiny paintings on your nails — blossoms blurred into soft, translucent washes of pink, blue, and violet. The effect is romantic and artistic, like pressed flowers seen through glass. It suits anyone who loves florals but wants something softer than painted daisies, and it is a beautiful choice for spring weddings or garden parties. The trick is diluting the polish: work on a white base, thin your colors with a little acetone or use sheer watercolor-style polishes, and blend while the paint is still wet so the edges melt together. Each nail ends up different, which is the charm. A glossy top coat deepens the colors and protects the delicate layers underneath.
14. Gold Foil on Emerald Green
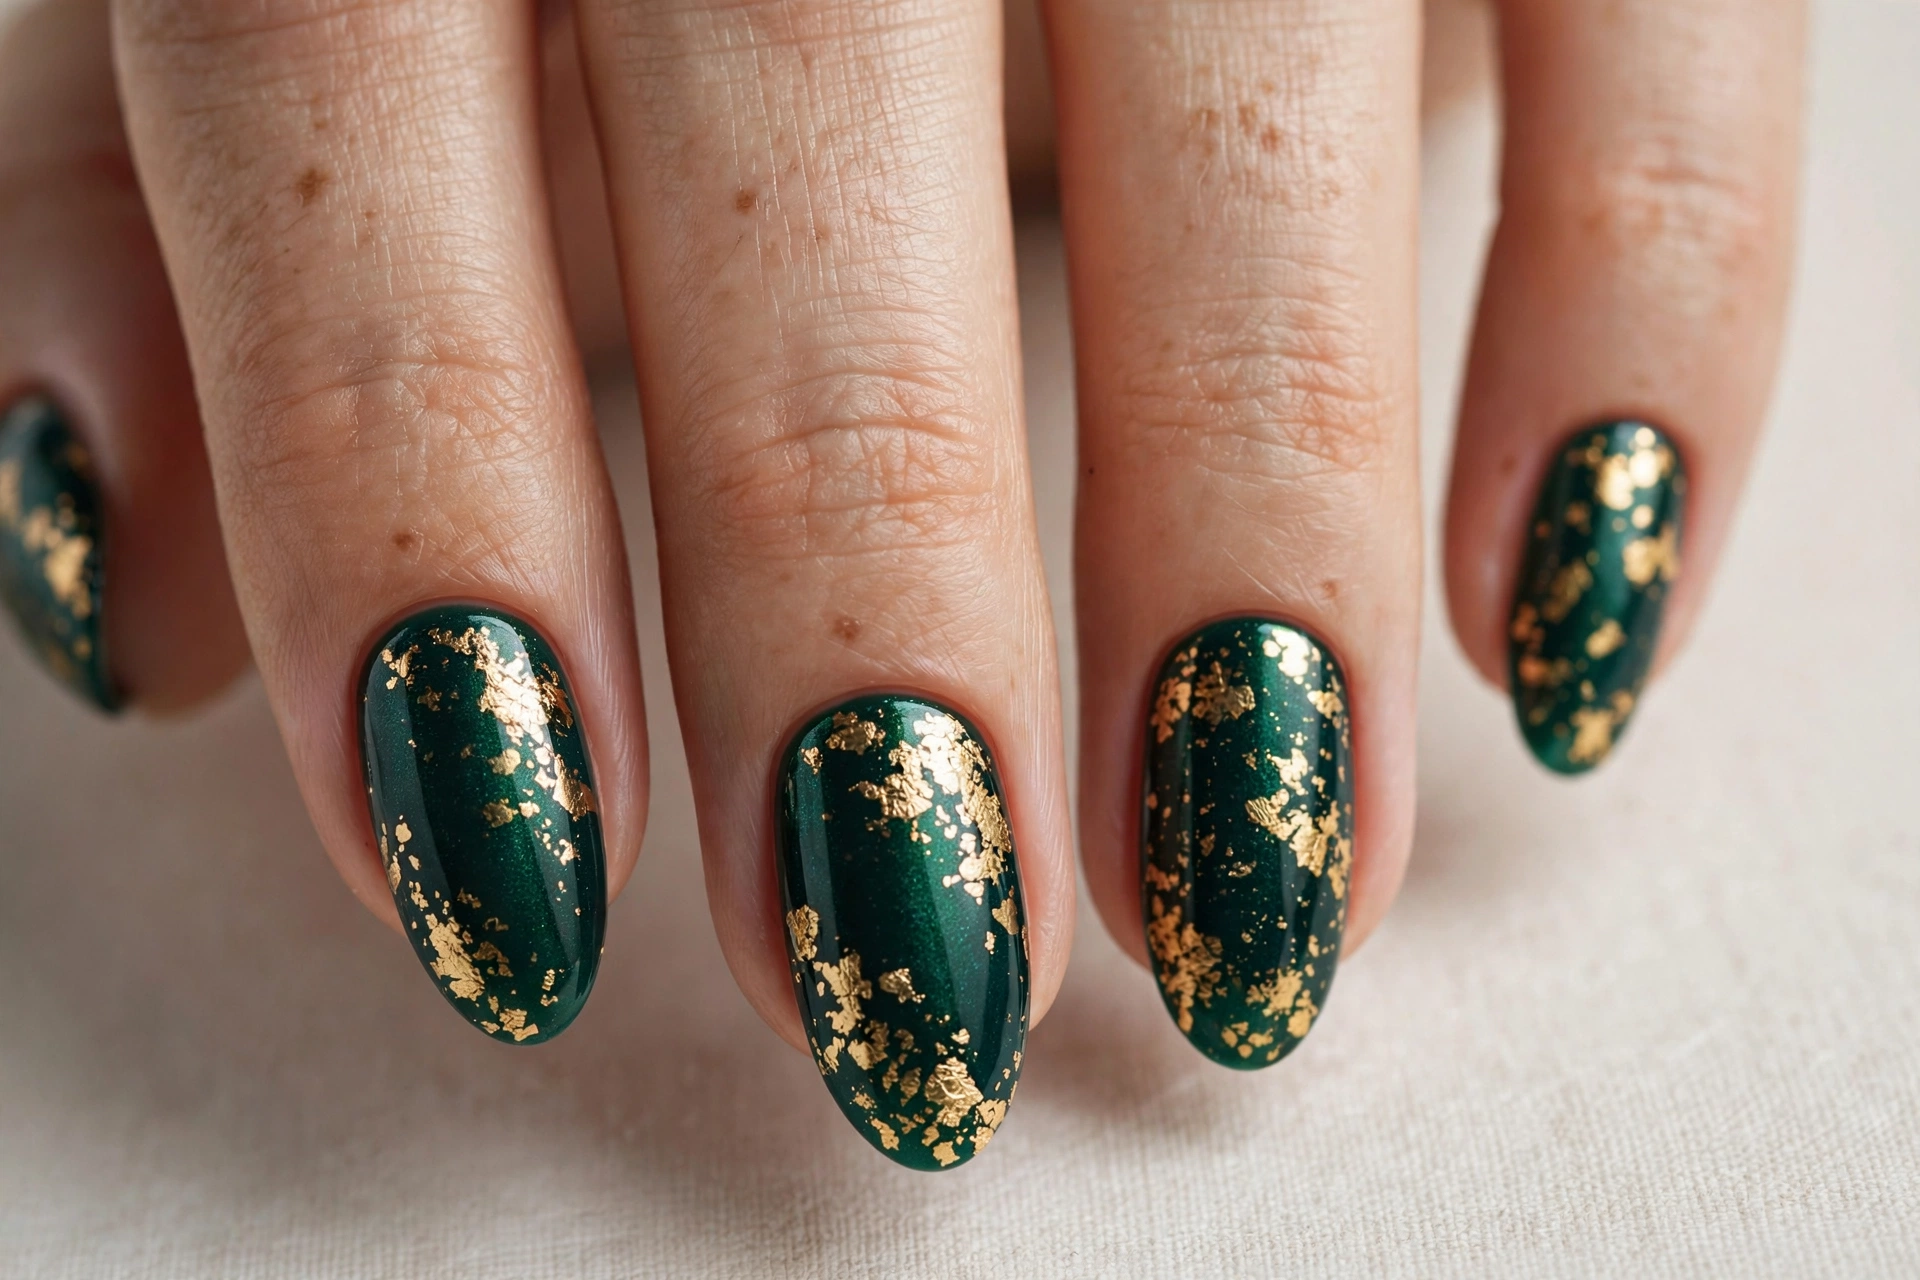
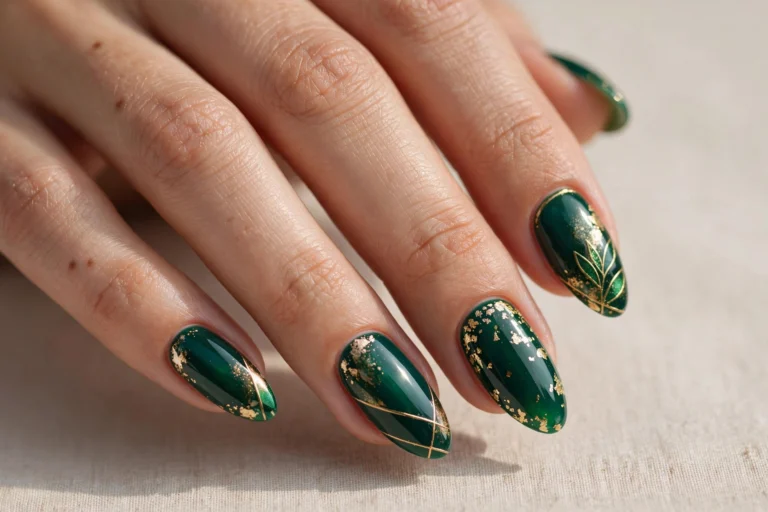
Emerald green with gold foil is luxury in nail form — deep, jewel-toned green with crinkled metallic gold laid over the top. The combination feels rich and evening-ready, perfect for the holiday season, formal events, or whenever you want to feel a little decadent. It suits medium to long nails where the green has room to look velvety. Apply two coats of green, then while the second coat is still tacky, press small torn pieces of gold foil onto the nail with tweezers and pat them flat — random placement looks best. Seal with two layers of top coat so the foil edges lie smooth. If you love this seasonal mood, these autumn nail art designs explore more rich jewel tones in the same spirit.
15. Butterfly Wings
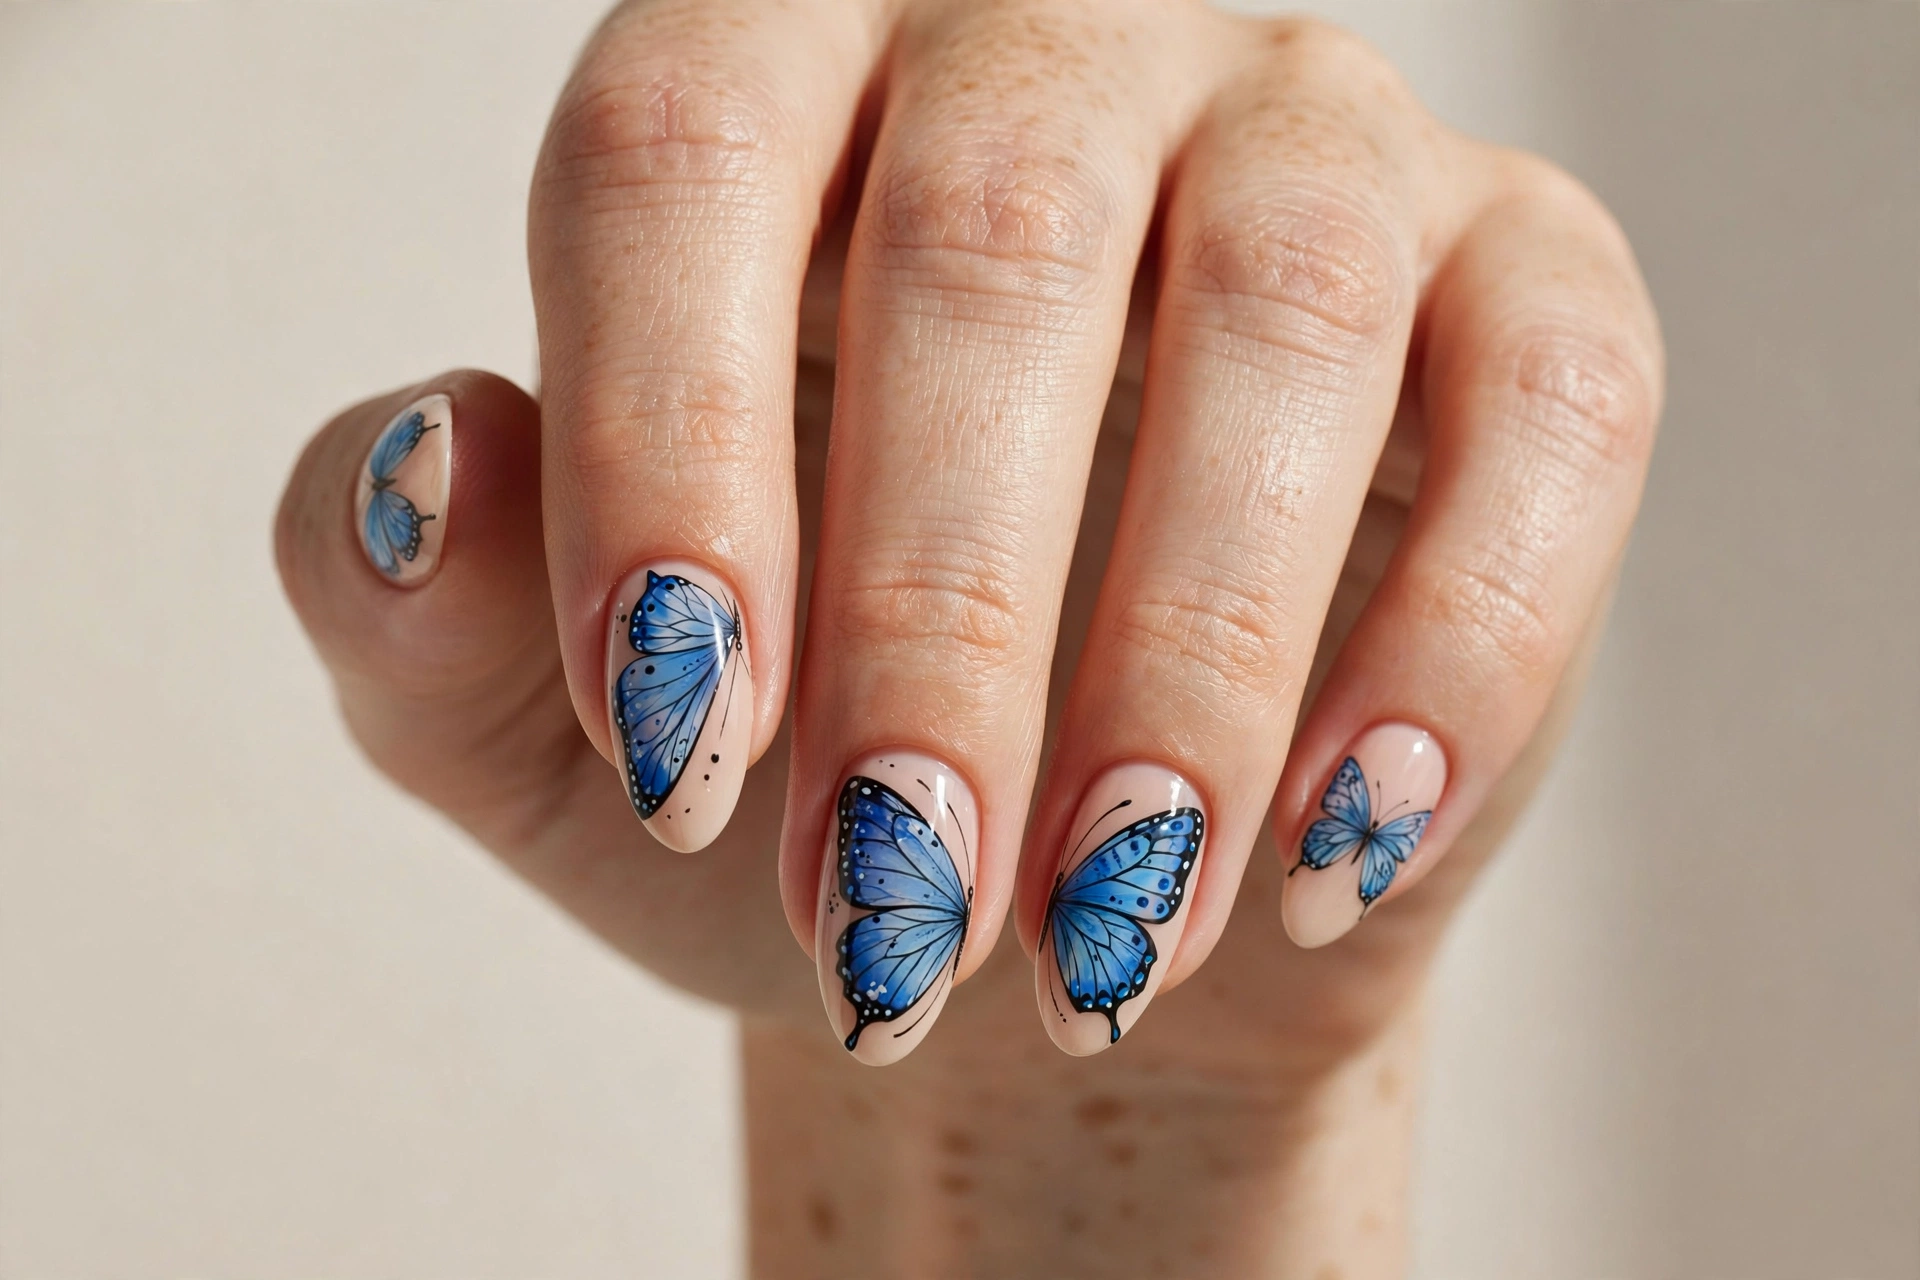
Butterfly wing nails turn each nail into a tiny wing — monarch orange and black, blue morpho, or soft pastel versions all work. The design suits dreamers and romantics, and it is especially popular for spring, festivals, and birthdays. Long nails give the wings the space they deserve. The simplest method is a symmetrical wing across two nails: paint the base color, then add the wing pattern in black liner and fill with orange or blue, mirroring the design on the neighboring nail so they read as one butterfly when your fingers are together. Stickers and nail wraps are a perfectly valid shortcut here — the result is what matters, not the method. A coat of glossy top coat makes the wings look like they are about to take flight.
16. 3D Pearls and Rhinestones
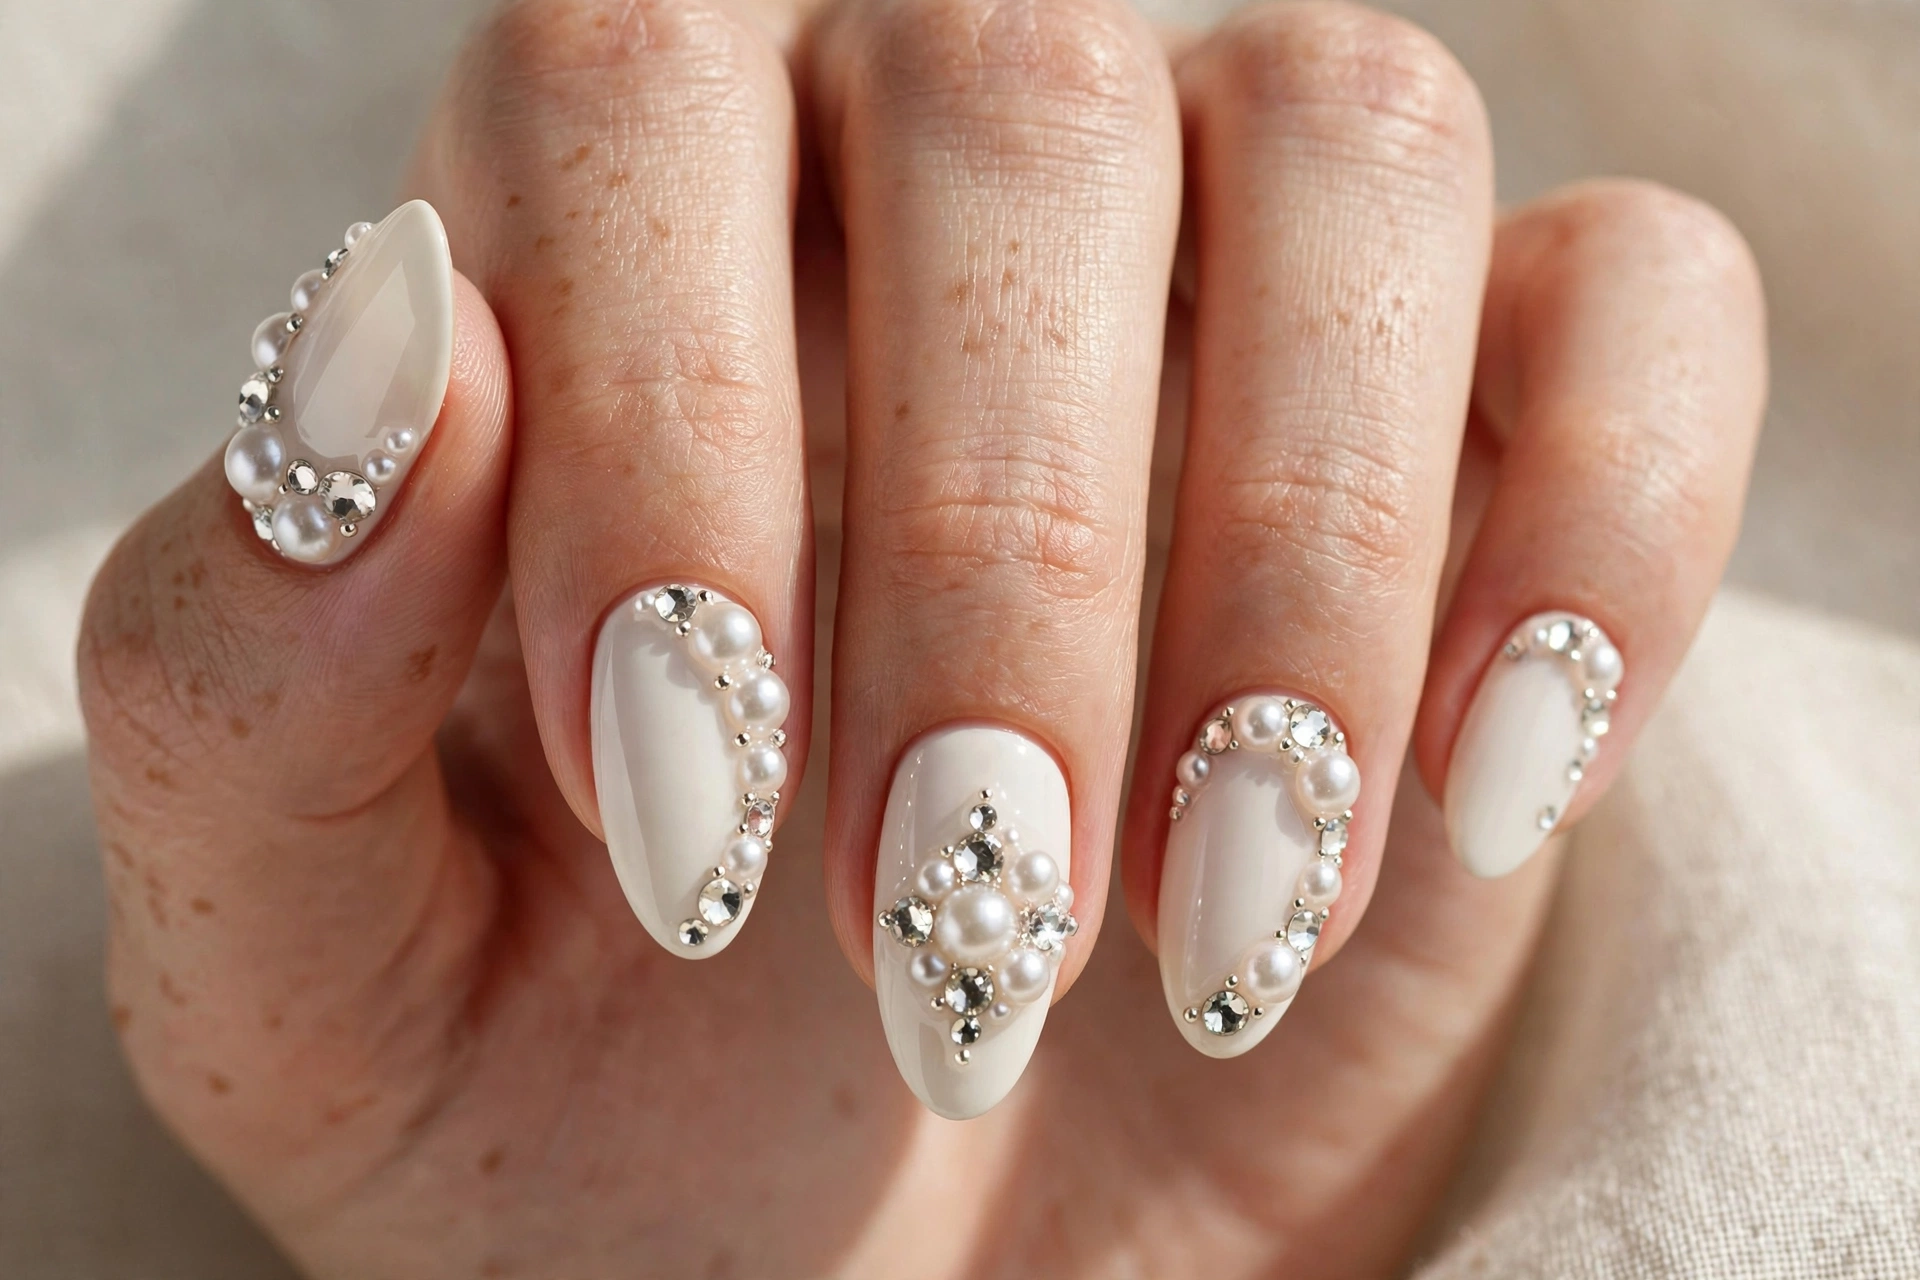
Pearls and rhinestones take nail art into jewelry territory — tiny pearls, crystals, and studs arranged on a nude or blush base. This is the design for weddings, proms, and celebrations where the nails should sparkle as much as the outfit. It suits people who love accessorizing and do not mind a little extra care. The key is strong adhesion: place each stone with a wax pencil into a dot of nail glue or builder gel, then cure or let it dry completely before sealing the edges (not the tops) with top coat so the stones keep their shine. Keep the arrangement to two or three stones per nail — restraint reads expensive. They can catch on hair and fabric, so plan this design for the event week, not everyday wear.
17. Celestial Stars and Moons
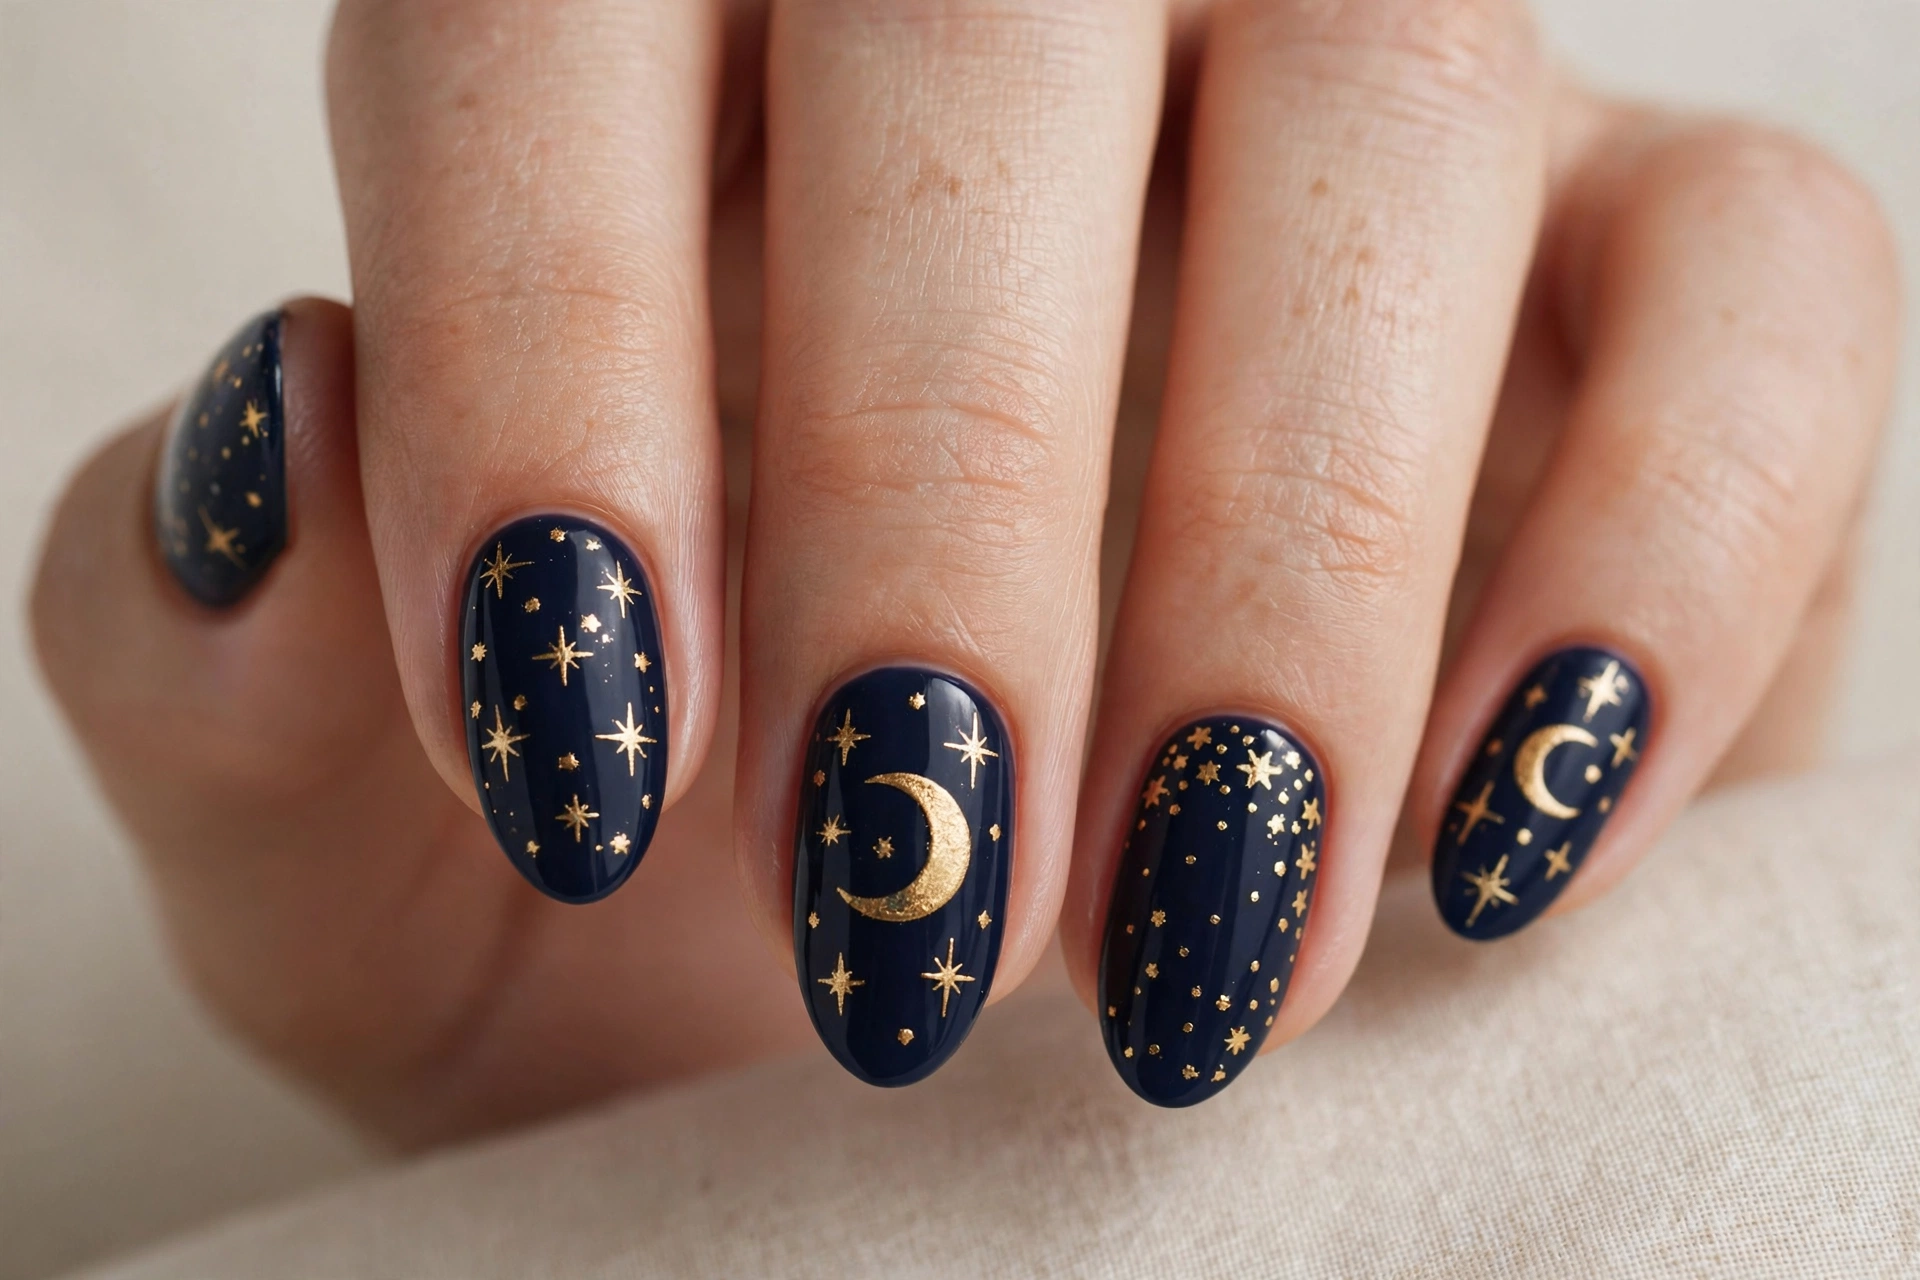
Celestial nails are midnight magic — tiny gold stars, crescent moons, and dots scattered over deep navy, black, or midnight purple. The design feels dreamy and mystical without being childish, and it suits night owls, astrology lovers, and anyone drawn to the night sky. Short and medium nails work well; the dark base makes the shapes pop at any length. Paint two coats of your dark base, then add the stars and moons with a thin brush in metallic gold, or use celestial nail stickers for crisp, uniform shapes — there is no shame in a shortcut. Finish with a glossy top coat to give the dark base that glossy, starlit depth. It is a natural pick for evening events and looks stunning paired with silver jewelry.
Nail Art Care and Longevity Tips
Good nail art deserves a long life. Start by capping the free edge of every nail with your top coat — that thin strip along the tip is where chips begin, and sealing it buys you days. Reapply a thin layer of top coat every two or three days to refresh the shine and protect the design underneath.
Be kind to your hands between manicures. Wear gloves for dishes and cleaning, since hot water and chemicals soften polish fast. Keep cuticle oil by the sink and use it daily; hydrated cuticles frame the art and stop peeling at the edges. A solid beginner routine can start with this nail polish kit, which covers the basics like base coat, top coat, and a good range of colors. As an Amazon Associate, this site may earn a small commission if you purchase through that link, at no extra cost to you. And when it is time for a change, remove polish gently with non-acetone remover on glitter-free designs — your nails will thank you.
Finally, give your nails rest weeks. A few days bare between sets, with just cuticle oil, keeps them strong and prevents yellowing from dark colors. Healthy nails hold art better, and the designs last longer on a smooth, cared-for surface.
Saving these seventeen designs and rotating through them through the seasons means your nails never get boring. Whether you go for the timeless French tip, the playful leopard print, or the midnight drama of celestial stars, there is a look here for your mood today and a new one to try next week. Pick your favorite, book the appointment or pull out your polishes, and enjoy the little ritual — good nails really do make everything feel a touch more put together.