10 Easy Halloween Designs for Nails (Simple, Spooky & Beginner-Friendly)
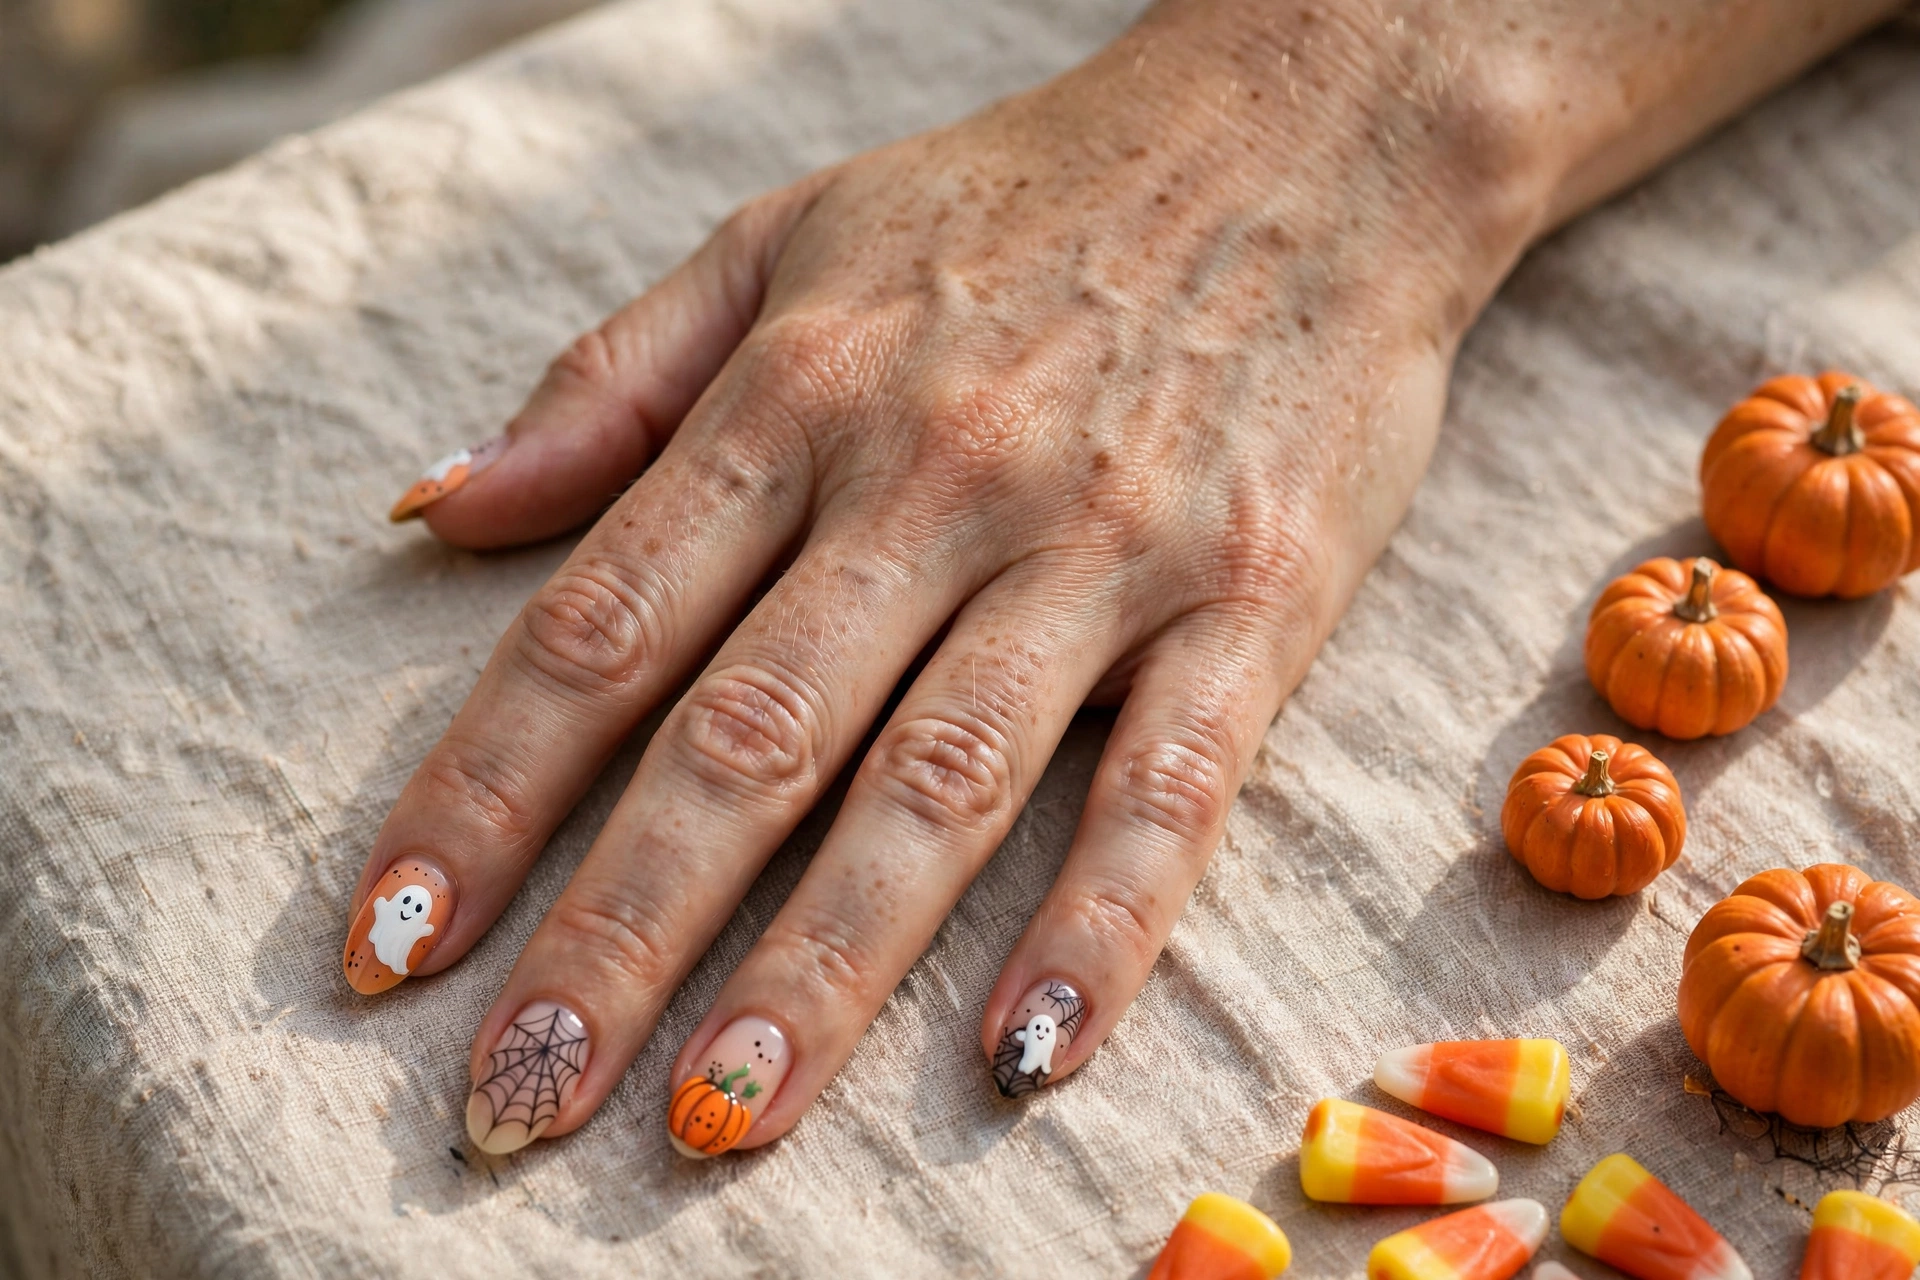
Halloween nails don’t have to mean hours of tiny detail work or a steady hand you don’t have. These easy Halloween designs for nails are made for real life: quick to paint, forgiving of wobbly lines, and cute enough that people will ask where you got them done. Whether you’re heading to a costume party, handing out candy, or just love October, there’s a simple spooky design below that fits your skill level. If you want bolder, more dramatic ideas too, take a look at our spooky and chic Halloween nail designs — but for quick, doable art you can finish in one evening, start here. Even as a total beginner, you’ll finish any of these ten looks with supplies you probably already own, and most of them dry fast enough to wear the same night you paint them.
Why You’ll Love These Easy Halloween Nail Designs
The best part about easy Halloween nail designs is that most of them use only two or three polish colors and one simple trick — a dot, a stripe, or a sponge. No salon visit, no expensive stamping plates, and no art degree required. Many of these looks are actually better when they’re a little imperfect: a lopsided ghost or a crooked spider web just adds to the handmade charm. They’re also perfect for pairing with your autumn wardrobe — several of these colors overlap nicely with our cozy fall nail designs, so your manicure works for the whole month, not just October 31st. grab your base coat, a toothpick or dotting tool, and let’s get painting. Keep a cotton swab dipped in polish remover handy for cleanup — it’s the secret weapon that makes every design below look neat, even when your lines wobble.
1. Friendly Ghost Faces
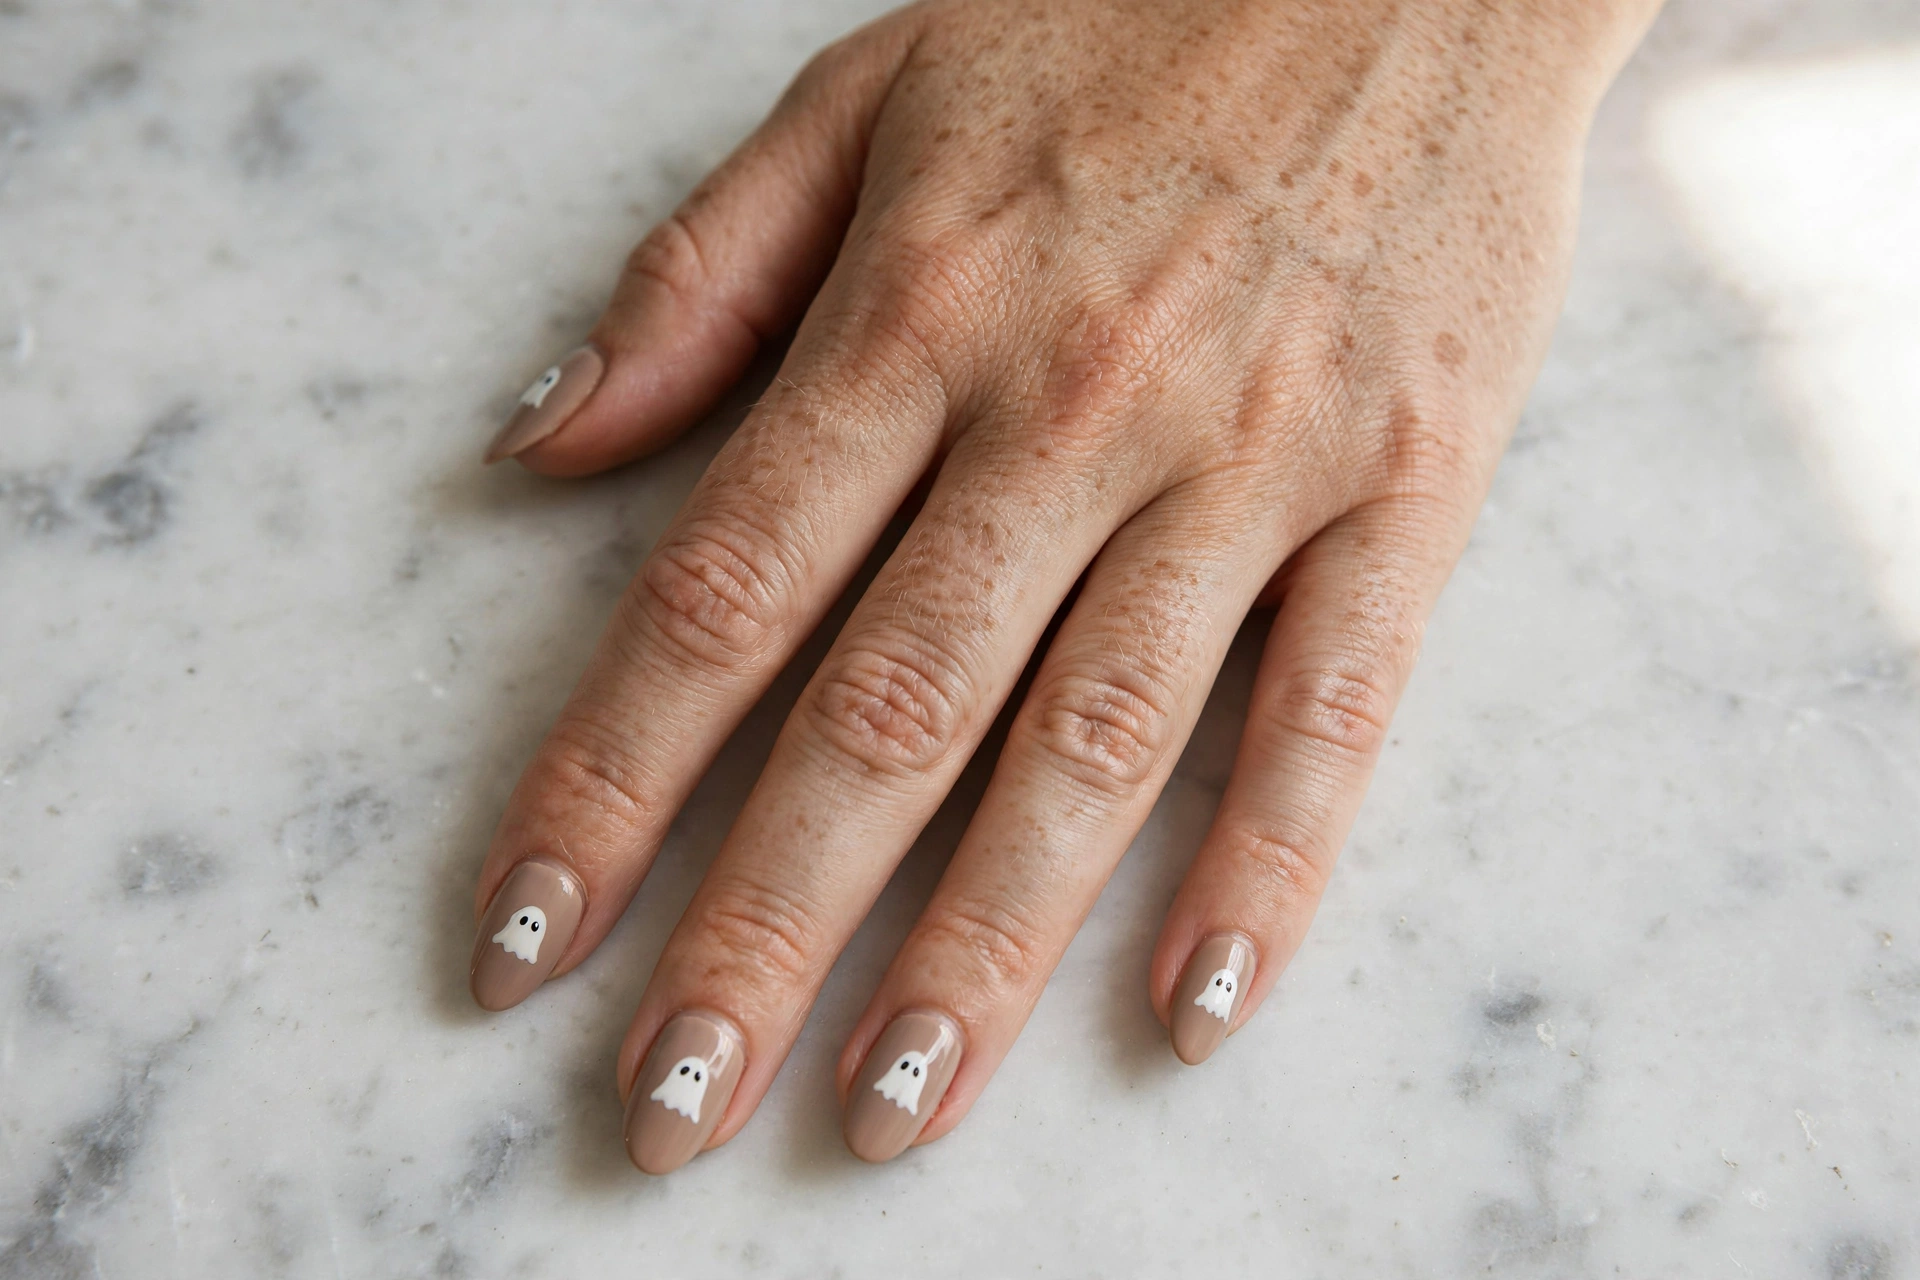
Nothing says Halloween like a little ghost, and this is genuinely the easiest design on the list. Paint your nails a soft nude or pale grey, then dab a blob of white polish near the tip with the brush — it doesn’t need to be a perfect shape. Add two tiny black dots for eyes and a small oval mouth with a toothpick dipped in black polish. That’s it. The charm of this look is its simplicity: each ghost comes out slightly different, which makes the whole manicure look playful rather than sloppy. It works on short nails, long nails, and every shape in between, and it dries fast since you’re only doing one or two layers. Do a ghost on every nail for maximum cuteness, or keep it to an accent nail or two if you want something more subtle for everyday wear. Either way, this is the design to start with if you’ve never done nail art before — you can have all ten nails finished in under twenty minutes, and they look adorable with any Halloween costume or a cozy autumn sweater.
2. Delicate Spiderweb Corners
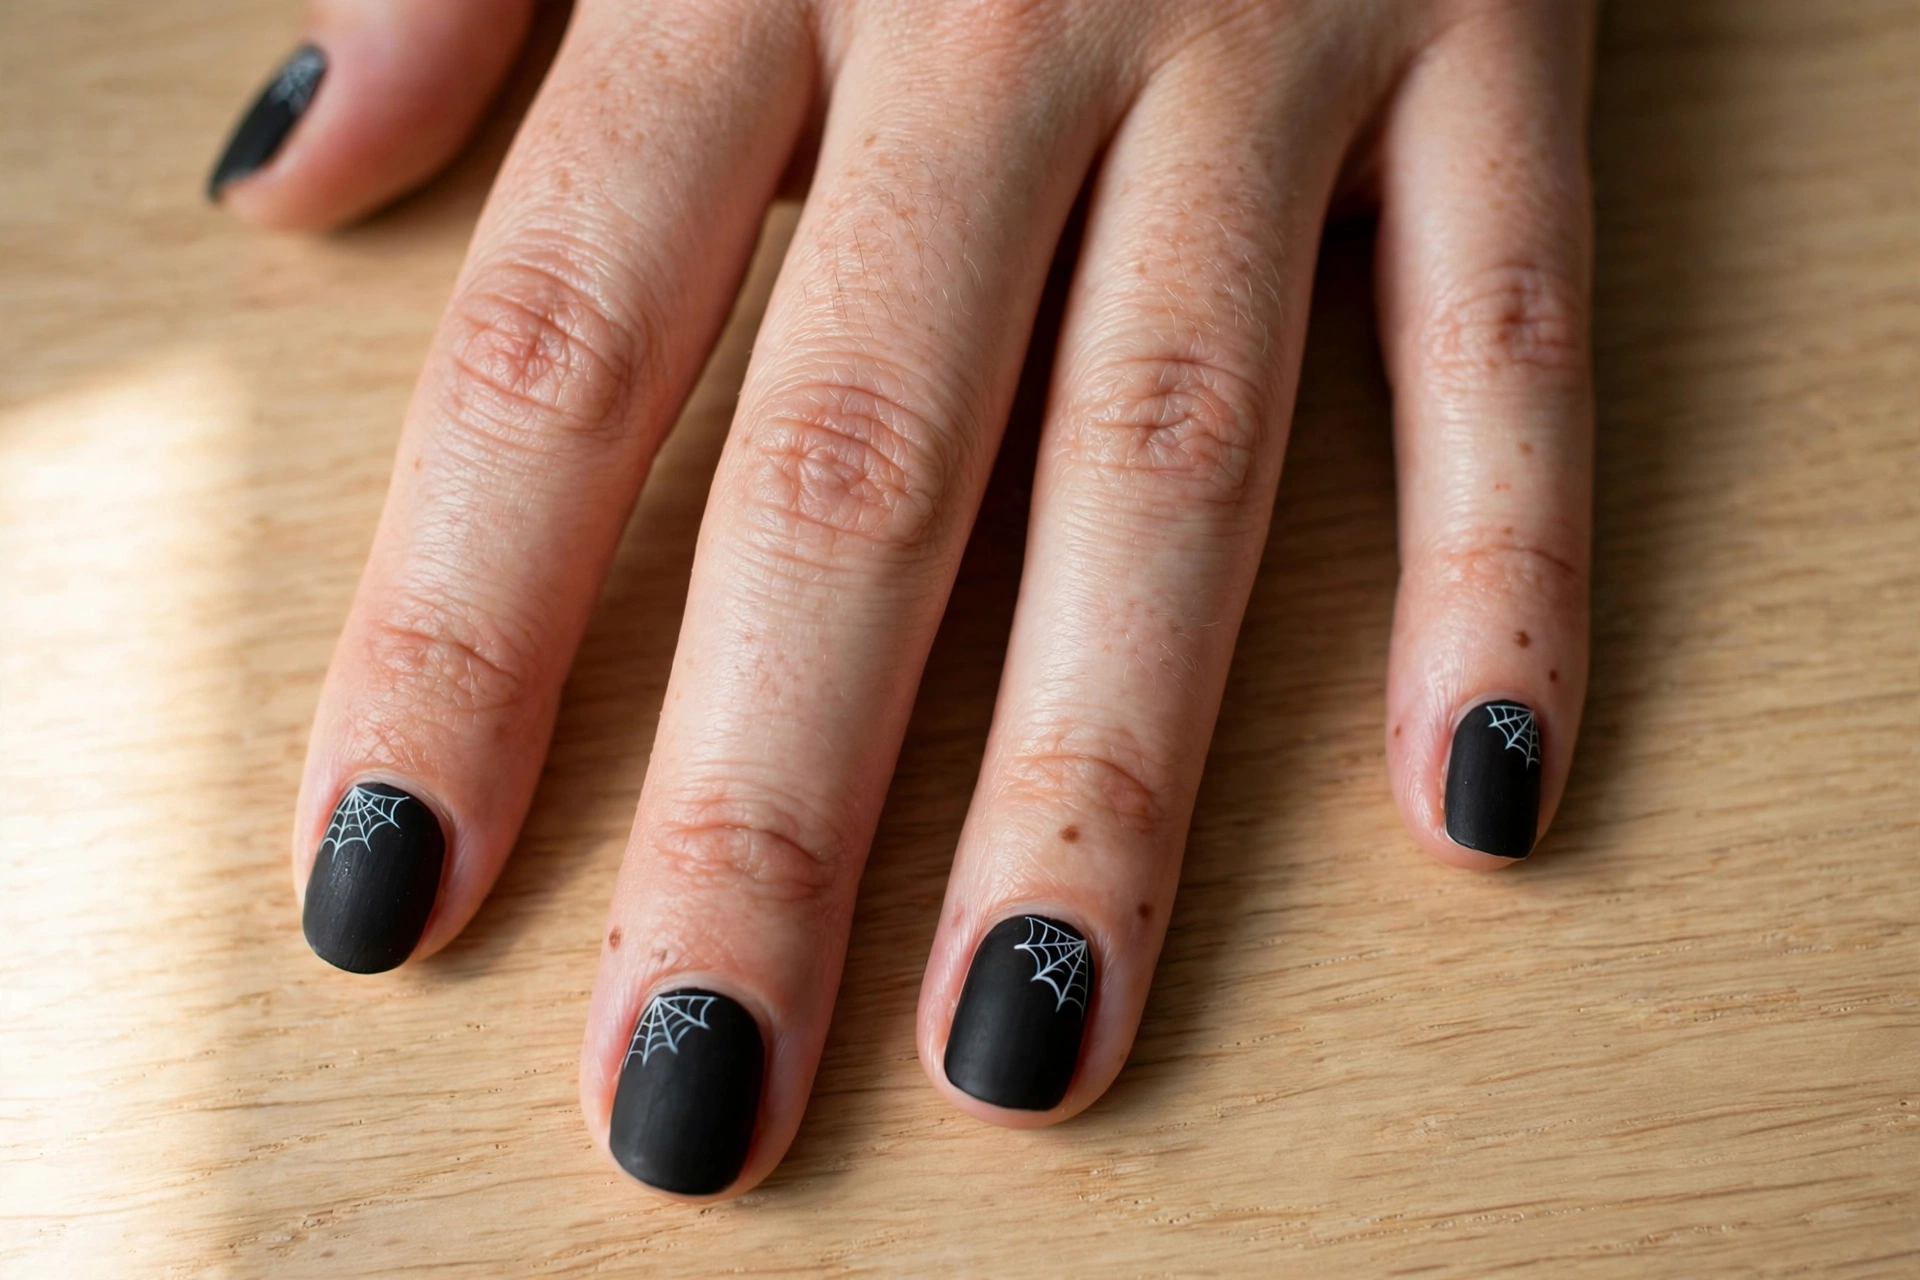
Spiderwebs look complicated, but they’re really just straight lines and arcs. Start with a matte or glossy black base. Then, using white polish on a thin brush or a toothpick, draw three or four lines fanning out from one corner of the nail. Connect them with small curved arcs, like a slice of pie with curved edges. Tuck the web into just one corner of each nail rather than covering the whole nail — it reads as elegant, not busy. If you want to level it up, add a tiny spider (a black dot with thin legs) on one accent nail. Black and white is a classic Halloween combo that photographs beautifully. A nail art pen set with fine tips makes the web lines even easier to draw, since the thin applicator gives you far more control than a regular polish brush.
3. Candy Corn Gradient
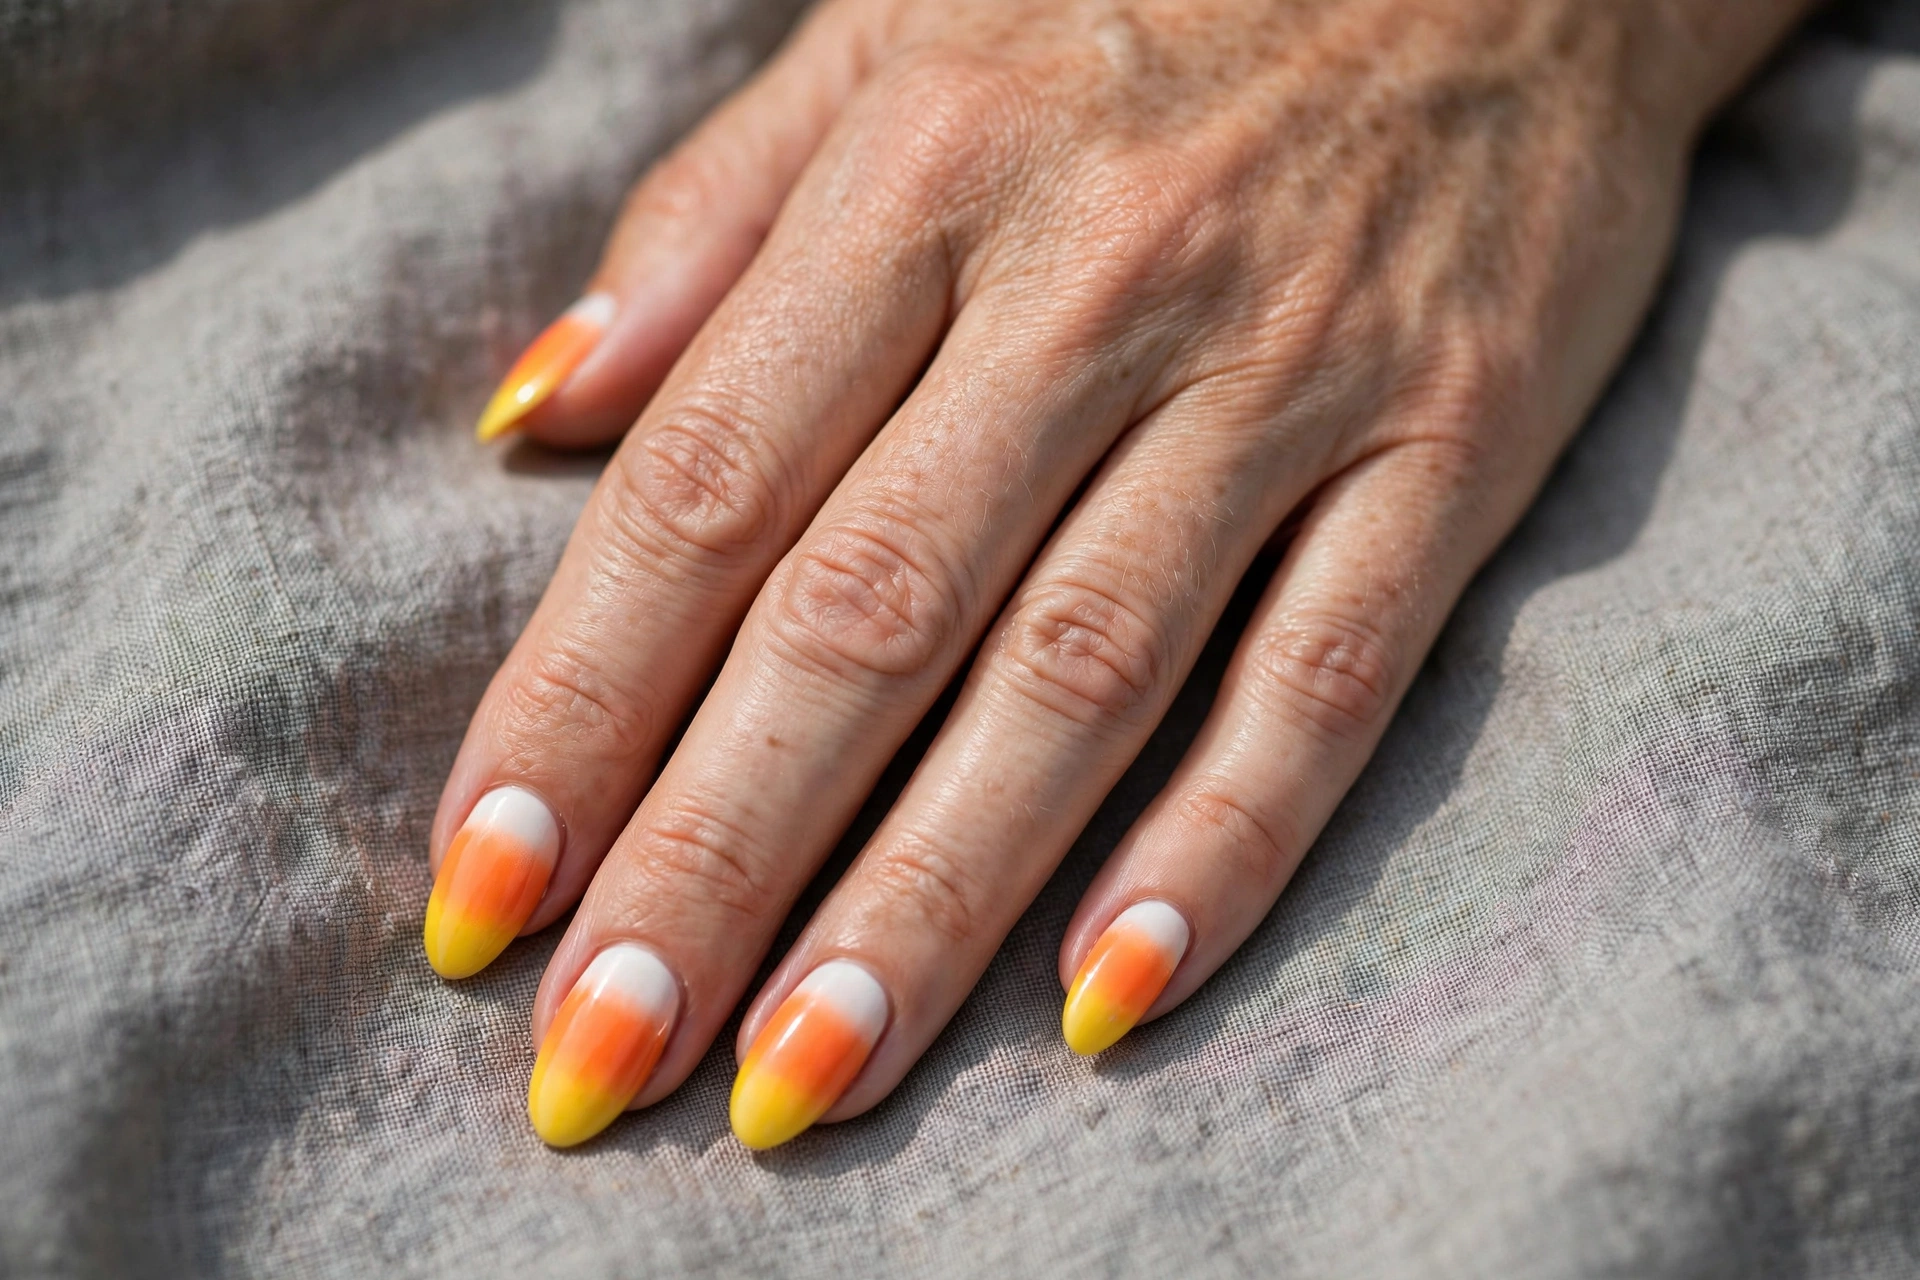
Candy corn is the official candy of Halloween, and this gradient version is almost impossible to mess up. Paint the whole nail white first and let it dry. Then, using a small makeup sponge, dab orange polish across the middle third and yellow across the tip third, blending where they meet. The sponge does all the blending work for you — no steady hand needed. Seal it with a glossy top coat and the colors melt together like the real thing. This design looks sweet rather than scary, which makes it great if you want festive nails that still feel wearable at the office or school. For a cleaner edge, paint liquid latex or plain tape around your cuticles before sponging, then peel it away when you’re done — the gradient will look crisp with zero cleanup.
4. Mini Pumpkin Accents
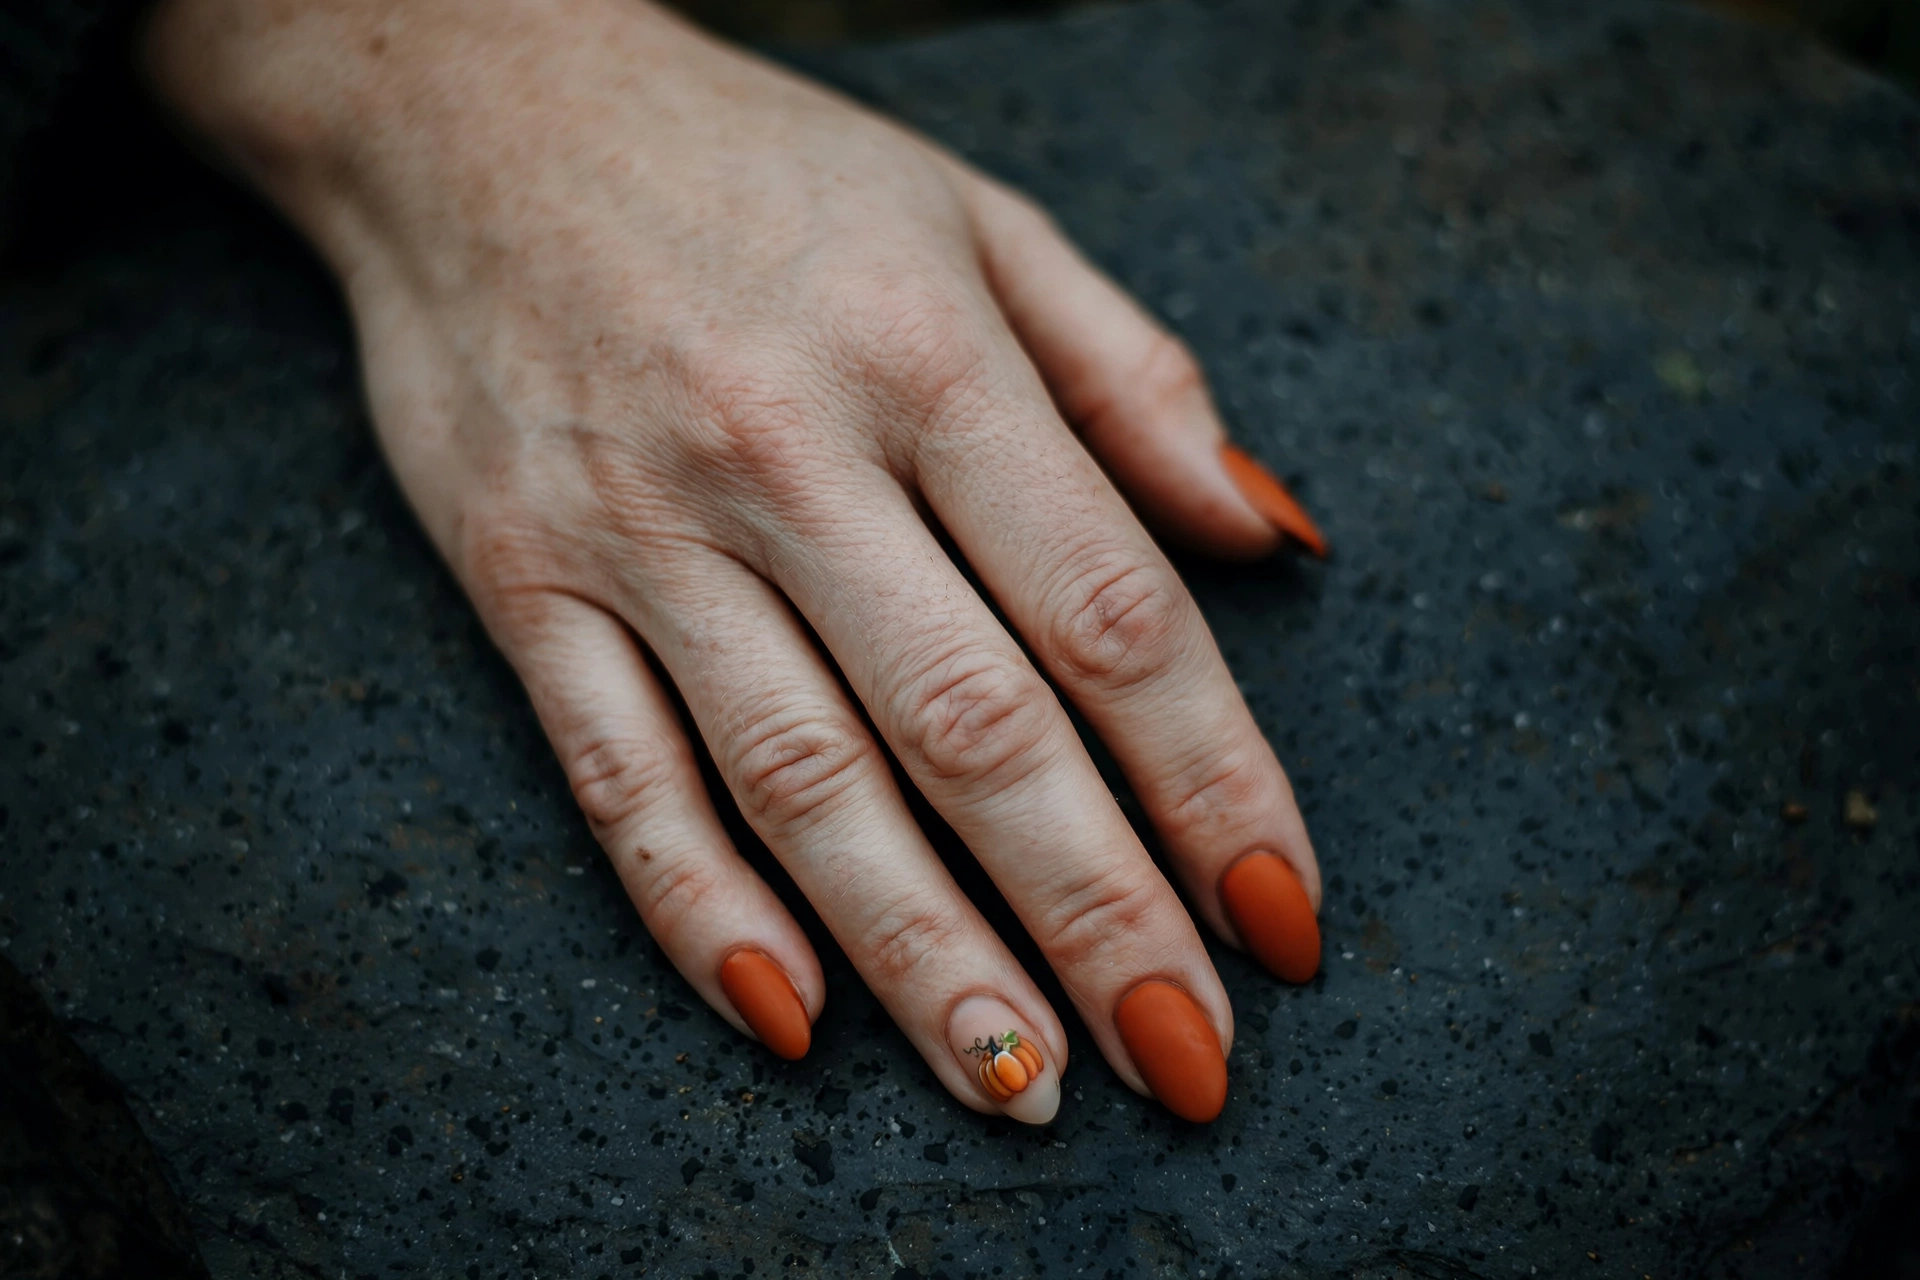
Paint all your nails a rich pumpkin orange, then pick one or two accent nails to decorate. For the pumpkin, dab a small orange oval near the cuticle, add a short green line for the stem, and you’re done — it genuinely looks like a pumpkin at this scale. If you want a jack-o’-lantern, add two triangle eyes and a zigzag mouth with black polish on a toothpick. Orange is one of the most flattering Halloween colors, and this design transitions beautifully into November, especially alongside our cozy Thanksgiving harvest nail designs. Try a matte top coat over the orange for a modern, velvety finish, or keep it glossy for that classic shiny pumpkin look. Either finish works with the little hand-painted pumpkins, and the whole set takes barely half an hour from base coat to top coat.
5. Black Cat Silhouette
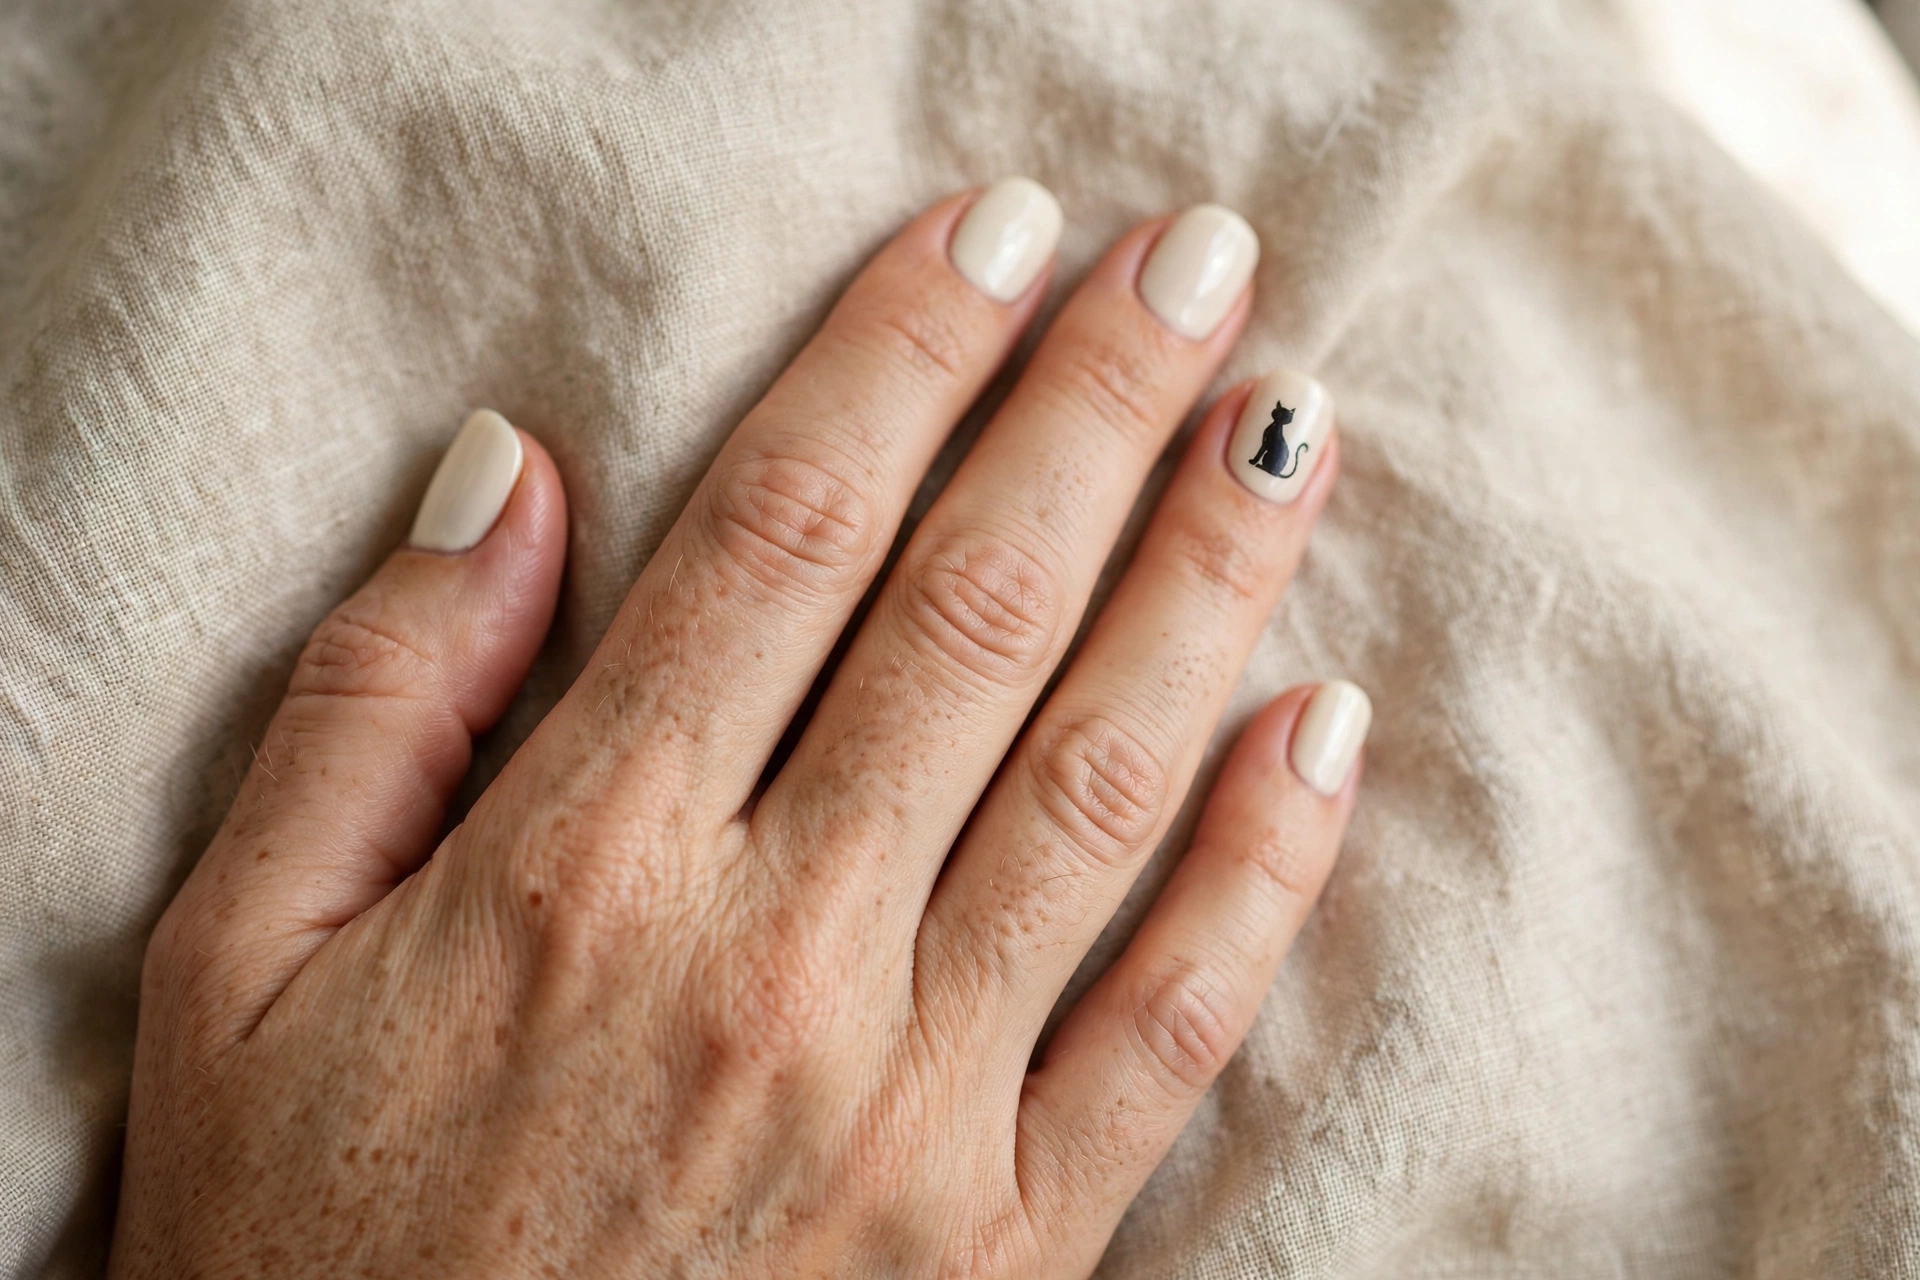
A black cat silhouette sounds advanced, but at nail scale it’s just a few simple shapes. Keep the rest of your nails a soft cream or beige, and on one accent nail paint a simple cat shape: a round body, a circle head, two triangle ears, and a curved tail. A toothpick dipped in black polish gives you enough control for this — think of it as drawing a cartoon, not a portrait. Yellow dot eyes make it instantly recognizable and add a fun pop. This one gets compliments every single time, and it’s simple enough to redo if you smudge it. If freehanding a cat feels intimidating, start with just the ears and tail on a curved black arc — even an abstract cat silhouette reads clearly at this size. Pair it with solid black nails on the other fingers for a sleek, coordinated look that stays wearable all October.
6. Bat Silhouette Tips
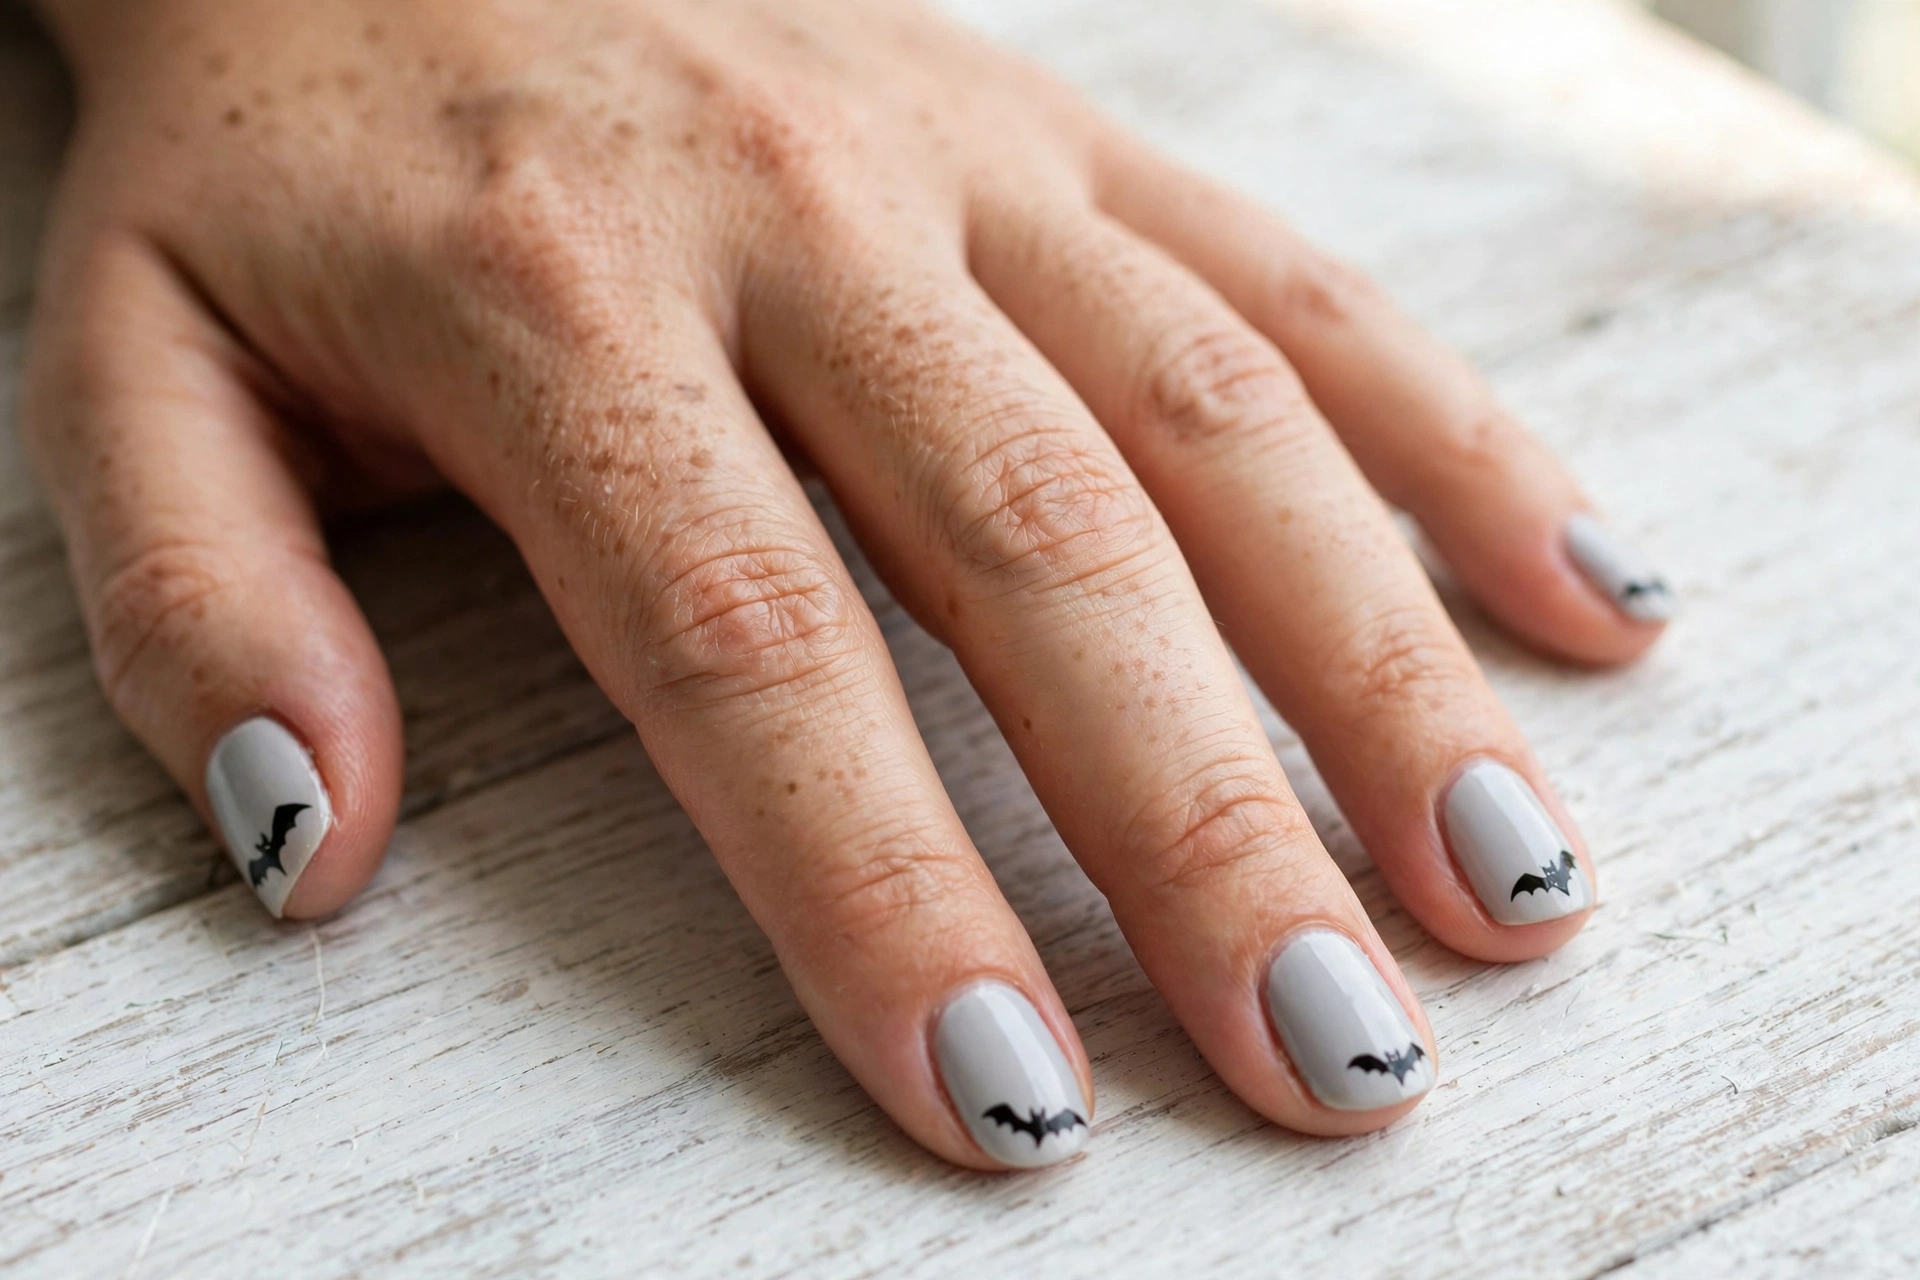
Bats are a Halloween staple, and tiny bat silhouettes are surprisingly easy to paint freehand. Use a pale grey or soft lilac base, then paint small bat shapes across the tips: two connected humps for the wings and a tiny body in the middle. Don’t overthink the shape — from a few feet away, any dark winged blob reads as a bat. Vary the size and position on each nail so it looks like a flock flying across your fingertips. This design is subtle enough for everyday wear through October but unmistakably Halloween. For extra dimension, use a deep plum or navy base instead of grey — the darker background makes the little black bats pop, and it gives the whole manicure a moodier, night-sky feel without any extra effort. Try painting a couple of bats mid-flap with slightly raised wings on your ring fingers to suggest motion, and keep the rest of the nails simpler for balance.
7. Black and Orange Polka Dots
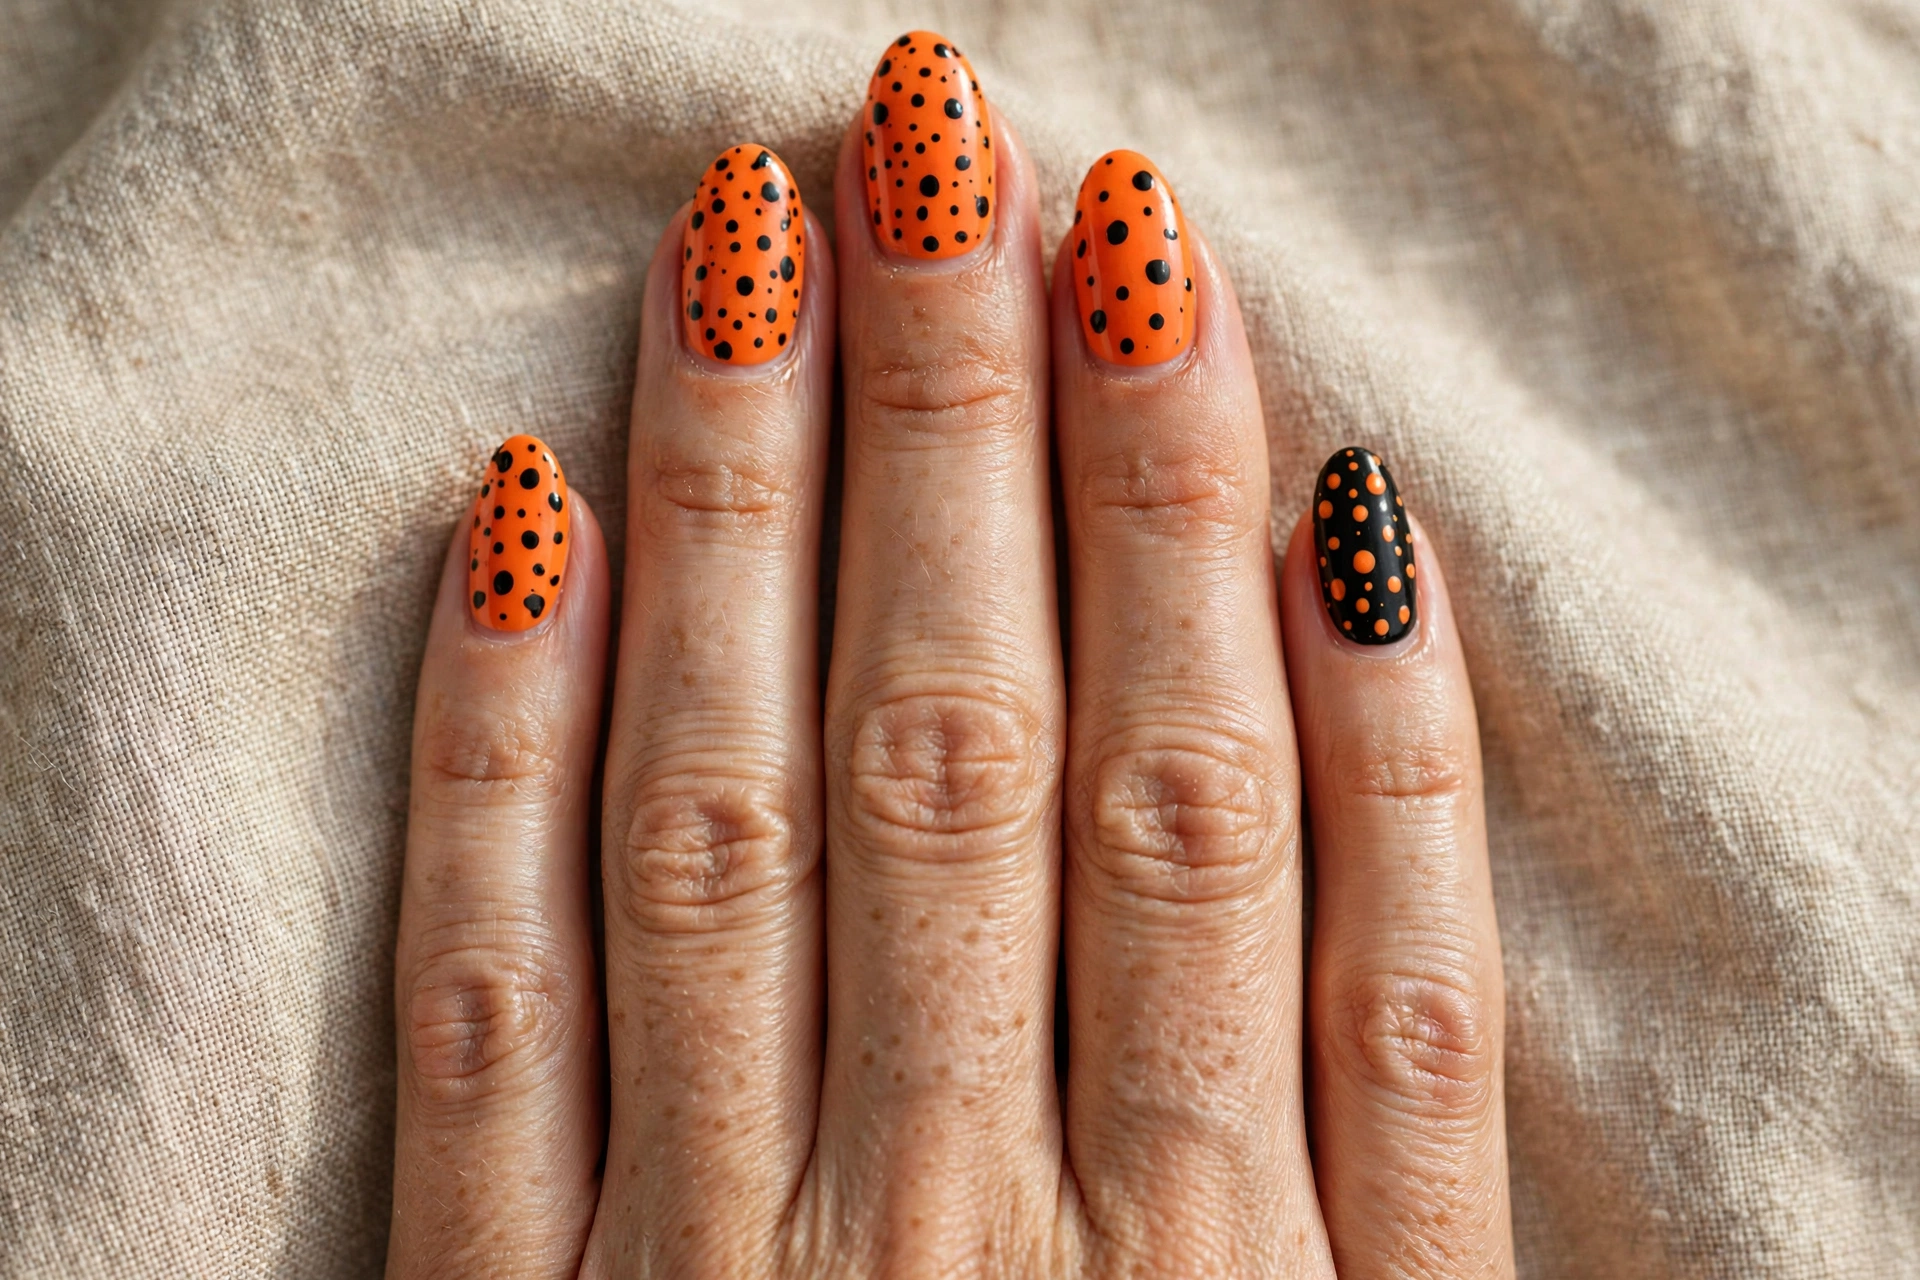
Polka dots are the ultimate beginner nail art — and in black and orange, they’re instantly Halloween. Paint your nails orange, then dip the round end of a bobby pin or the tip of a pencil eraser into black polish and stamp dots across each nail. Vary the sizes for a playful look, or keep them uniform for something cleaner. You can flip the colors on accent nails (black base, orange dots) for contrast. This design takes minutes, needs no drawing at all, and the dotted texture hides any base-coat streaks. It’s cheerful, festive, and perfect if you prefer cute Halloween over creepy. To keep the dots crisp, let the orange base dry fully before stamping, and press straight down rather than dragging — you’ll get clean, round dots every time.
8. Mummy Wrap Stripes
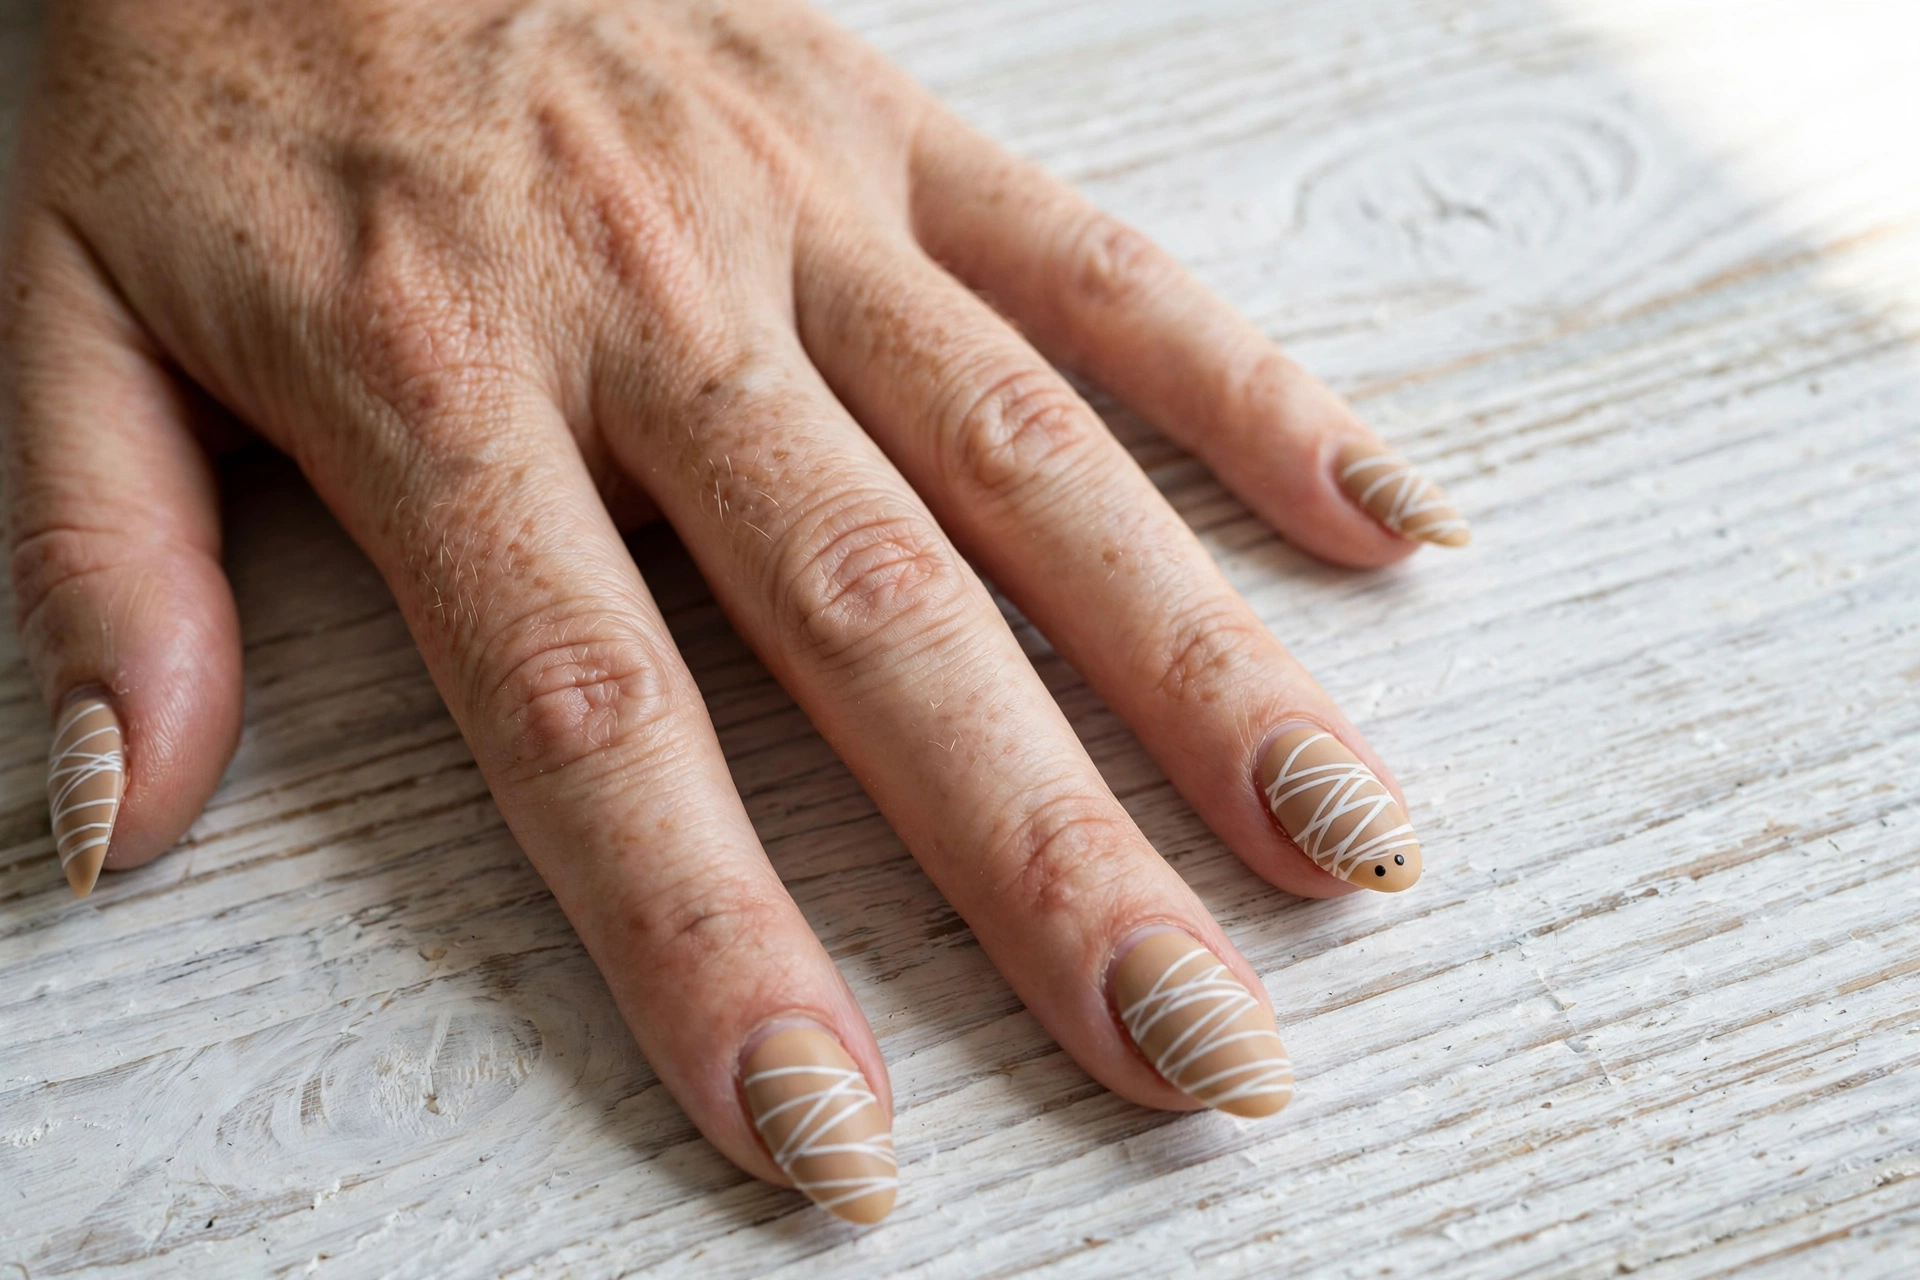
Mummy nails are just stripes, and stripes are the easiest nail art there is. Paint your nails a warm beige or off-white, then wrap thin horizontal and diagonal white stripes across each nail, leaving tiny gaps of the base color showing through like bandage layers. Add two small black dots near the top of one nail for peeking mummy eyes. The stripes don’t need to be straight — mummy bandages are messy by nature. This is a great design for beginners because there’s genuinely no wrong way to do it. Use a striping brush or a toothpick for the lines, and don’t stress about overlapping them — the layered, wrapped look is exactly what makes mummy nails convincing. Seal everything with a matte top coat rather than glossy — a flat finish makes the wraps look like real cloth, and it hides brush strokes better too.
9. Purple to Black Ombre
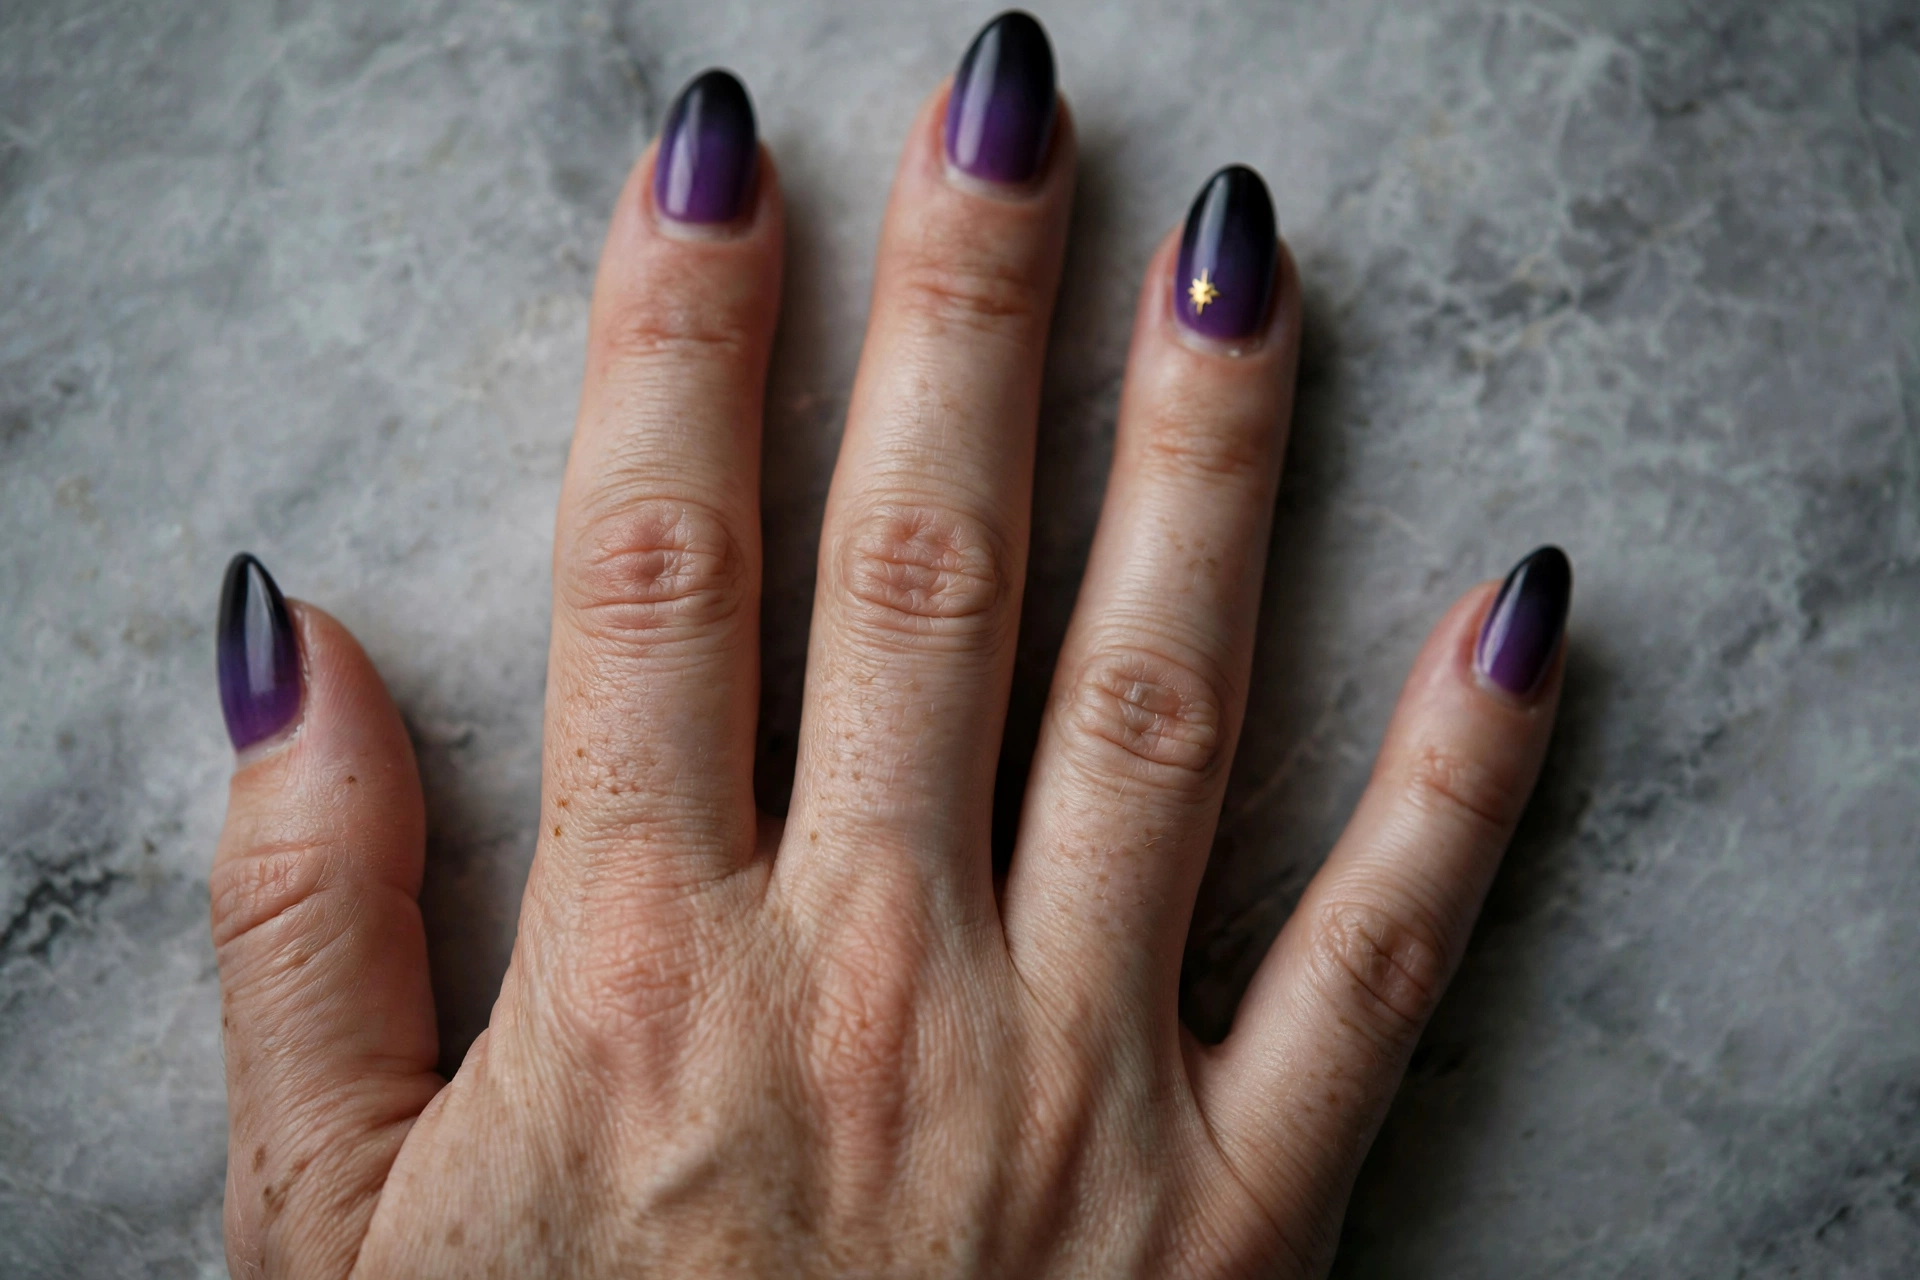
Ombre nails look like a salon job, but the sponge technique makes them beginner-friendly. Paint your nails deep purple, then use a makeup sponge to dab black polish from the tips downward, fading it into the purple. Two or three light dabs build the gradient without any skill required. This moody, witchy gradient is Halloween-perfect on its own, and you can add a single gold star sticker or dot on an accent nail for a night-sky effect. It’s elegant enough for a Halloween dinner party and dark enough for a costume. The key to a smooth ombre is building it in thin layers — dab, let it set for a minute, then dab again rather than loading up the sponge all at once. Finish with a glossy top coat to melt the colors together seamlessly.
10. Glittery Orange Tips
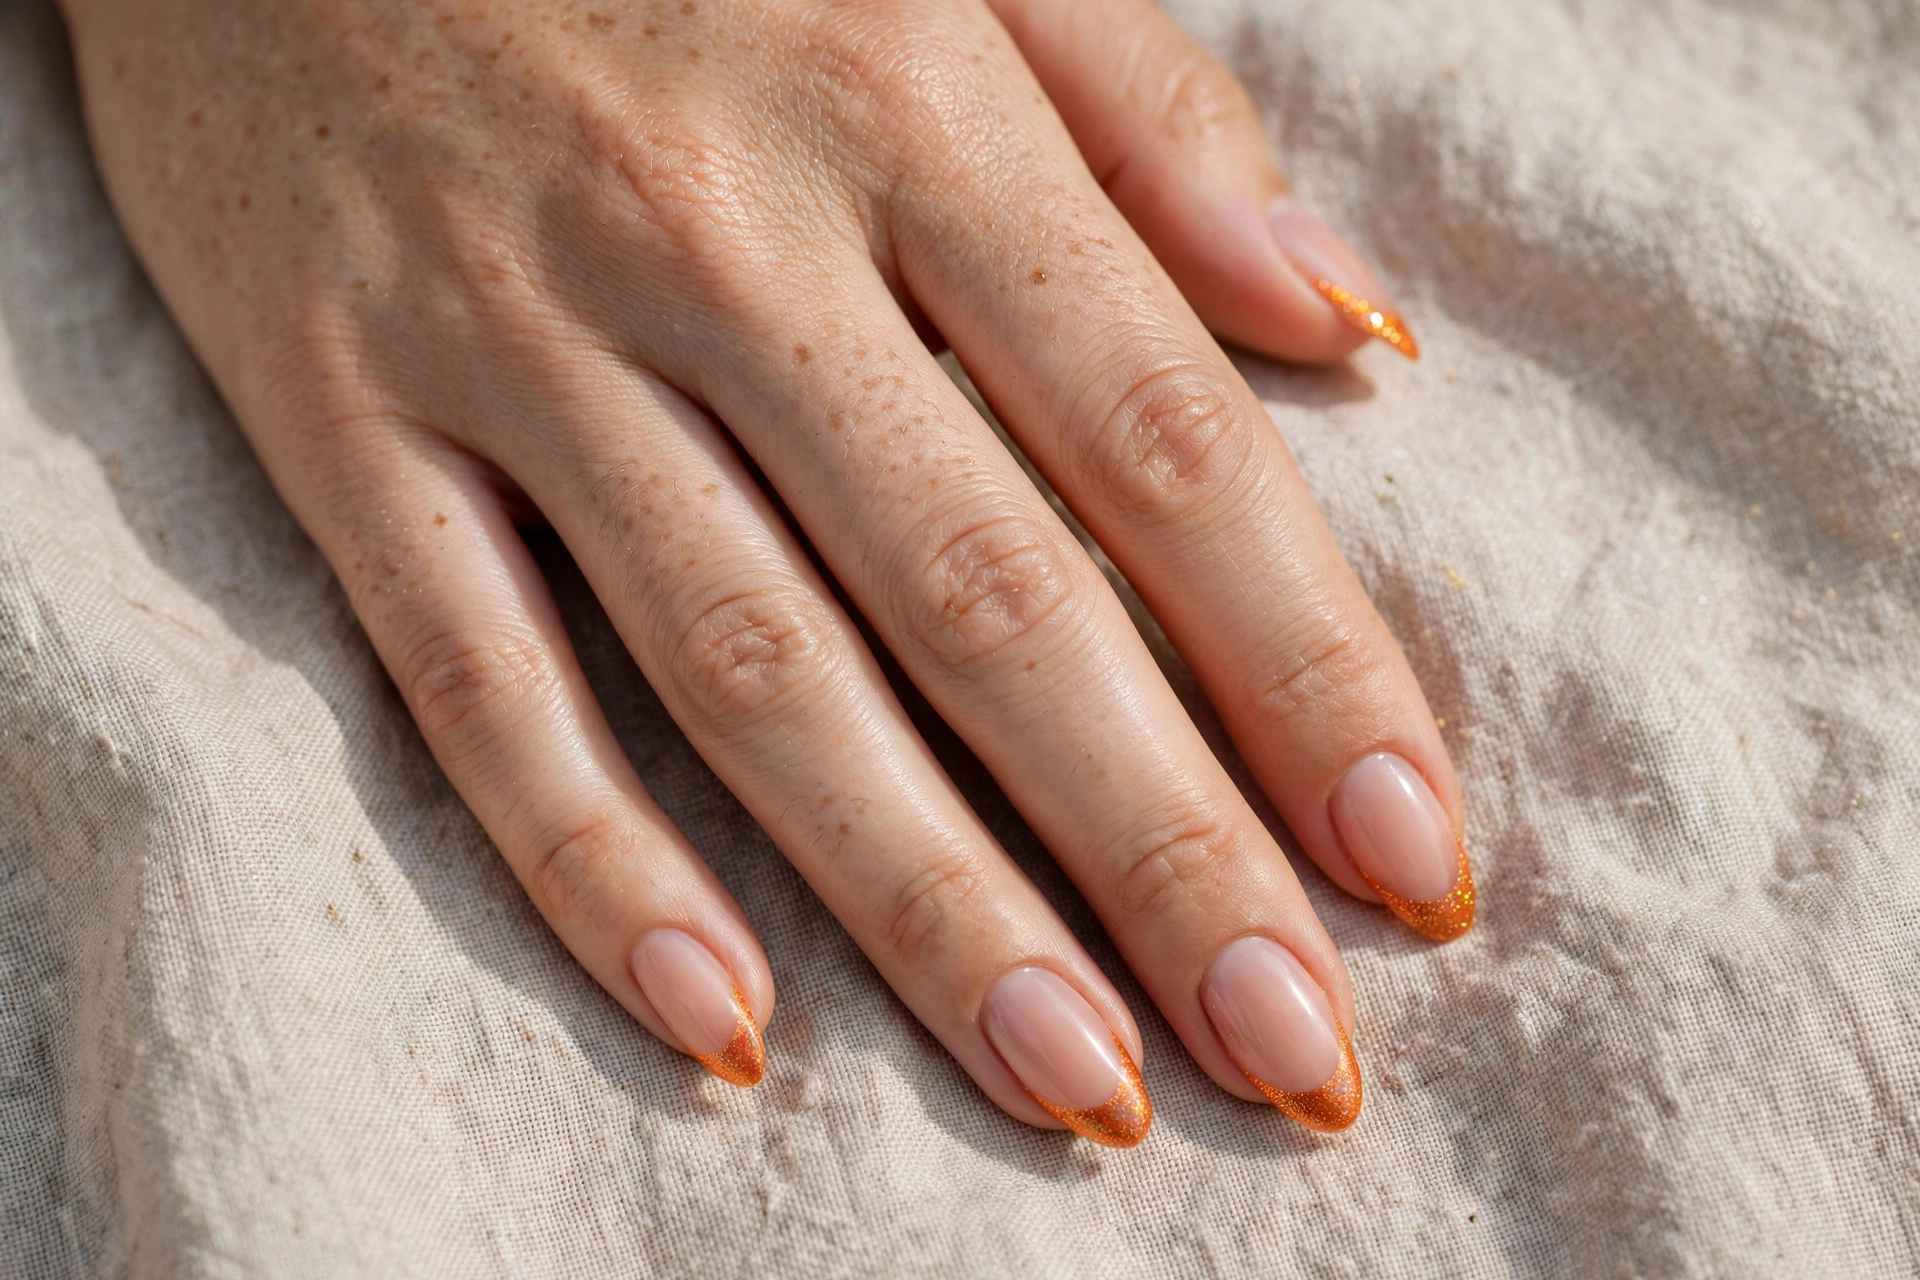
When in doubt, add glitter. Paint your nails nude or clear, then sweep glittery orange polish across just the tips in a French-manicure shape. Glitter polish is the most forgiving product in nail art — it hides uneven edges, dries quickly, and catches the light beautifully. If you want extra Halloween flair, layer a second coat of glitter only on one or two accent nails. This is the fastest design on this list, perfect for a last-minute manicure on October 31st itself. For a crisp smile line, use small pieces of tape as a guide, or just freehand it — the sparkle hides any wobble. Top it with a clear glossy coat to smooth the glitter texture and lock in the shine through the whole Halloween weekend.
Final Thoughts
Easy Halloween designs for nails prove that you don’t need professional skills to have festive, eye-catching nails. A toothpick, a makeup sponge, and two or three polish colors are enough to paint ghosts, webs, pumpkins, and stripes that look genuinely good. Start with the simplest designs — ghosts, glitter tips, and candy corn gradients — and work your way up to the little details like bat silhouettes and mummy wraps. Whichever of the ten you try first, work in thin coats, give each layer a few minutes to set, and clean up the cuticle edges with a small brush dipped in remover for that tidy, finished look. The best Halloween manicure is the one you actually finish before the party, so pick your favorite, pour something warm to drink, and enjoy painting. Happy Halloween!