20 Ideas on Nail Art for a Fresh, Creative Manicure
When your manicure starts feeling repetitive, it’s usually not the color that’s the problem — it’s the idea. Nail art gives you a way to completely change the mood of your nails without changing anything else about your routine. These ideas on nail art range from five-minute polish tricks to salon-worthy details, so there’s something here whether you do your nails at the kitchen table or in a salon chair. If you’re new to decorating your nails, these nail art design ideas are a good warm-up before you dive in.
Below you’ll find 20 different nail art looks, each with tips on who it flatters and how to actually get the result at home. Pick one, or mix and match across your nails — some of the best manicures come from combining two or three of these ideas.
Why Nail Art Is Worth the Effort
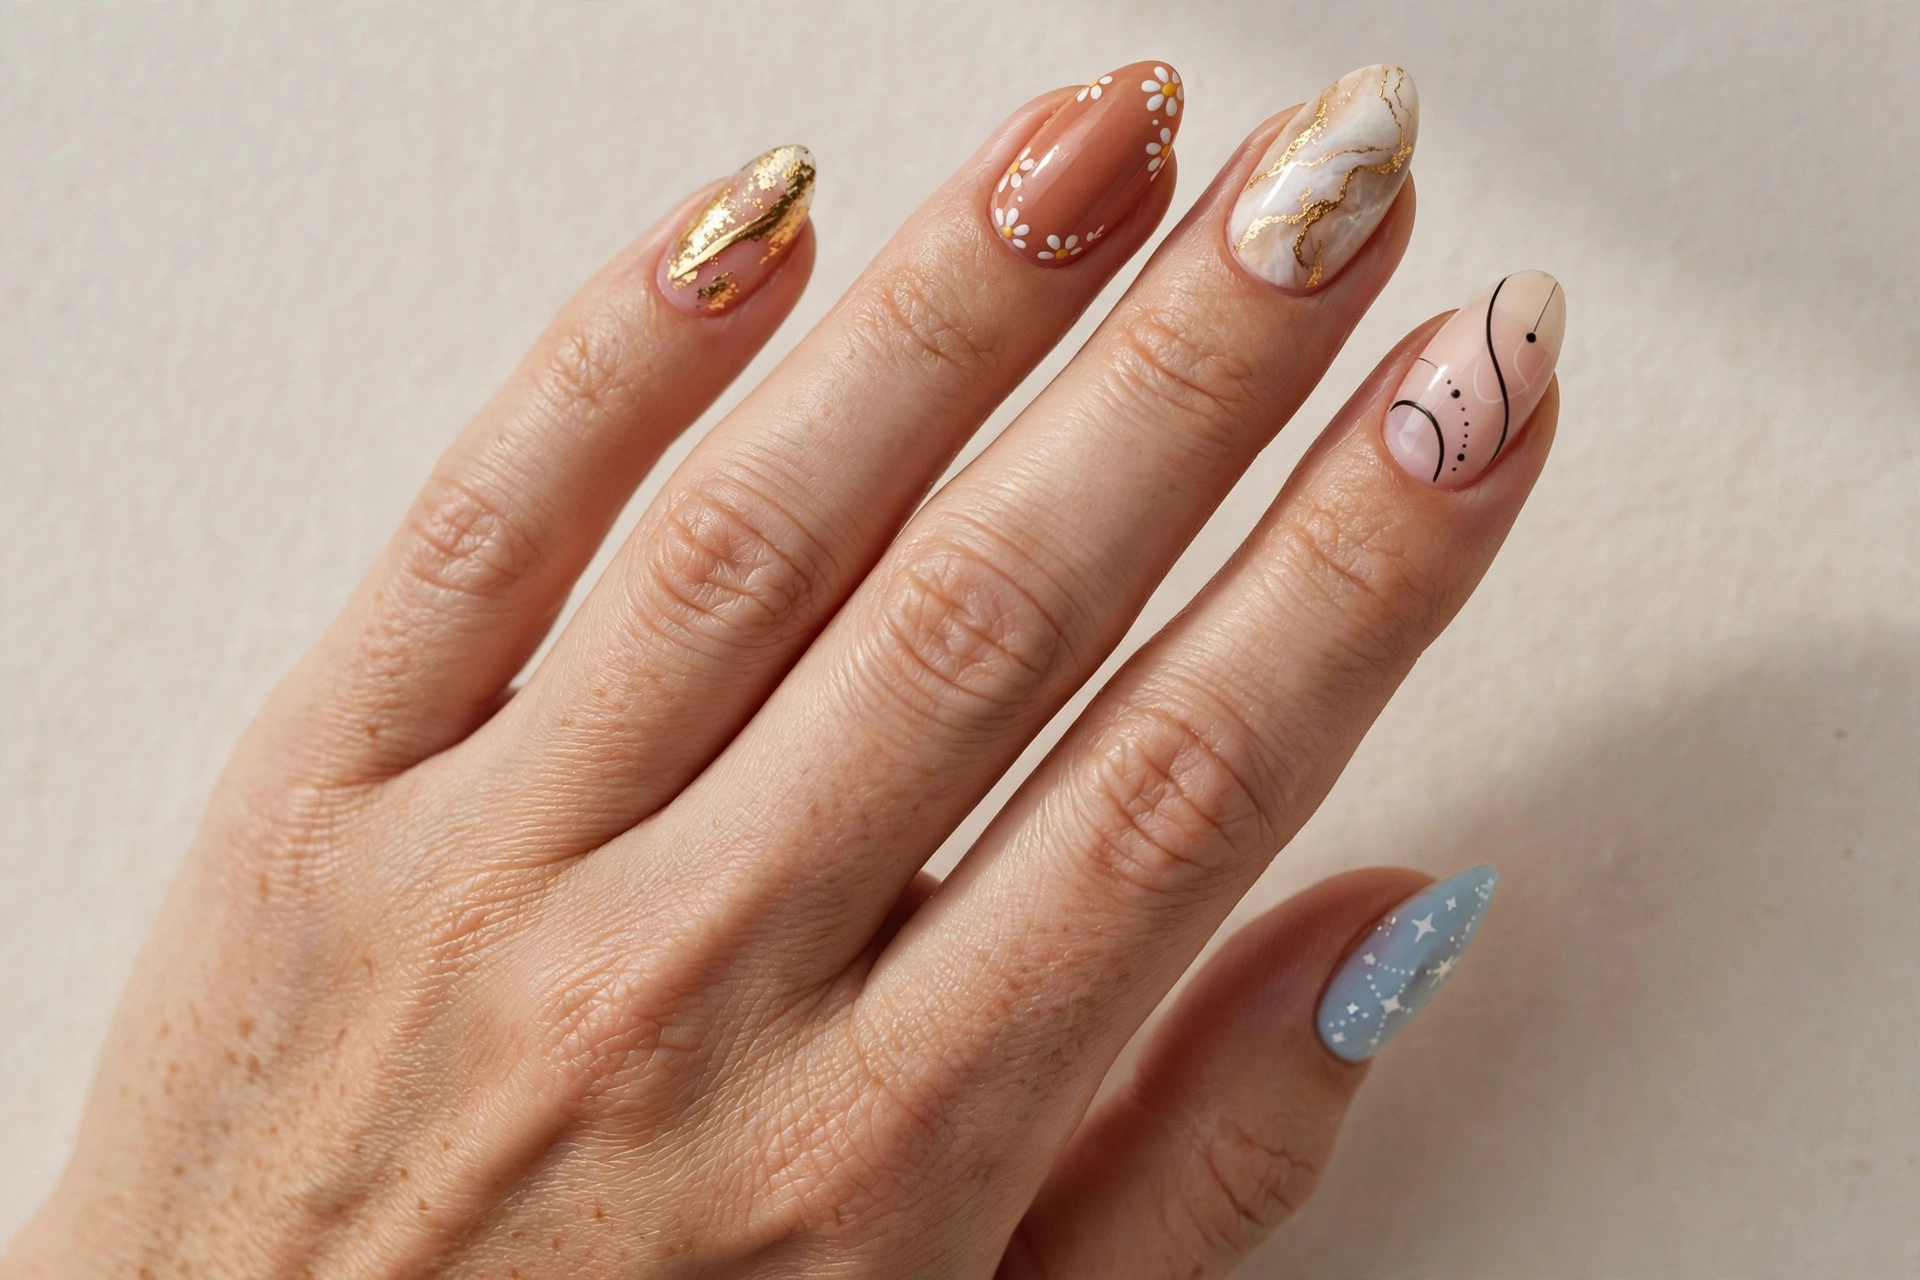
A plain polish job looks tidy, but nail art makes a manicure personal. A tiny design can make short nails look longer, draw attention away from an uneven cuticle line, or just give you something pretty to look at during a boring meeting. It’s also one of the cheapest ways to experiment with trends — a bottle of white polish and a striping brush cost less than a new outfit and get noticed more. Nail art also hides regrowth better than a solid color, since the busy design at the tip distracts from the gap at the base. Even a minimalist look like striped line nail designs can transform bare nails into something deliberate and chic with almost no effort.
1. Colorful French Tips
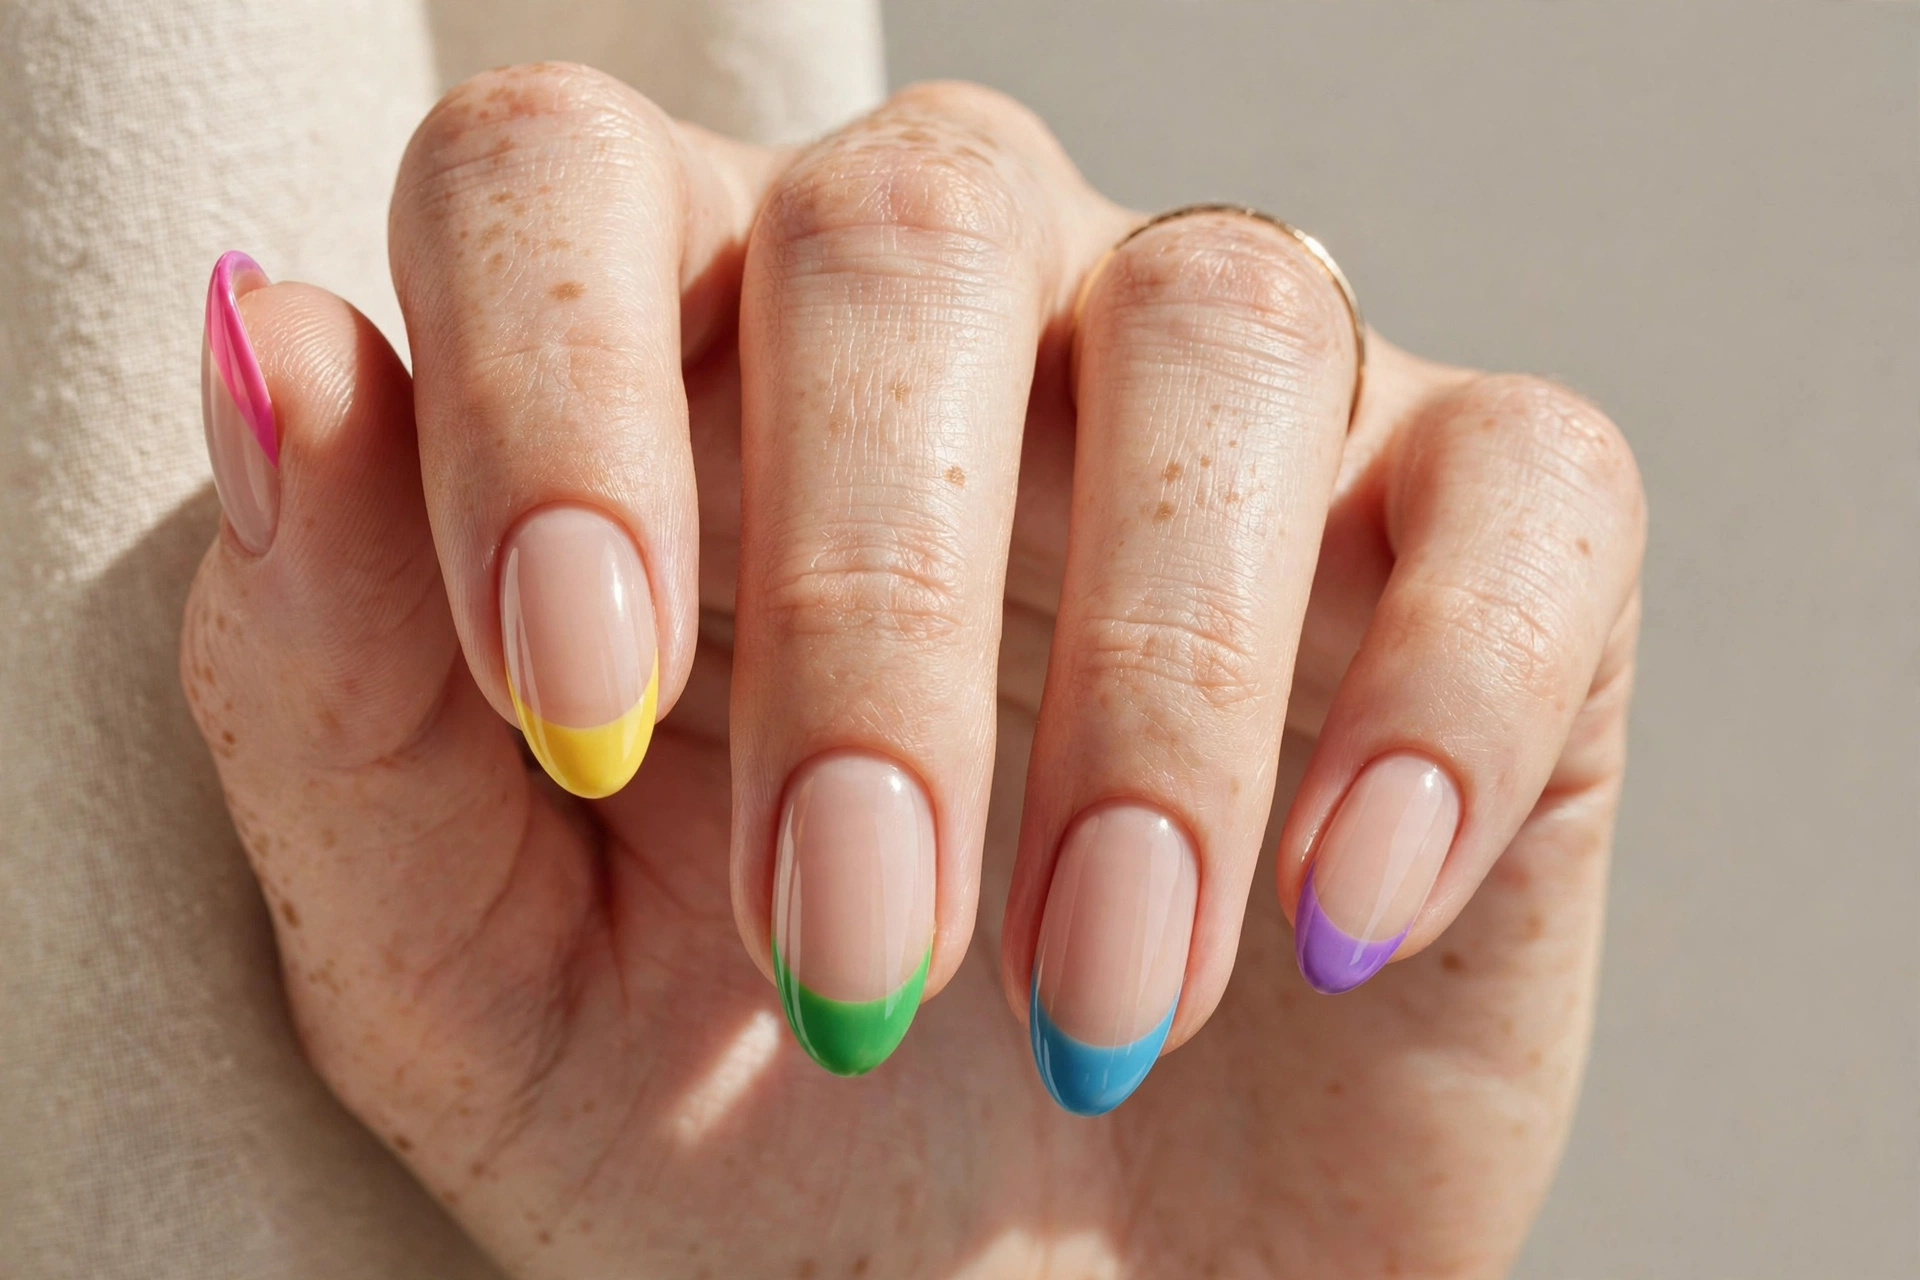
The French manicure grew up and got fun. Instead of the classic white tips, paint each tip a different bright color — coral, mint, lilac, sunny yellow — over a sheer nude base. It works on any nail length and suits anyone who wants a playful look without going full neon. To get it, paint your base coat, let it dry completely, then use the brush corner to sweep each tip in a single stroke. A thin brush helps with short nails. Clean up the edges with a flat brush dipped in polish remover before sealing with top coat. This look is especially good for spring and summer, and it makes a great festival manicure.
2. Pink Ombre Fade
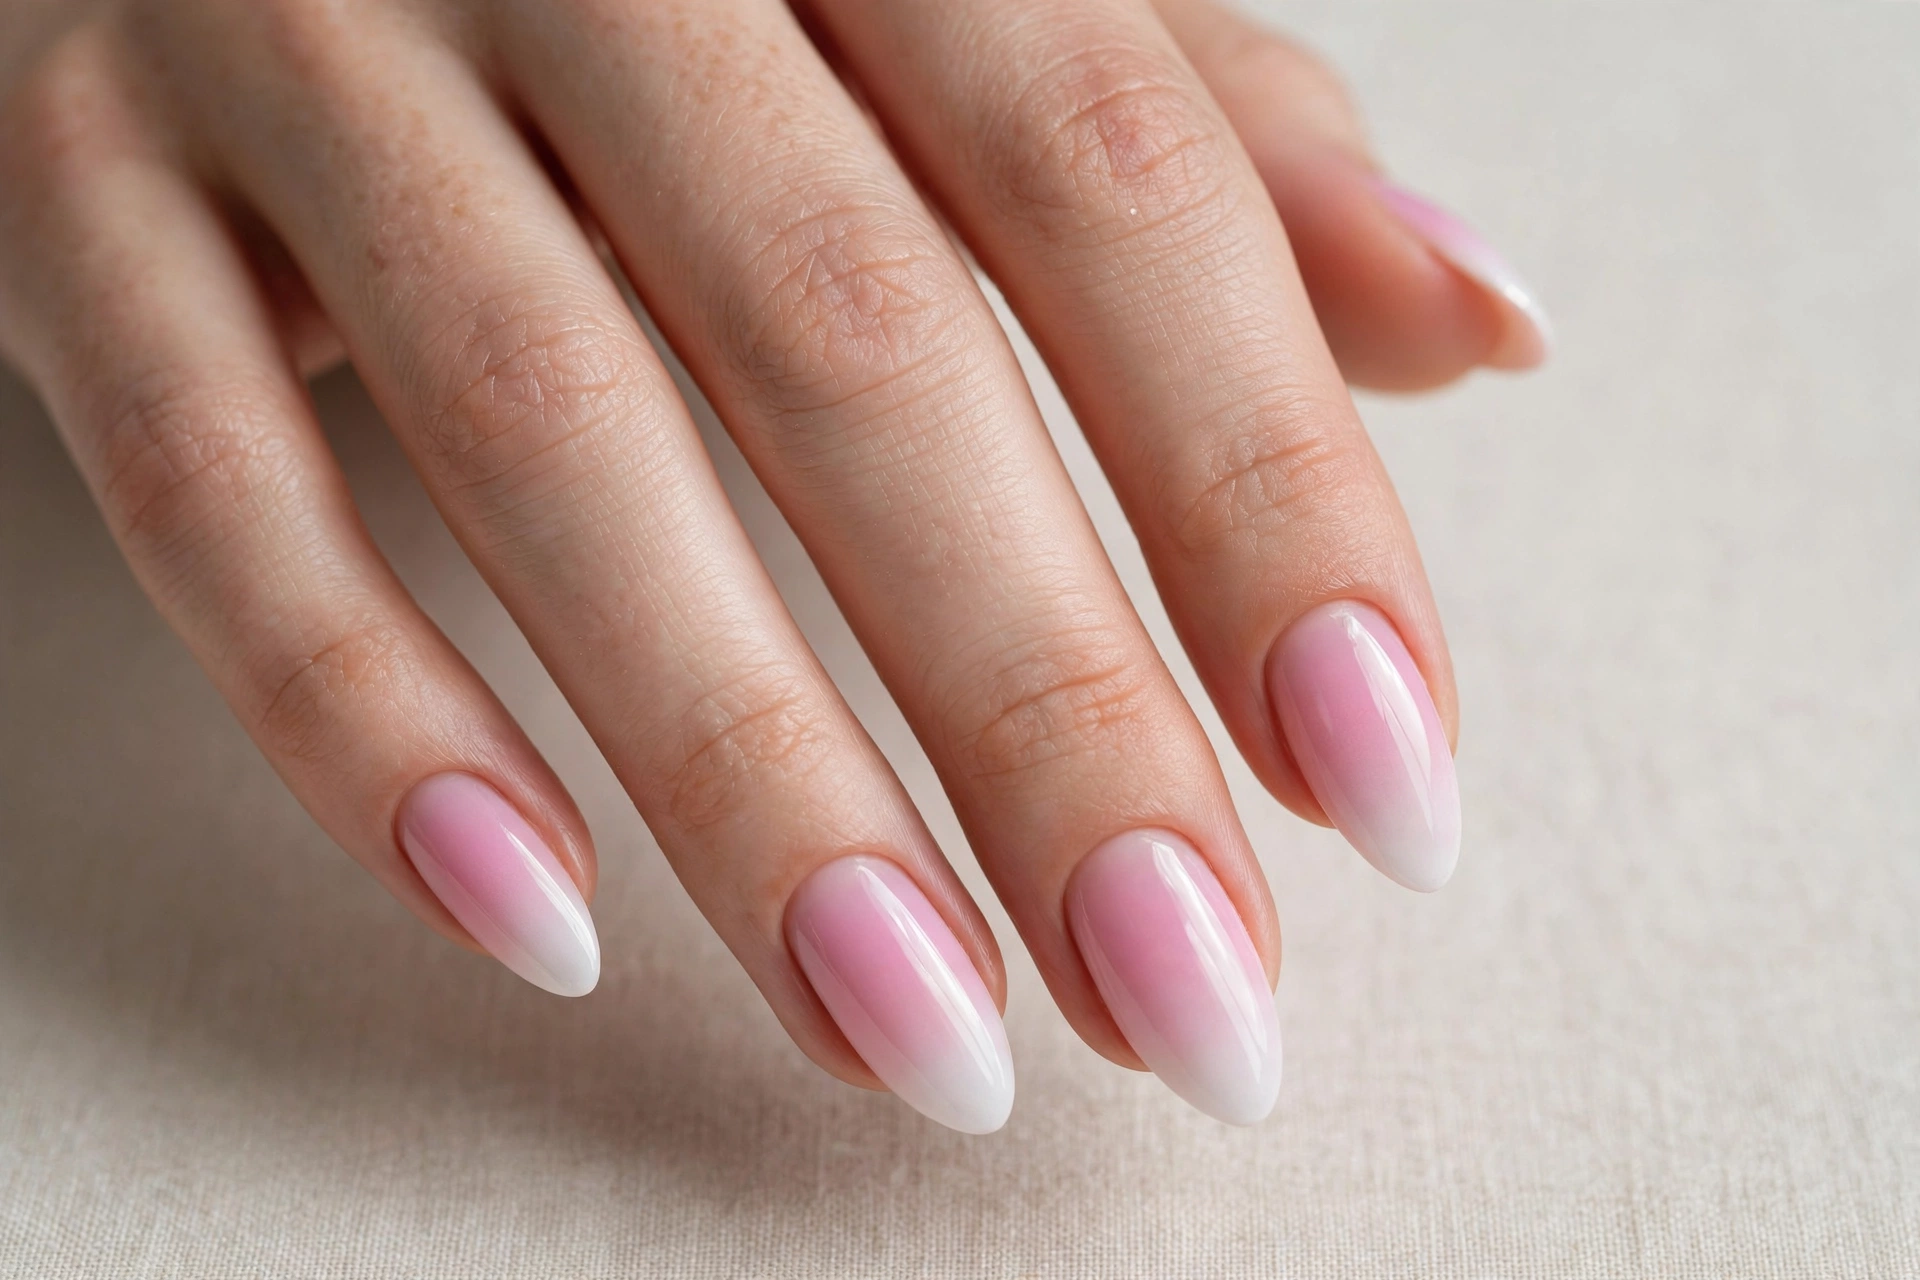
Ombre nails look like you spent an hour on them, but a makeup sponge does the work in minutes. The soft pink-to-white fade flatters every skin tone and makes nails look longer instantly. Start with a pale pink base, then sponge on white polish at the tips in light, dabbing motions, building up two or three thin layers. Peel off the excess around your cuticles with a cleanup brush. This design suits brides, office workers, and anyone who wants nail art that reads as polished rather than loud. It also pairs beautifully with rings and bracelets, since the soft tones never clash with jewelry.
3. Daisy Florals
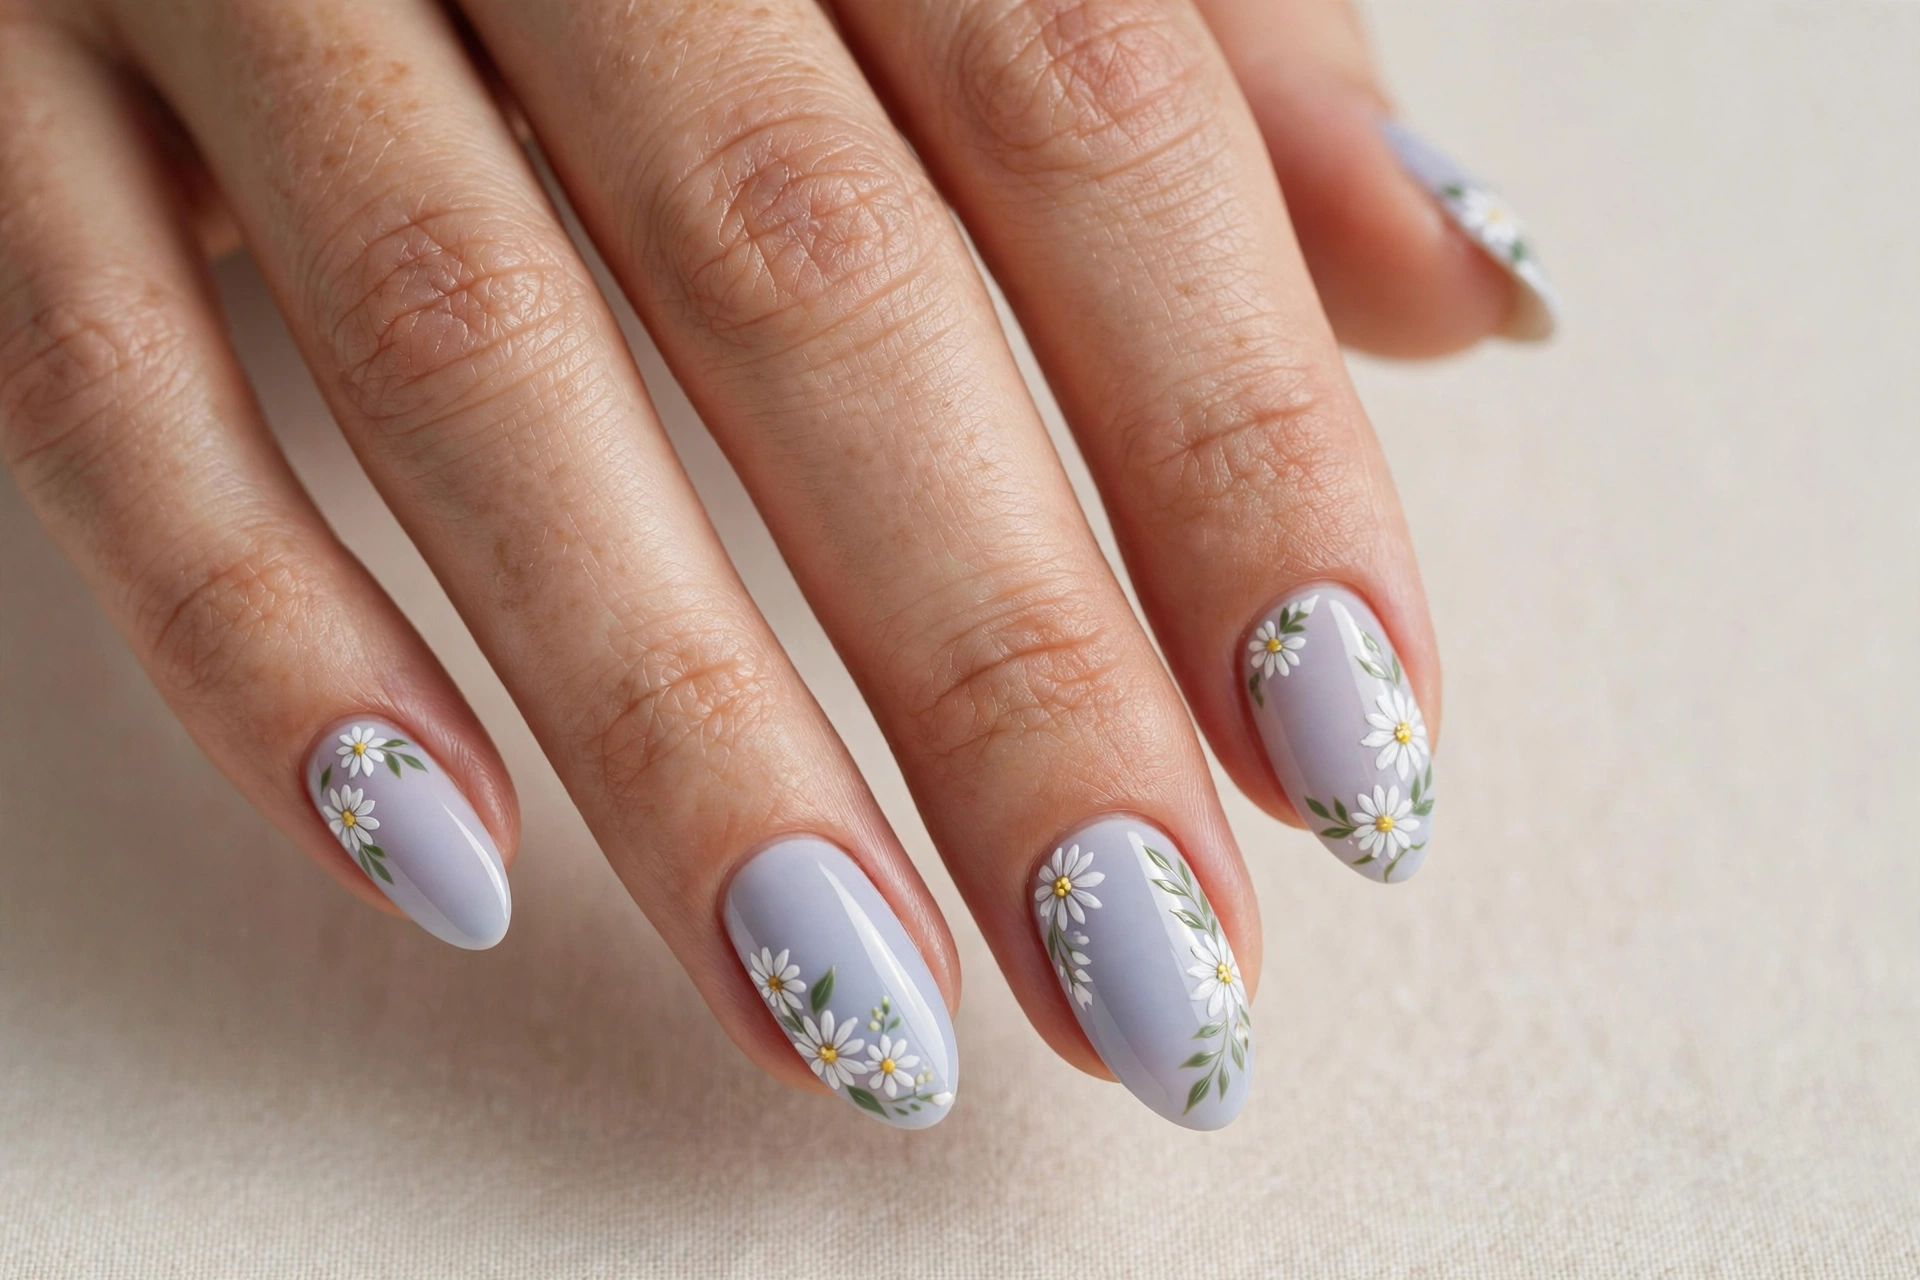
Florals are the friendliest form of nail art — they look hand-painted even when they’re not. White daisies on a pastel base suit spring perfectly, and they work on short nails where big designs would crowd. Use a dotting tool to place five dots in a circle for the petals and one yellow dot in the center for the flower’s heart. A toothpick works in place of a dotting tool. Scatter two or three daisies per nail rather than covering it completely; the negative space keeps the look airy. Finish with a glossy top coat so the dots look raised and dimensional instead of flat.
4. Marble Swirls
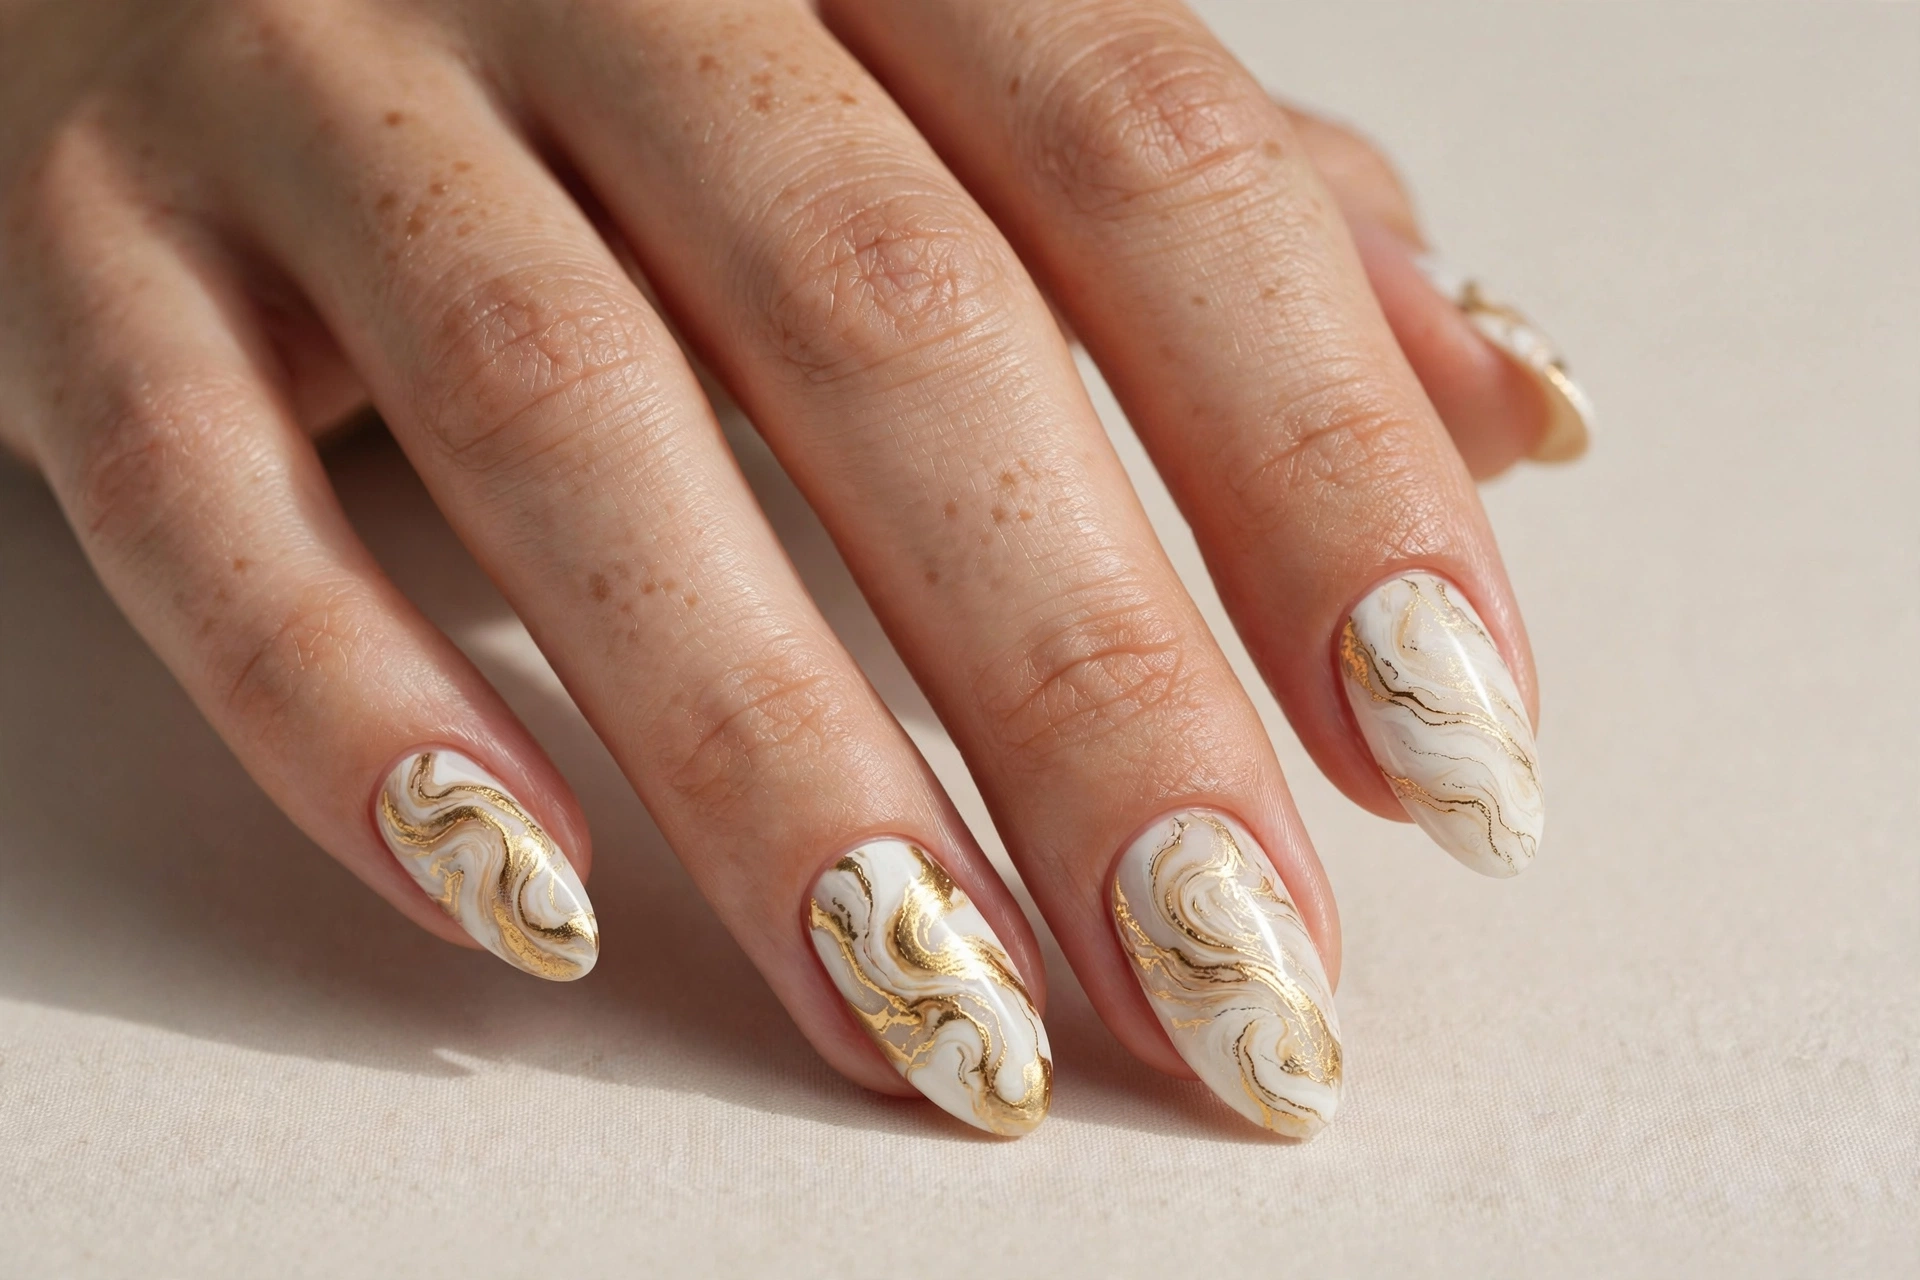
Marble nails bring that expensive-stone look to your fingertips. The white and gold version here reads elegant without trying too hard, and it suits longer almond or coffin shapes where the swirls have room to show. The trick is simple: paint a white base, then drag thin gold and gray lines across each nail with a detail brush while the polish is still tacky, softening them with a clean dry brush. Seal with a thick top coat to mimic polished stone. No two nails will match exactly, which is the whole point — marble is supposed to look organic. This design photographs beautifully for special occasions.
5. Glitter Accent Nails
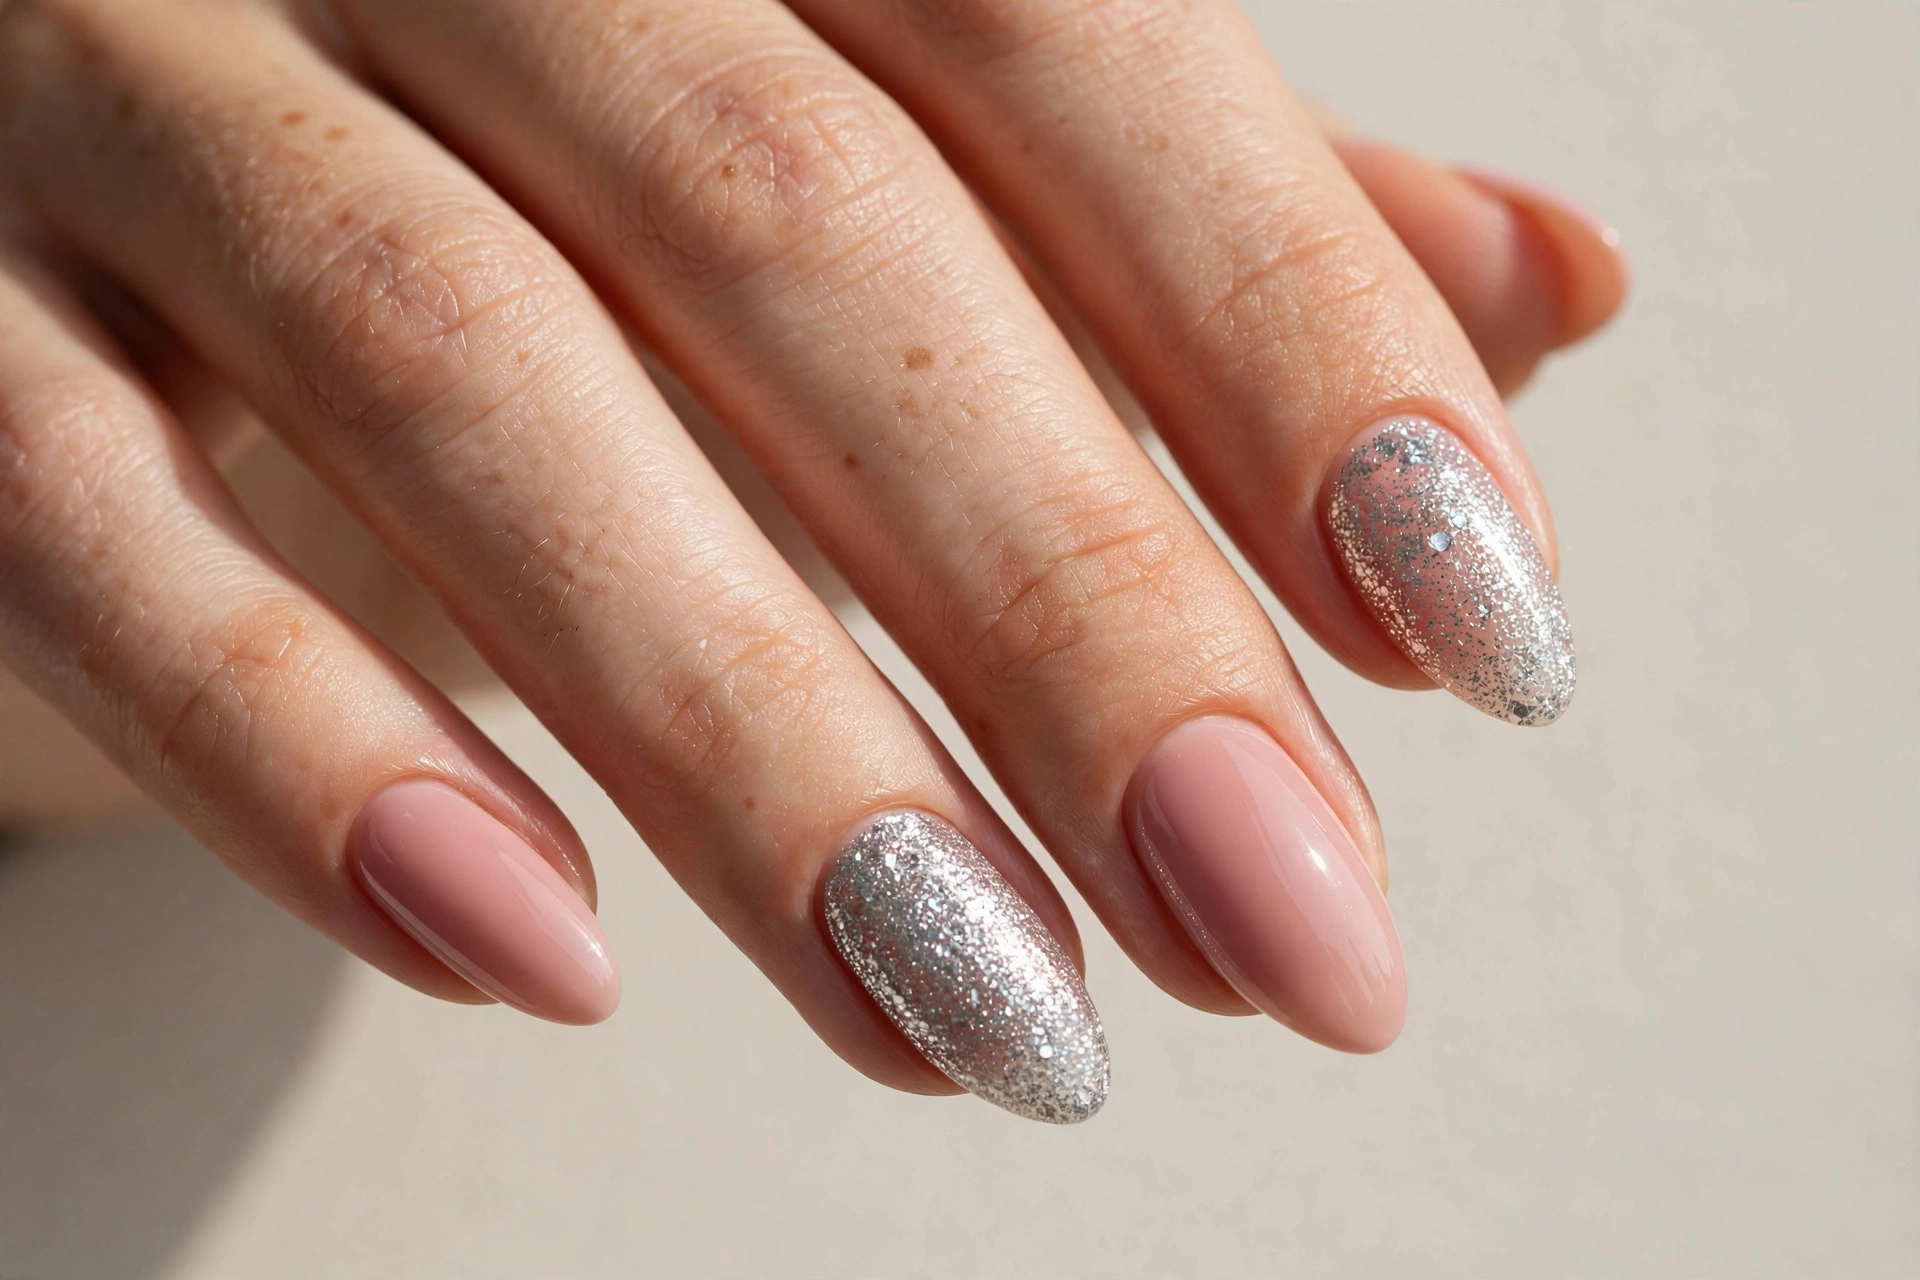
Glitter accent nails are the perfect compromise when you want sparkle but still need to look put-together. Paint most nails in a soft nude pink and add glitter to just one or two nails — usually the ring fingers. The contrast makes the glitter pop without overwhelming your hands. Chunky holographic glitter gives the most drama; fine glitter looks more refined. To avoid a lumpy finish, press the glitter into wet polish with a sponge rather than brushing it on. Two coats of top coat smooth everything down. This is a great party look, and the glitter accents survive longer between fills because chips blend into the sparkle.
6. Minimalist Line Art
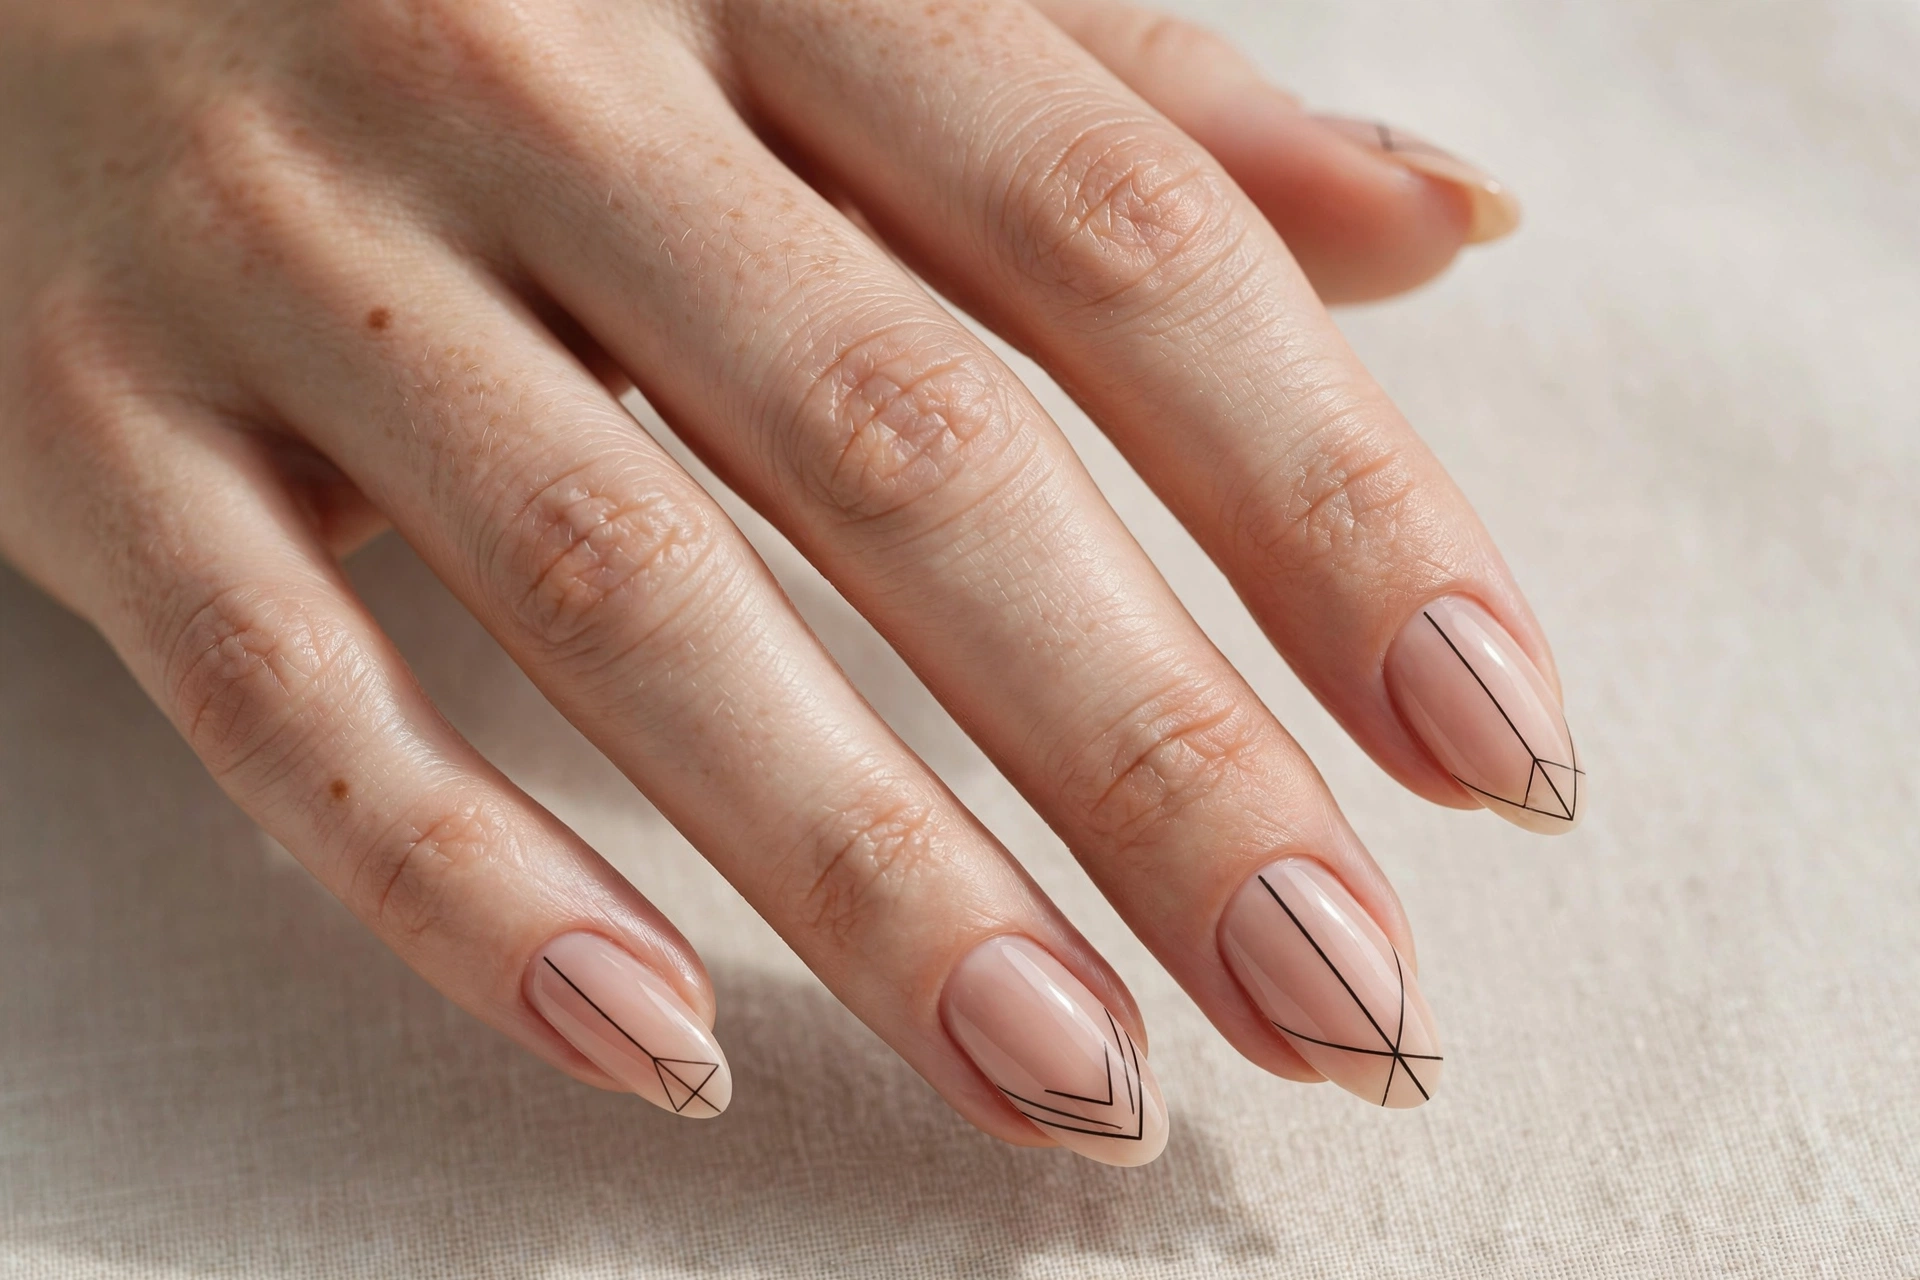
Sometimes one confident line says more than a full design. Thin black geometric lines on a nude base look architectural and modern, and they flatter short nails because the lines draw the eye along the nail’s length. Use a long striping brush and keep your hand steady — rest your pinky on the table for control. Asymmetry is fine here; a vertical line on one nail and a diagonal on another looks intentional. This style suits anyone with a clean, modern wardrobe, and it works year-round since the palette is so neutral. If lines feel too stark, swap black for gold to soften the effect.
7. Polka Dot Play
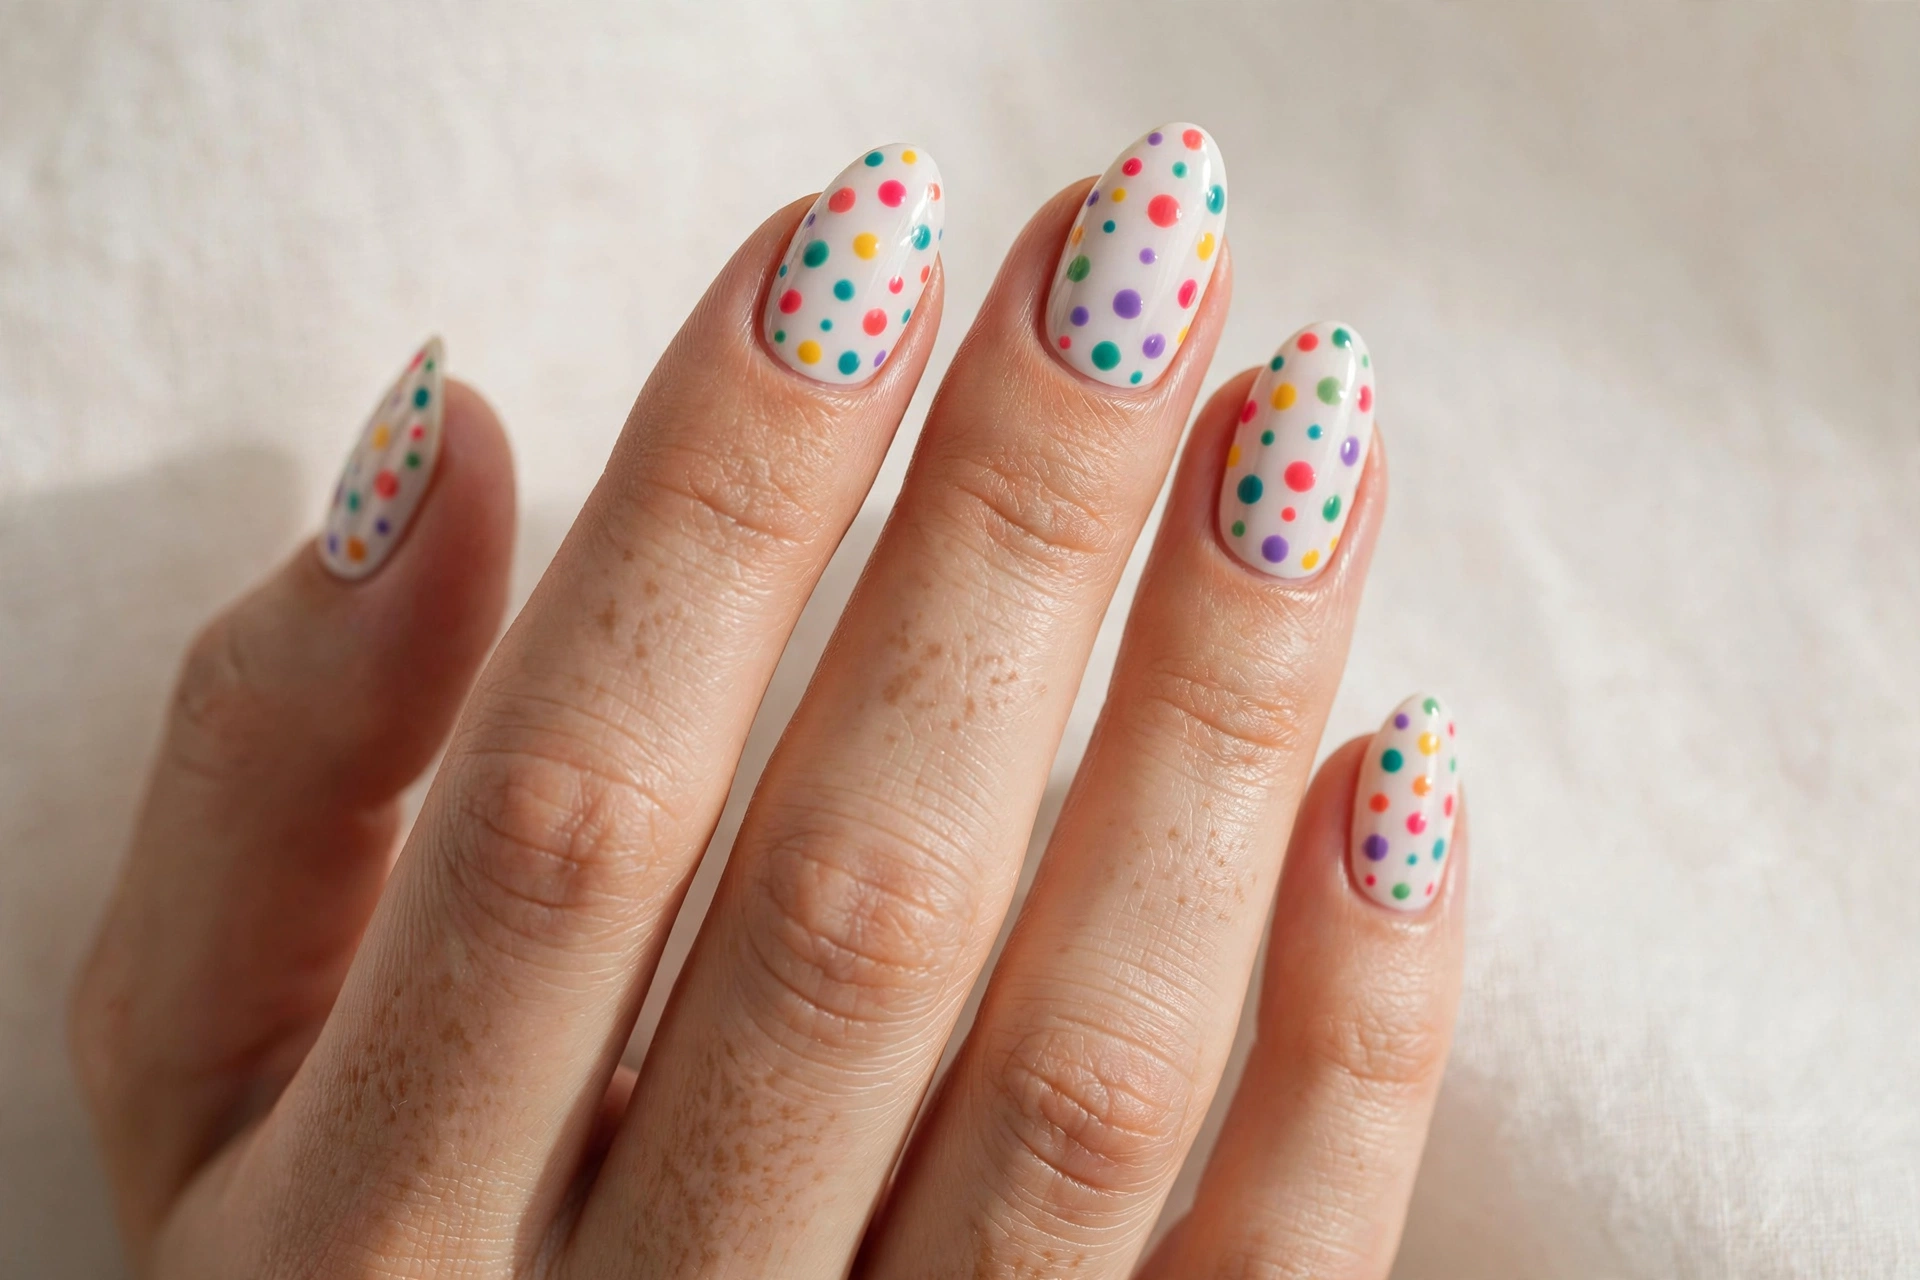
Polka dots are retro in the best way — cheerful, easy, and impossible to mess up badly. A white base with colorful dots looks fresh and young, and the design suits anyone who likes a manicure with personality. The secret to neat dots is loading your dotting tool with polish and pressing straight down without dragging. Vary the dot sizes across the nail for a more interesting composition. Stick to three colors maximum so the result looks designed rather than random. This is one of the best starter nail art ideas because even slightly imperfect dots still read as playful and charming.
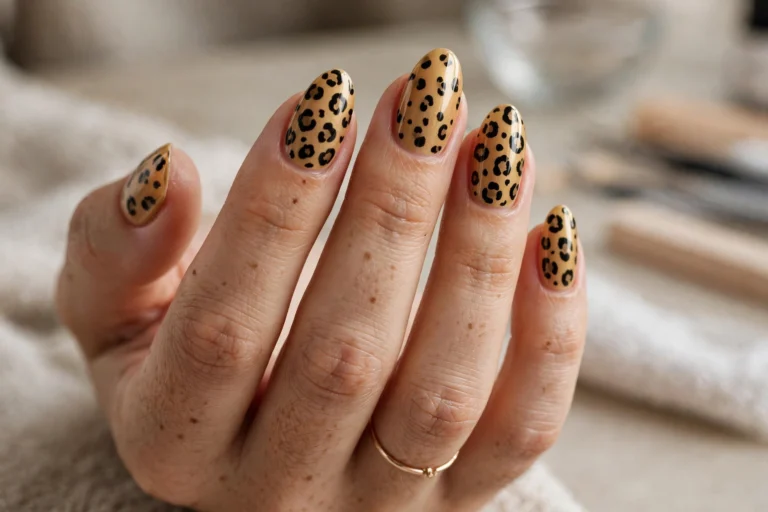
8. Leopard Print
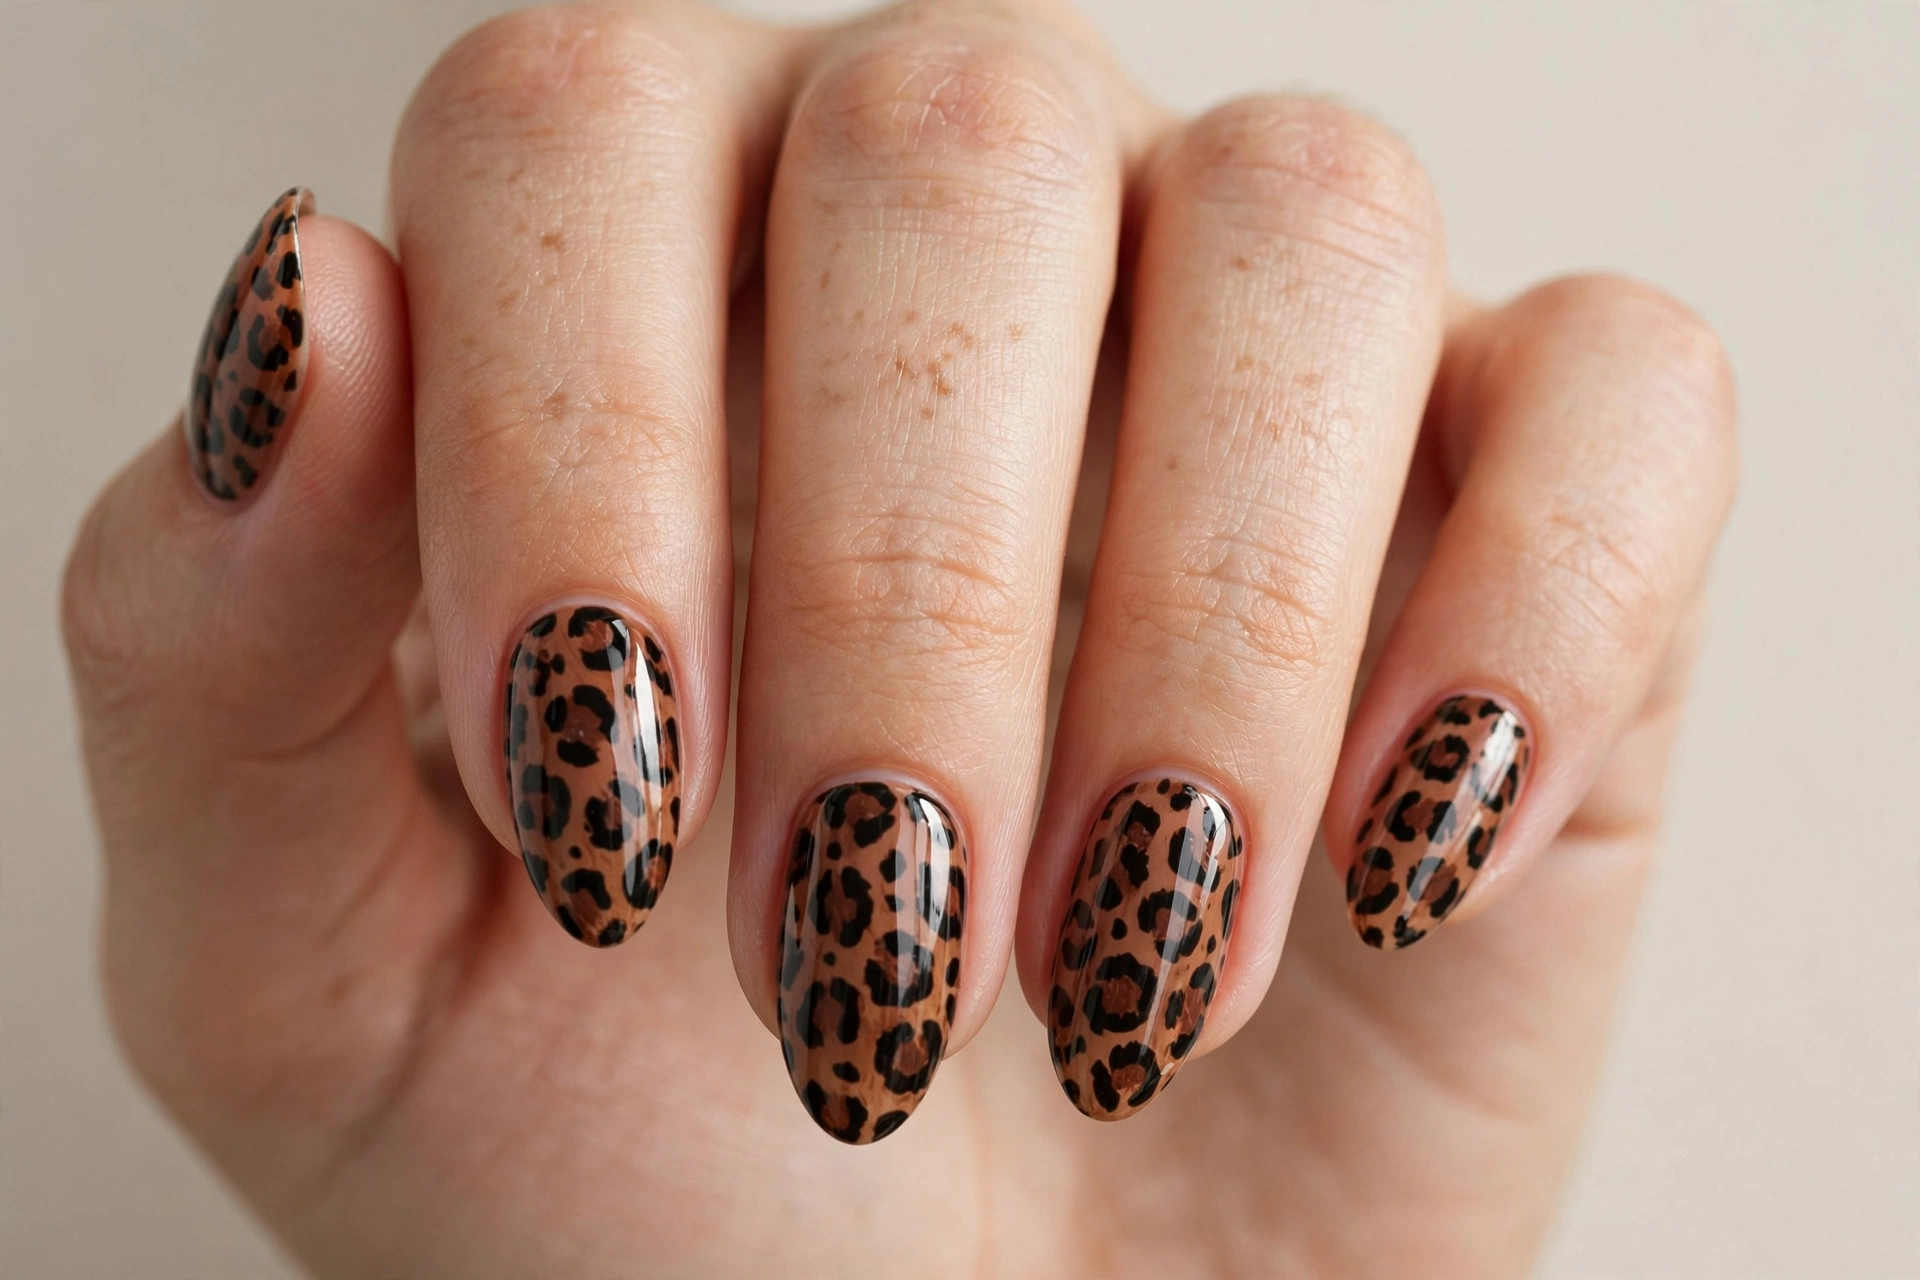
Leopard print never really leaves, and on nails it adds instant attitude. The classic brown-and-black version suits medium to long nails where the spots have room to develop. Paint a tan or nude base, then add irregular dark brown blobs and outline them partially with black — leaving the outlines broken is what makes it read as leopard rather than spots. Keep the shapes organic; perfect circles ruin the effect. Pair leopard nails with gold jewelry and neutral outfits, since the print does enough talking on its own. For a softer take, try the print on just two accent nails.
9. Negative Space Cutouts
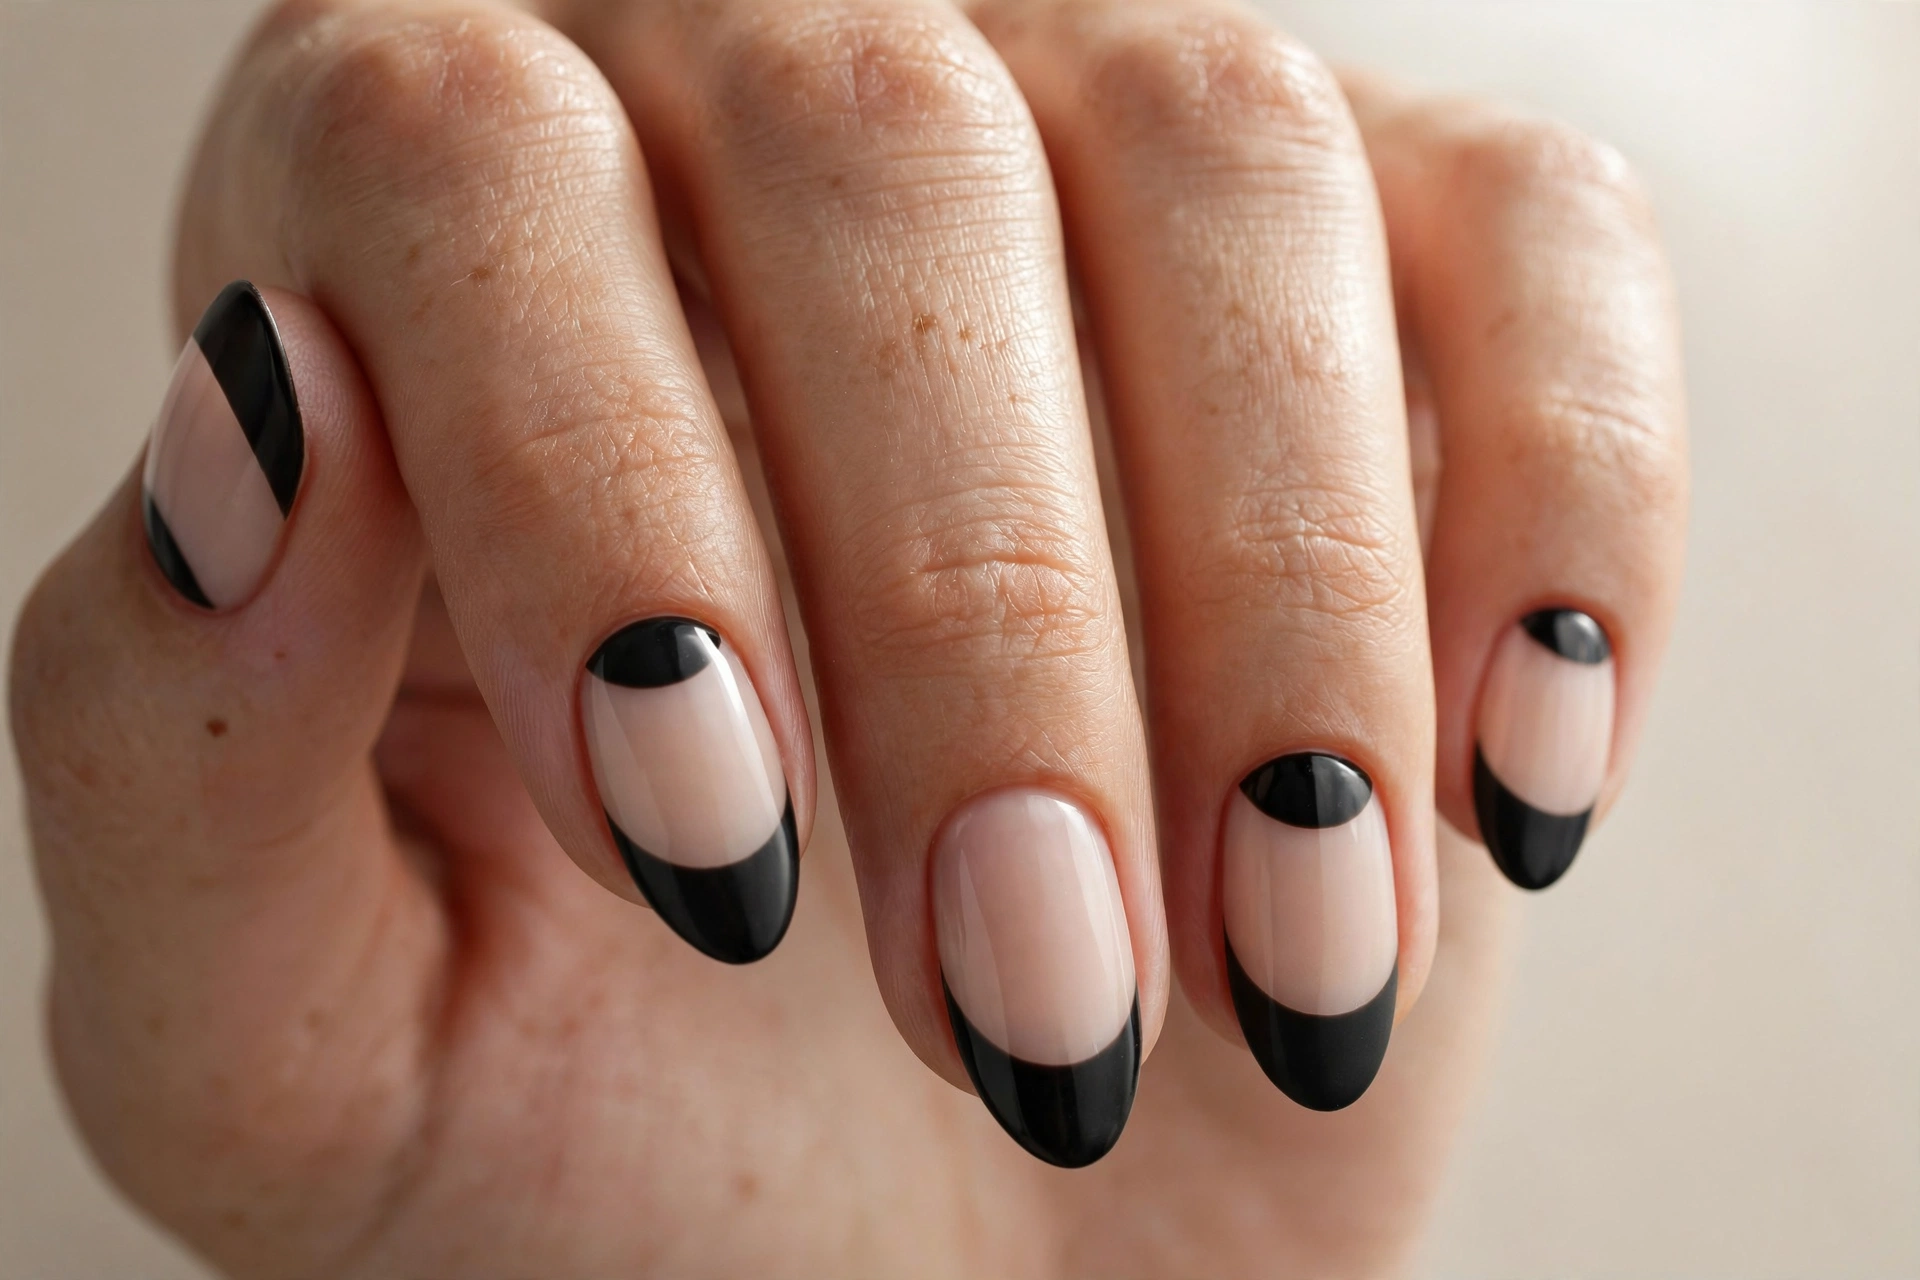
Negative space nail art uses your bare nail as part of the design, which makes it one of the most forgiving techniques to try. These half-moon cutouts in beige and black look graphic and expensive, and the bare sections mean chips are less visible as the manicure grows out. Apply nail vinyl guides or freehand the curves with a detail brush, then fill in around them. The look suits anyone who likes modern, gallery-worthy aesthetics. It also pairs well with a matte top coat for an editorial finish. Keep the shapes bold and simple — fussy details get lost in this style.
10. Mirror Chrome
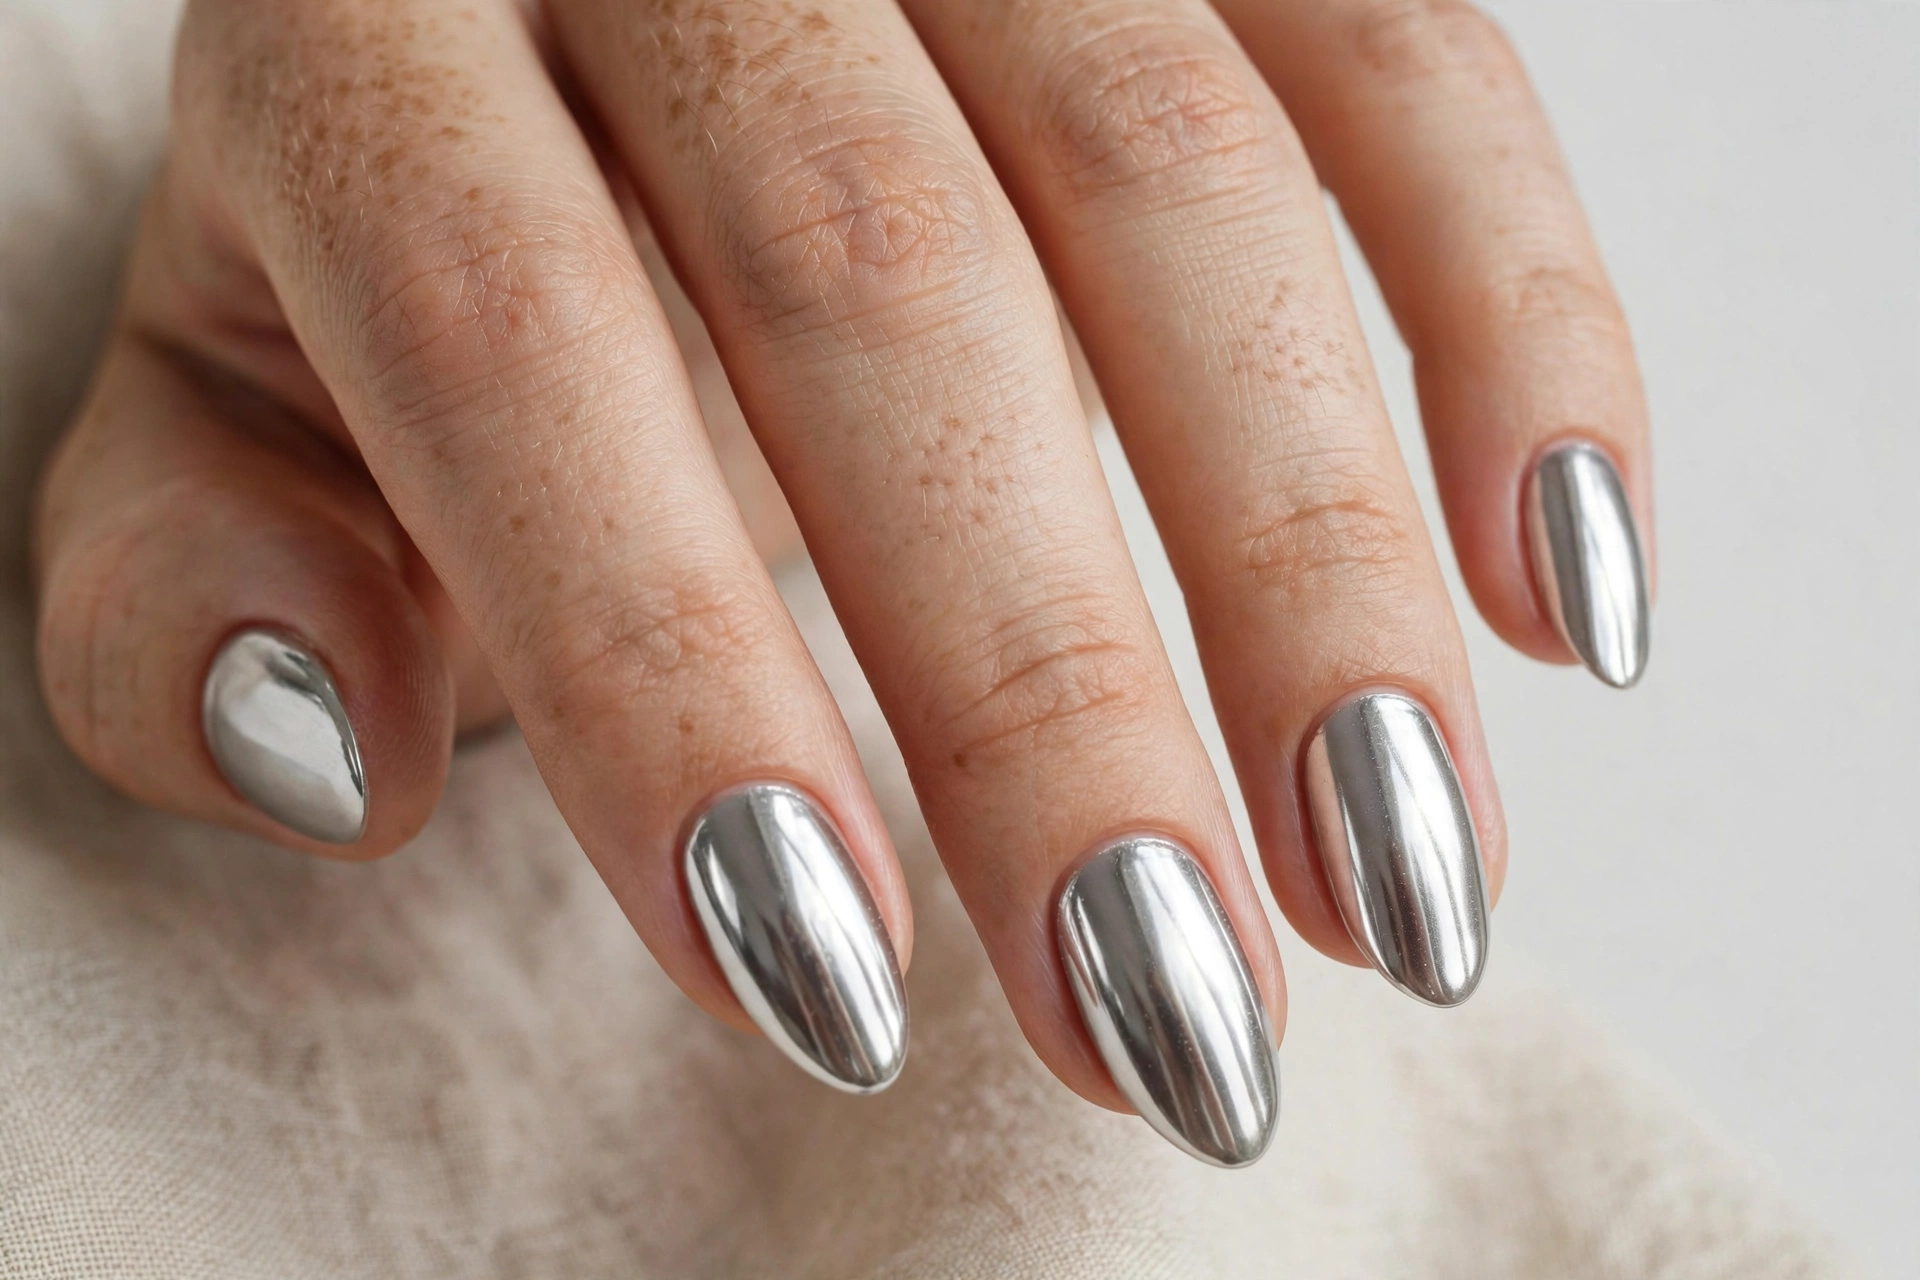
Chrome nails are pure drama — a liquid-metal finish that catches light with every movement. The silver version suits evening events and anyone who loves a futuristic edge. The technique needs chrome powder: apply a no-wipe gel top coat, cure it, then buff the powder in with a sponge applicator until it mirrors. A gel base is essential — chrome over regular polish won’t achieve the same reflectivity. Chrome shows every ridge in your nail, so buff your nail surface smooth first. If you want more inspiration for shine-heavy looks, these chrome nail designs show how far the mirror finish can go.
11. Matte Black with Glossy Tips
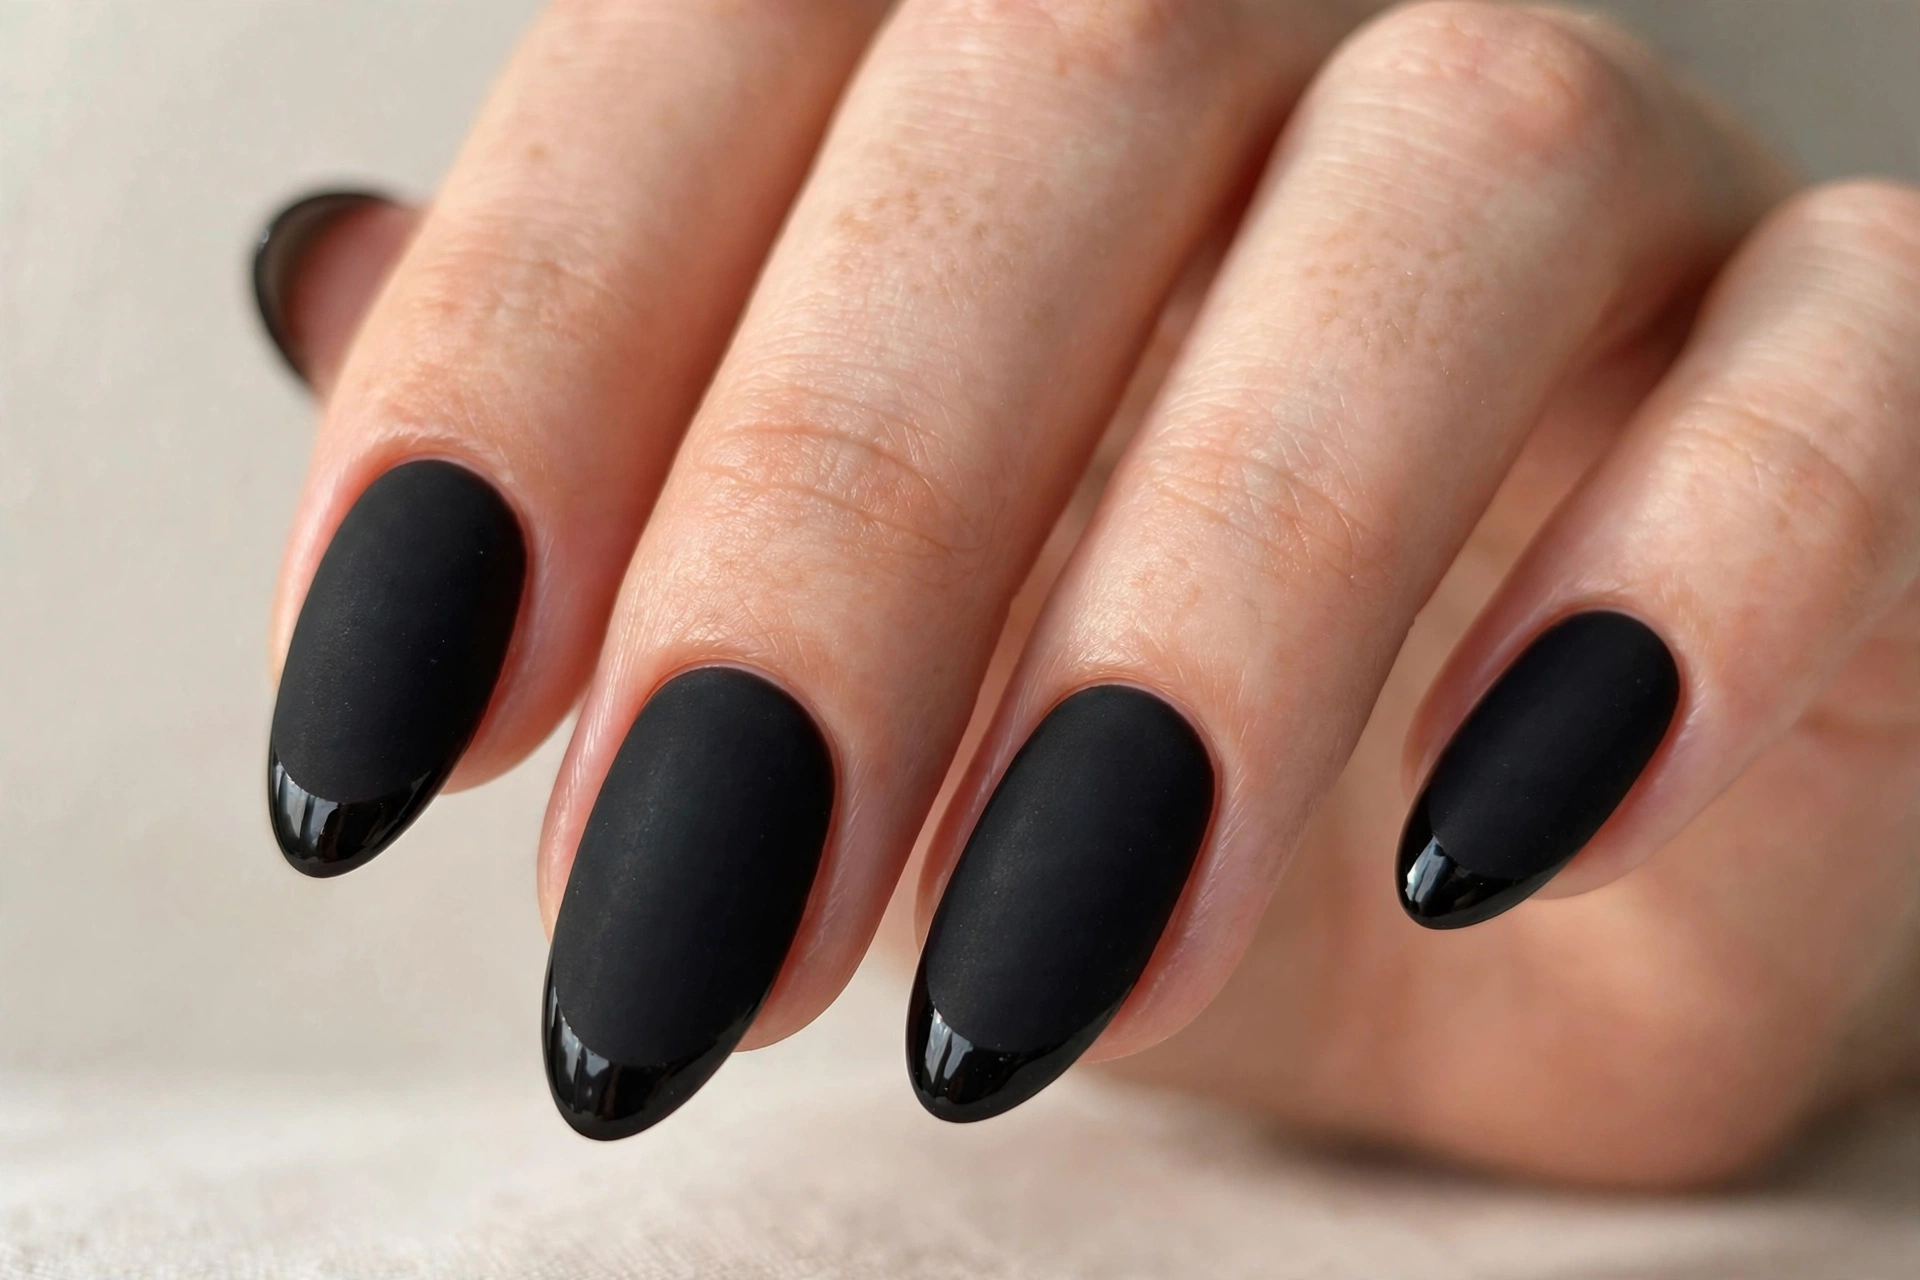
This is the stealth version of a French manicure: all-black nails where only the tips shine. The matte-and-gloss contrast reads sophisticated and slightly edgy, perfect for evenings out. Paint the whole nail matte black, let it dry, then add glossy top coat just on the tips. The texture difference is subtle up close but striking at a distance. It suits short to medium nails and anyone whose wardrobe leans dark. The matte finish does show fingerprints more than glossy polish, so keep a matte top coat handy for touch-ups. This design lasts well because the two-texture detail disguises tip wear.
12. Abstract Brush Strokes
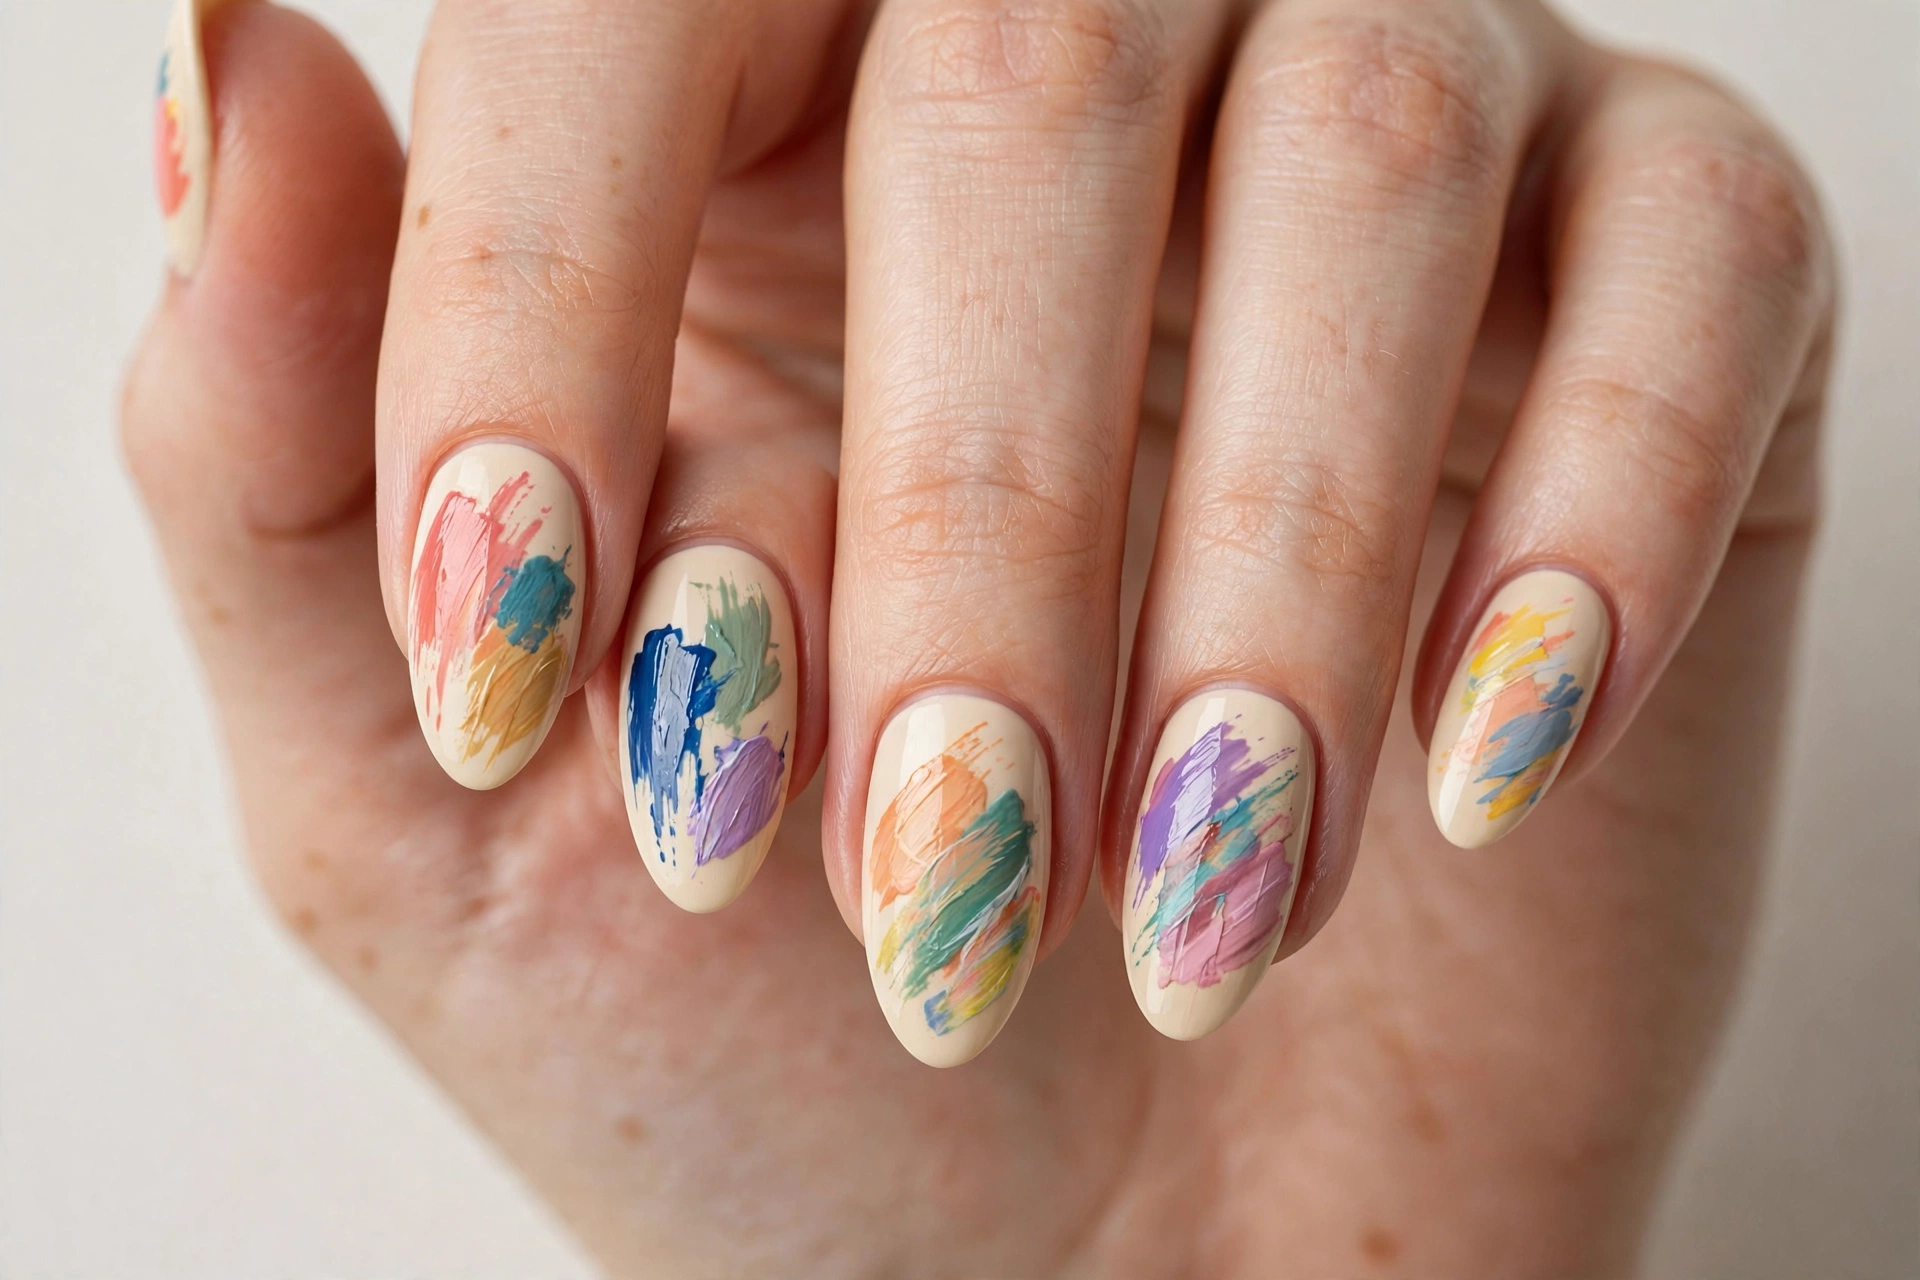
Abstract brush strokes are the “I woke up artistic” of nail art — deliberate-looking but genuinely easy. Sweep bold strokes of color across a cream base with a flat nail art brush, letting each stroke overlap the last. The key is committing: hesitant little dabs look messy, while confident single strokes look like a gallery piece. Stick to a palette of three or four colors that already live in your wardrobe. This design suits creative personalities and works on any nail shape. Seal with top coat quickly while the polish is fresh so the strokes keep their crisp edges rather than dragging.
13. Tiny Heart Details
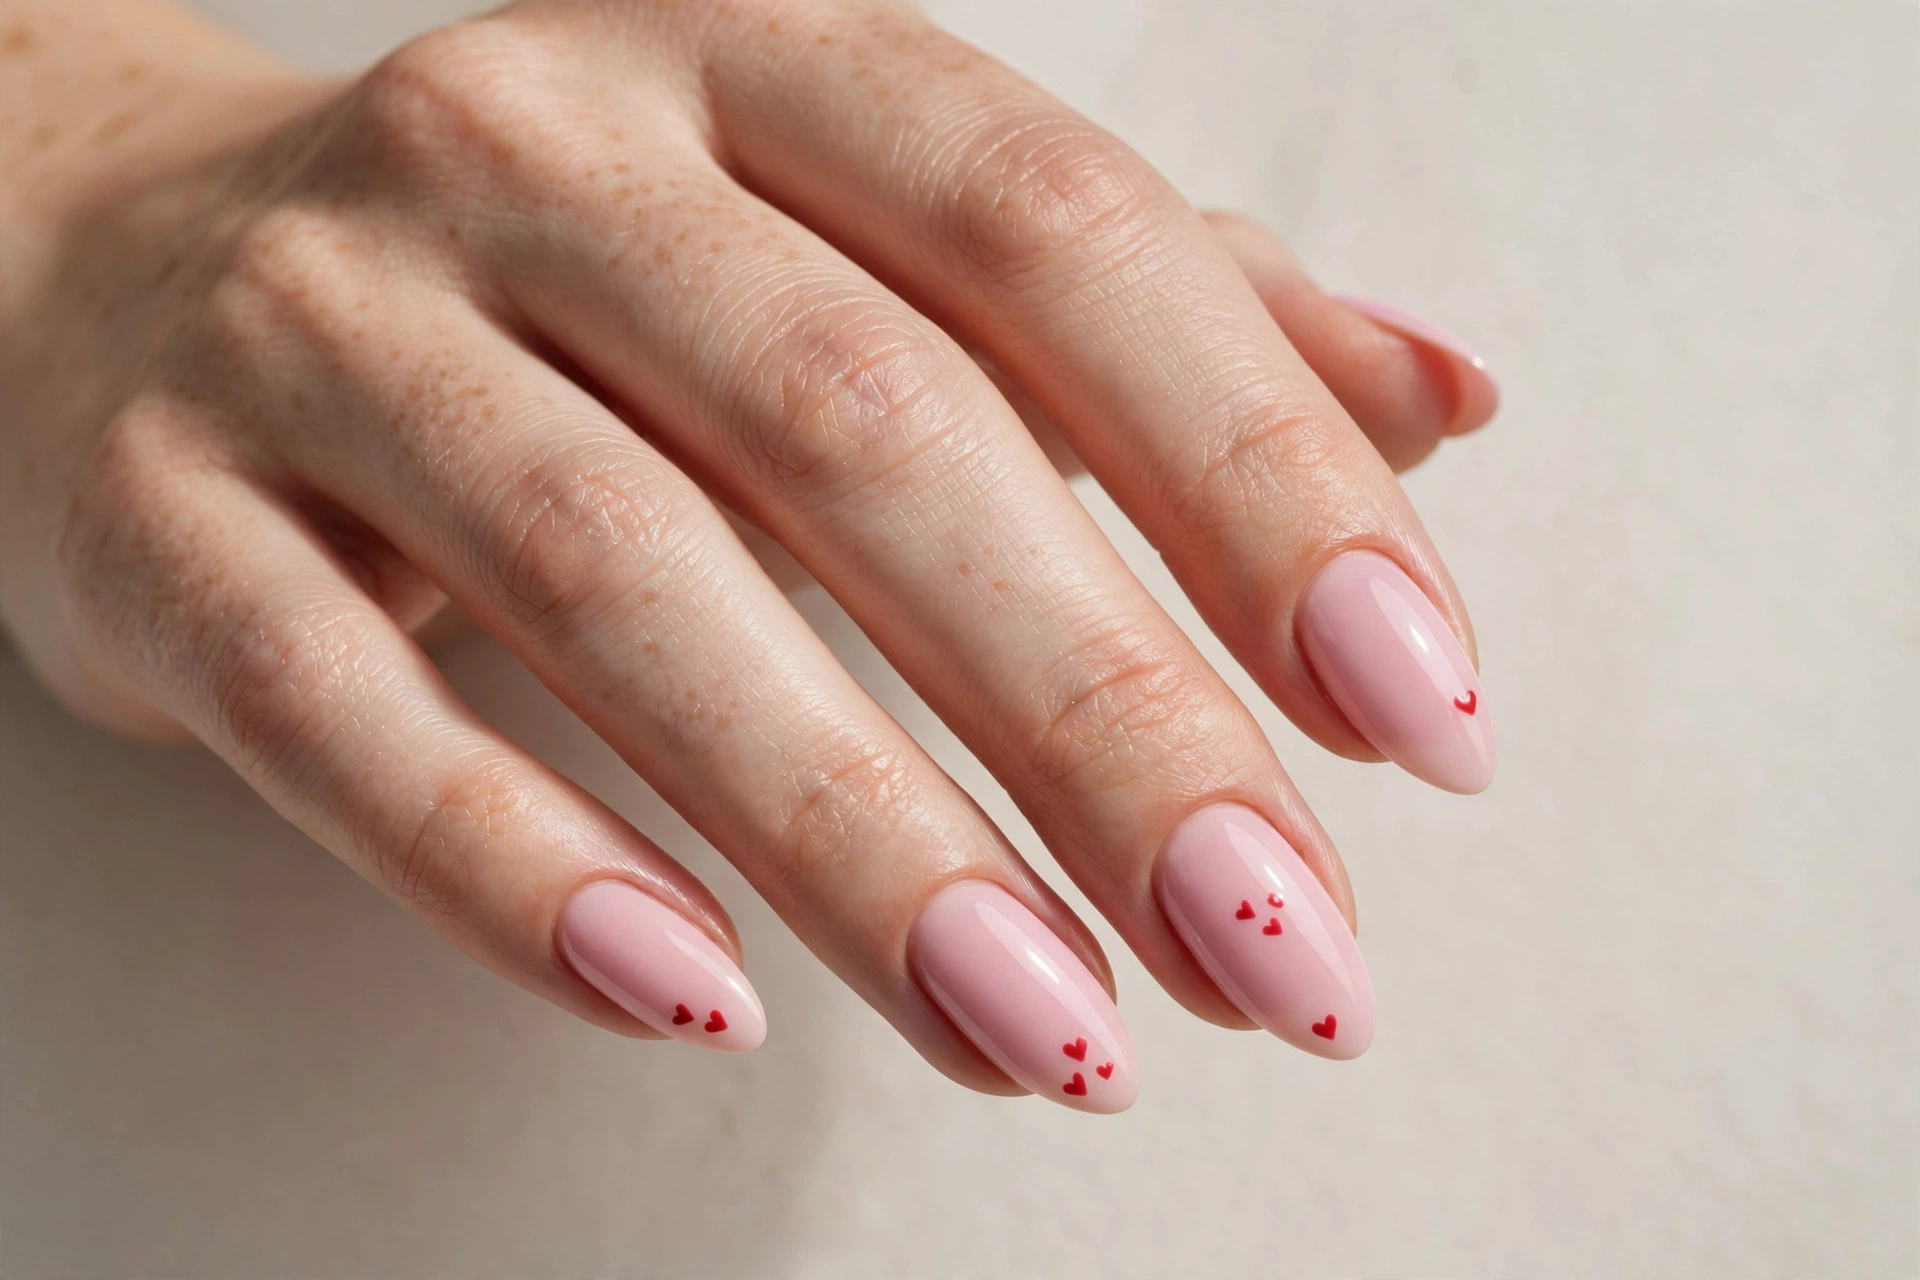
A single tiny heart can carry a whole manicure. Red hearts on a pink base feel sweet without being childish, and they suit anyone who wants romantic nails without a full Valentine’s theme. Stamp or freehand one heart per nail — a dotting tool makes this easy: two dots side by side, then drag downward into a point. Place the heart near the cuticle or dead center; both look intentional. Keep the rest of the nail clean so the heart stays the star. This design photographs beautifully for couples’ photos and anniversaries, and it takes minutes to do at home.
14. Starry Night
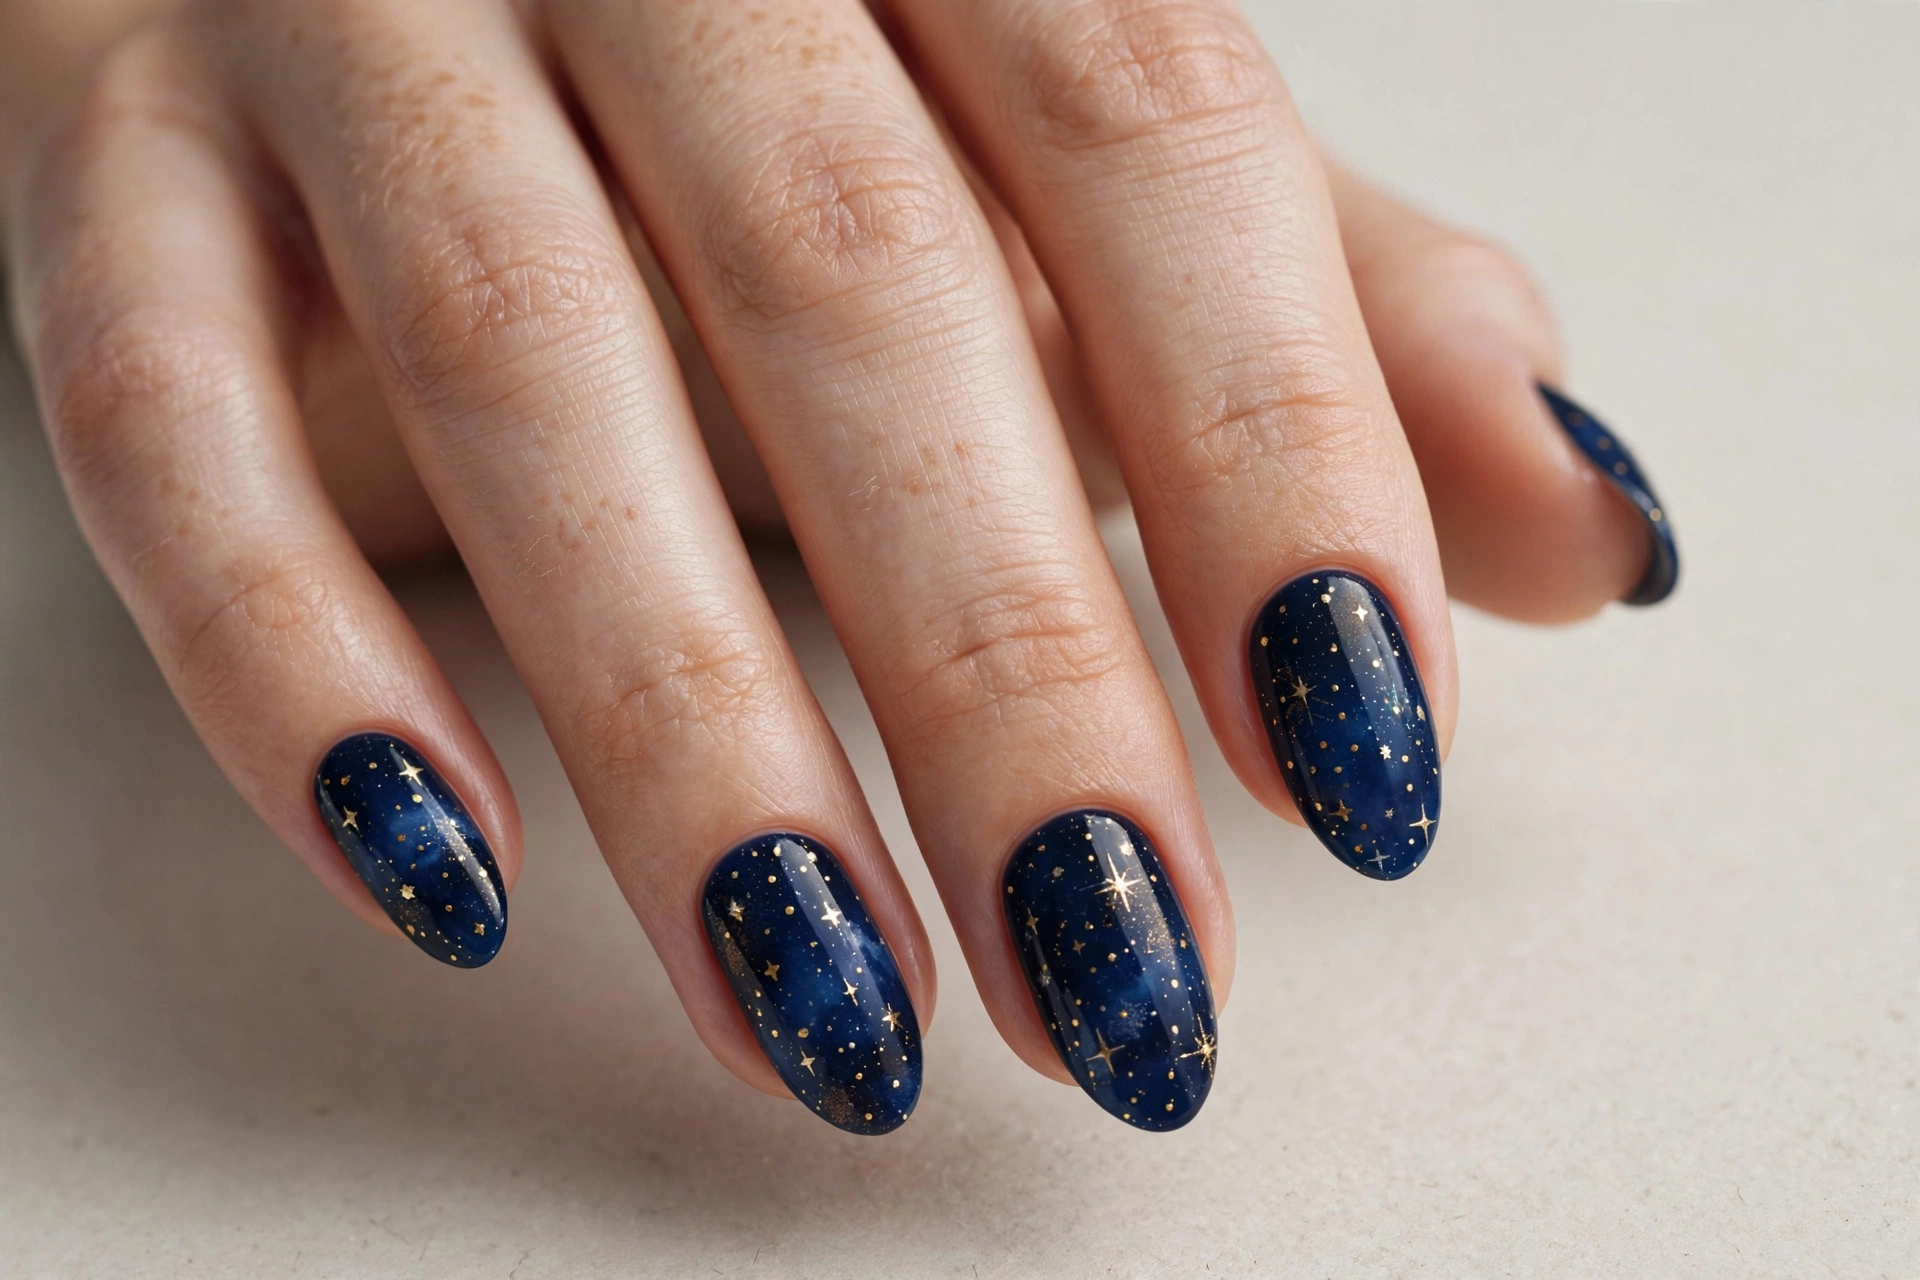
Deep midnight blue with tiny gold stars turns your nails into a miniature night sky. The dark base suits medium and long nails best, and the look feels magical without being costume-y. Sponge on the blue base for depth, then dot gold stars with a dotting tool or stamp them with a star stamper for perfect shapes. Add a few silver micro-dots for distant stars. A glossy top coat makes the whole thing look like wet ink. This is a great winter or evening design, and it hides regrowth well since the dark color keeps attention on the tips.
15. Rainbow Tips
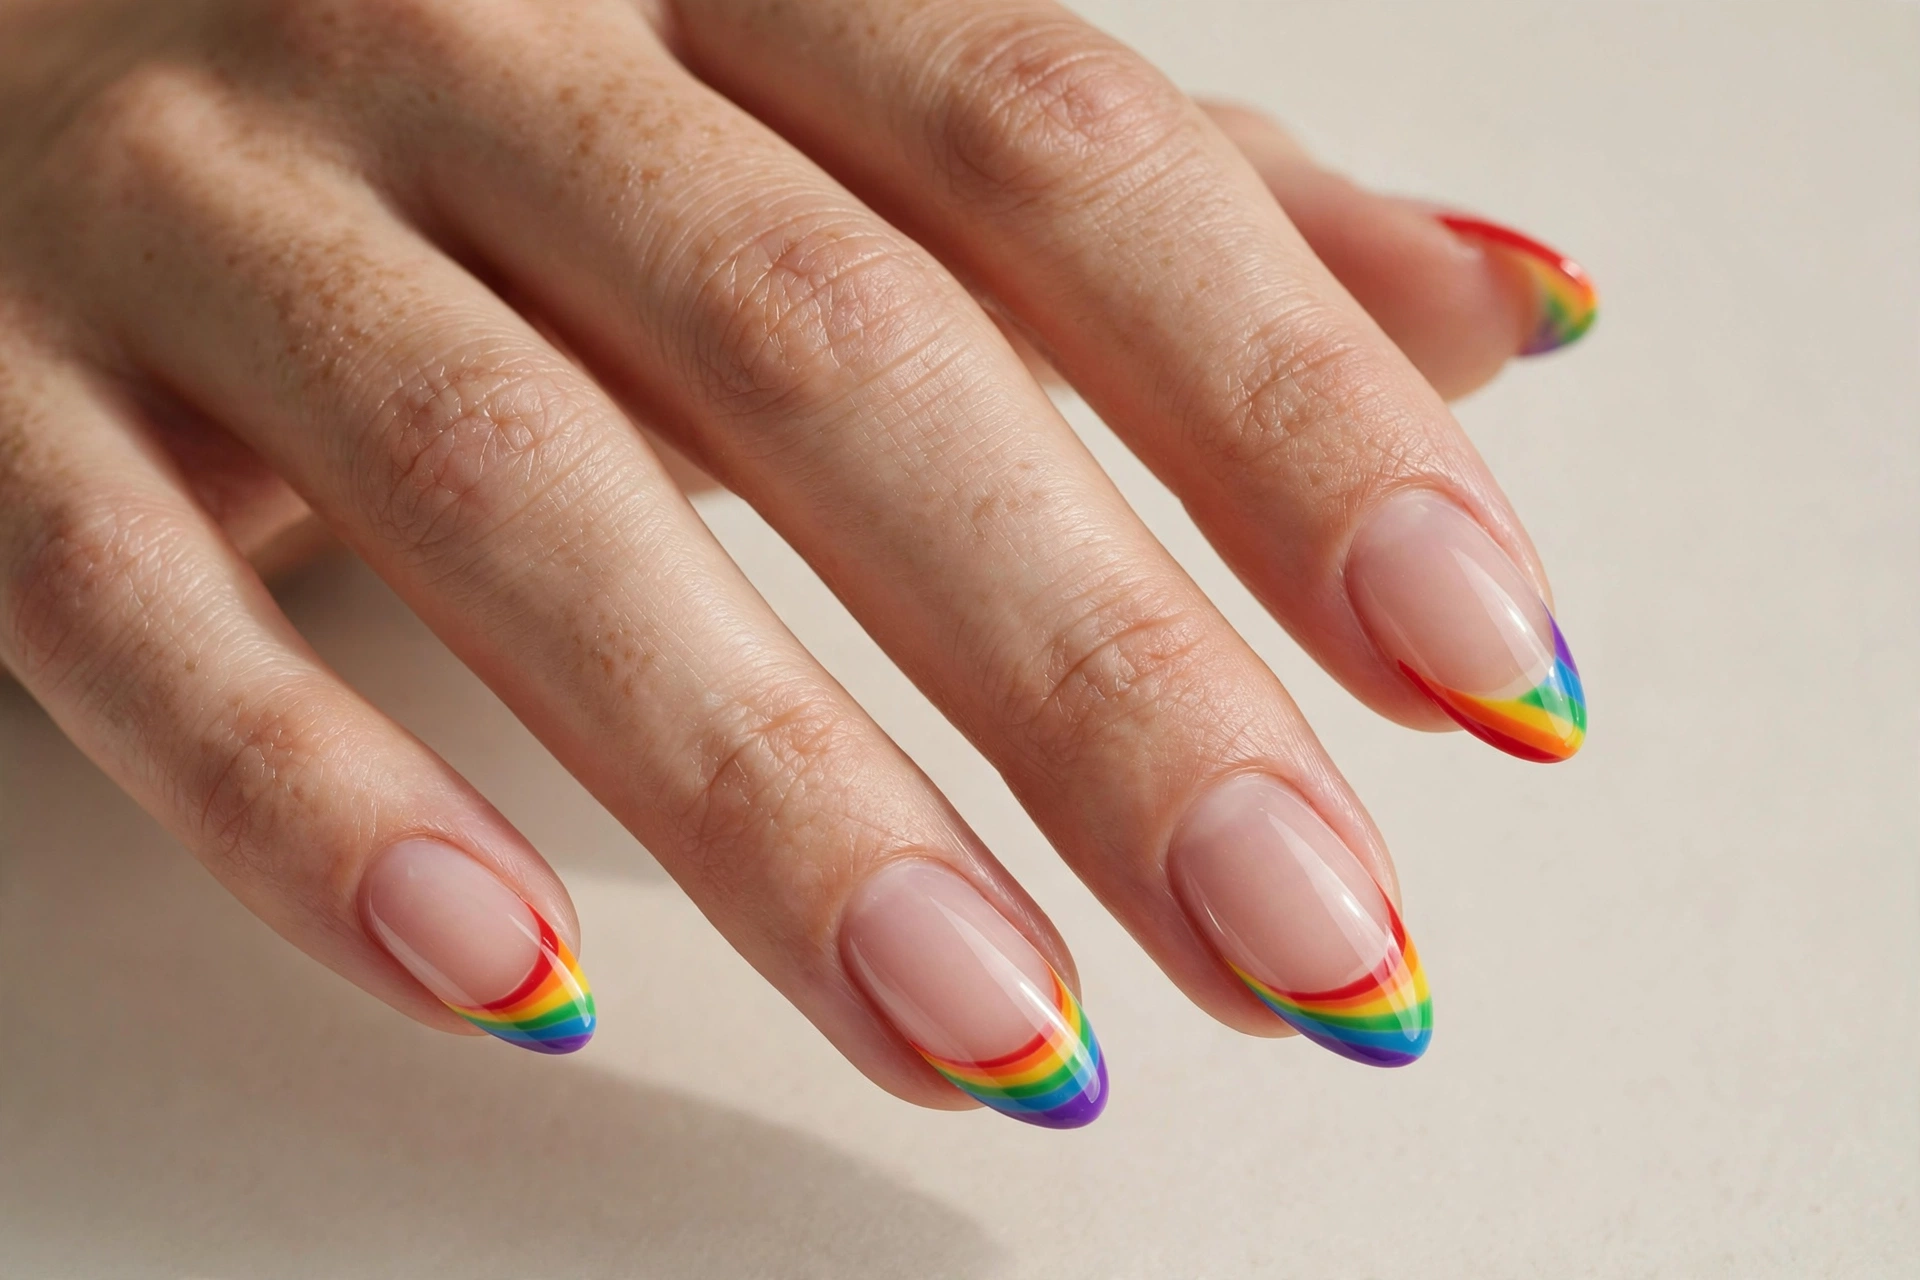
Rainbow tips are the happiest nail art idea on this list. A clear base keeps them from feeling overwhelming, while each tip carries a different bright color. They’re perfect for Pride season, summer festivals, or anytime you need a mood lift. The technique is the same as a classic French manicure — just change the polish color per nail. A thin striping brush gives the cleanest curve on short nails. Because the base is clear, regrowth barely shows, which makes this one of the longest-wearing colorful looks you can do. Finish with a strong top coat to protect the tips from chipping.
16. Butterfly Wings
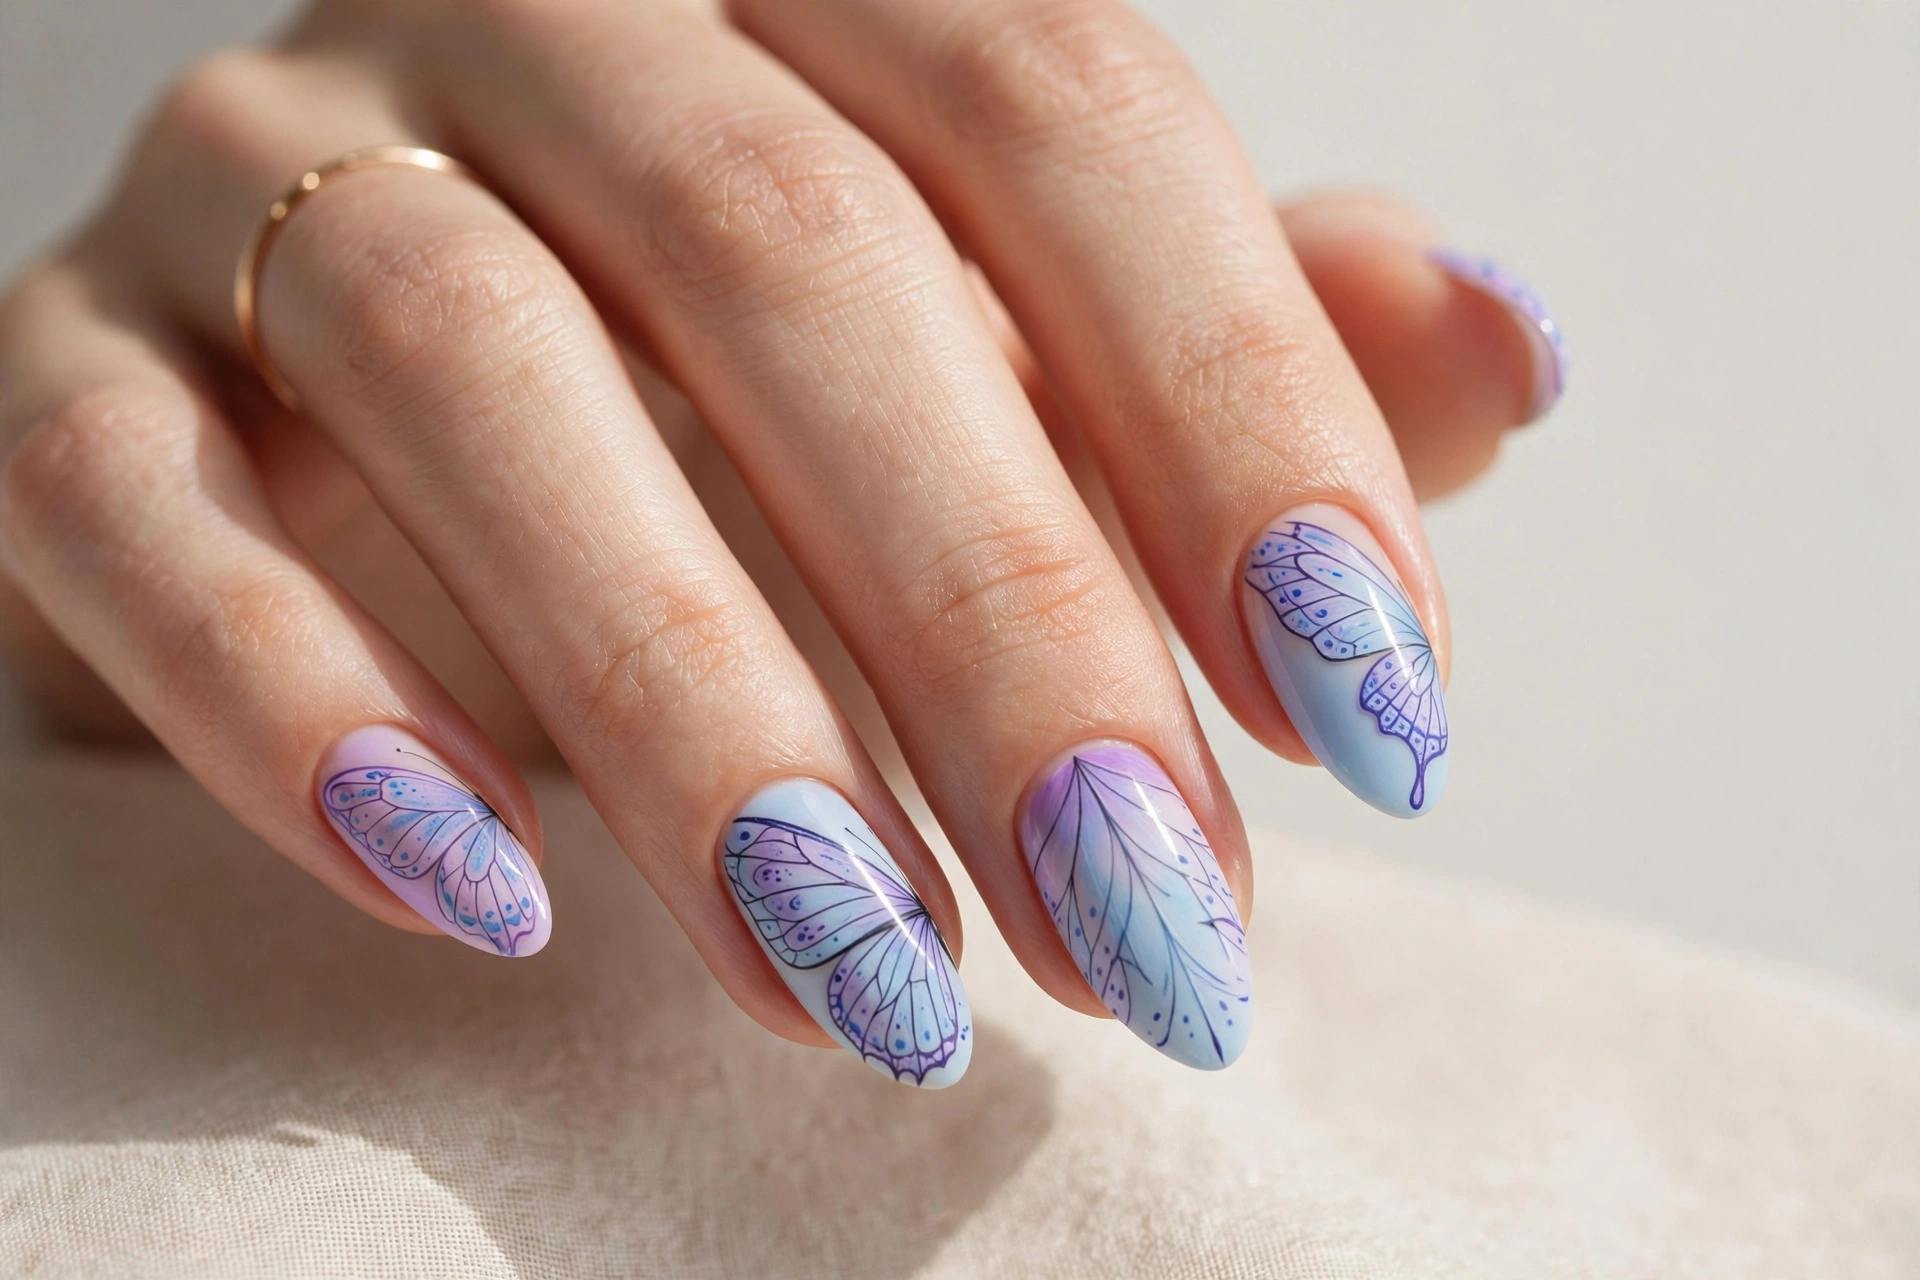
Butterfly nail art feels delicate and dreamy, and the pastel blue-and-purple version here suits spring perfectly. It works best on medium to long nails where the wing details have space to spread. Paint the wings with a detail brush — two rounded lobes per nail with darker outline strokes and tiny dots along the edges. If freehand feels intimidating, butterfly nail stickers give a near-identical result in seconds. This design suits romantic, feminine styles and pairs beautifully with flowy fabrics and silver jewelry. It’s also a lovely choice for spring weddings and garden parties.
17. Pearl Embellishments
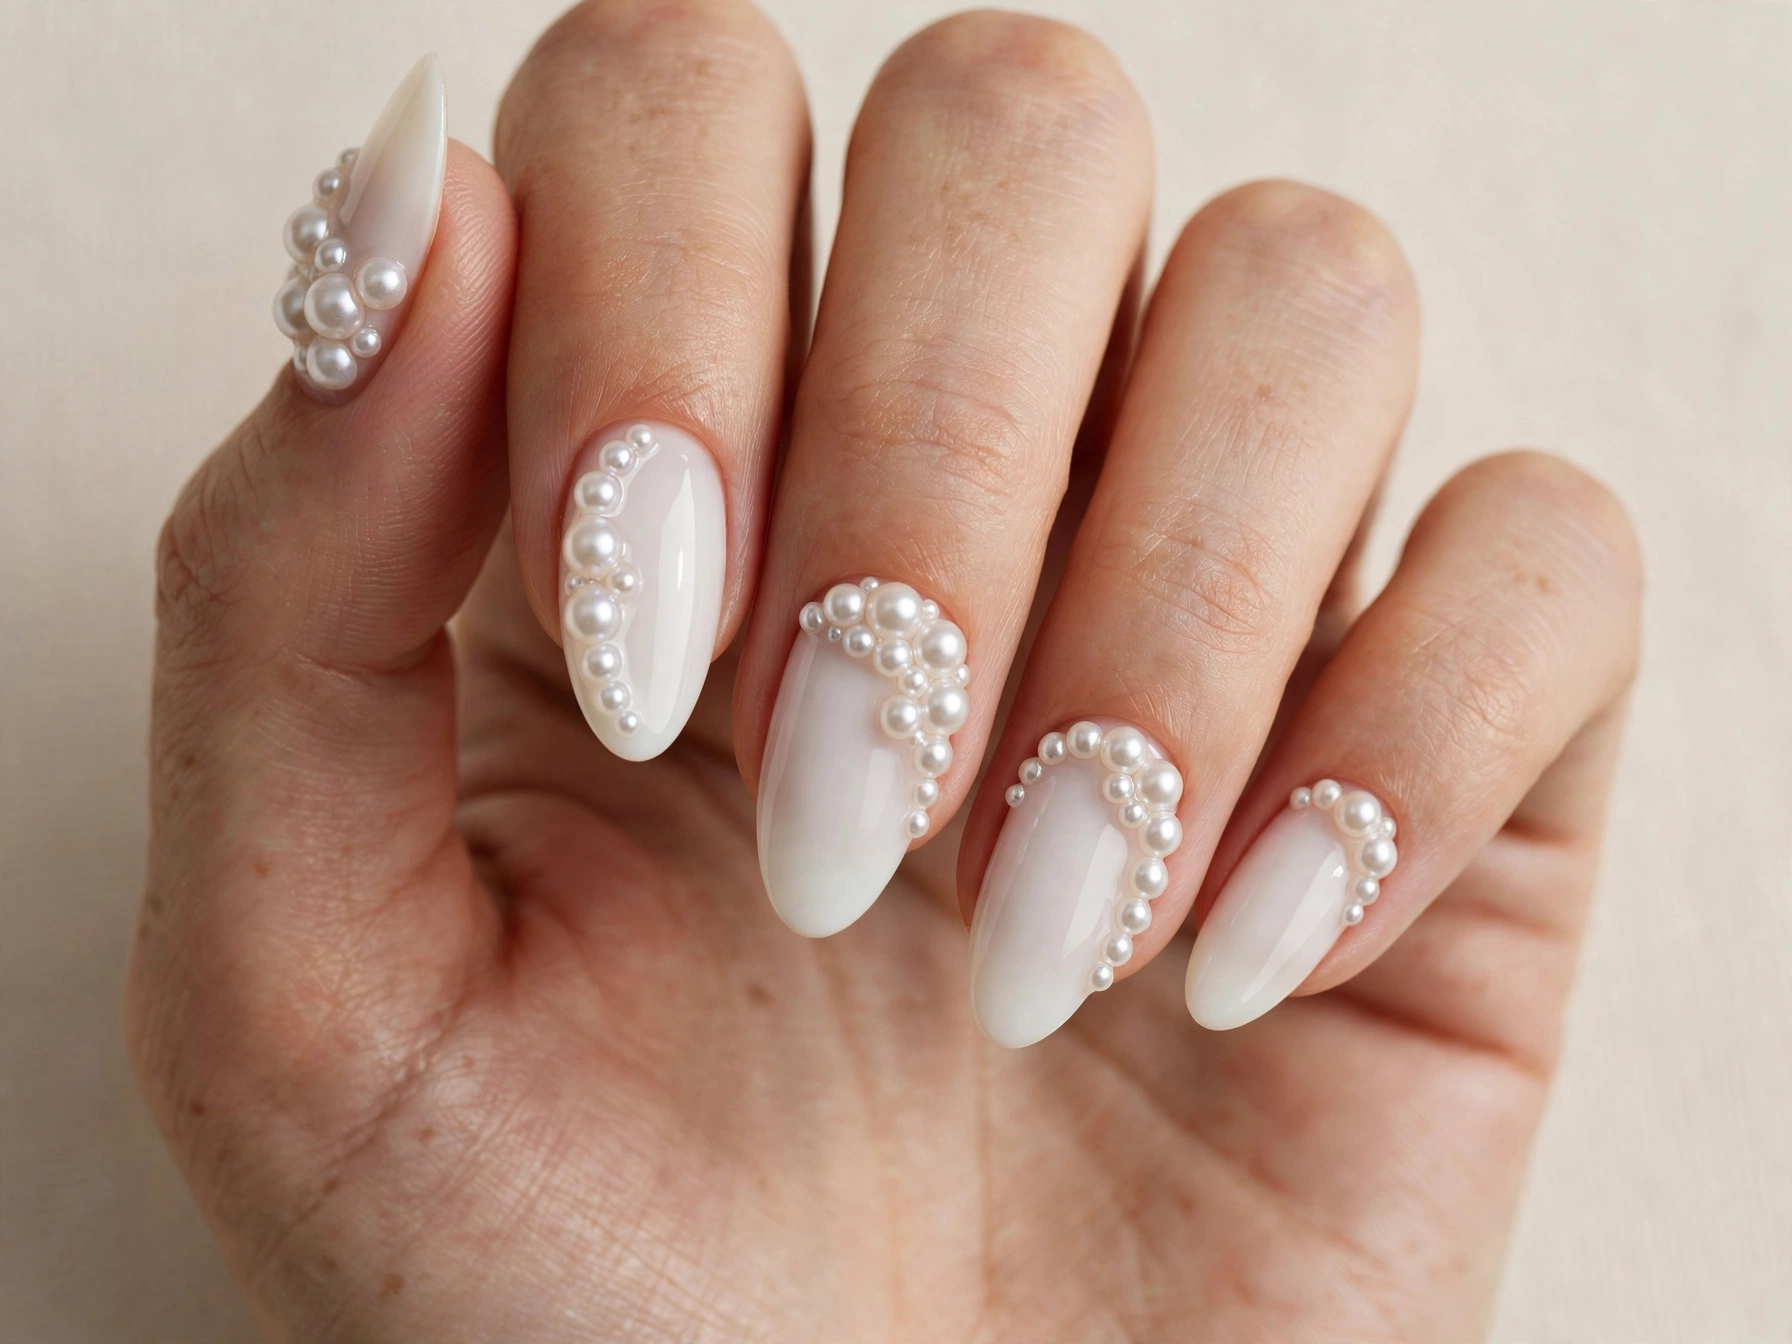
Pearls on nails are jewelry you don’t take off. Tiny flat-back pearls on a milky white base look bridal, elegant, and surprisingly modern. Apply them with a dot of nail glue while the polish is still slightly tacky, pressing each pearl down firmly. Place one pearl per nail for a refined look, or cluster three near the cuticle for drama. This design suits special occasions — weddings, graduations, formal dinners. Be aware that embellishments can catch on fabrics, so keep the pearls small for everyday wear. A final layer of top coat around (not over) each pearl helps them stay put.
18. Watercolor Wash
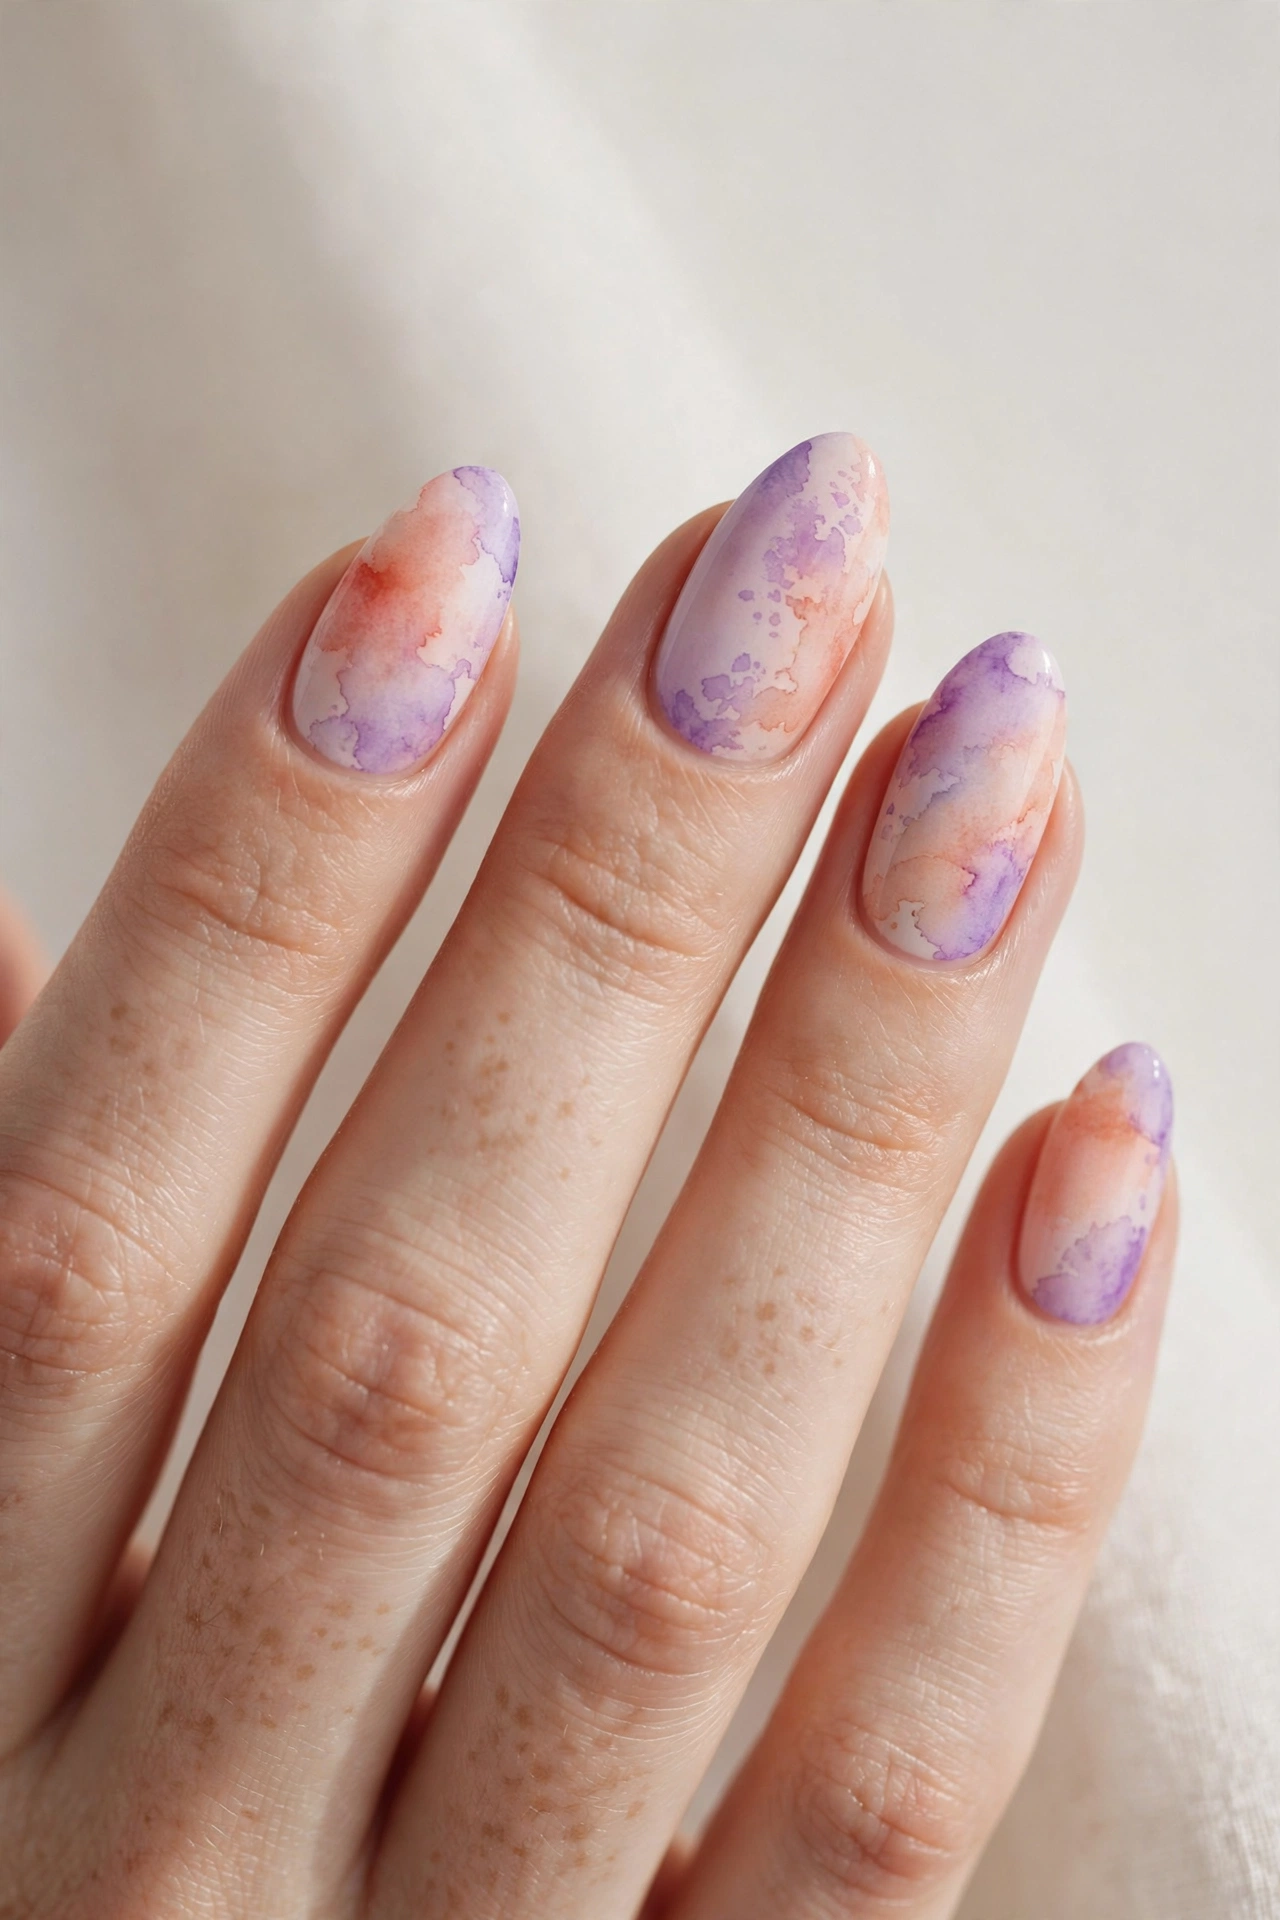
Watercolor nails look like silk — soft lavender melting into peach with no hard edges. The technique uses diluted polish: paint a white base, then dab on drops of colored polish thinned with a little acetone, blending with a clean brush. The colors bleed into each other naturally, so perfection isn’t the goal. This dreamy finish suits anyone who finds solid colors boring but loud designs too much. It works on every nail length and looks especially pretty on almond shapes. For a similar artsy-but-wearable vibe, these creative nail designs explore more ways to make your nails look like art.
19. Checkerboard
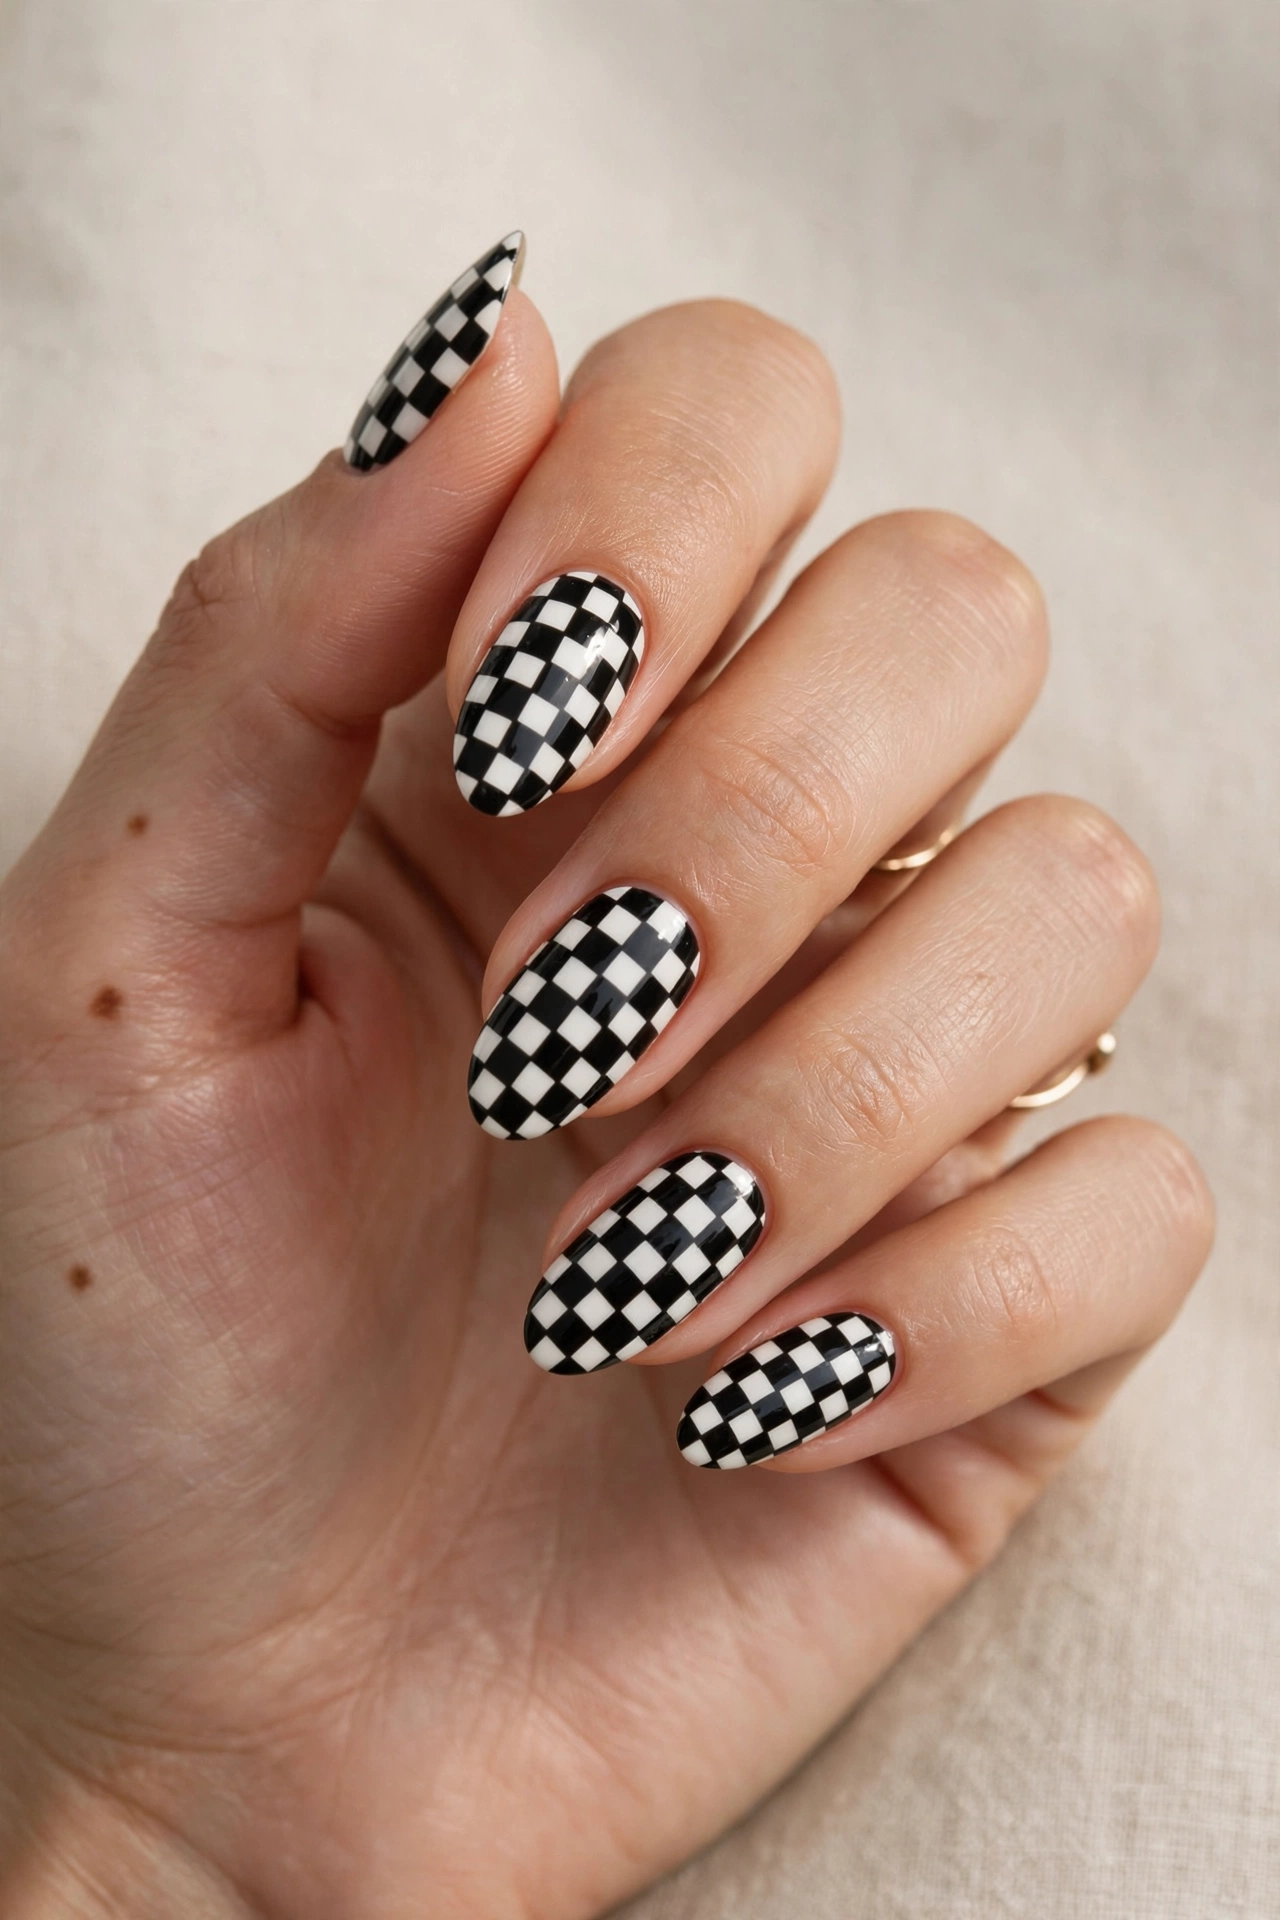
Checkerboard nails are bold, graphic, and weirdly flattering — the alternating squares make nails look longer and more uniform. Black and white is the classic combo, but pastel checks are a softer option. The neat way to do it: paint a white base, then use striping tape or a thin brush to fill alternating squares with black. Keep the squares small enough to fit three or four across the nail. This retro design suits streetwear styles and anyone who likes a statement manicure. It’s meticulous work, so give yourself time — but the payoff is a look that always gets compliments.
20. Aura Glow Nails
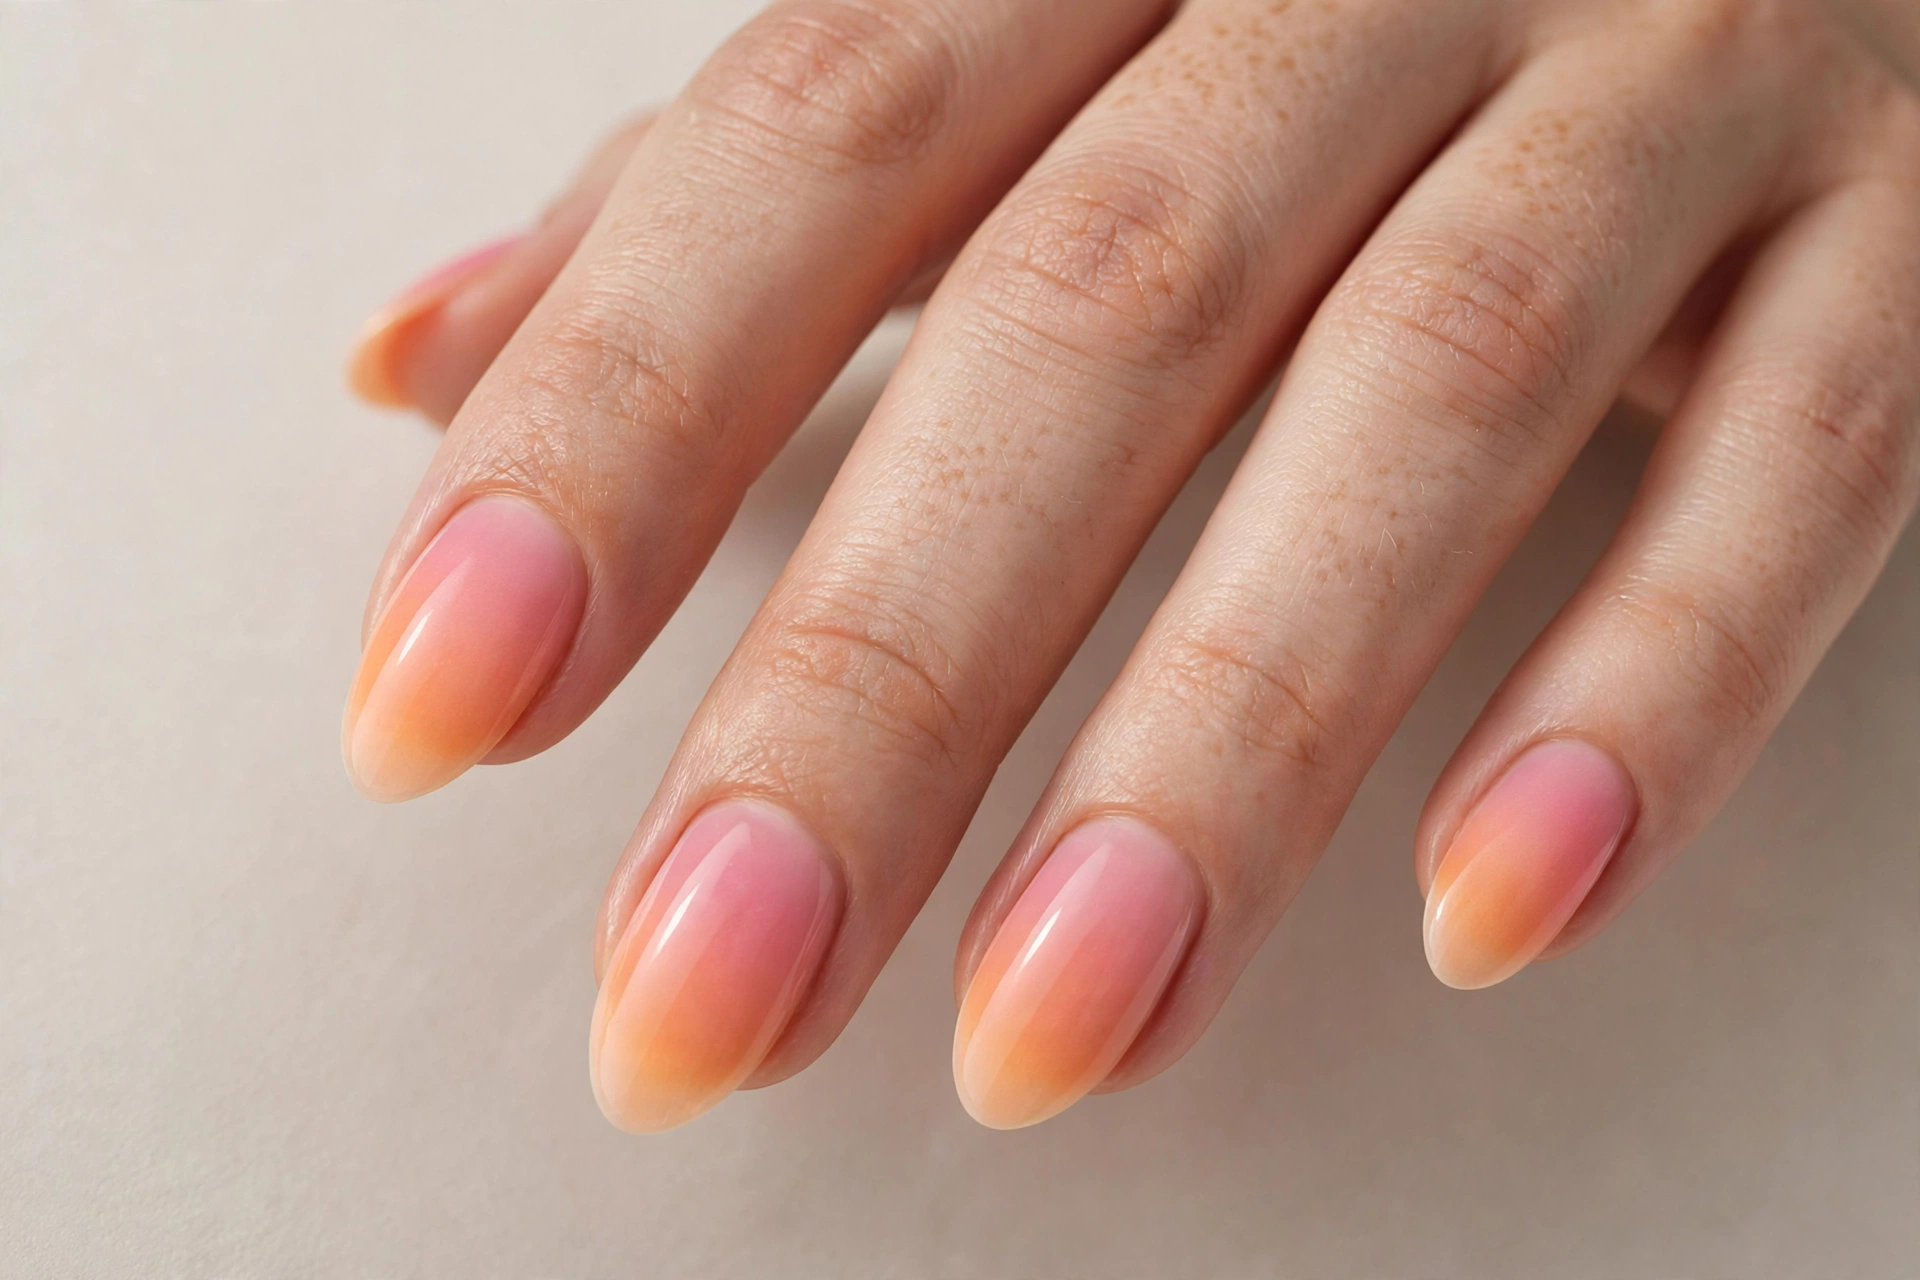
Aura nails mimic the soft glow of an aura photograph — a hazy burst of color fading into the base. The warm pink-and-orange version feels cozy and modern, like a sunset captured on your fingertips. Sponge a darker shade in the center of the nail and blend outward with a clean sponge, repeating until the gradient is seamless. This design suits anyone who loves the clean-girl aesthetic with a twist, and it works on short nails because the centered color draws the eye inward. Aura nails are one of the trendiest looks right now, and the soft edges mean the application doesn’t need to be perfect.
How to Make Your Nail Art Last Longer
Nail art takes more effort than a plain manicure, so it’s worth protecting your work. Always start with a proper base coat — it gives the polish something to grip and prevents staining, especially under dark colors. Apply your art in thin layers rather than thick ones; thick polish chips faster and takes forever to dry. Cap the free edge of each nail with every coat, including your top coat, since that’s where wear starts.
For at-home nail artists, investing in this nail polish kit makes a real difference — having the right brushes, dotting tools, and a good top coat on hand means cleaner lines and longer wear. Once your design is done, seal everything with two layers of a quality top coat, and reapply a fresh top coat every two to three days to refresh the shine and add a protective barrier. Wear gloves for dishes and cleaning, and keep cuticle oil in your bag — hydrated cuticles make any nail art look twice as polished.
Pick one idea that caught your eye and try it this week — nail art gets easier every time you practice, and even a simple design can completely change how your hands look and feel. The best nail art is the kind that makes you smile every time you glance at your fingers, so choose the one that feels most like you and have fun with it.