25 Nail Art Design Christmas Tree Ideas for a Festive Holiday Look
There is no nail art that says “holiday season” quite like a Christmas tree on your nails. Whether you love a classic green fir or a frosty white minimalist take, Christmas tree nail art is the easiest way to carry the festive mood with you from the first week of December all the way through New Year’s. The best part is how flexible it is — it works on short nails and long acrylics, in bold colors or soft neutrals, as a single accent nail or a full set of tiny painted forests.
If you are hunting for festive manicure ideas, this collection gathers 25 Christmas tree nail designs, each photographed and described in detail so you can take your favorite straight to your nail tech or recreate it at home. And if you want even more seasonal inspiration beyond trees, browse our full roundup of Christmas nail design ideas for a magical holiday look.
Why Christmas Tree Nail Art Works Every Holiday Season
A Christmas tree is instantly recognizable, which means even the simplest painted version reads as festive from across the room. That is why tree designs suit everyone — from people who want a quiet nod to the season to those who go all-out with ornaments, lights, and glitter. The design also adapts beautifully to any base color, so you can match it to your party outfits, your winter coat, or your holiday photoshoot.
Trees also photograph incredibly well, which matters when your manicure ends up in every holiday Instagram story. Pairing a tree accent with a rich solid base keeps the look polished rather than crafty, and it is one of the rare holiday nail trends that still feels tasteful at the office. For more color-driven festive options, our Christmas red nail designs collection pairs beautifully with any of the tree ideas below.
1. Classic Red and Green Tree
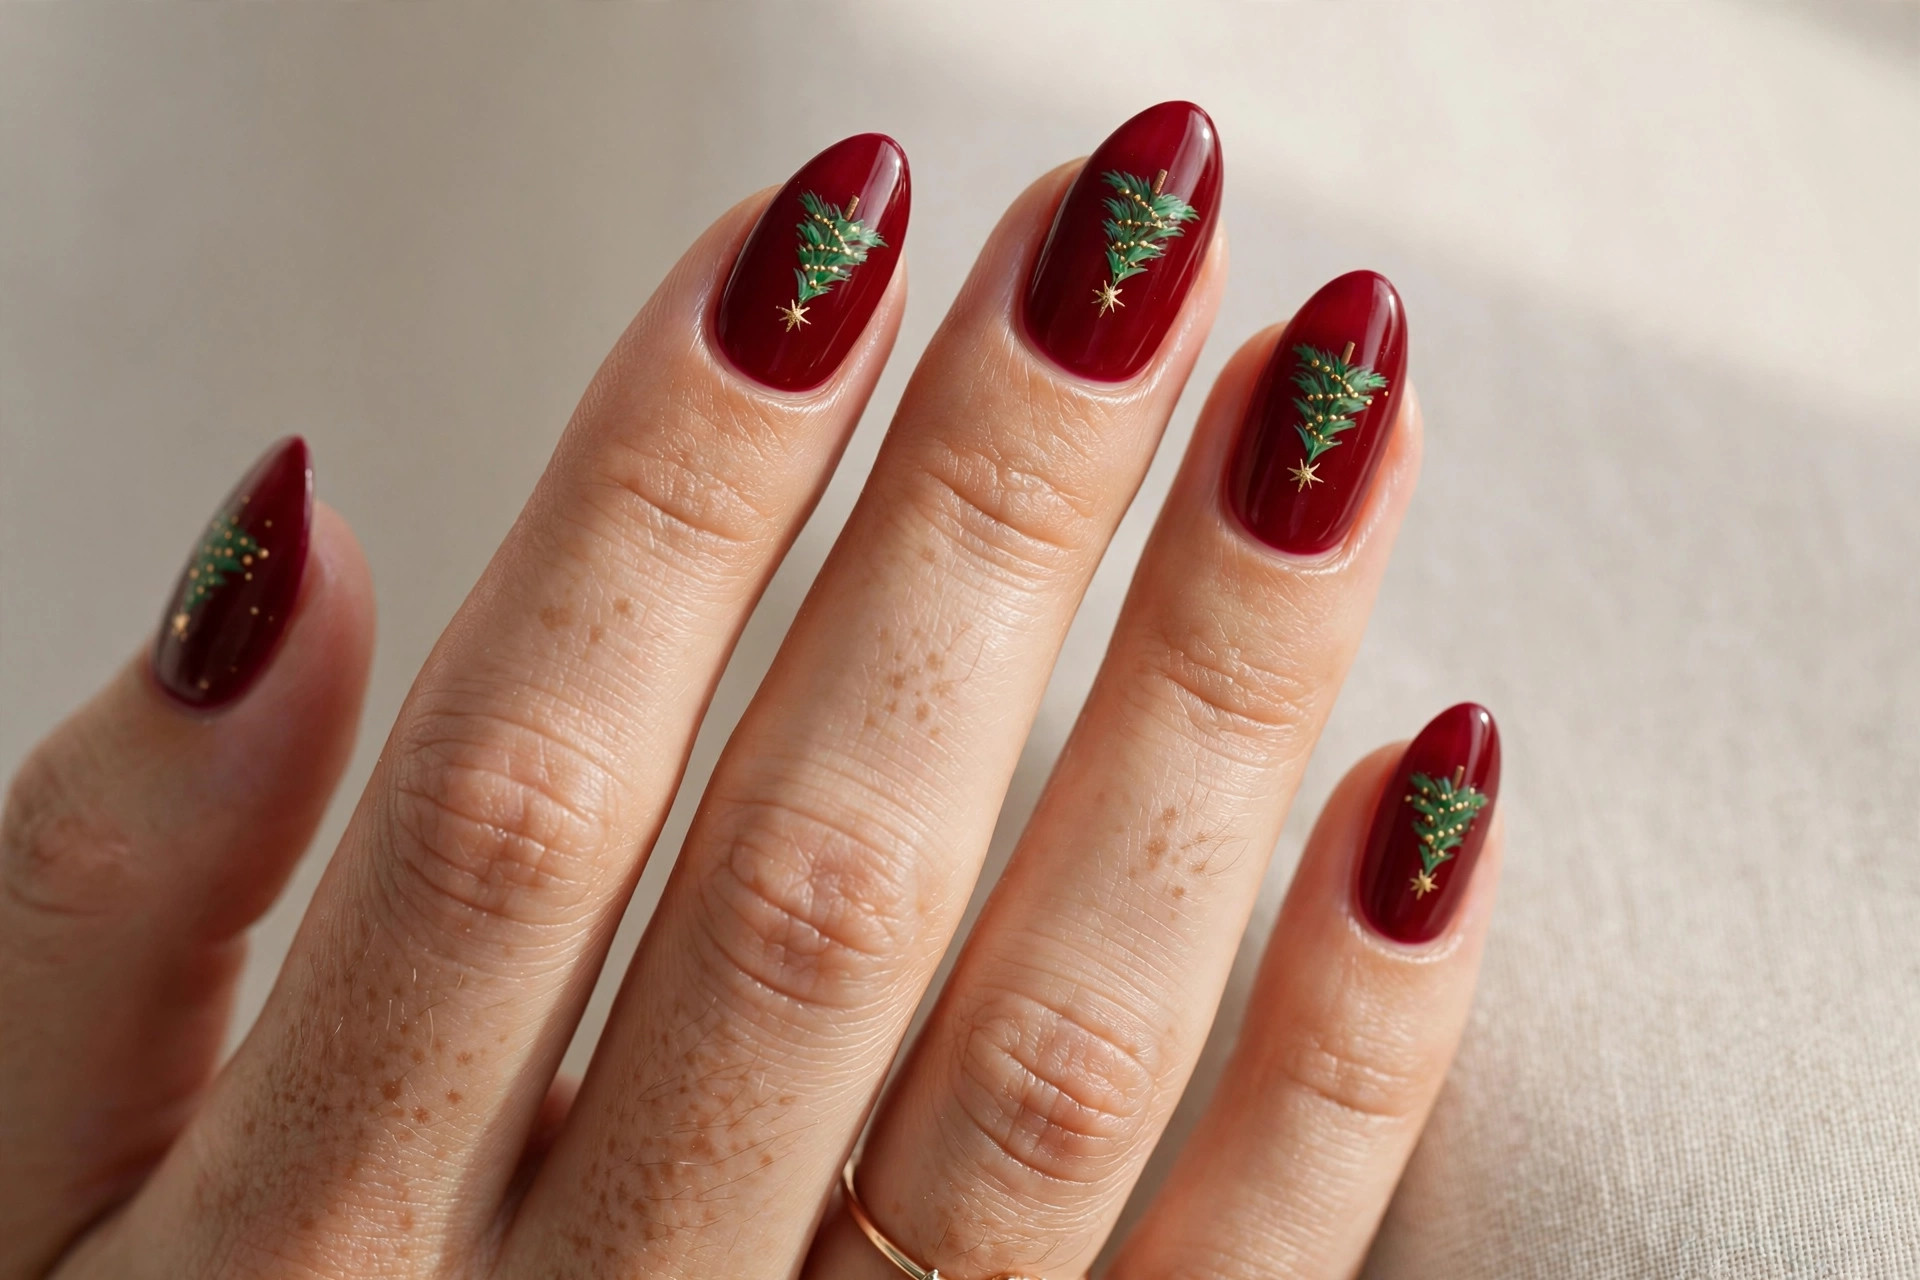
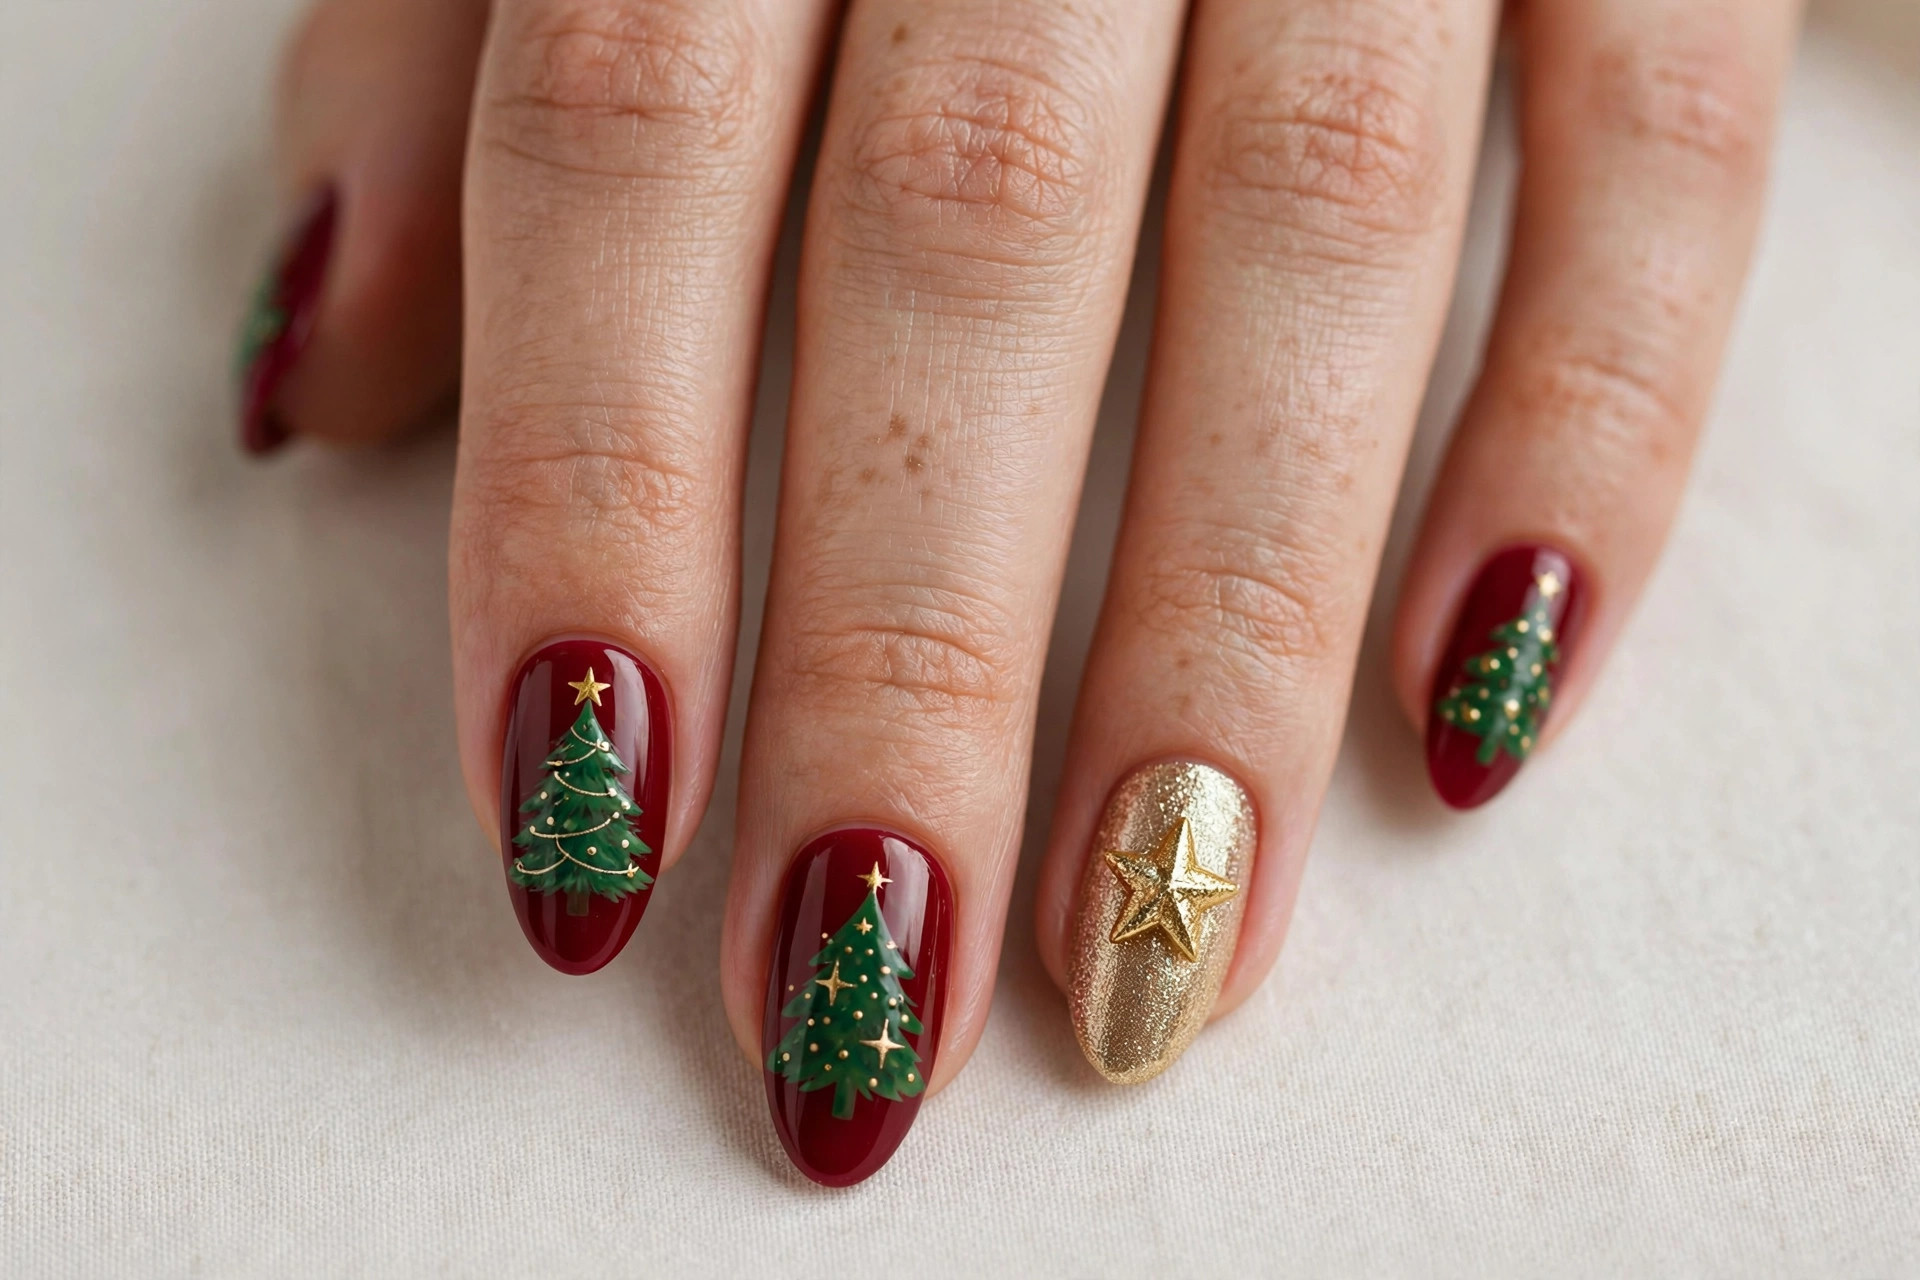
This is the Christmas tree nail art every holiday purist reaches for: a deep red base with one or two accent nails carrying a green fir tree and a tiny gold star on top. The red-green combination is bold and unmistakable, and it matches everything from velvet party dresses to cozy flannel. Keep the tree simple with a fine brush — three stacked triangles read clearly as a fir without needing much detail.
This design suits medium to long nails best, where the tree has room to breathe. Short nails can wear it too — just shrink the tree to a single accent nail and let the red base do the heavy lifting. Ask your nail tech for a glossy top coat so the red looks rich rather than flat, and the gold star will catch the light beautifully in evening photos.
2. Frosty White and Silver Tree
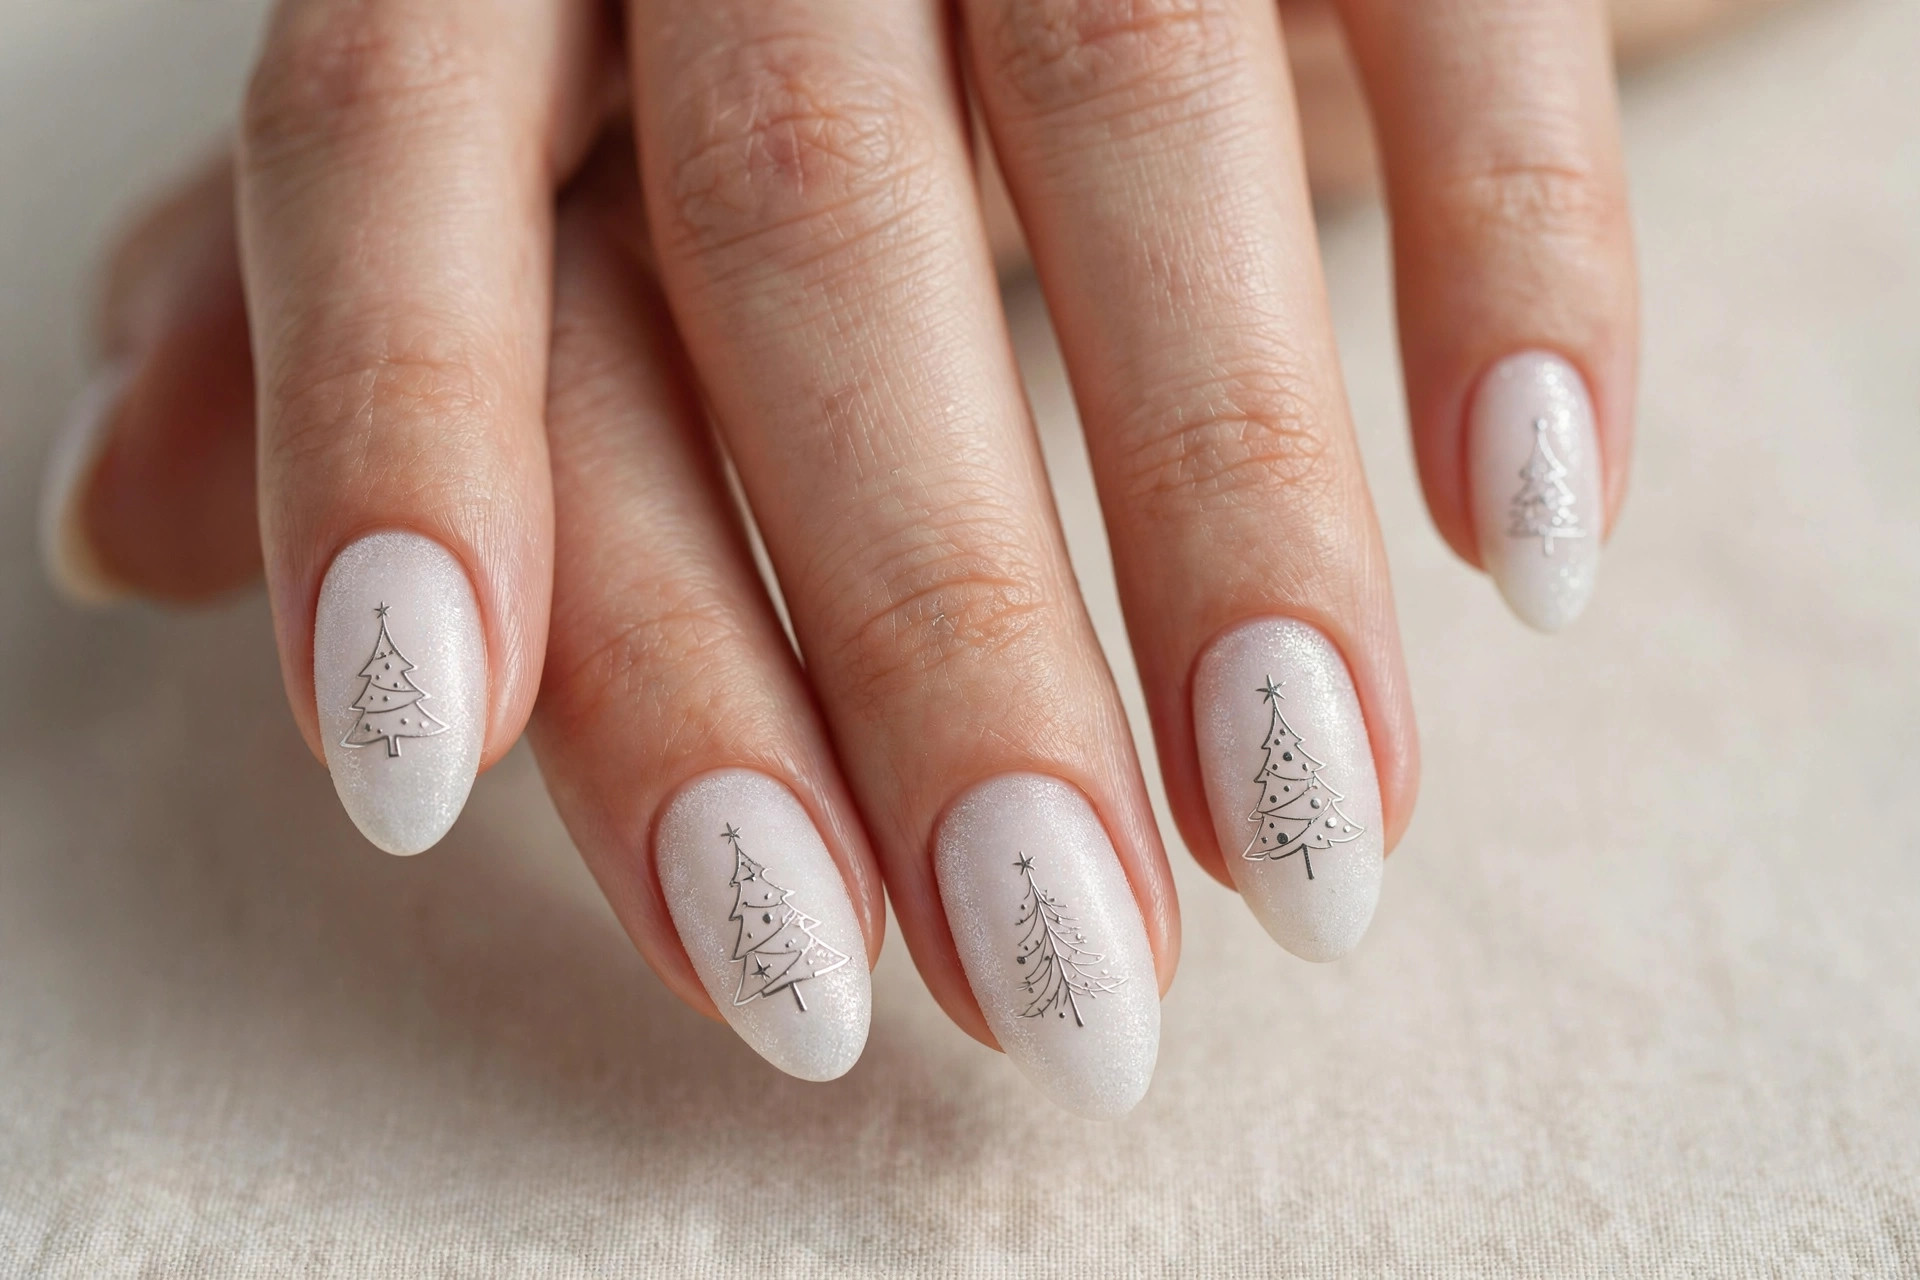
If classic red and green feels too loud for your style, this frosty take on the Christmas tree is a quieter way to stay festive. A crisp white base carries a delicate silver tree silhouette — think of a snow-covered fir at dusk. The monochrome palette makes it one of the most elegant tree designs you can wear, and it pairs well with winter whites, greys, and silver jewelry.
This look suits anyone who prefers cool tones and minimalist holiday styling. It works especially well on almond or coffin shapes, where the long nail gives the tree silhouette a graceful presence. For the tree itself, silver metallic polish or a chrome pigment over white gives the best effect — matte silver tends to disappear against white, so keep it shiny.
3. Gold Glitter Tree on Nude
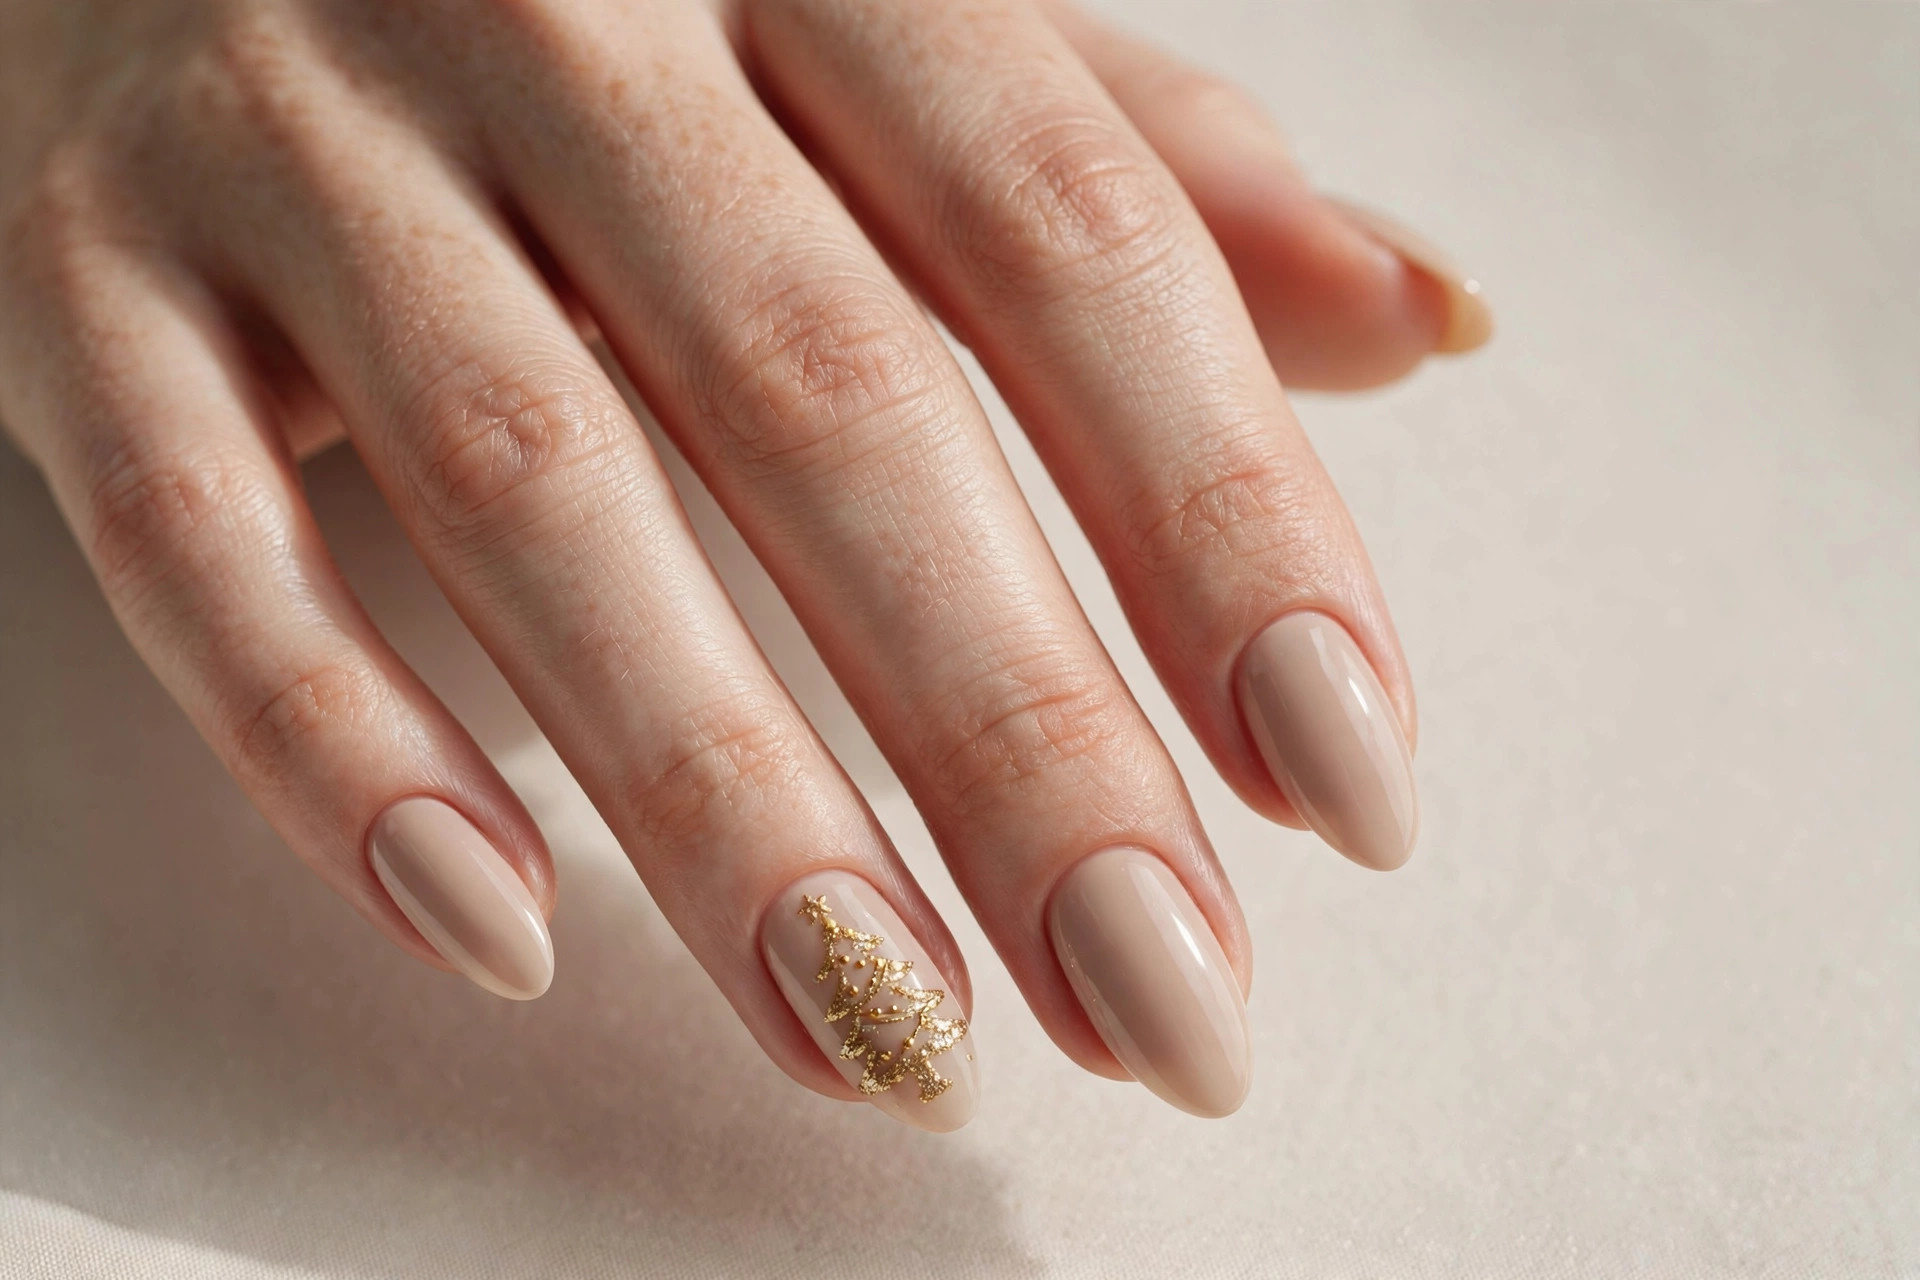
A glittering gold Christmas tree on a nude base is the definition of understated holiday glamour. The nude background keeps the design wearable from work to Christmas dinner, while the gold glitter tree adds just enough sparkle to feel festive. This is a brilliant choice for brides and anyone with a December wedding on the calendar, since it reads elegant rather than seasonal-costume.
Who it suits: literally everyone. Nude bases flatter every skin tone, and a single gold tree accent on each ring finger is enough to carry the theme. To recreate it, stamp or hand-paint the tree with gold glitter polish, then fill the tree with two coats so the glitter density looks even. A glossy top coat seals the glitter and stops it from feeling rough.
4. Minimalist Black Line-Art Tree
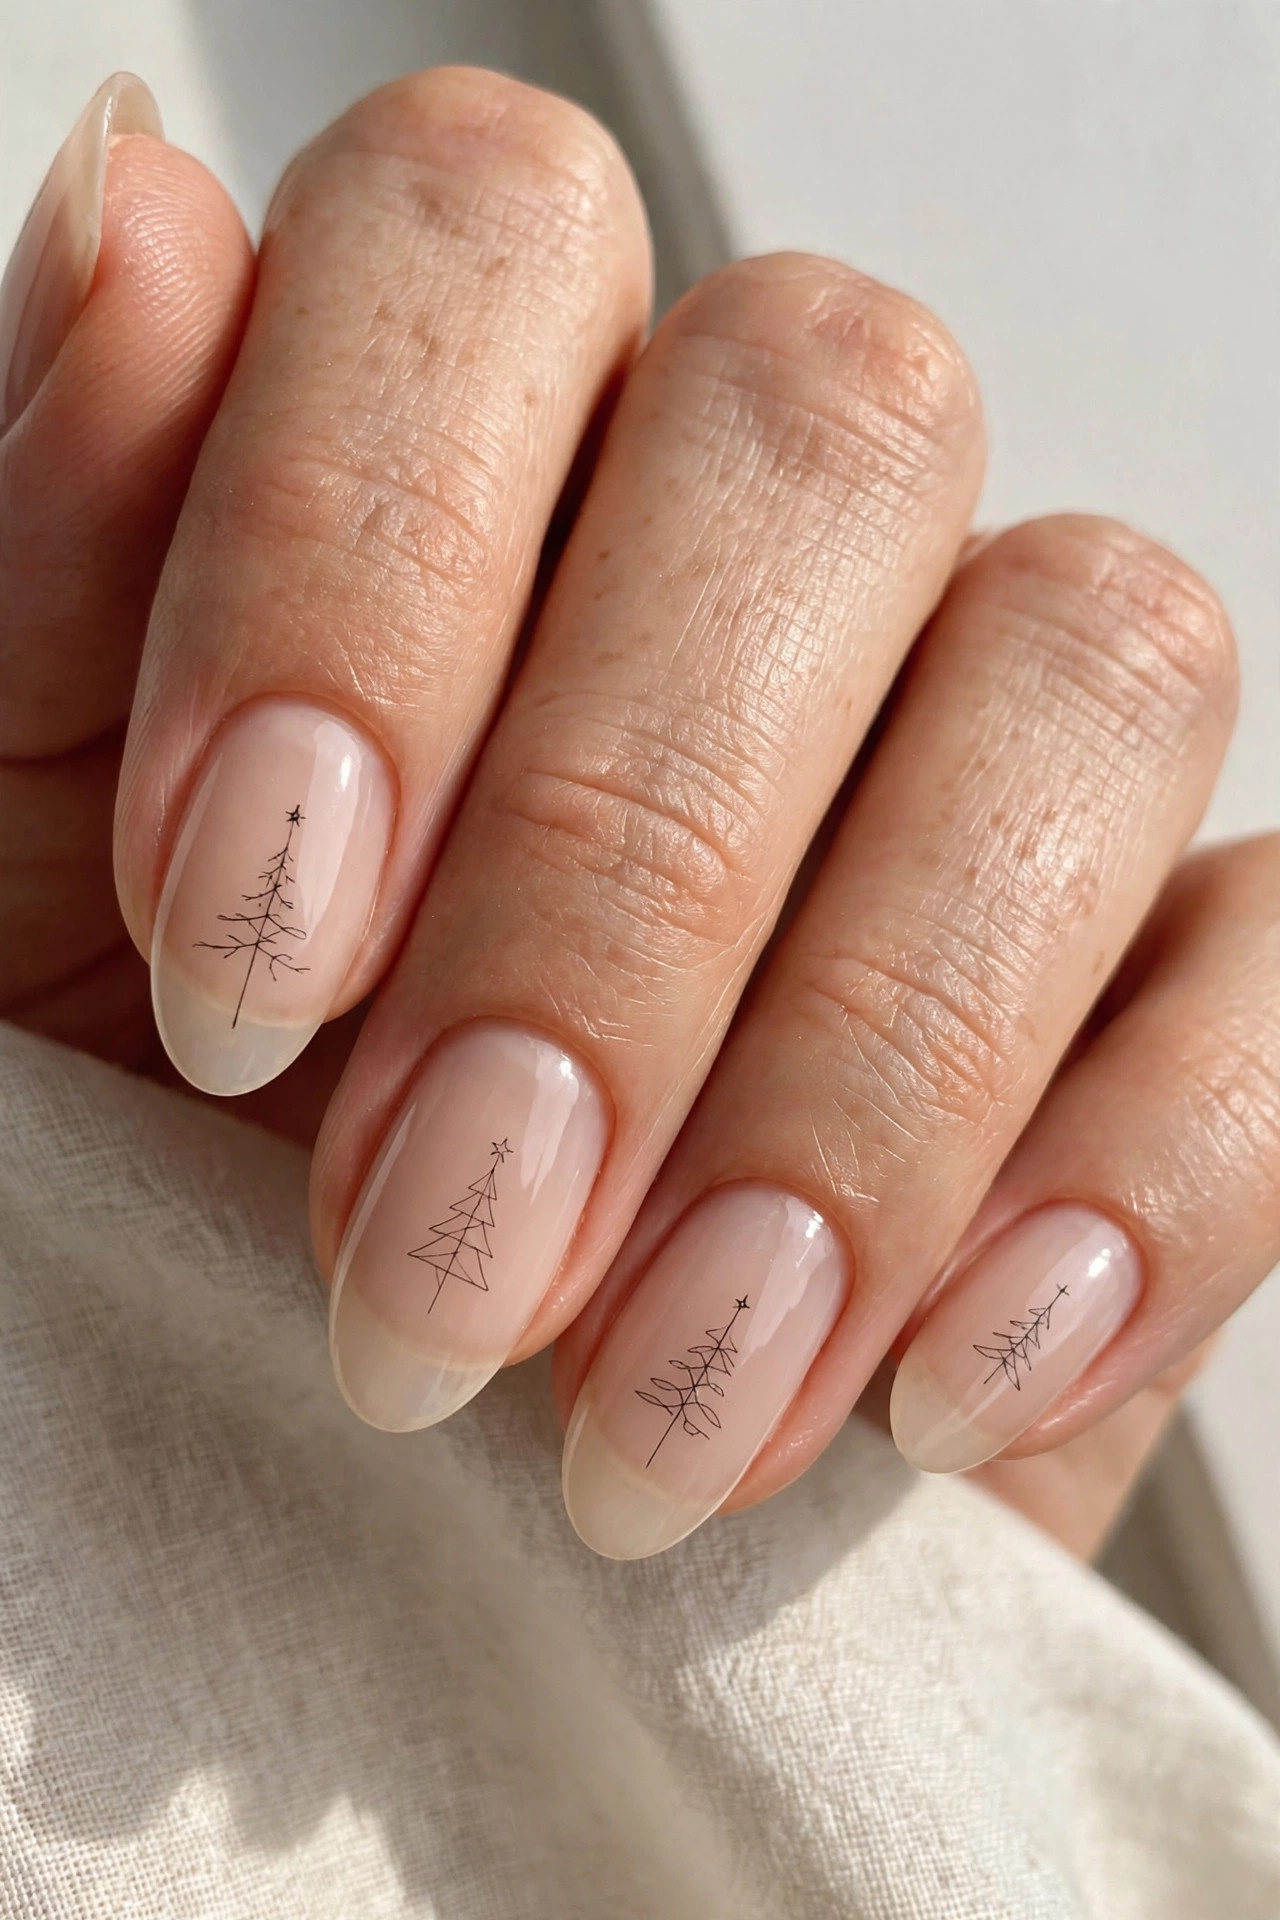
For a modern, almost architectural take, a thin black line-art Christmas tree over a sheer nude base is hard to beat. One continuous zigzag line forms the tree, a tiny circle marks an ornament or two, and the negative space does the rest. It is festive in a knowing, fashion-forward way — the kind of nail art that gets compliments from people who don’t usually notice nails.
This design is perfect for short nails and for anyone who wants holiday spirit without glitter or bright color. It also photographs beautifully against dark clothing. Use a detail striping brush and keep the lines confident — hesitation is what makes line art look wobbly. Two thin coats of sheer nude first will hide any ridges and give the black lines a smooth canvas.
5. Emerald Tree French Tips
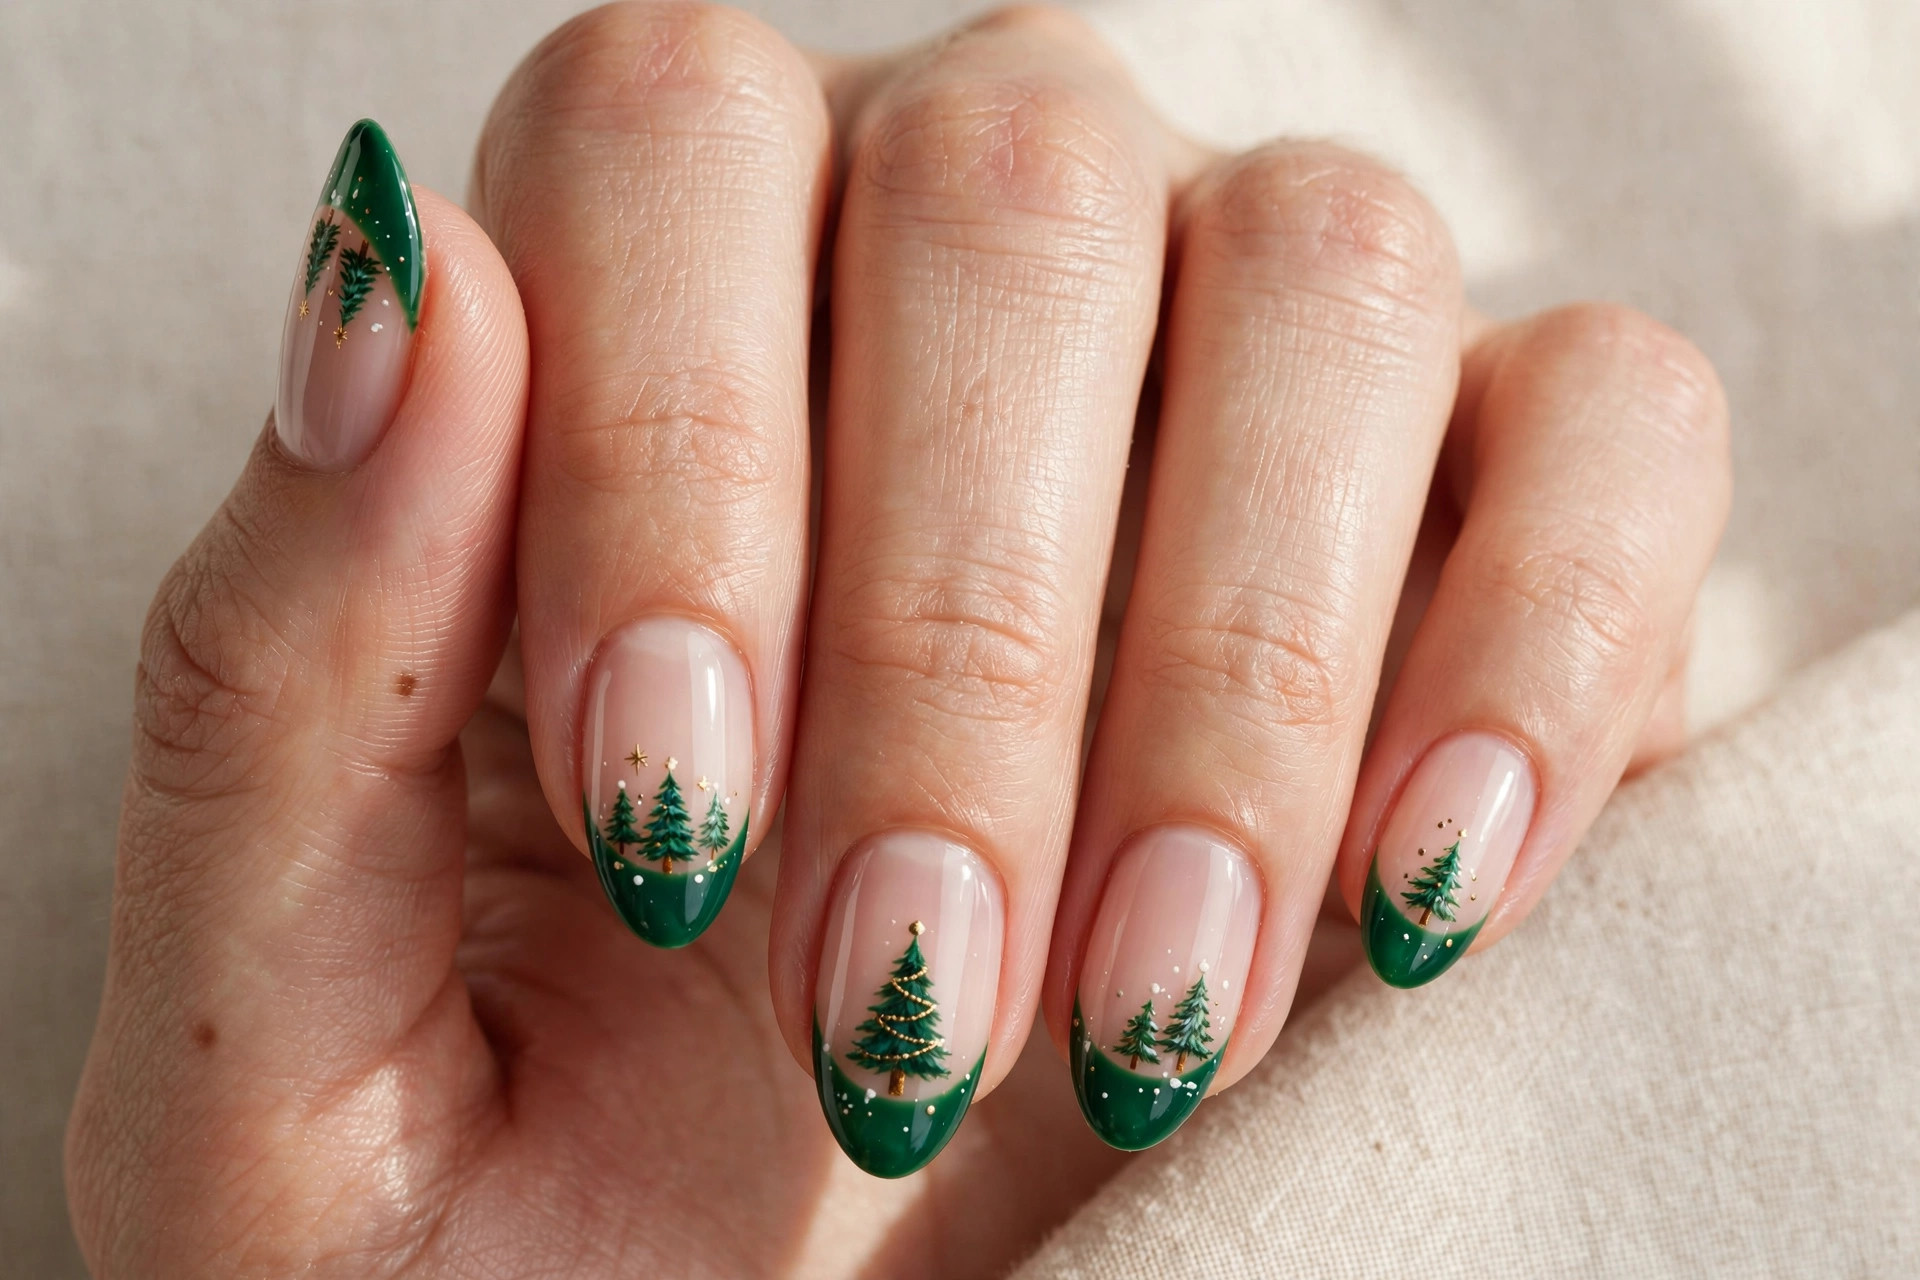
The French manicure gets a holiday upgrade here: instead of classic white tips, each tip becomes a tiny emerald Christmas tree. The base stays sheer or milky white, and the green trees sit right at the free edge like a festive twist on the smile line. The result is fresh and playful without overwhelming the nail.
This suits people who love French tips but want something special for December. It works best on almond or oval nails with a defined free edge. Ask your tech to paint the trees small — each one only needs to span the tip. Pair it with a gold star sticker or a single dot of gold polish at the top of each tree to finish the holiday detail.
6. Snow-Dusted Pine
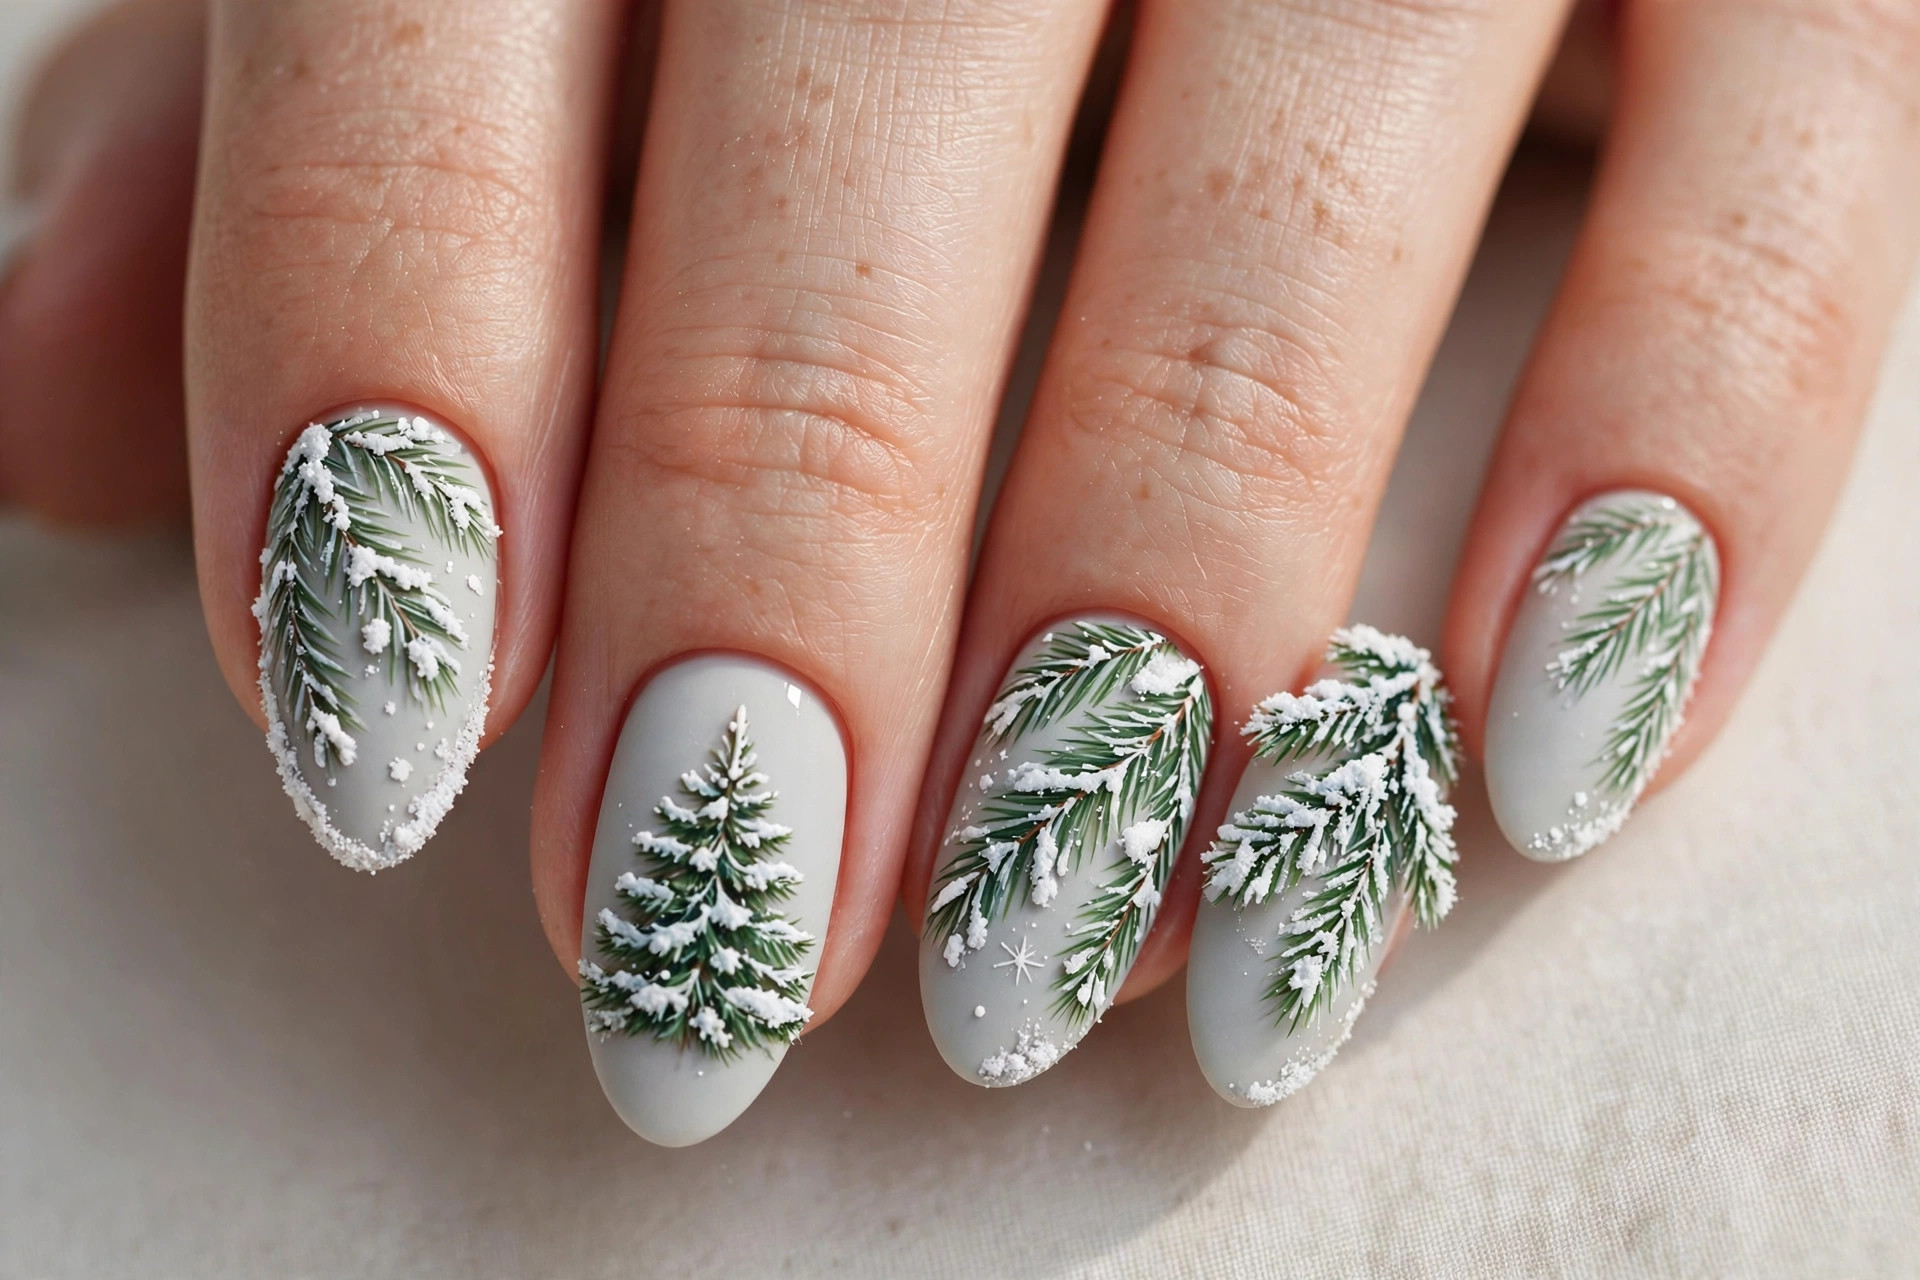
This design captures a real winter forest: green fir branches tipped with white, like fresh snow on a pine. Painted over a pale grey or icy neutral base, the snow-dusted tree feels calm and wintery rather than loud. It is the perfect choice for anyone who loves the cozy side of the holidays more than the glittery side.
To get it right, layer the green branches first, let them dry fully, then dab white polish with a dry sponge or a fan brush along the branch tips. The dry-brush technique gives a soft, natural snow effect that solid white dots cannot match. Keep the white subtle — too much and the green disappears. Seal with a matte top coat for a frosty, powdery finish.
7. Burgundy Matte with Gold Tree
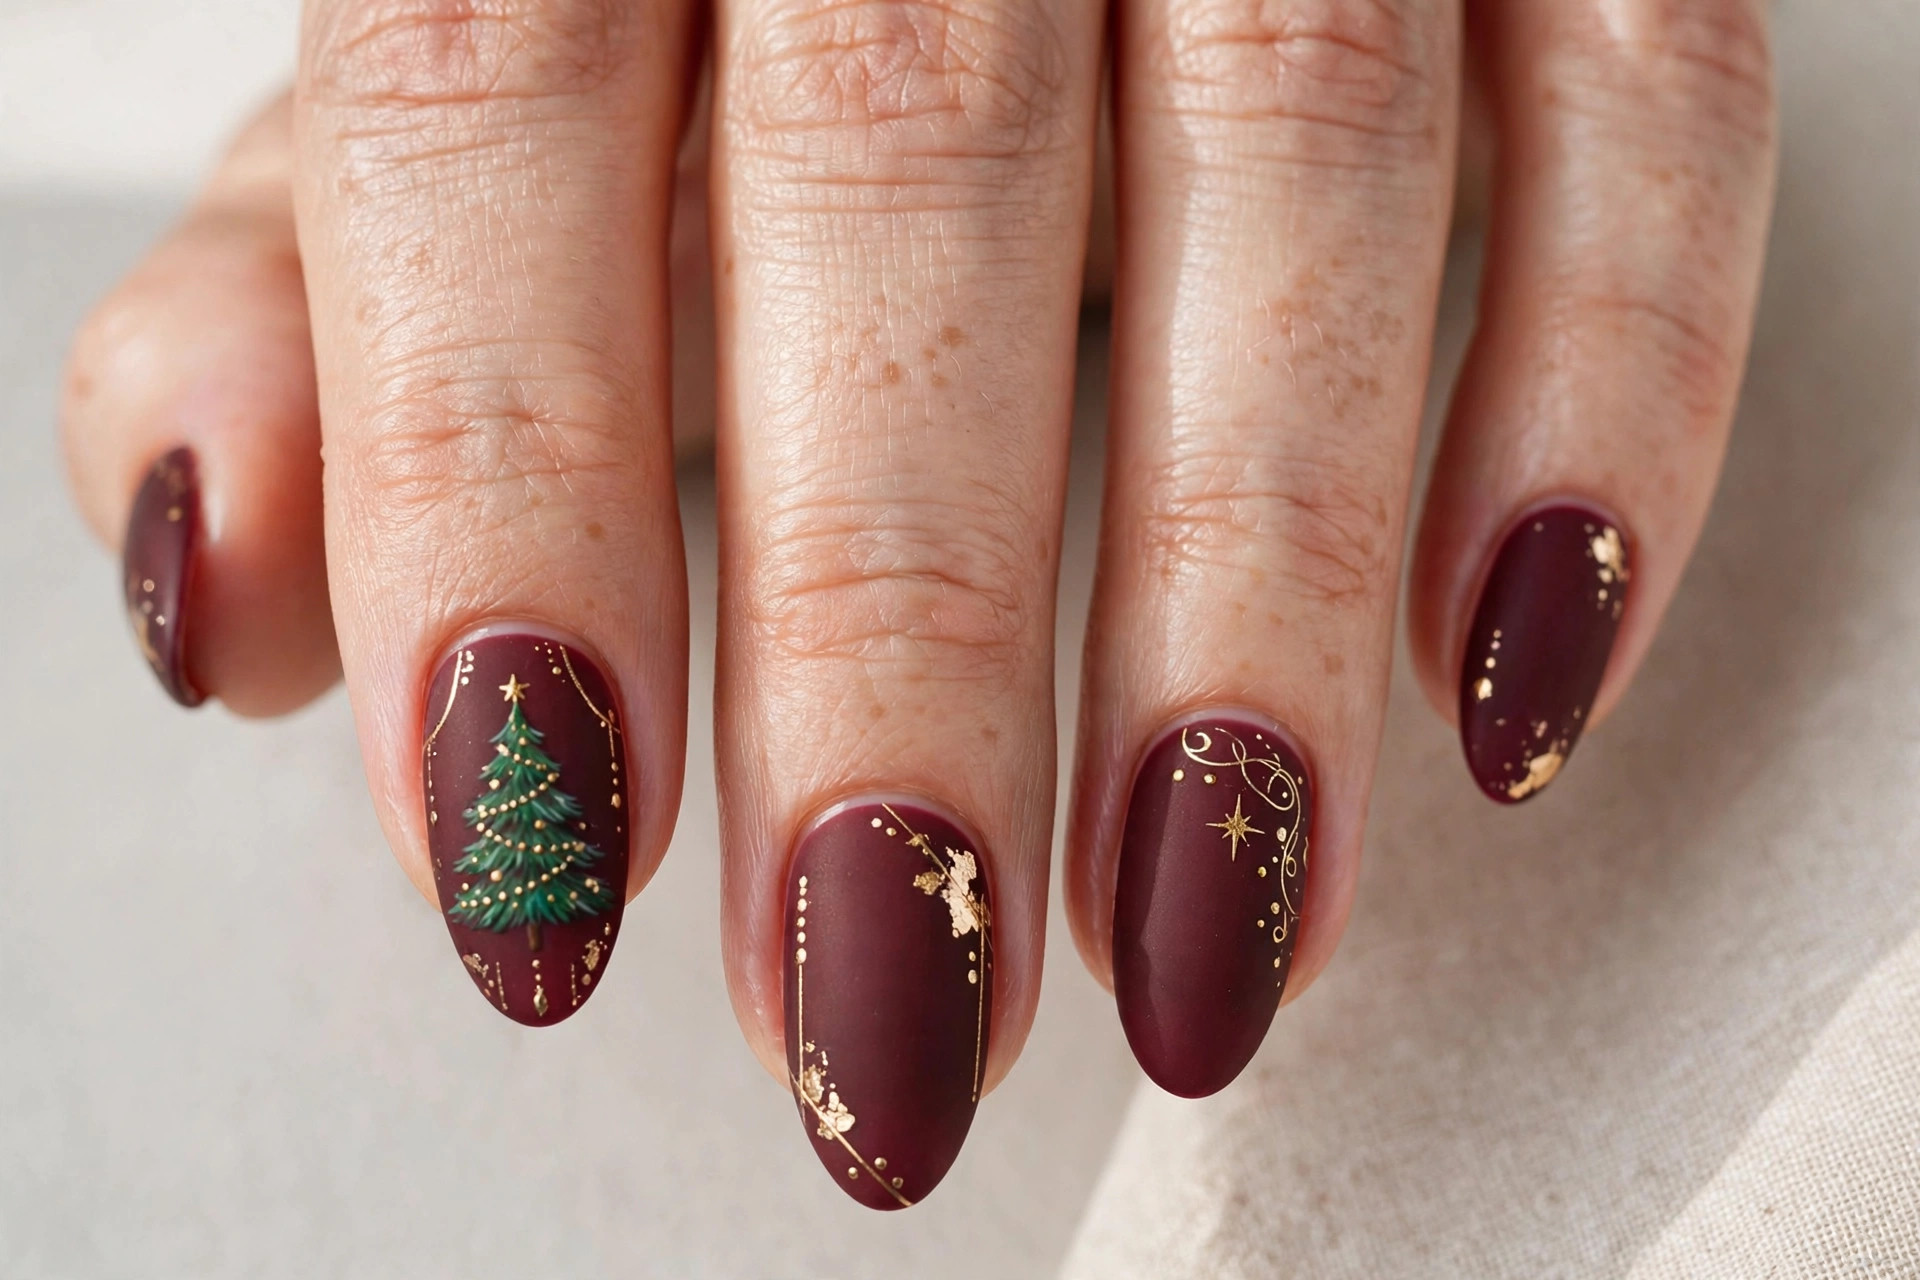
Deep burgundy is one of the richest bases you can choose for December, and a gold tree over matte burgundy looks expensive. The contrast between the velvety matte base and the gleaming metallic tree creates instant drama — this is an evening-out manicure that happens to be holiday-themed.
This combination suits anyone with a warm or deep skin tone particularly well, though it flatters everyone. If you are building a full set of festive looks this season, it also coordinates nicely with the rest of our holiday designs for nails, since burgundy and gold are the thread running through so many Christmas manicures. Use a true matte top coat — the effect falls flat if the base still looks glossy.
8. Ornament-Dotted Tree
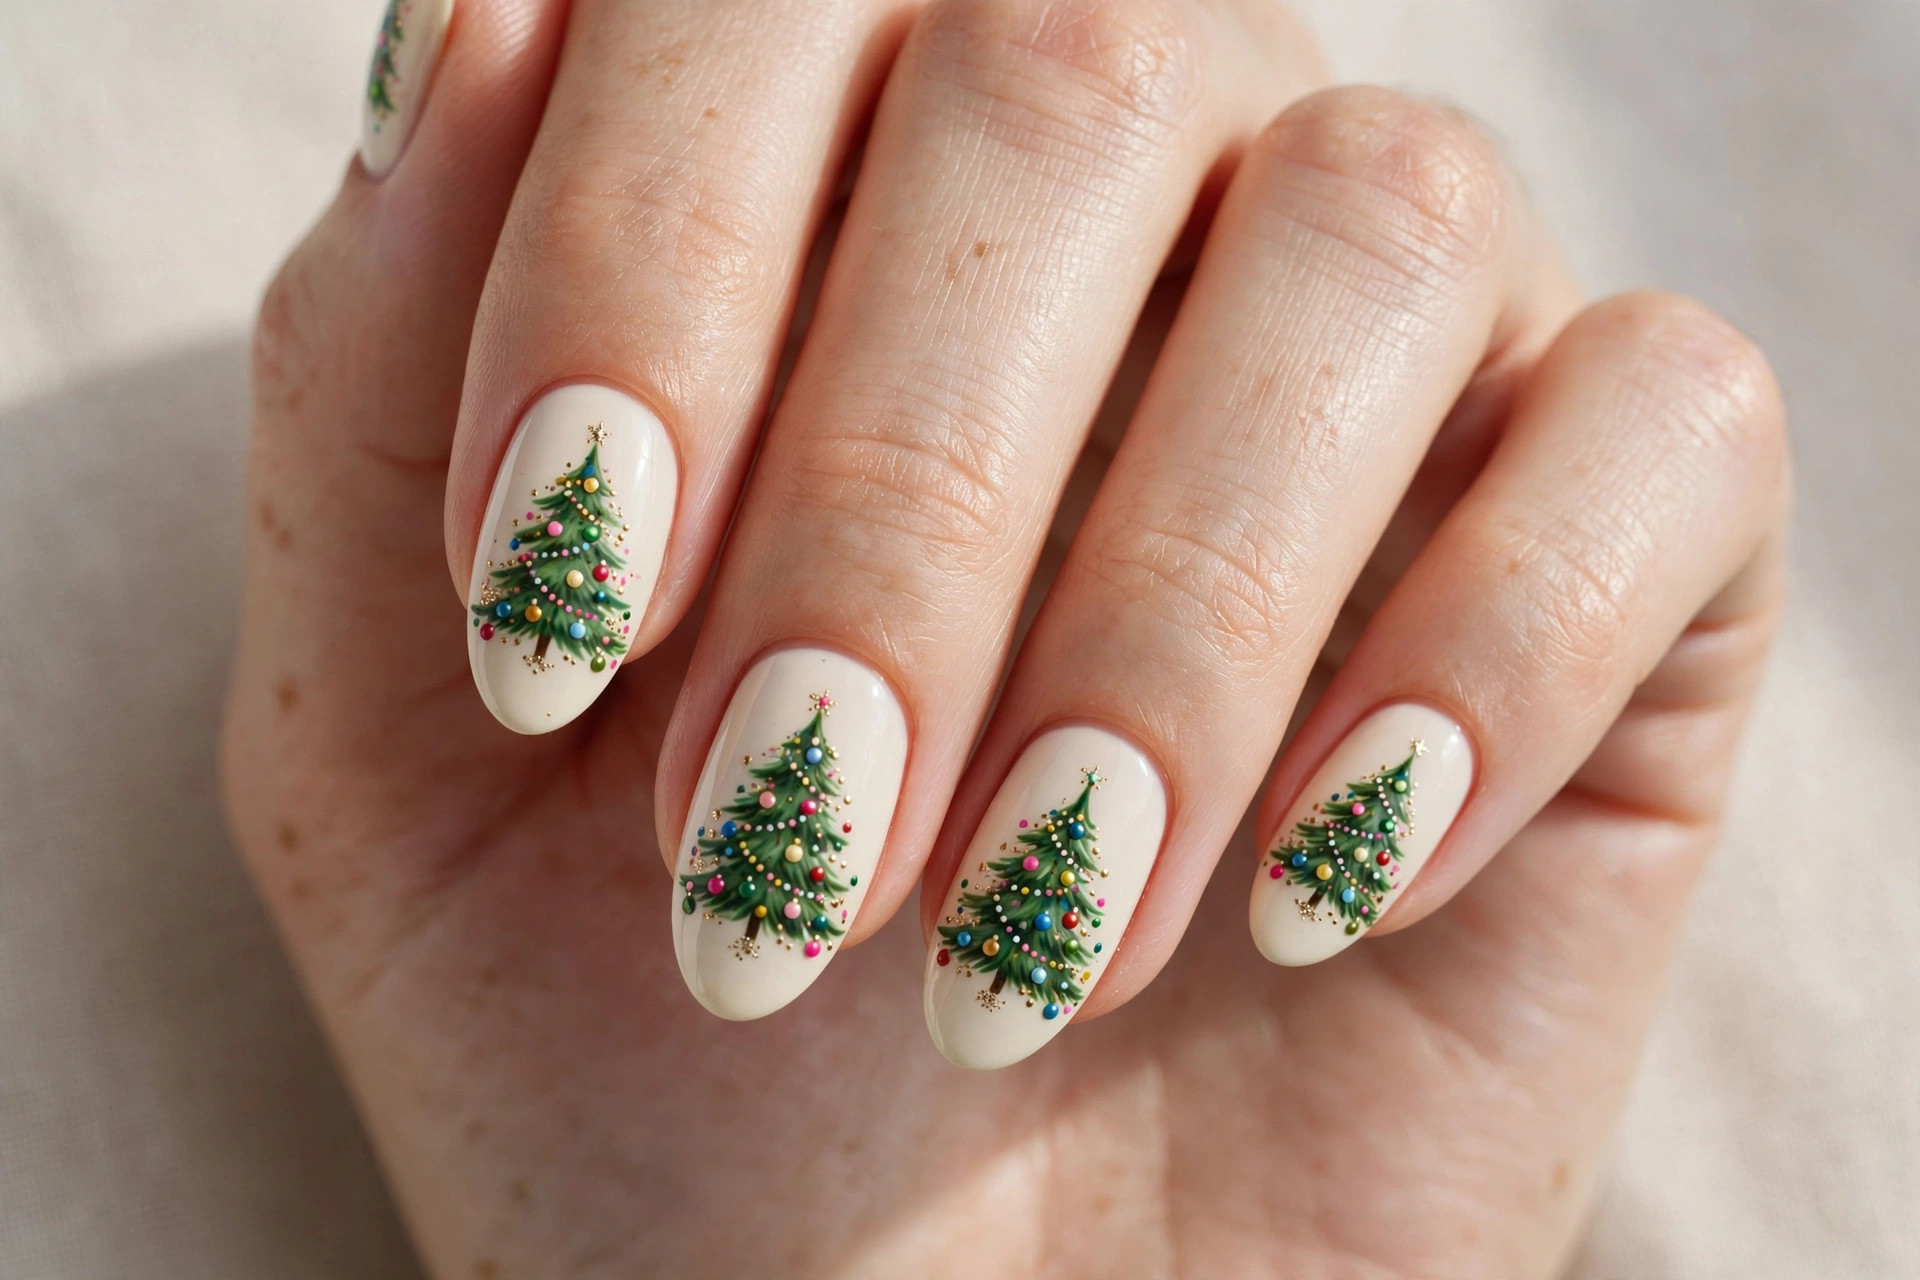
Sometimes the tree itself is just the starting point. In this design, a green fir becomes a tiny decorated tree with hand-painted ornaments — small colorful dots in red, gold, blue, and white scattered across the branches. It is cheerful, detailed, and genuinely fun to look at up close.
This is a great pick for people who love intricate nail art and have the patience for dotting. A dotting tool makes the ornaments perfectly round; vary the dot sizes so the tree looks like it carries ornaments of different sizes. Keep the base cream or ivory so every ornament color pops. Expect compliments — strangers will notice this one.
9. String Lights Tree
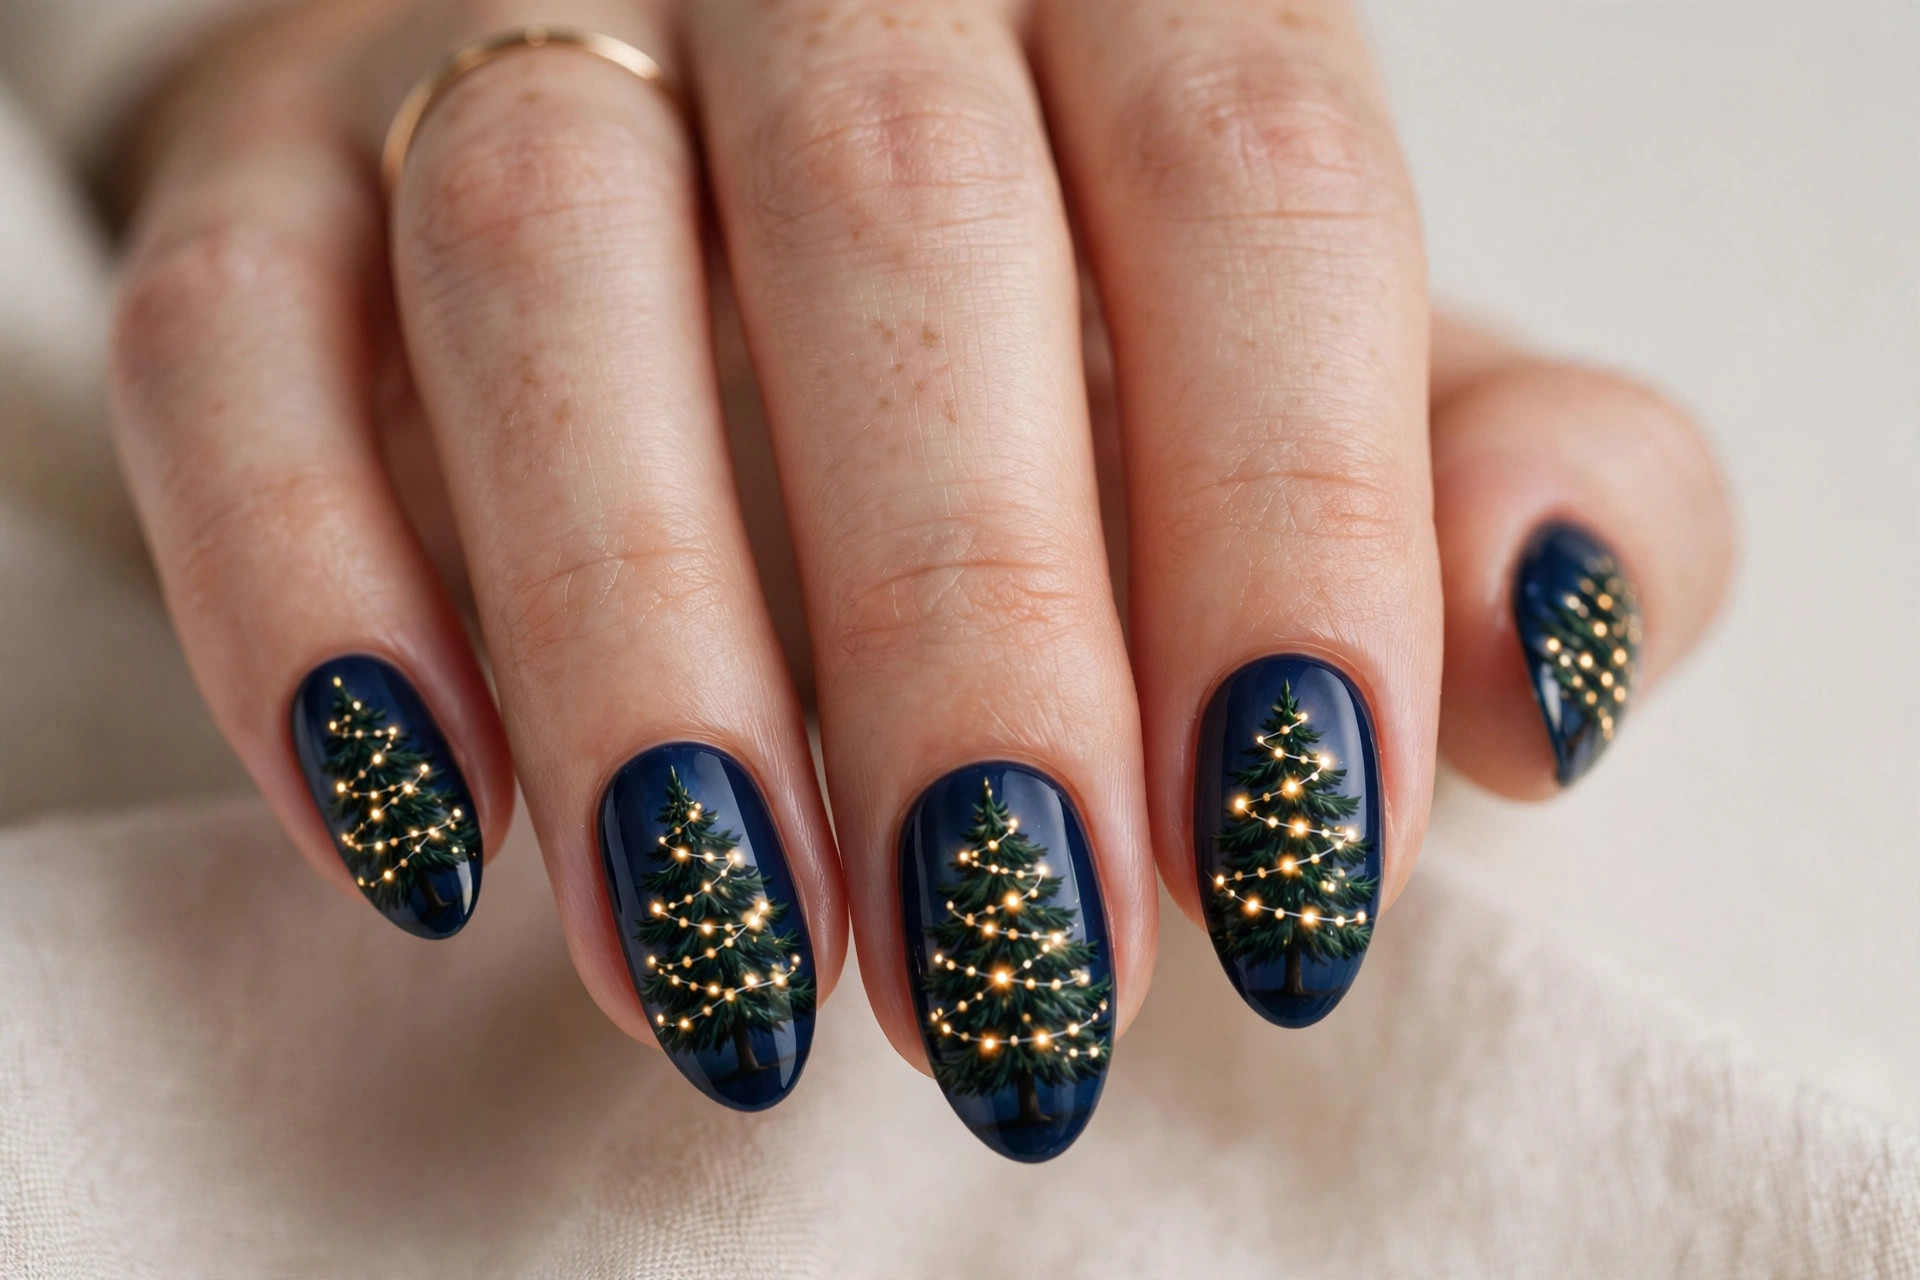
Wrap your tree in glowing string lights for one of the prettiest Christmas nail designs in this roundup. A dark green tree on a midnight blue base carries tiny warm golden dots that look like lit fairy lights against the night sky. The effect is magical — like looking at a decorated tree through a window after dark.
This design suits evening wear and looks stunning in photographs. Use a fine brush to wind a thin gold line through the tree branches, then place the light dots along it. A glossy top coat makes the “lights” appear to glow. For more tree-focused manicures to pair with this look, our Christmas nail designs roundup has plenty of complementary ideas.
10. Pink Christmas Tree
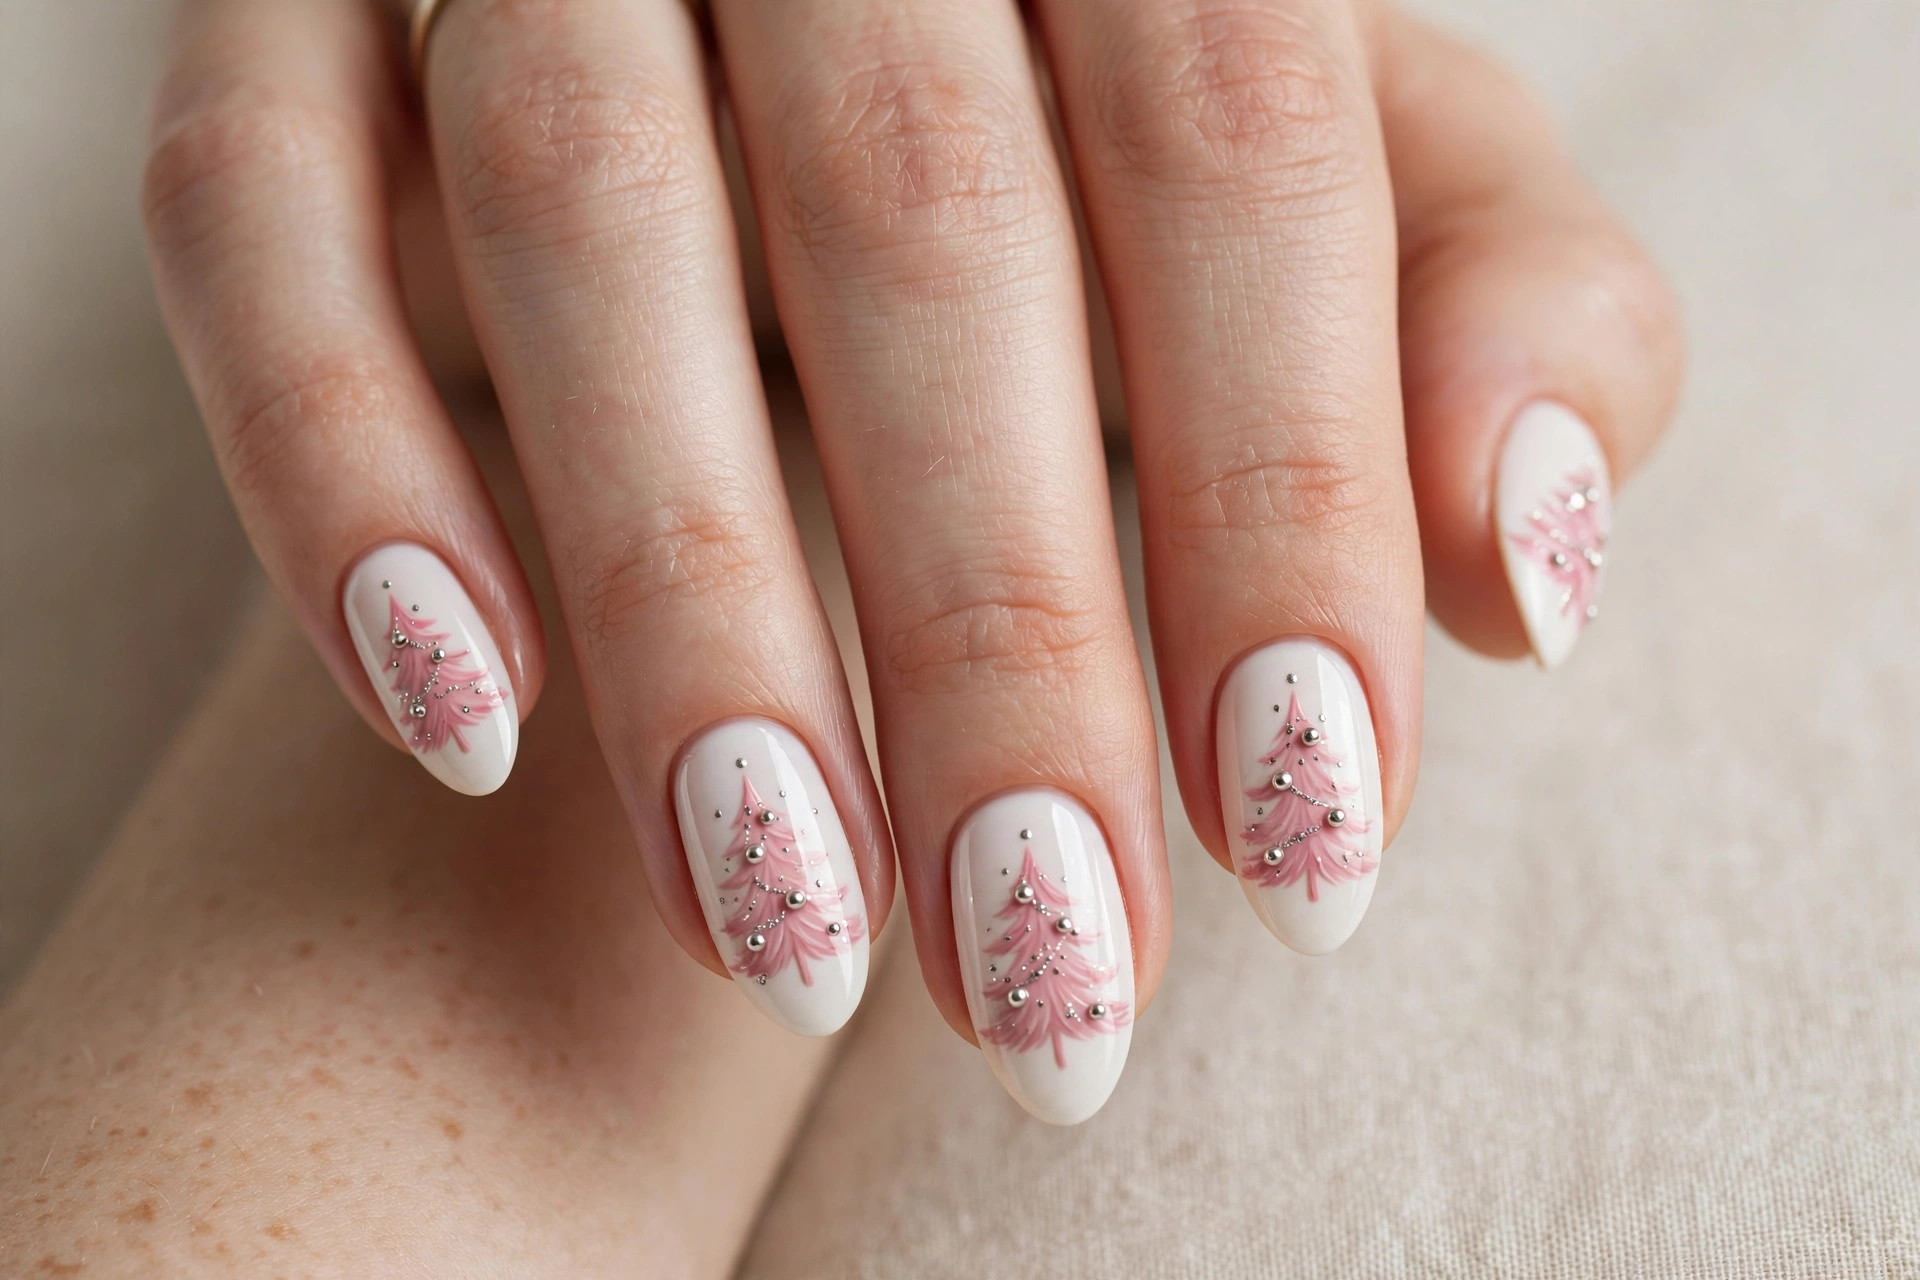
Who says Christmas trees have to be green? A blush pink fir with silver baubles on a white base is the modern, playful alternative that has taken over holiday nail feeds. It is festive without a single traditional color, and it looks incredible with the season’s pale, sparkly outfits.
This design suits anyone with a fun, youthful style, and it is a favorite for Christmas brunch, holiday parties, and New Year’s Eve. Keep the pink soft rather than hot — blush and rose tones photograph best. Add tiny silver dots or micro-beads as baubles for texture, and finish with a glossy top coat so the pink stays vibrant.
11. Icy Blue Frosty Tree
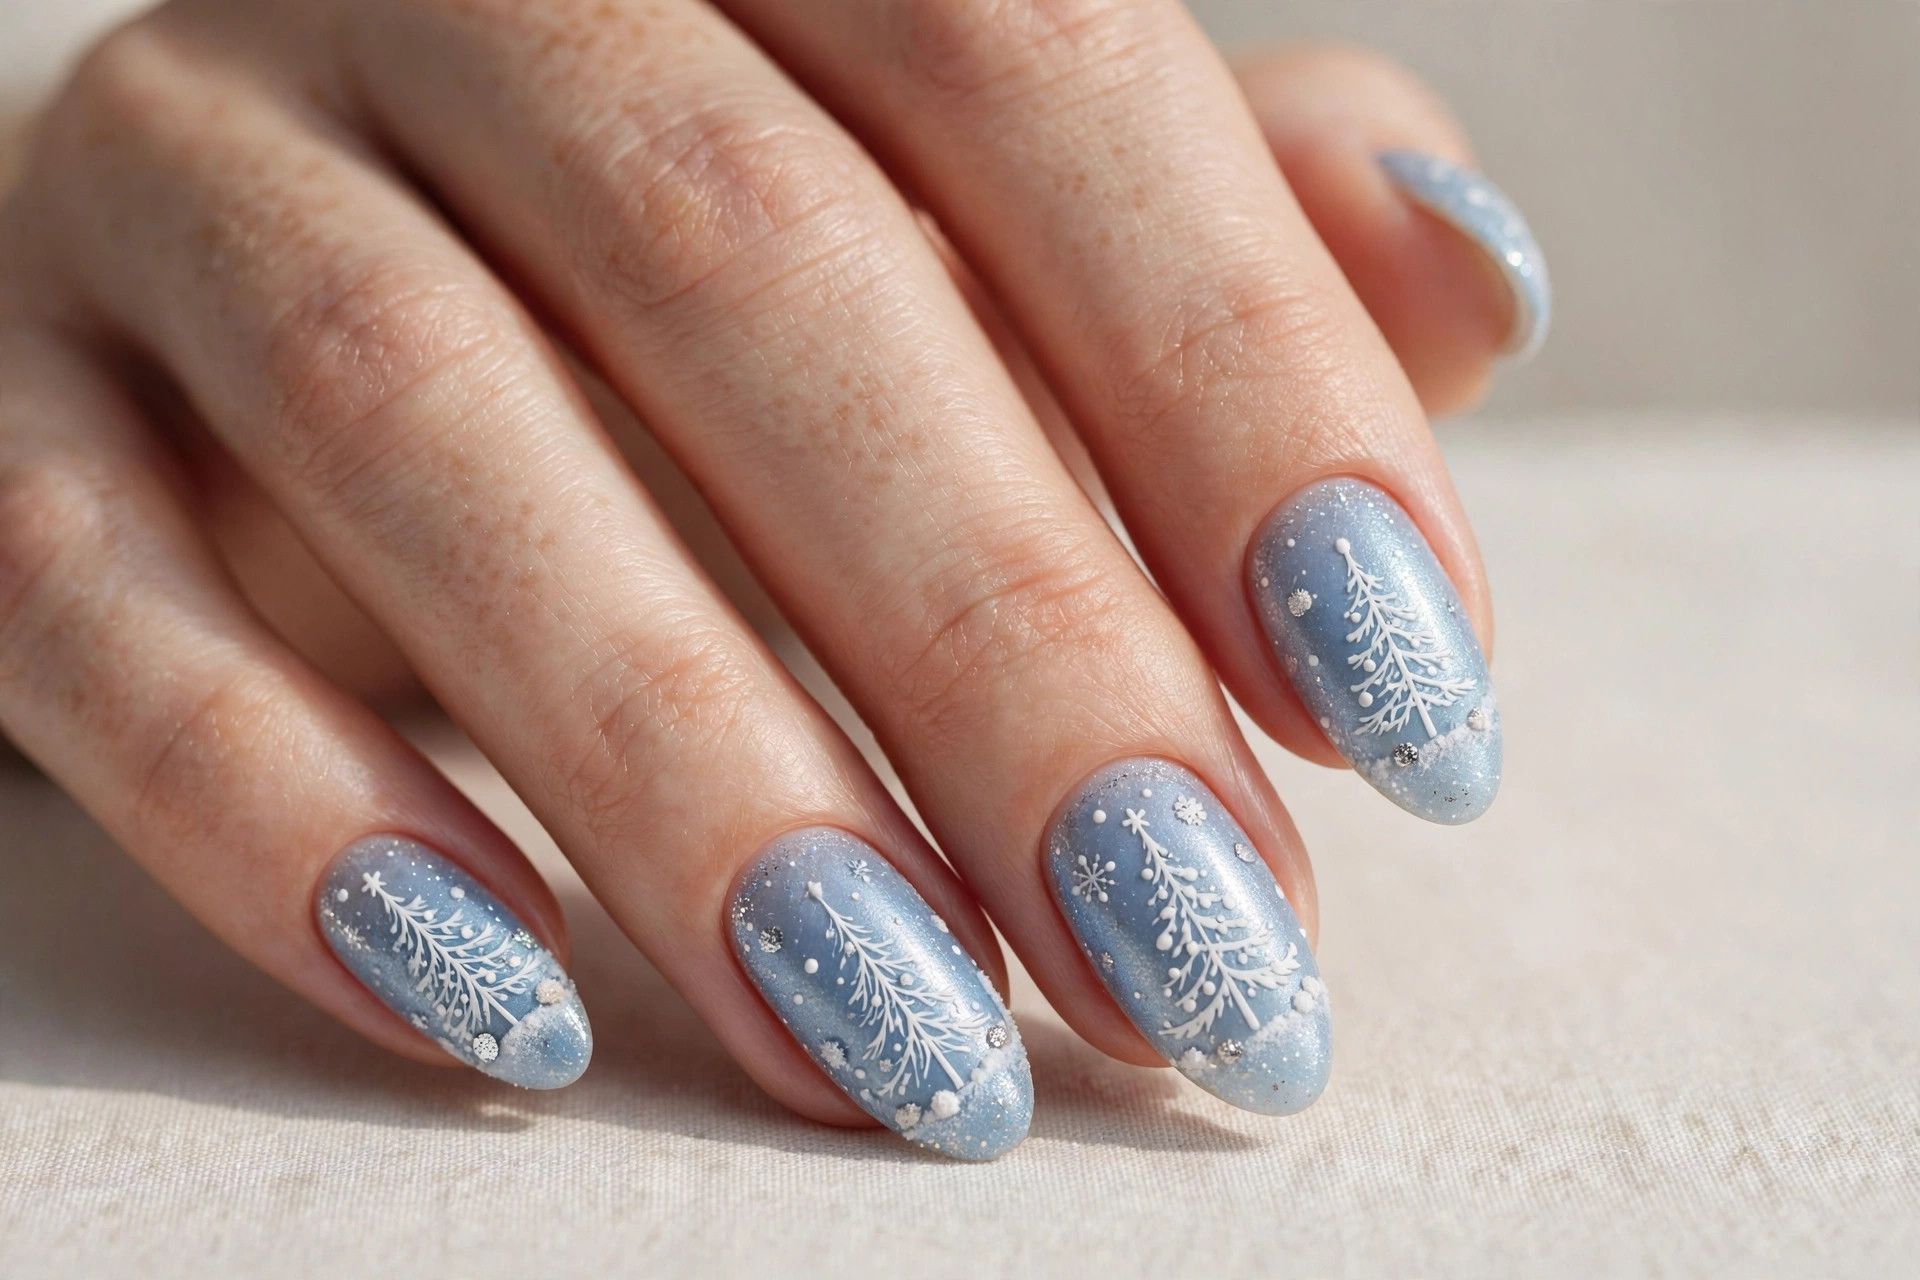
For a winter-wonderland feel, pair a white Christmas tree with an icy blue base. The combination reads as pure frost — elegant, cool, and unmistakably seasonal. Unlike red and green, it never clashes with your outfit, which makes it one of the most versatile festive designs you can wear.
This suits cool skin tones beautifully, though the icy palette flatters almost everyone in winter light. Add a touch of silver glitter along the tree edges for a frosted look. It works well on both short and long nails — on short nails, keep the tree to a single accent per hand so the design doesn’t crowd the nail.
12. 3D Gem-Ornament Tree
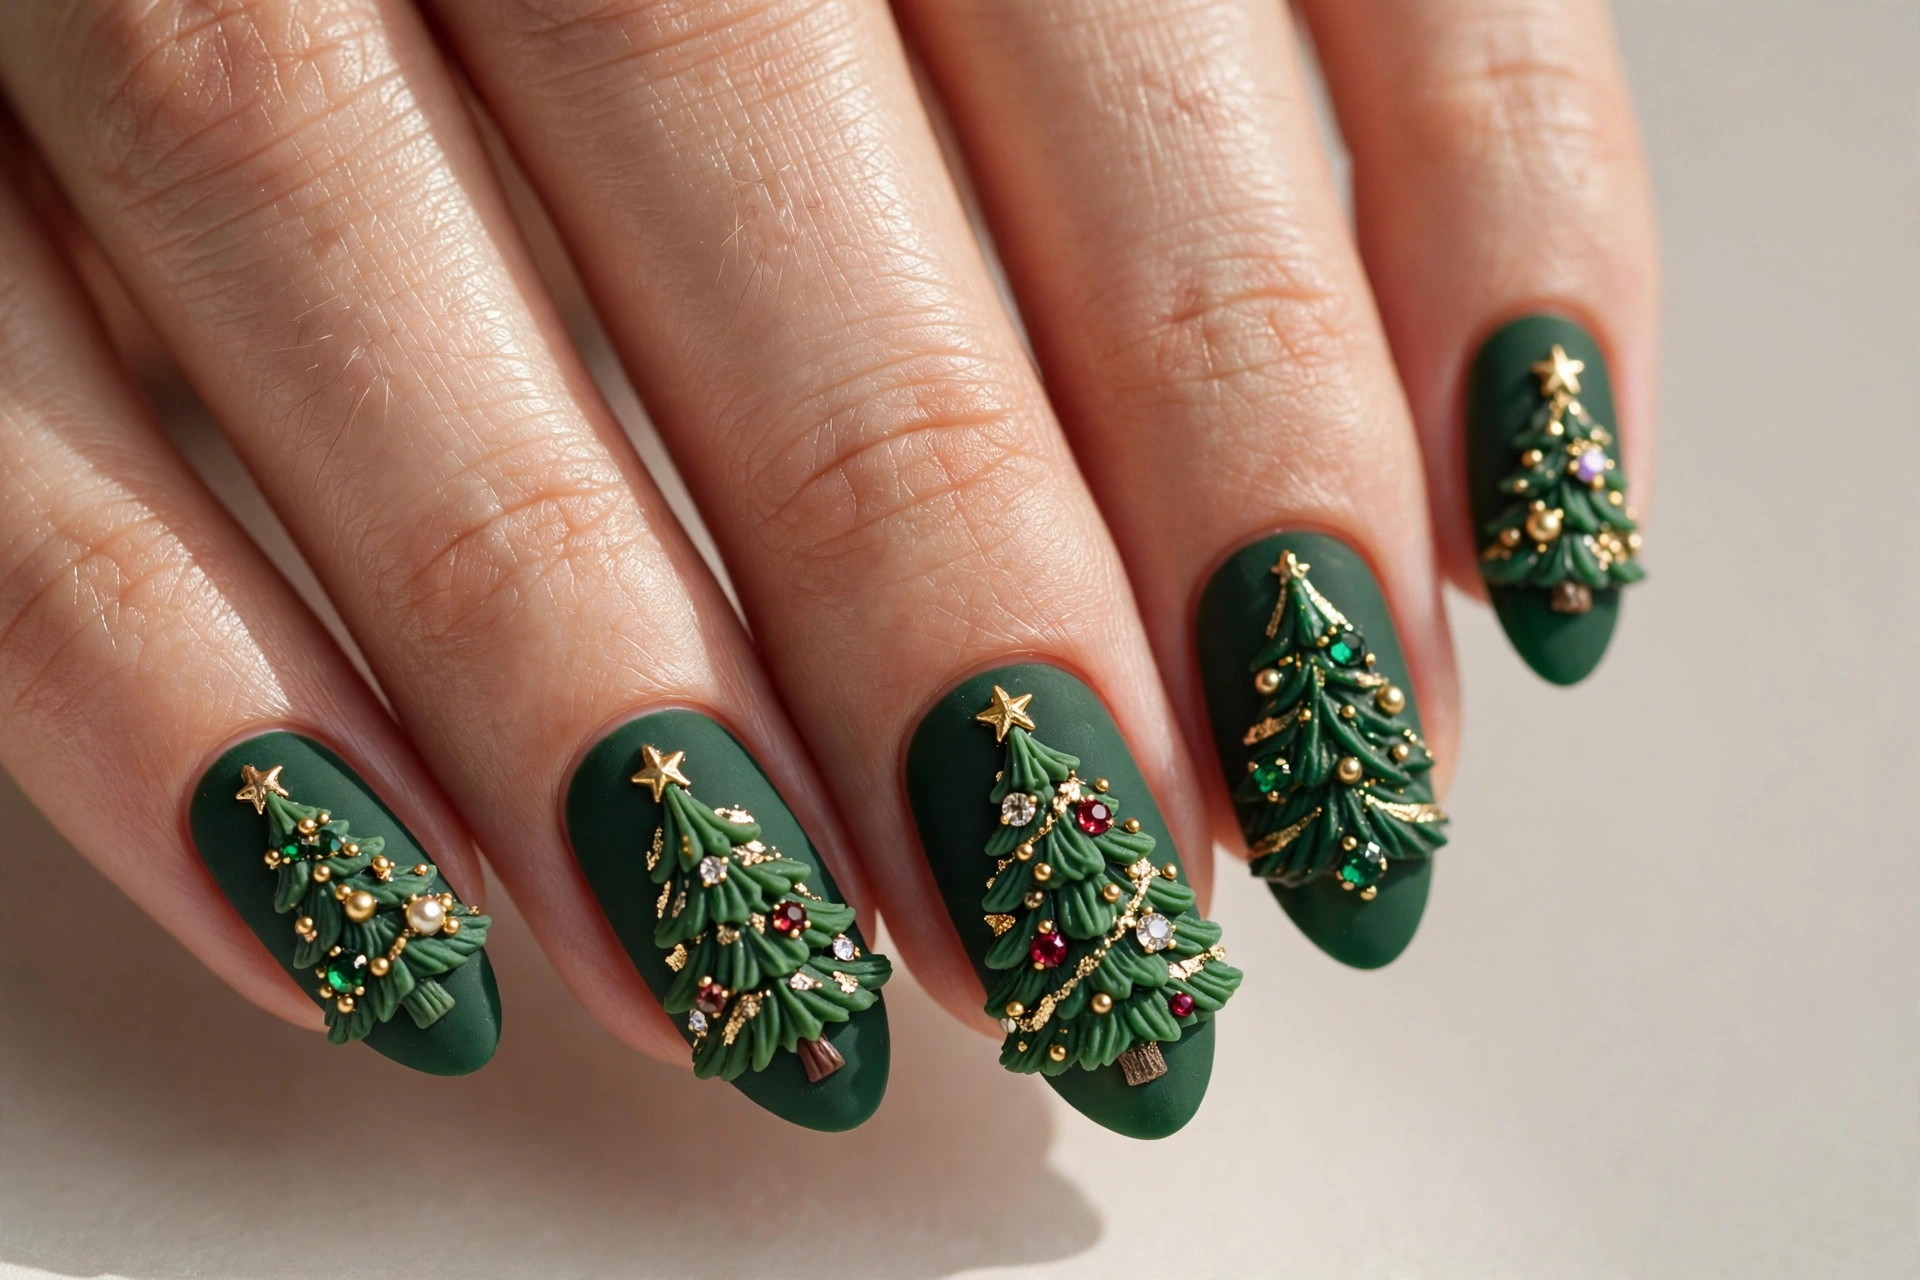
Take the ornament idea into the third dimension: a deep green tree decorated with tiny gems and gold accents that sit on top of the nail. This textured design catches the light from every angle and feels genuinely luxurious — the kind of manicure that looks like jewelry on your fingertips.
Reserve this one for special occasions, since 3D elements need care — they can catch on fabric. Ask your nail tech to set each gem in a bead of builder gel and cure it well, then cap the edges with top coat. Keep the base dark green so the gems stand out, and limit the tree to one or two accent nails with solid green on the rest to avoid overwhelming the hand.
13. Tree Silhouette at Night
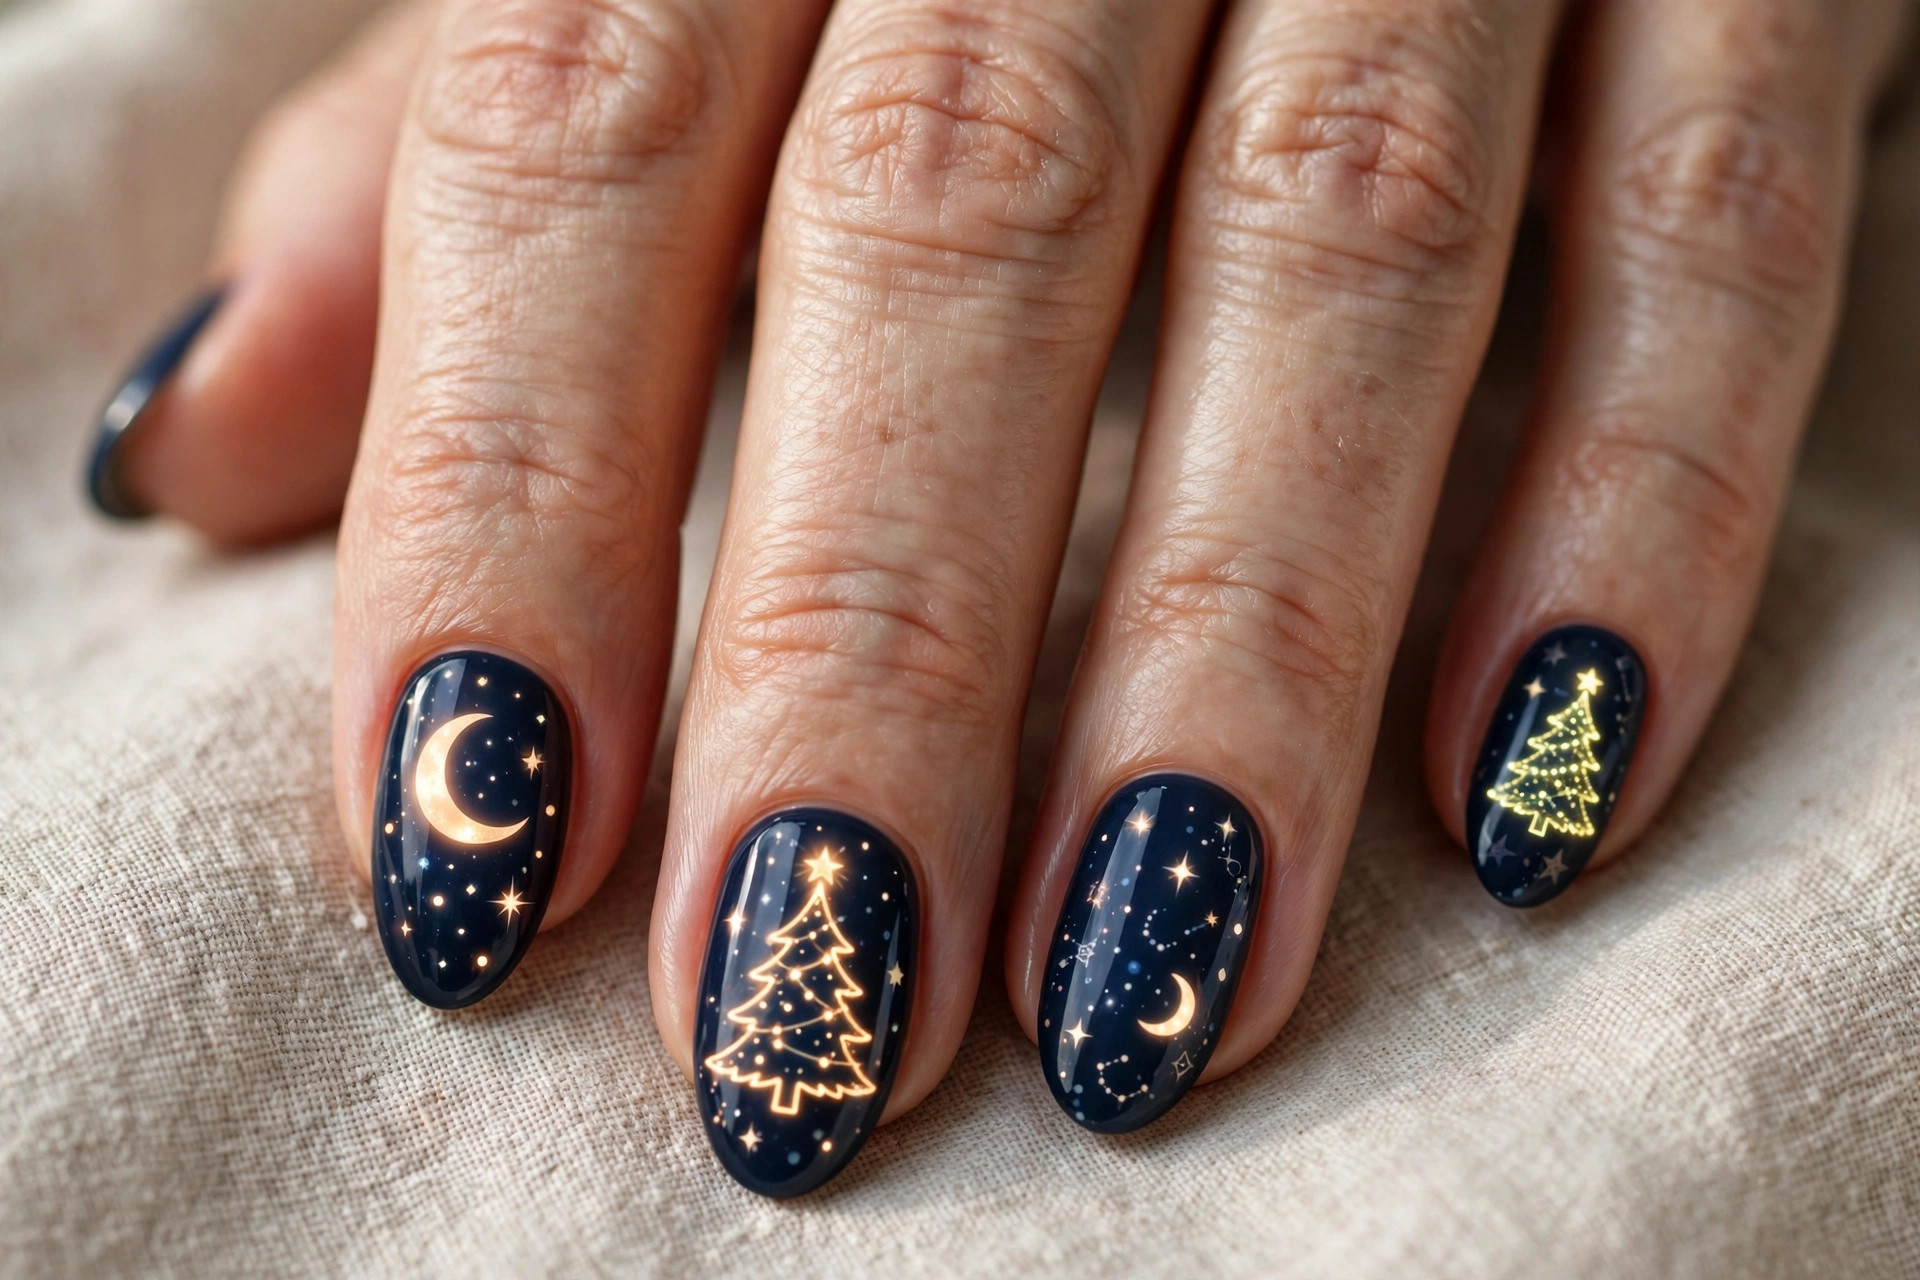
Dark, moody, and striking: a Christmas tree silhouette glowing against a night sky. Painted on a deep navy base with a luminous tree outline and a tiny moon, this design feels like a Christmas card illustration on your nails. It is one of the most artistic options in this collection.
This suits anyone who loves dramatic nail art and darker winter palettes. The glowing effect comes from layering — paint the tree in a deep green first, then trace the edges with a thin line of gold or pale yellow to create the glow. A glossy top coat deepens the night-sky base. Pair with a chunky knit sweater and let the nails do the talking.
14. Candy Cane and Tree Combo
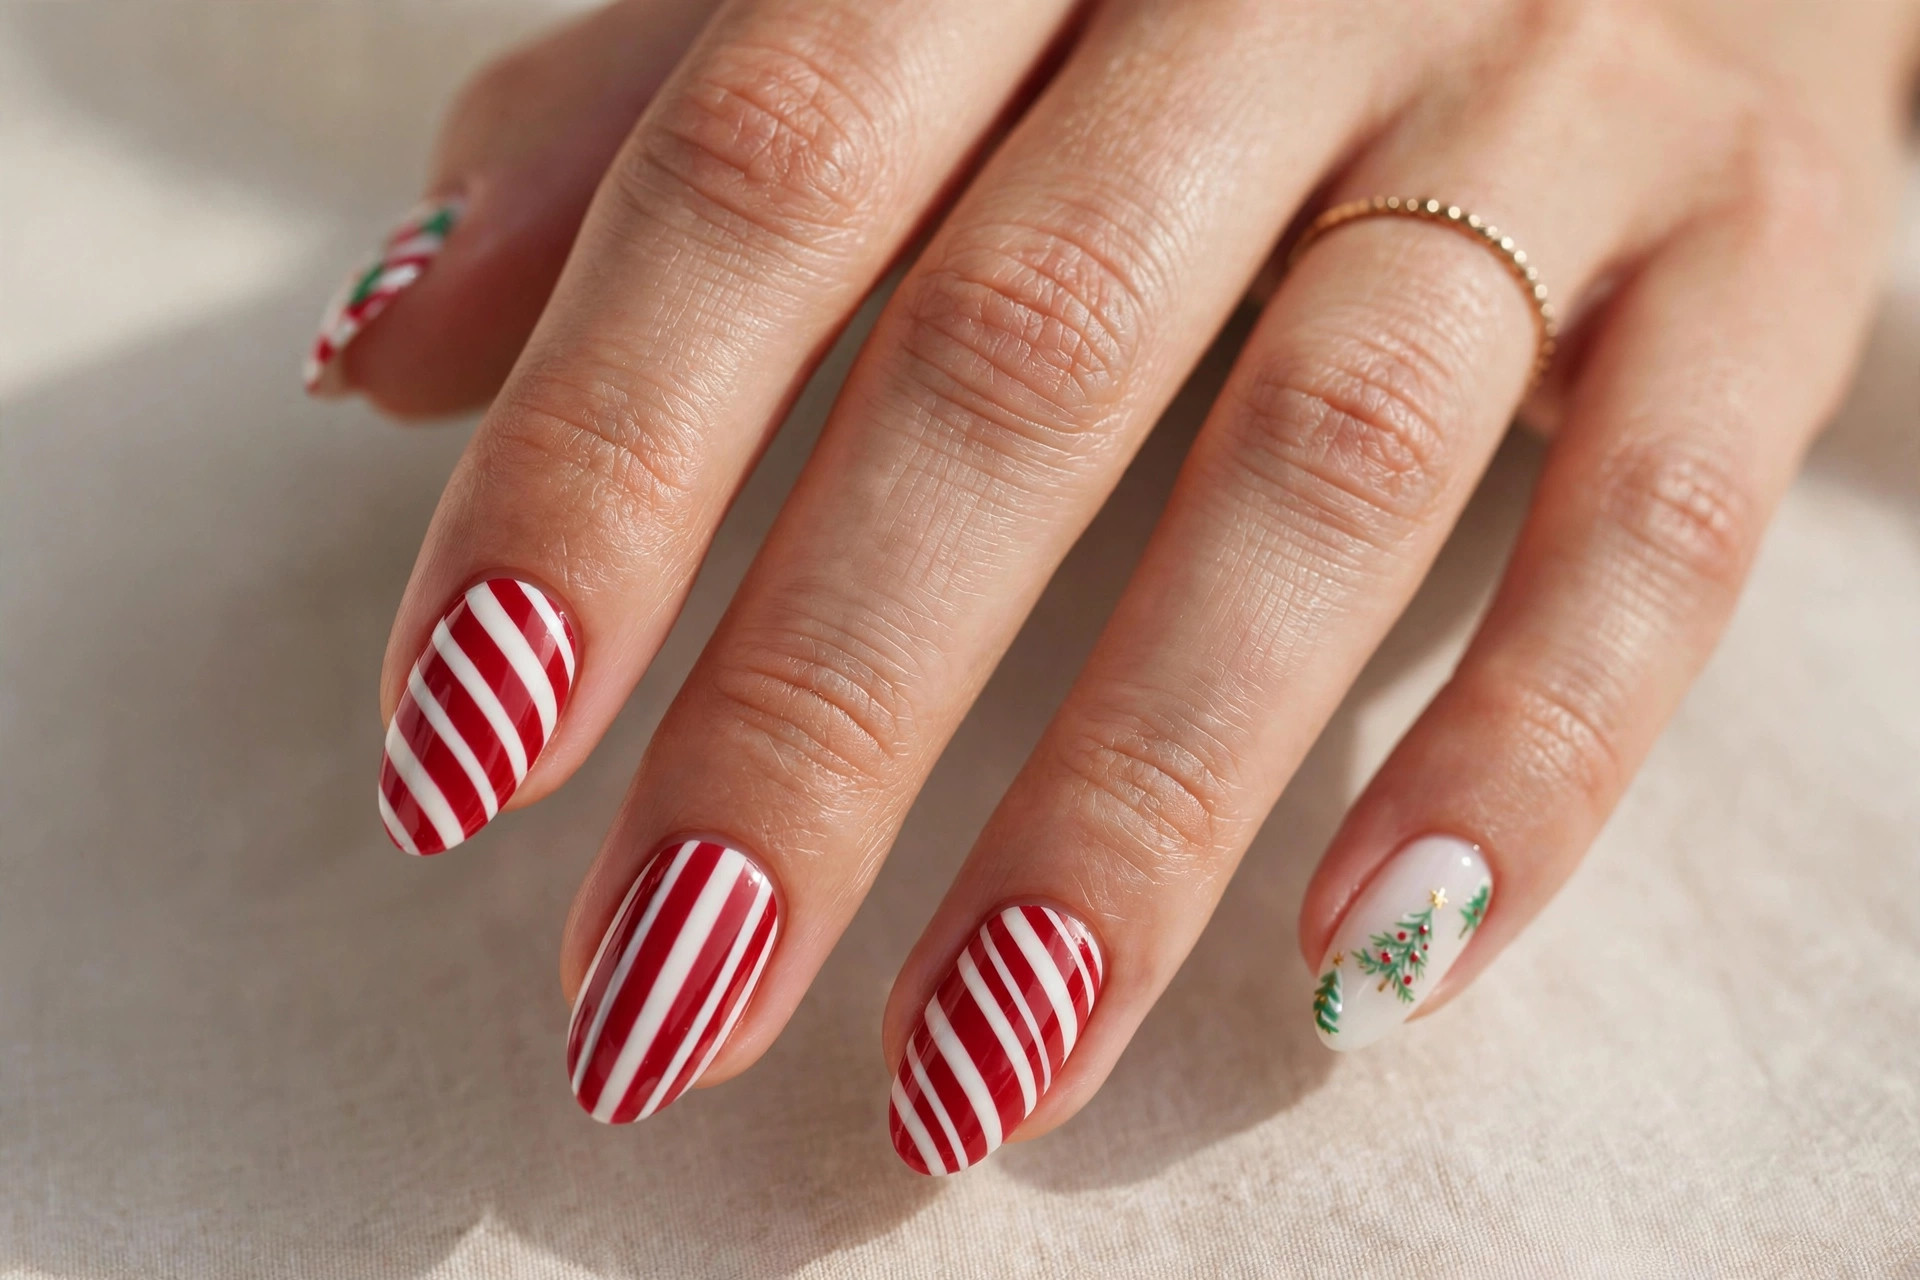
Two Christmas icons are better than one. This playful combo pairs red-and-white candy cane stripes with tiny green tree accents, alternating across the set or split on each nail. The candy cane stripes add graphic punch while the trees keep it rooted in the theme.
This design suits short to medium nails especially well — the bold stripes look crisp and clean on smaller canvases. Use a striping brush or thin nail tape for straight candy cane lines, and keep the tree accents small so they read clearly against the stripes. It is a fun choice for Christmas parties and looks great in close-up holiday photos.
15. Gold Star Topper Tree
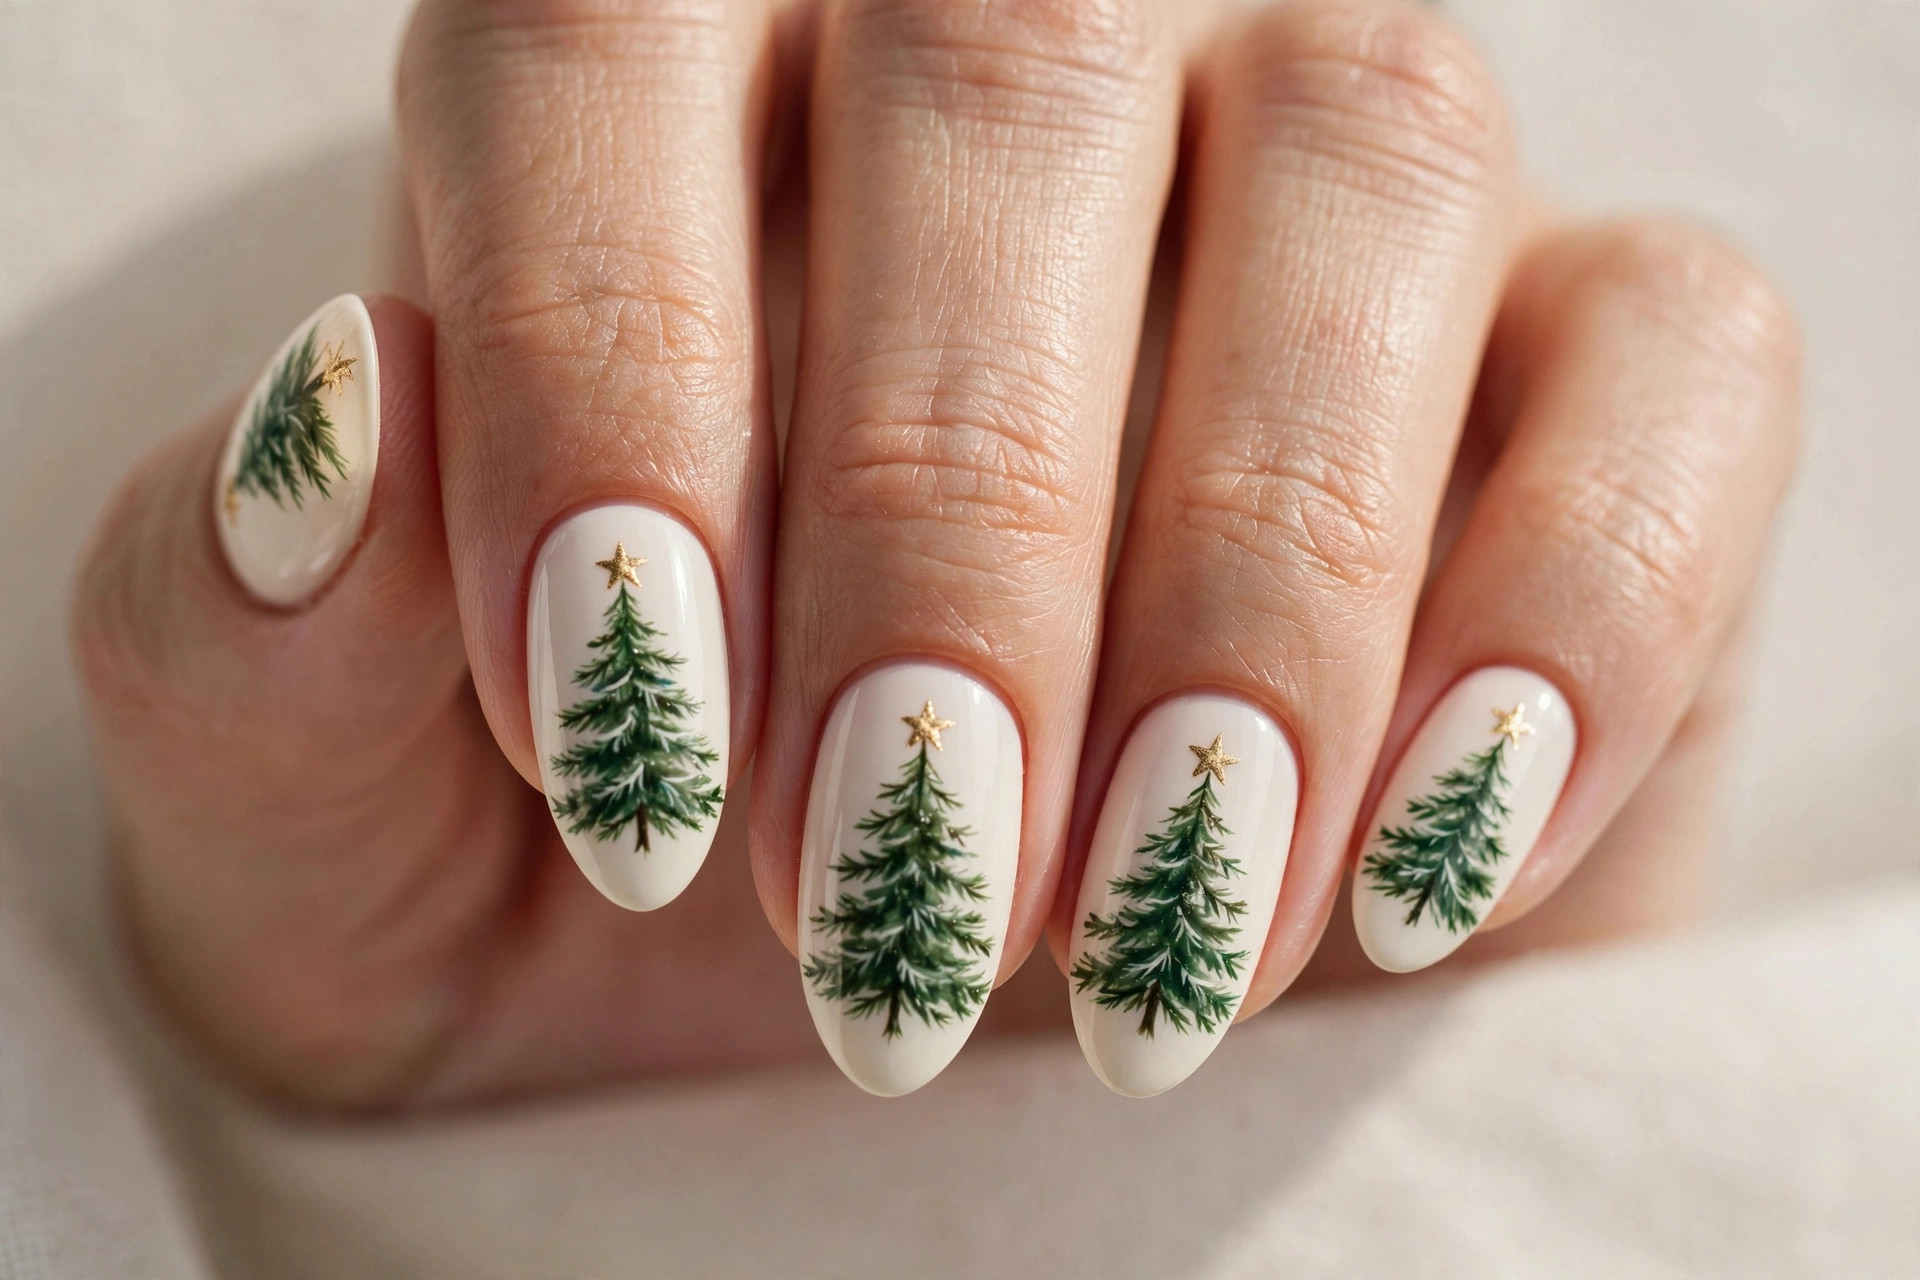
Every tree deserves its star, and this design makes the topper the hero. Forest green trees on an ivory base each carry a bold golden star — hand-painted or placed as a tiny sticker — so the eye goes straight to the top of every nail. The ivory base keeps everything light and fresh.
This is a clean, graphic take that suits minimalist tastes while still reading clearly as Christmas tree nail art. For the crispest stars, use a small star stencil or a metallic gold striping polish and build the star with two coats. Ivory shows smudges easily, so finish with two thin layers of top coat and let each layer dry fully before the next.
16. Vintage Folk-Art Tree
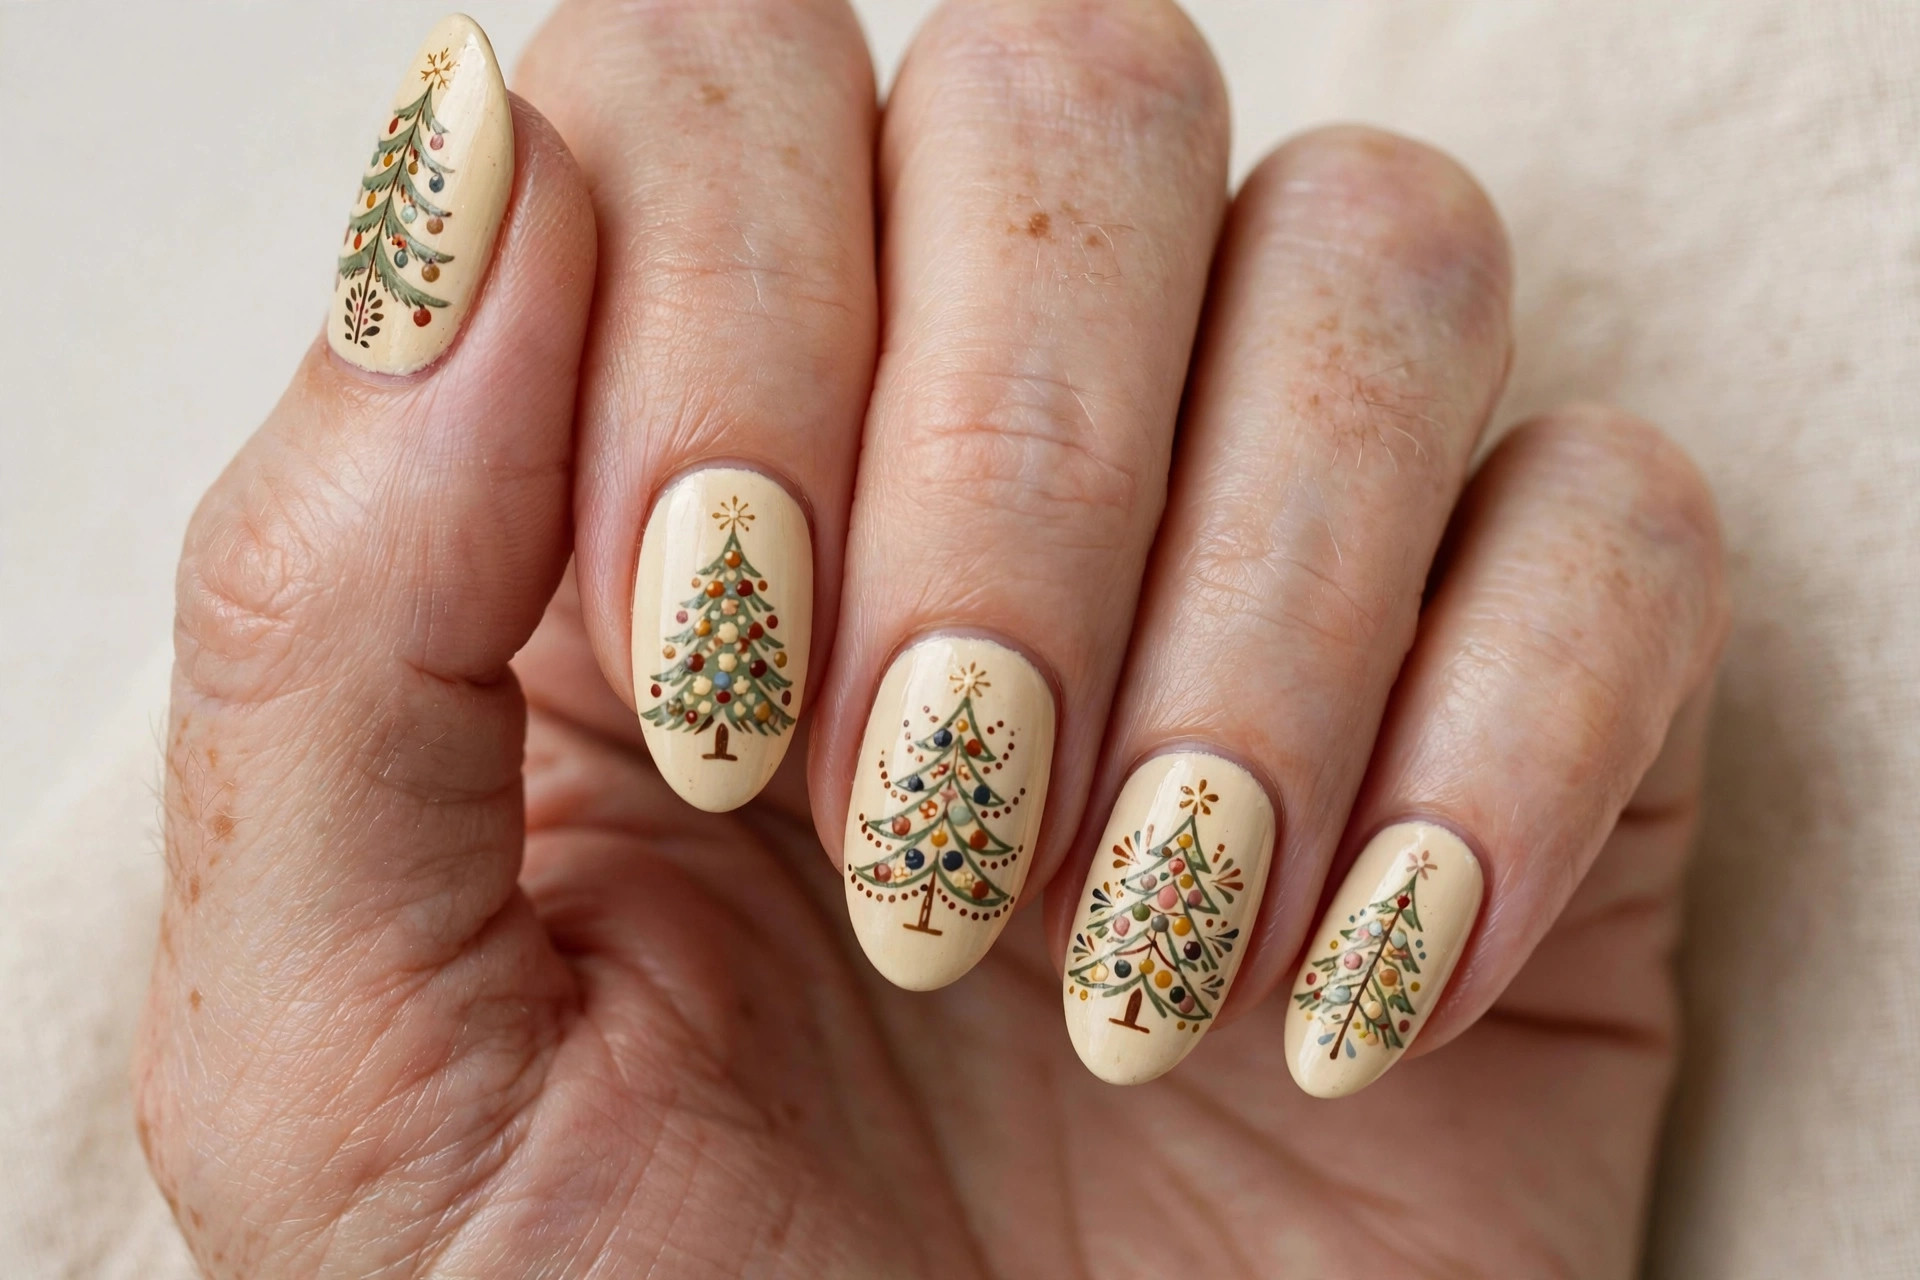
Inspired by hand-painted folk art, this vintage-style Christmas tree carries tiny ornaments, dots, and swirls in a warm, nostalgic palette on a cream base. It looks like something from a vintage Christmas card — charming, detailed, and full of character rather than polish-perfect.
This suits anyone who loves crafty, homemade holiday aesthetics. The key is to embrace imperfection: slightly irregular dots and swirls are what make folk art feel authentic. Use a cream or warm beige base, a forest green tree, and add ornaments in cranberry red, mustard gold, and dusty blue. A matte top coat gives it the right vintage, unvarnished feel.
17. Snowfall Tree
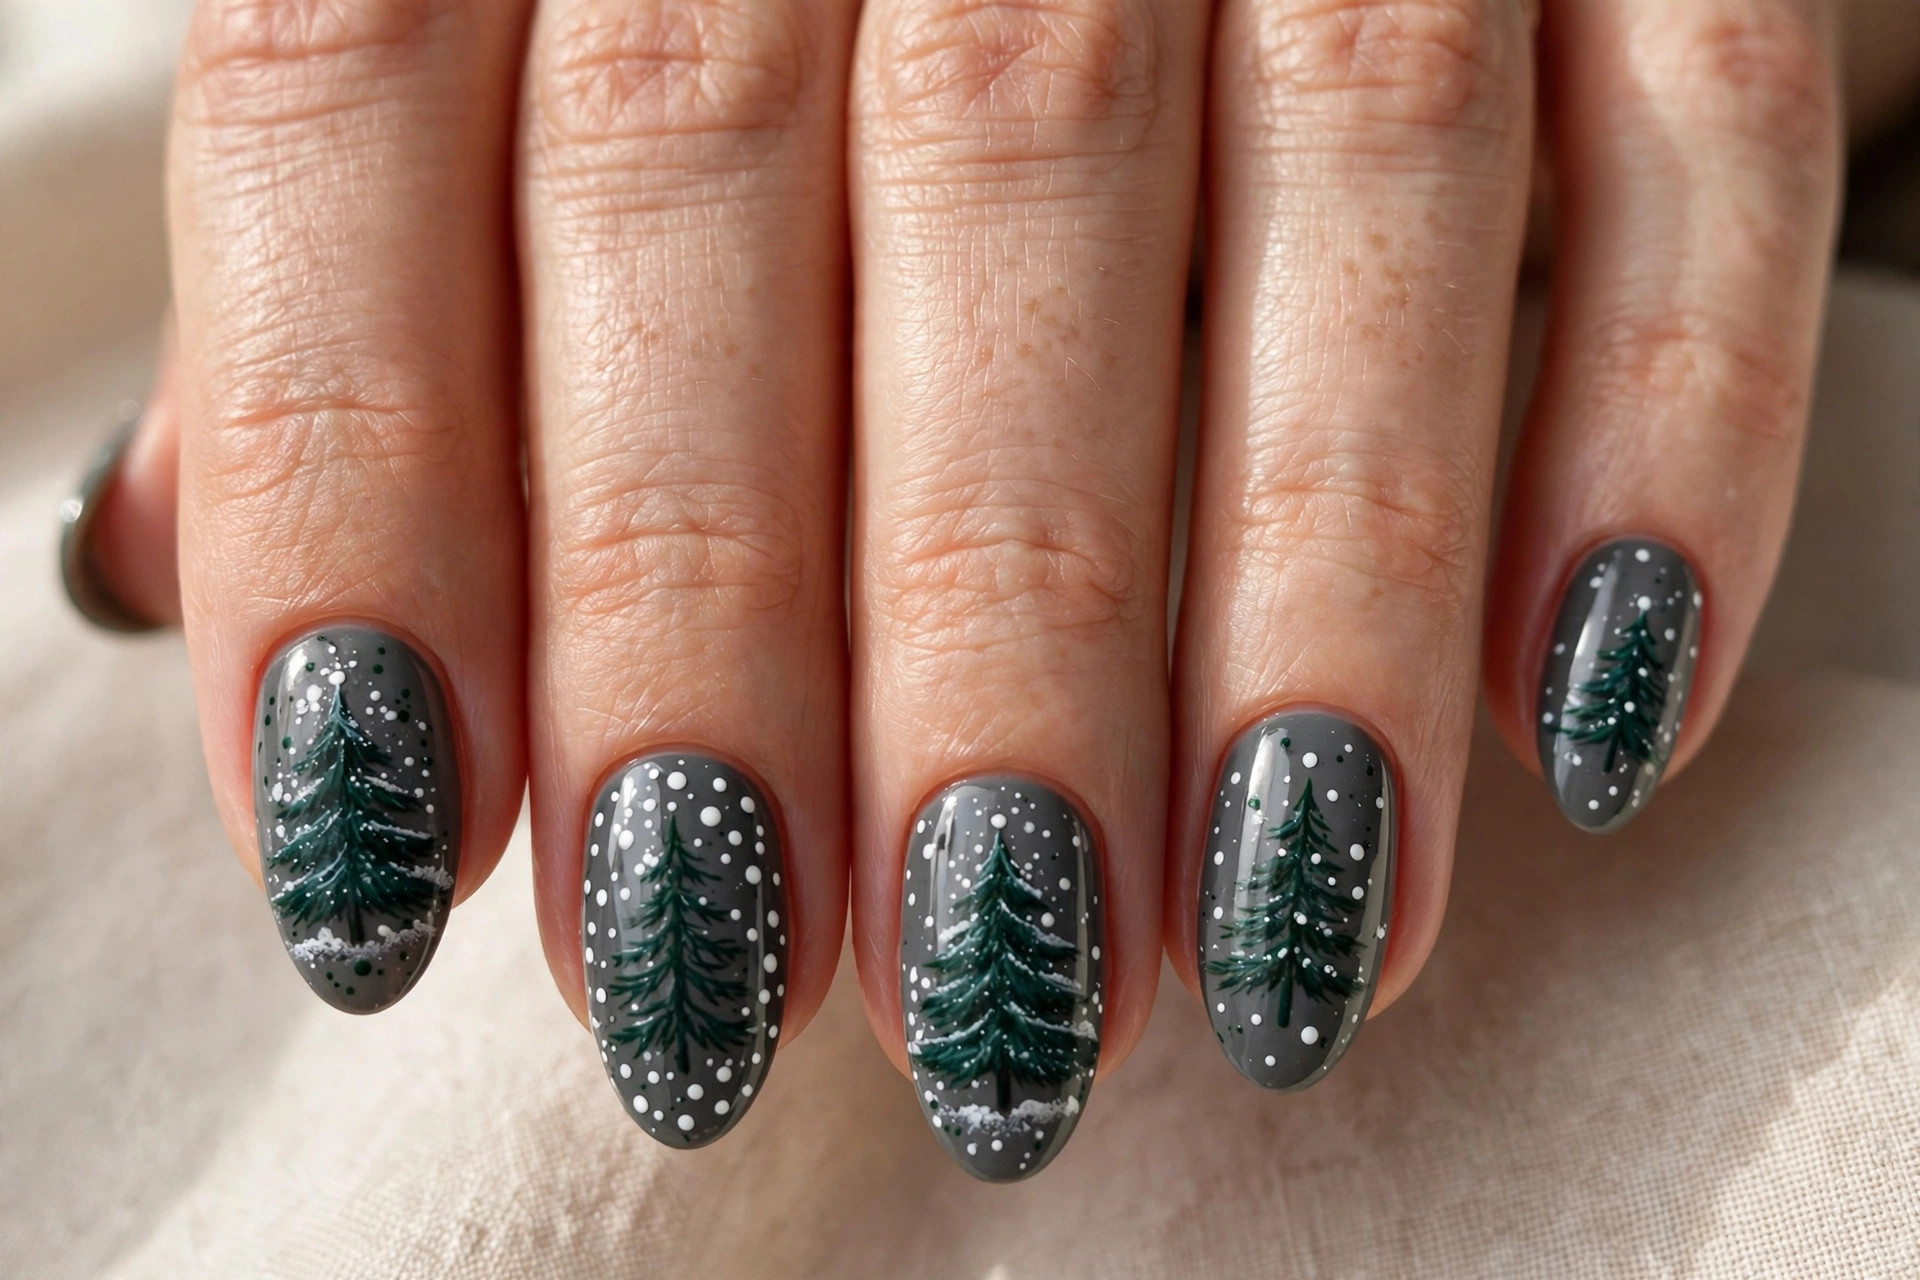
A deep green Christmas tree surrounded by falling snow — tiny white dots scattered across a charcoal grey base — is winter itself on your nails. The contrast between the dark base and the falling snow creates real depth, and the tree feels like it is standing in a snowstorm.
This design suits anyone who loves the snowy side of Christmas more than the glittery one. To get the snowfall right, use a dotting tool and vary the dot sizes randomly — uniform dots look stamped, not natural. Place a few dots over the tree too so the snow sits on the branches. Two thin coats of top coat will level out the texture of the dots.
18. Mini Forest of Trees
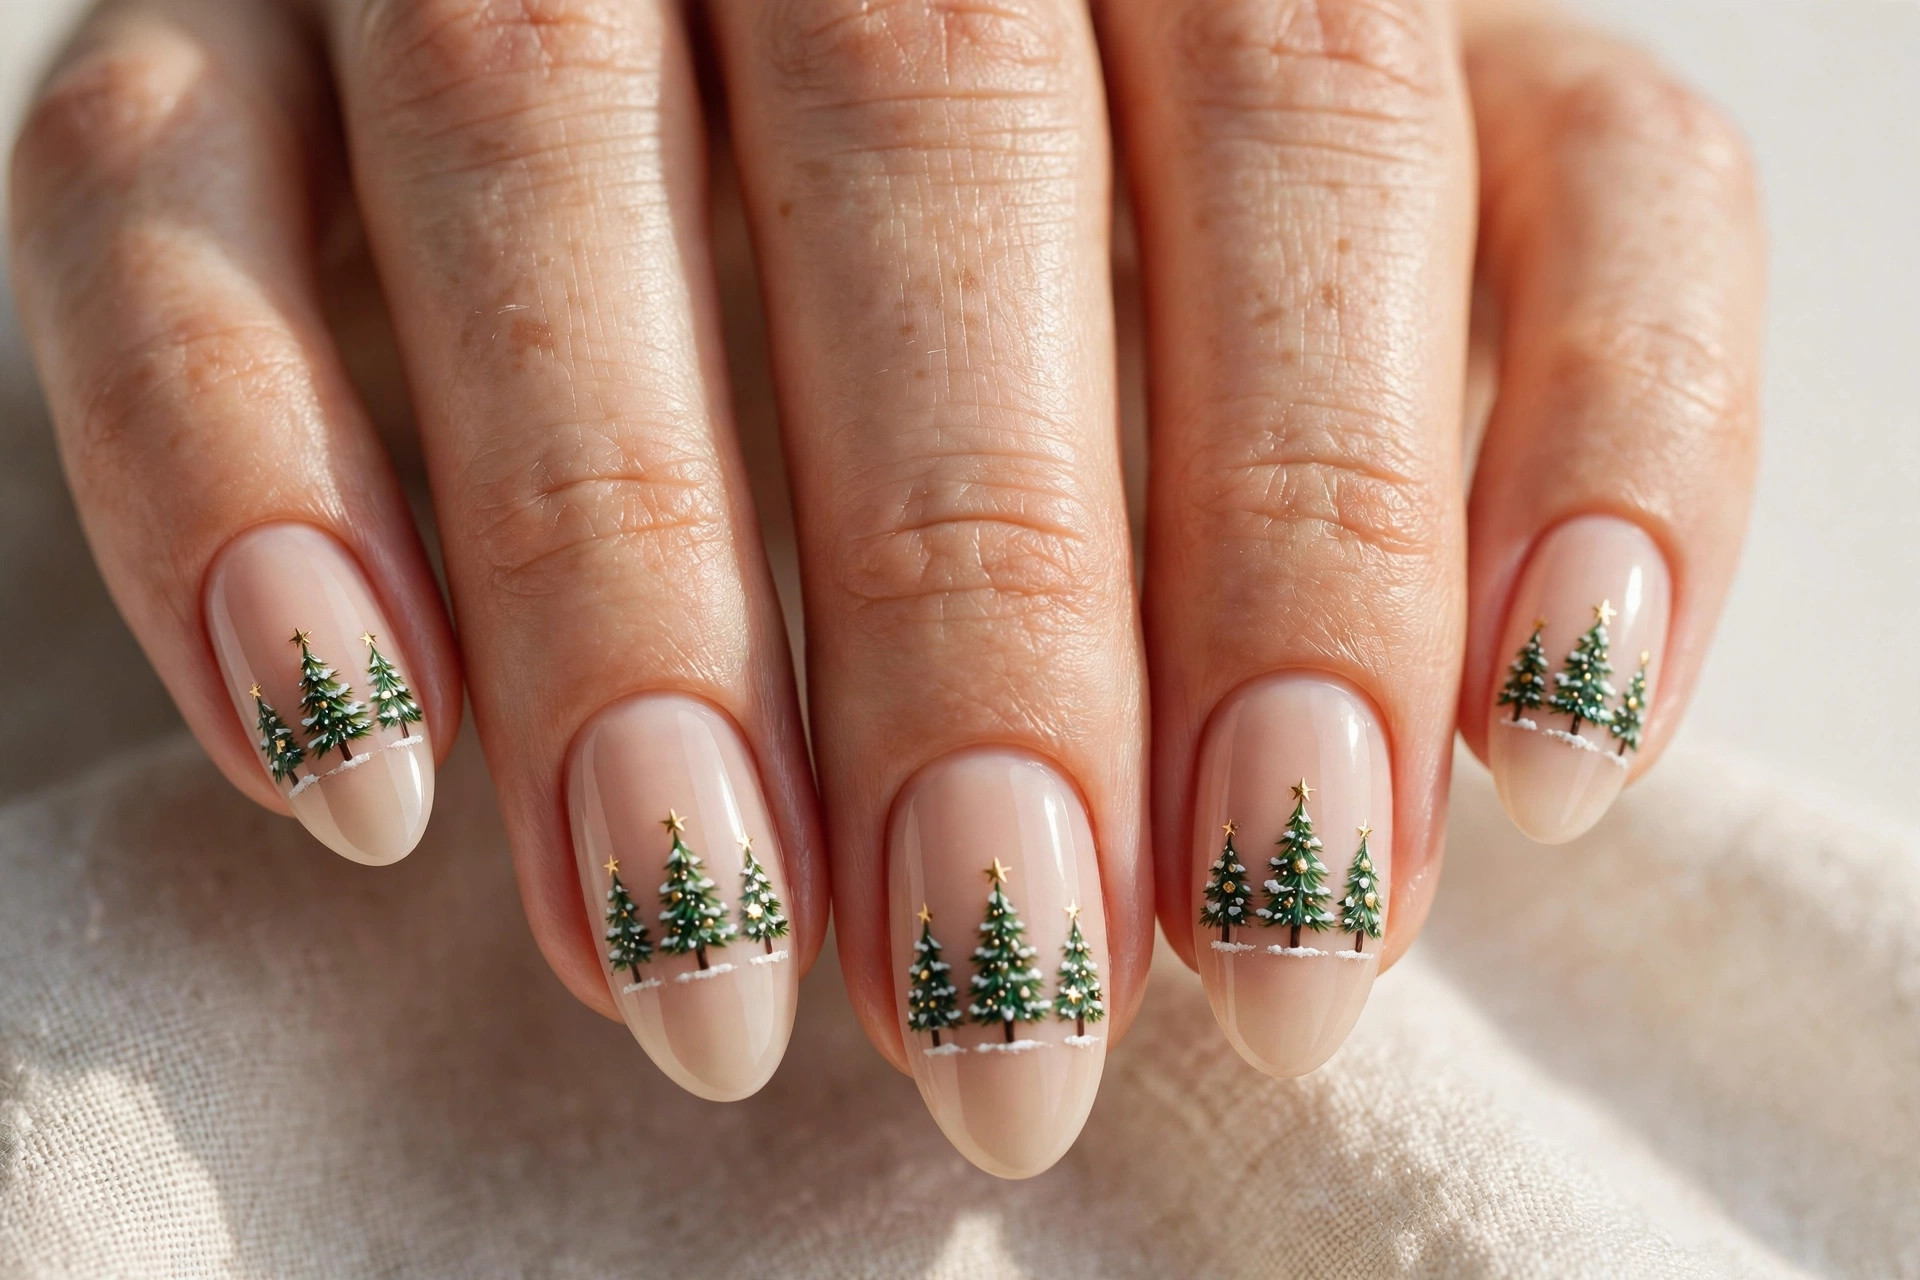
Why paint one tree when you can paint a forest? This design covers a soft nude base with rows of tiny green Christmas trees — three or more per nail. The repetition turns the tree into a pattern, and the result is surprisingly elegant: it reads as festive from a distance and intricate up close.
This suits people who want a design that works from every angle and at every distance. Keep the trees small and evenly spaced, and use two shades of green so some trees sit “behind” others for depth. A nude base keeps the busy pattern calm. It is also a forgiving design to DIY — small trees are much easier to paint well than one big detailed one.
19. Glitter Ombre Tree
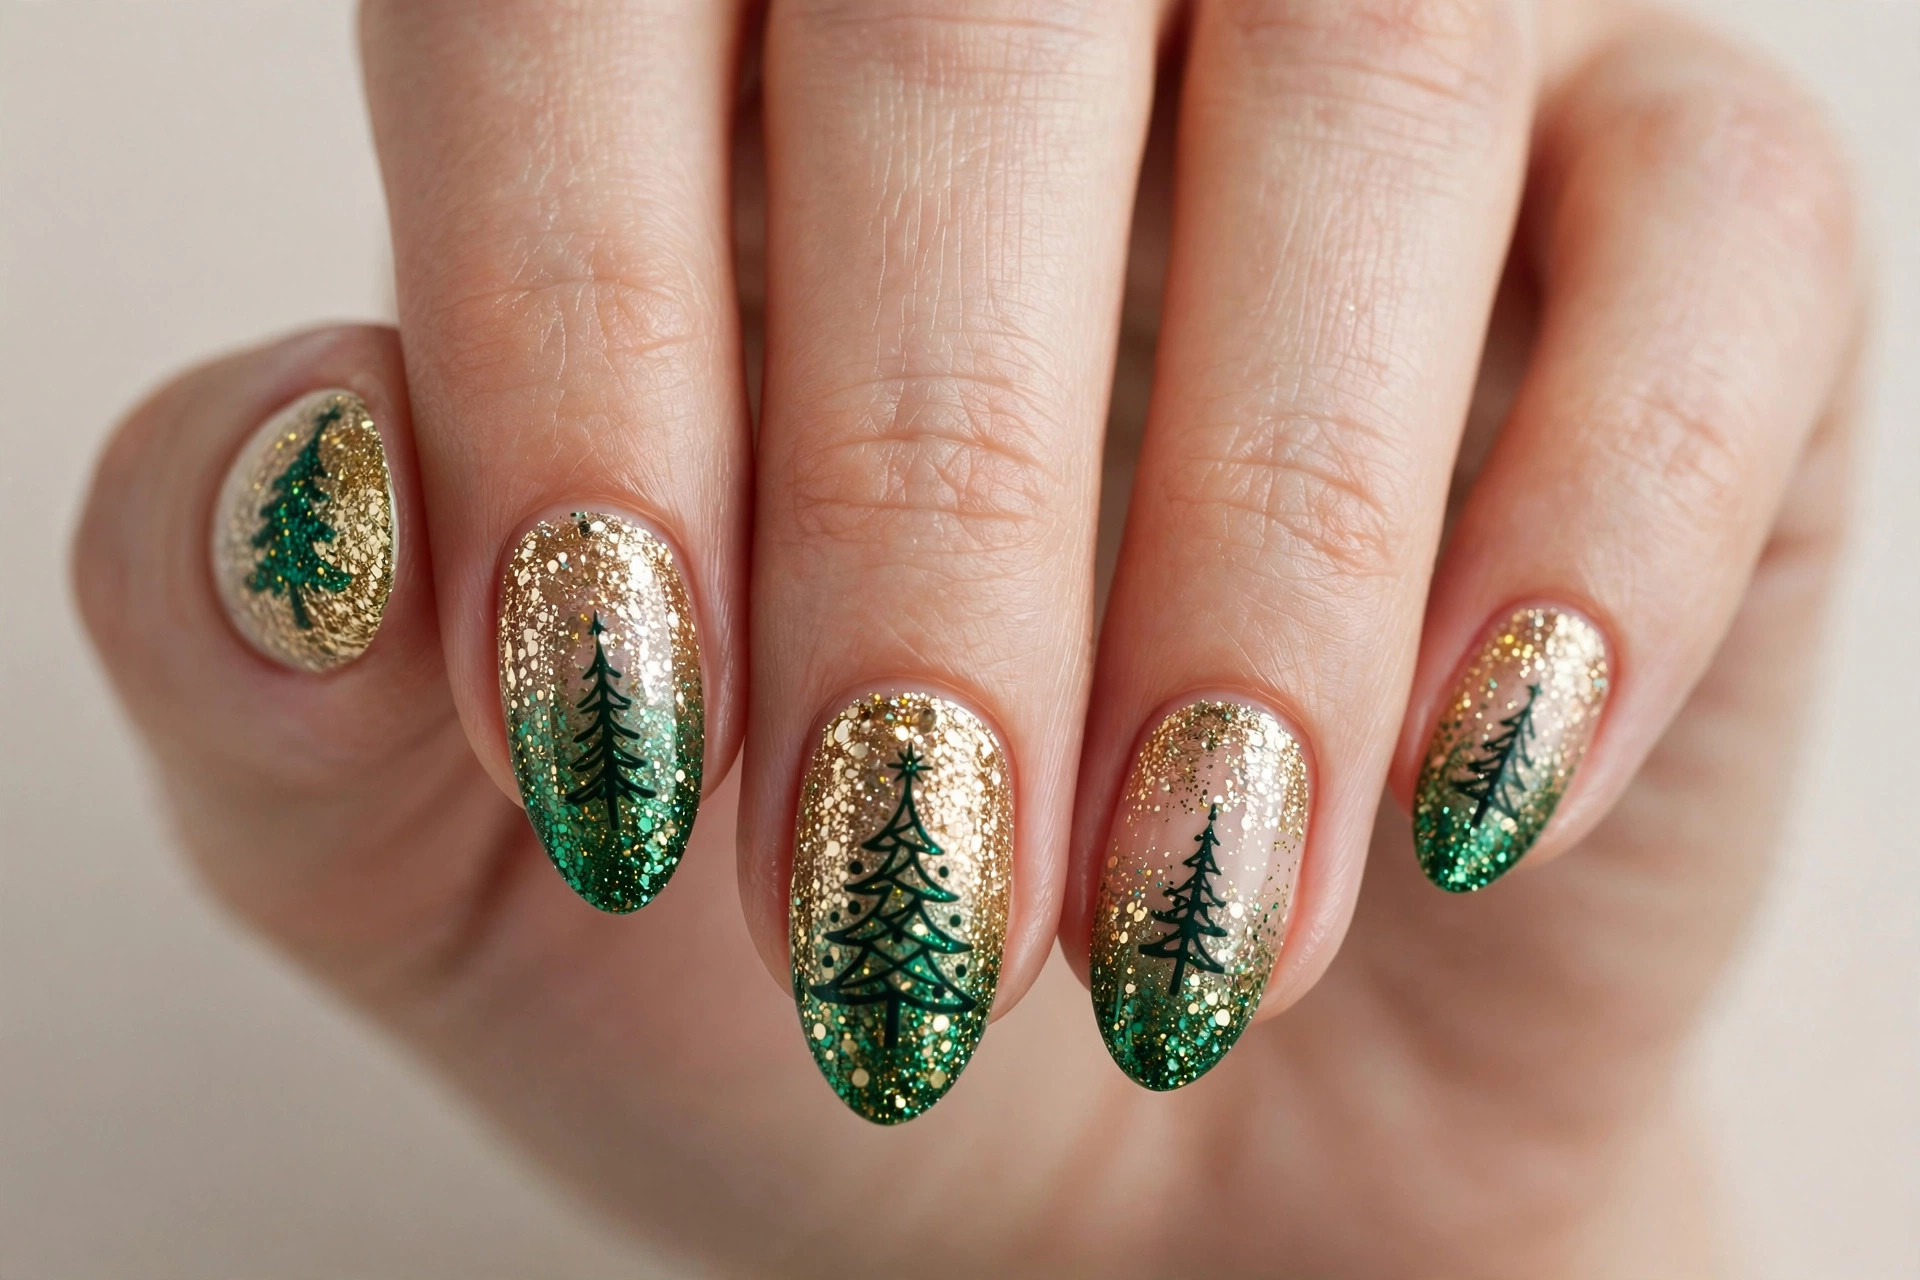
Maximum sparkle: a gold-to-emerald glitter ombre with tree silhouettes cut out or painted over it. The ombre shifts from warm gold at the cuticle to deep green at the tip, and the tree silhouettes stand out against the shimmer. This is the most glamorous tree design in the collection.
Reserve it for party season — it is too sparkly for the office but perfect for every December celebration. Build the ombre with a makeup sponge, dabbing gold glitter at the base and emerald at the tip until they blend. Paint the tree silhouette in a solid dark green over the top. It will take three coats of top coat to fully smooth the glitter, so be patient.
20. Tree with Presents
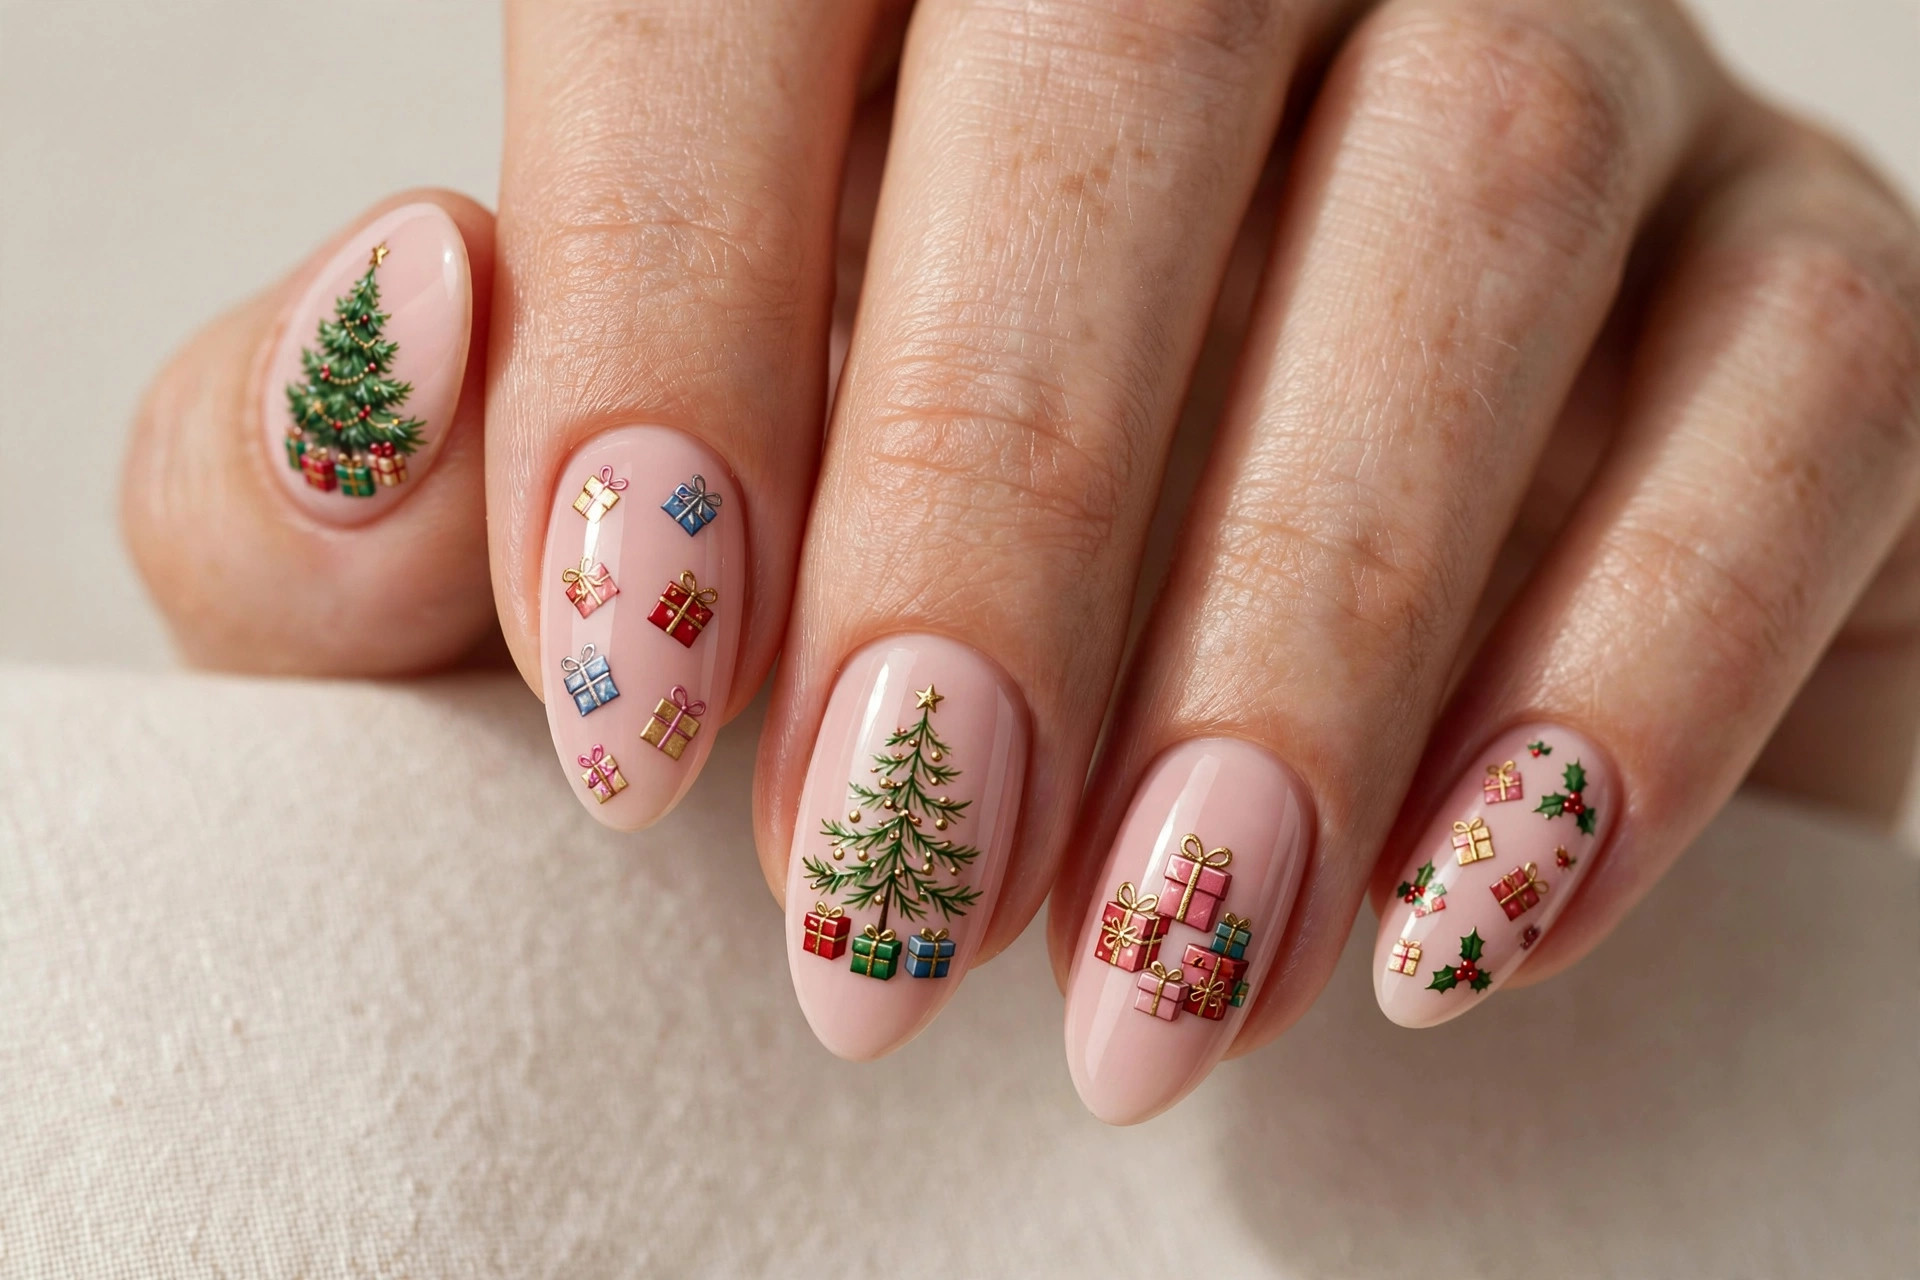
A Christmas tree with tiny wrapped presents at its base is pure holiday joy. The green tree sits on a blush pink base with little gift boxes — striped ribbon, bow tops, alternating colors — gathered at the bottom of the nail. It tells a whole Christmas-morning story on each fingertip.
This design suits anyone who loves storytelling nail art and has a detail-loving nail tech. Keep the presents at the cuticle end so the tree has room above, and use bright gift-wrap colors — red, teal, gold — against the soft pink base. It is adorable on medium and long nails; on short nails, use just one tree-plus-presents accent per hand.
21. Watercolor Tree
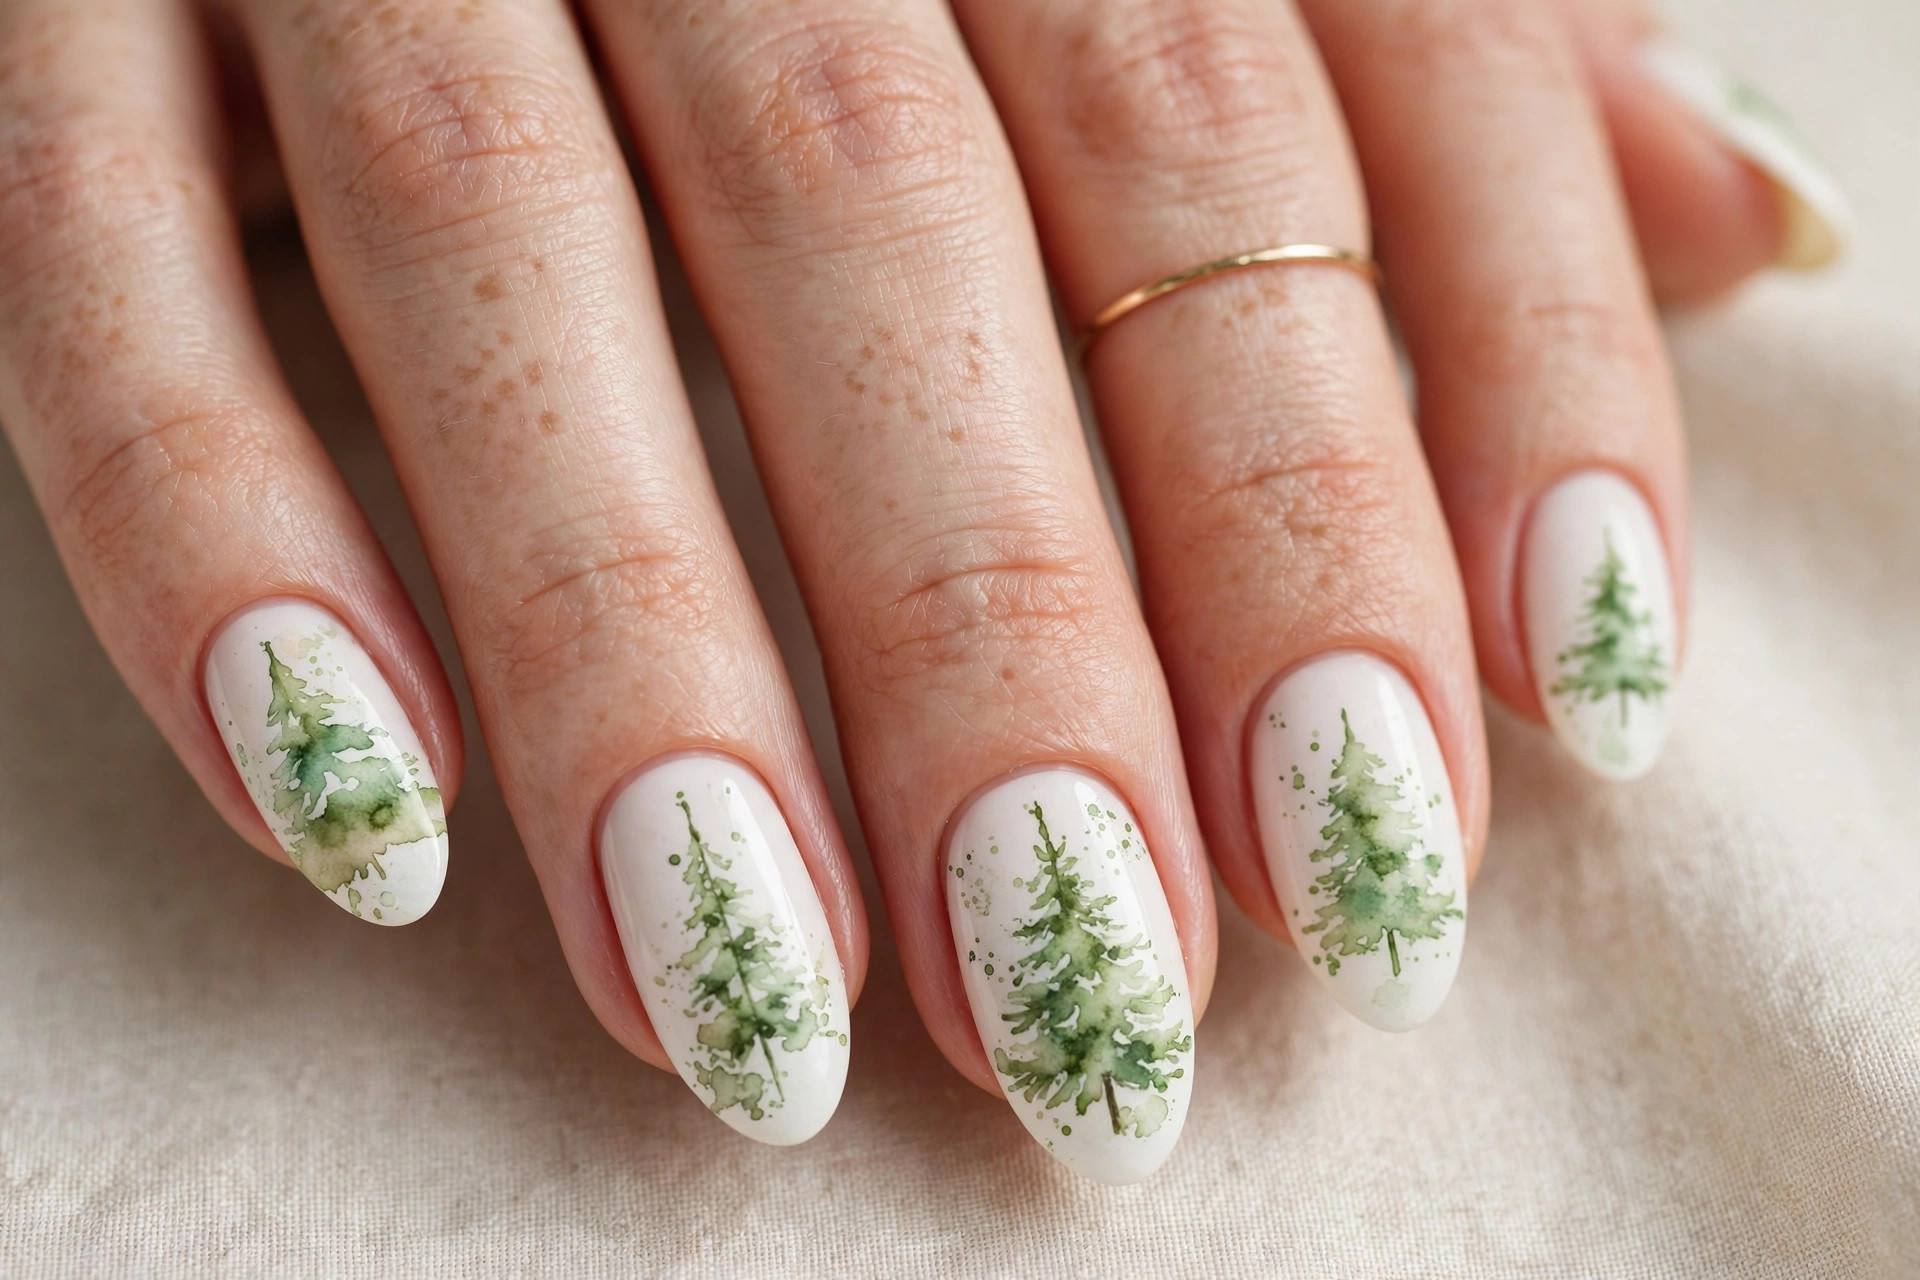
Soft, painterly, and quietly beautiful: a watercolor Christmas tree in loose green washes on a white base. Instead of crisp lines, the tree is built from blended brushstrokes that fade into the base like wet paint. The result is artistic and gentle — a breath of calm among all the glitter.
This suits creative types and anyone who finds traditional nail art too sharp. Achieve the watercolor effect by thinning green polish with a drop of polish thinner on the brush, then layering washes while the previous layer is still slightly wet. Let the edges blur naturally — precision is the enemy here. One coat of glossy top coat will make the washes glow like wet paint.
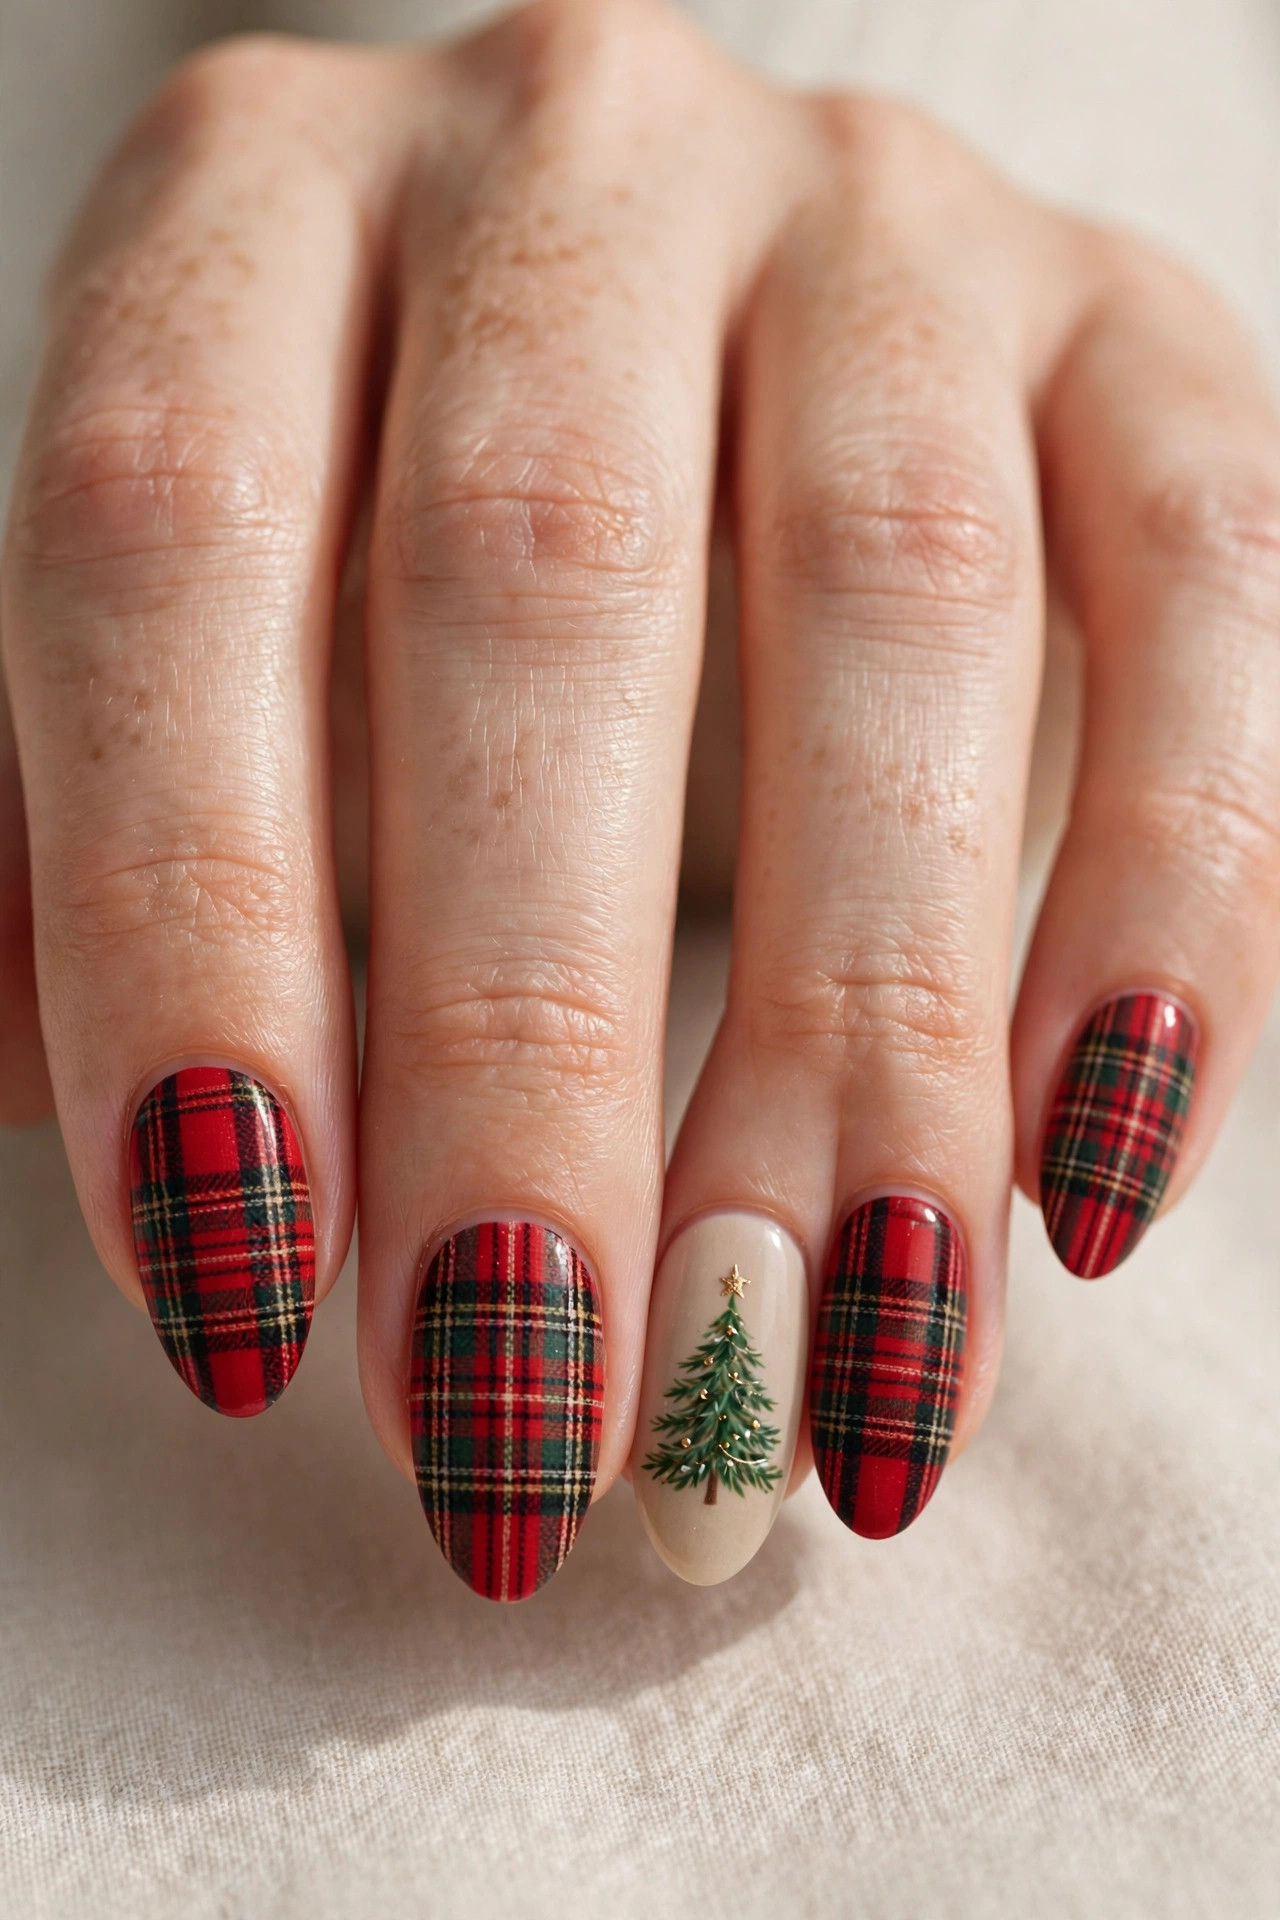
22. Plaid and Tree Rustic
Cabin-core Christmas: red tartan plaid with small green tree accents. The plaid brings a cozy, rustic energy — think fireside evenings and flannel — while the tiny trees keep the holiday theme clear. It is one of the most characterful designs here and a favorite for casual, cozy December days.
This suits anyone with a love of rustic or farmhouse holiday style. Paint the plaid first with thin crossing lines in red, black, and white over a cream base, then add the tree as a small accent on one or two nails per hand. Keep the tree simple — detailed trees get lost against plaid. This design also looks great on short nails, where the plaid pattern reads cleanly.
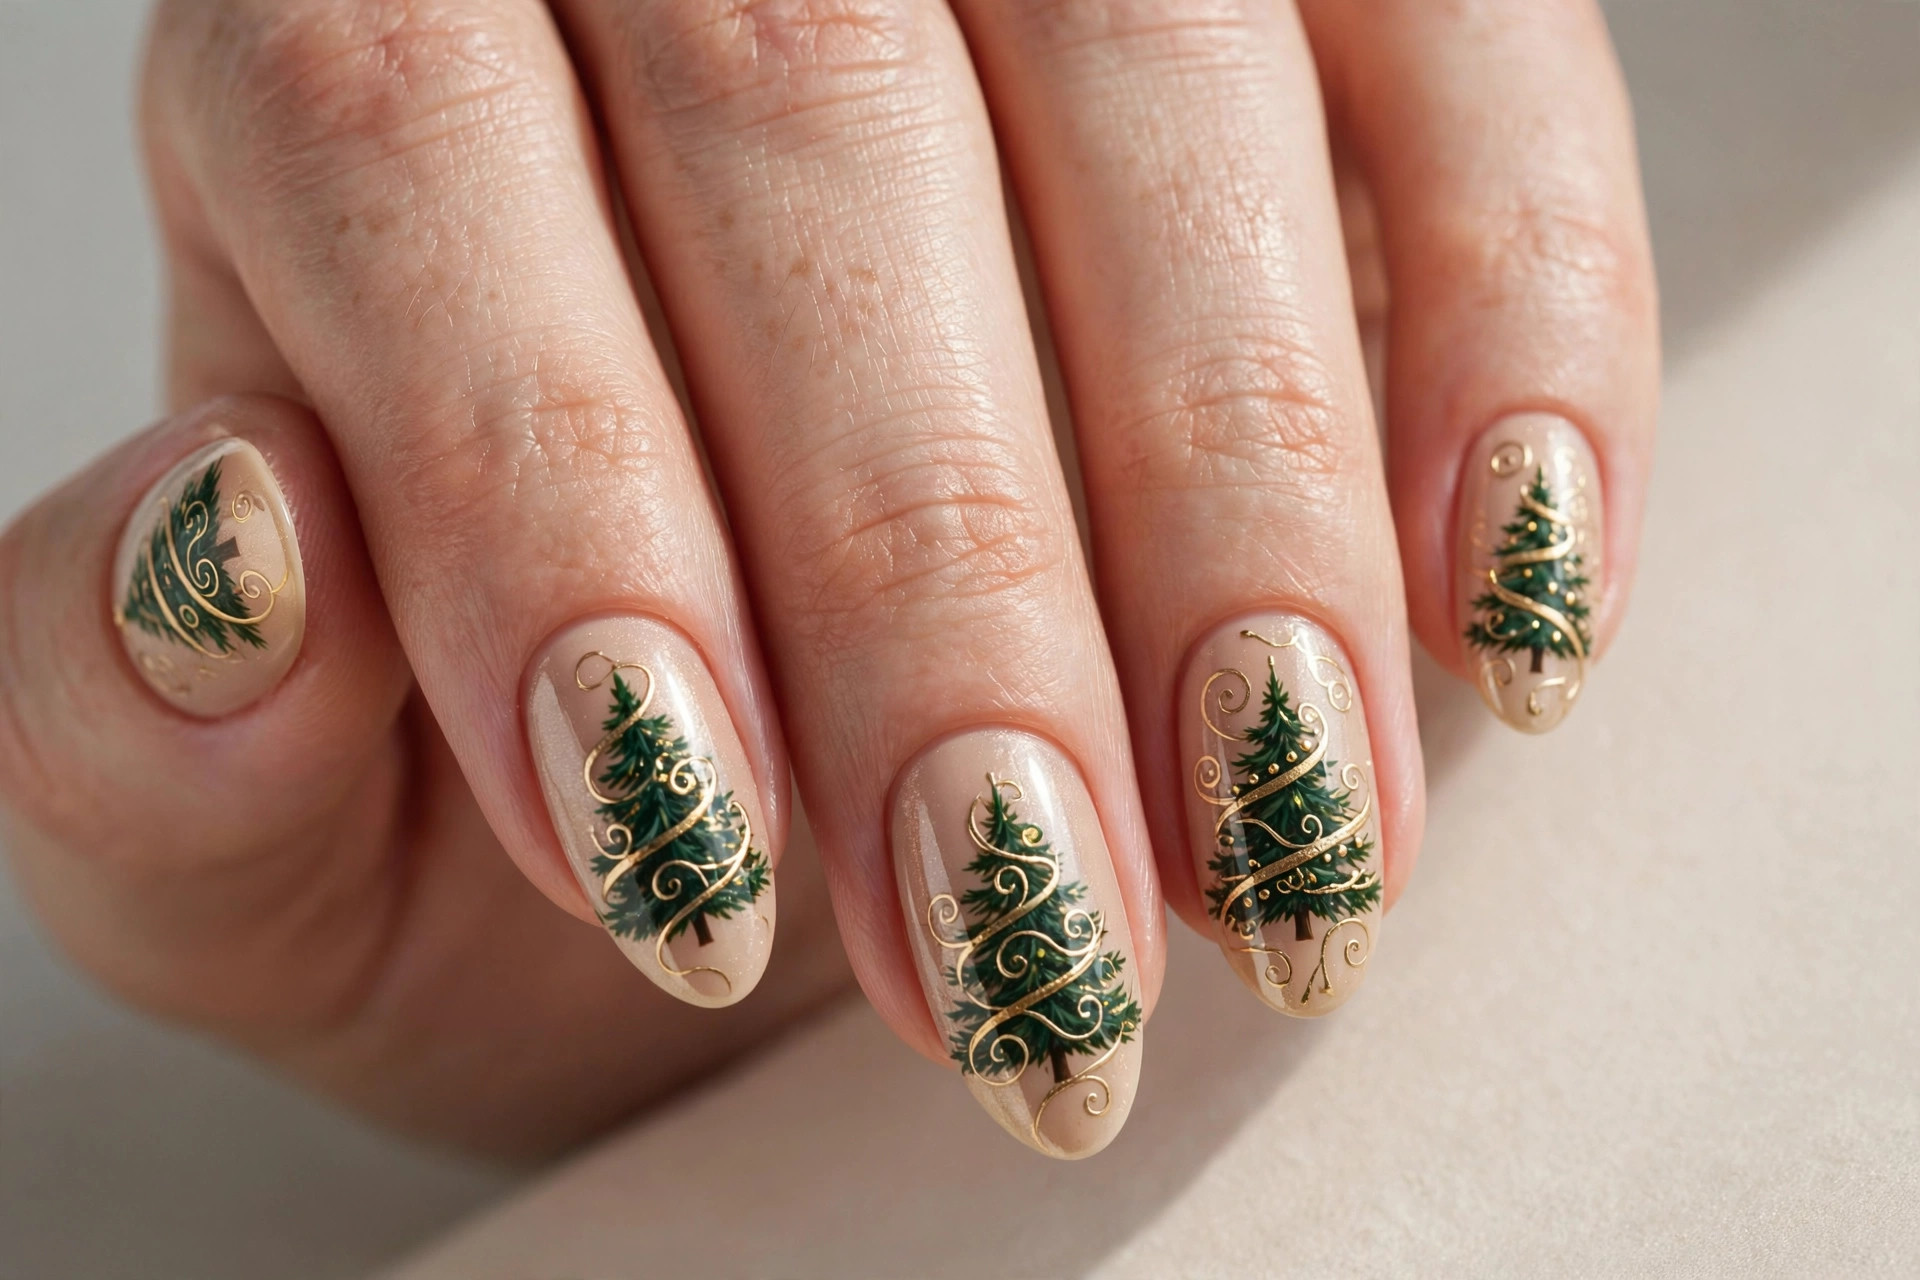
23. Gold Ribbon Tree
Wrap your tree in gold ribbon swirls for an elegant, gift-like finish. Deep green trees on a champagne base carry flowing gold ribbons that wind around the branches like a garland. The champagne base keeps everything luminous, and the gold ribbon ties the whole look together — literally.
This is a sophisticated choice for formal holiday events: Christmas dinner, office parties, winter weddings. Use a metallic gold striping polish for the ribbon and keep the swirls fluid and unhurried — stiff lines will look mechanical. A glossy top coat is essential; matte finishes dull metallic gold. This design earns compliments from across the room.
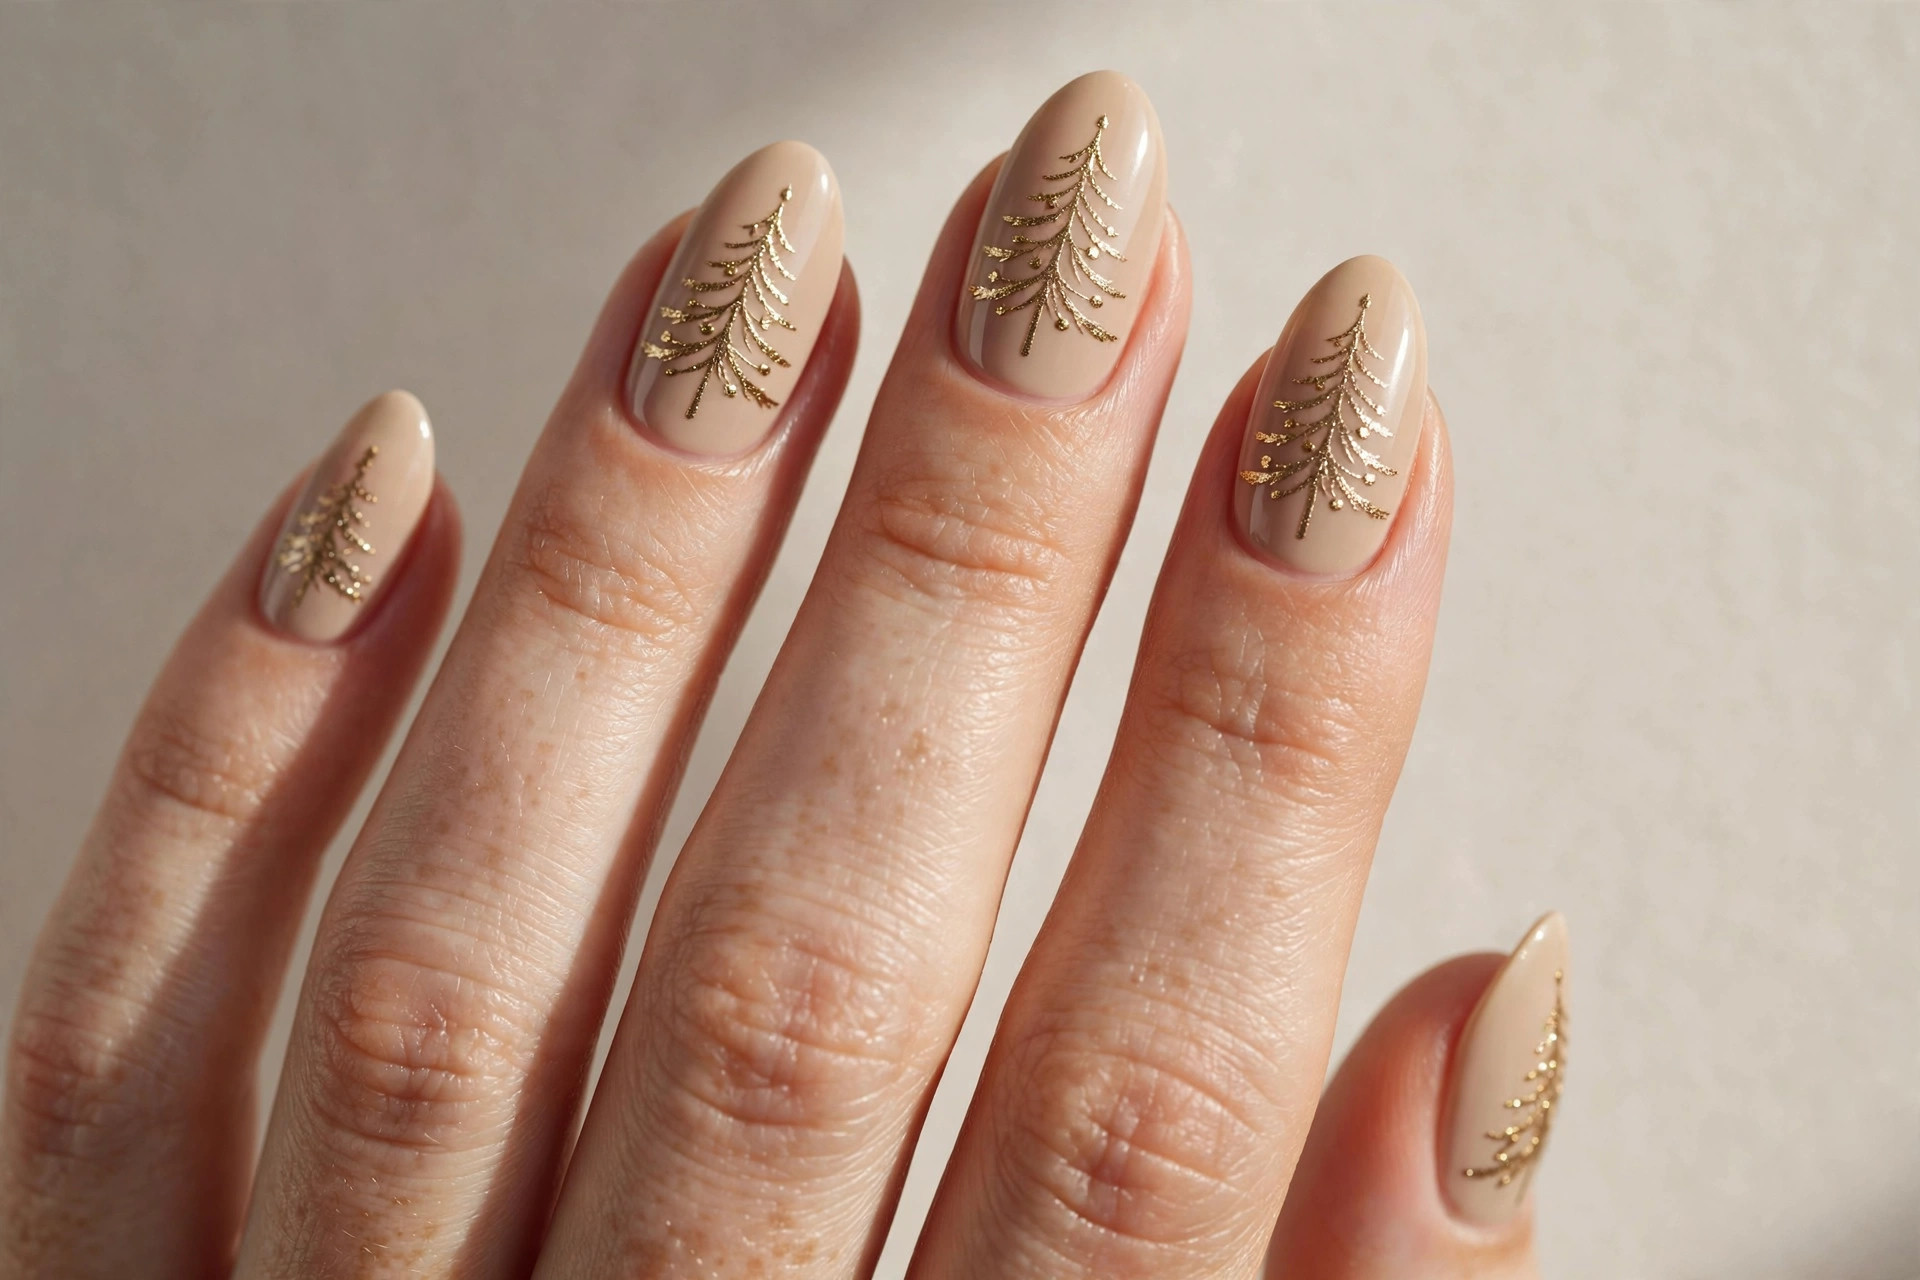
24. Champagne Gold Tree
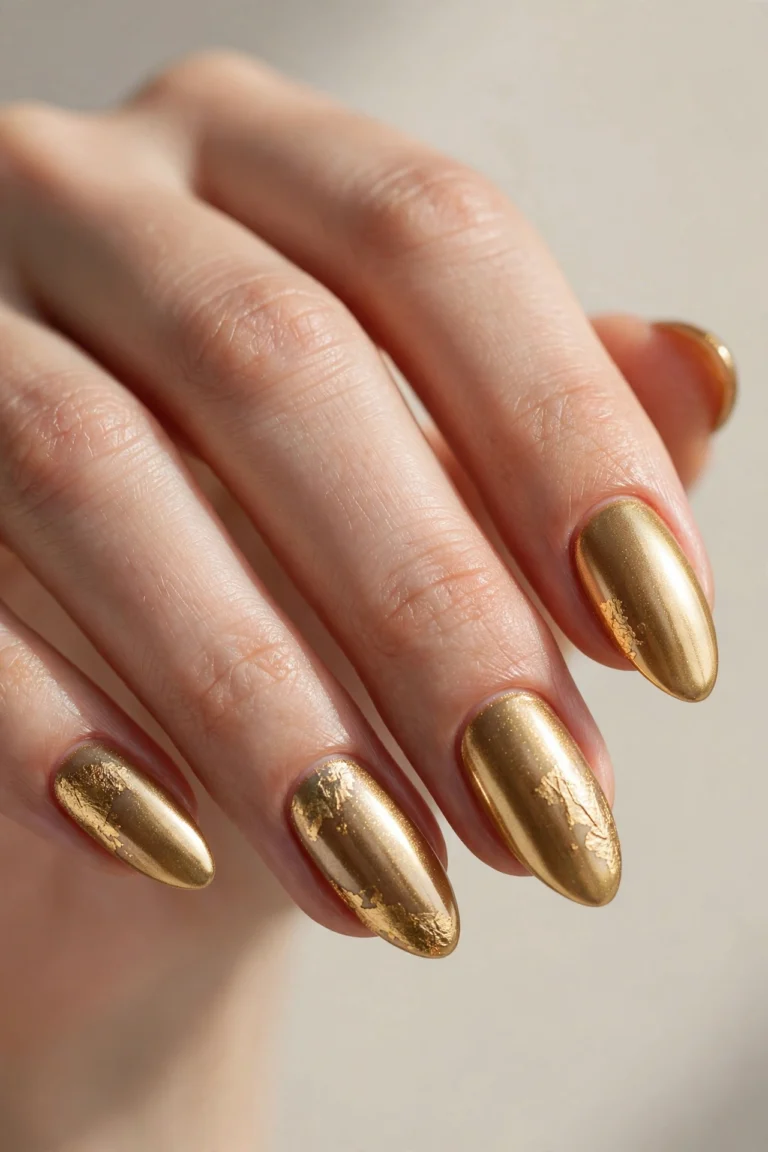
Pure shimmer: metallic gold Christmas trees on a soft beige base. Every nail catches the light, and the monochrome gold-on-champagne palette feels like liquid luxury. It is festive without any green at all — Christmas through the lens of jewelry rather than decoration.
This suits anyone who lives in gold jewelry and warm metallics. The key to a convincing metallic tree is a smooth chrome or metallic gold polish with no streaks — apply over a ridge-filling base and work quickly before the polish sets. Keep the rest of the manicure simple: this design is the statement, so let it shine alone.
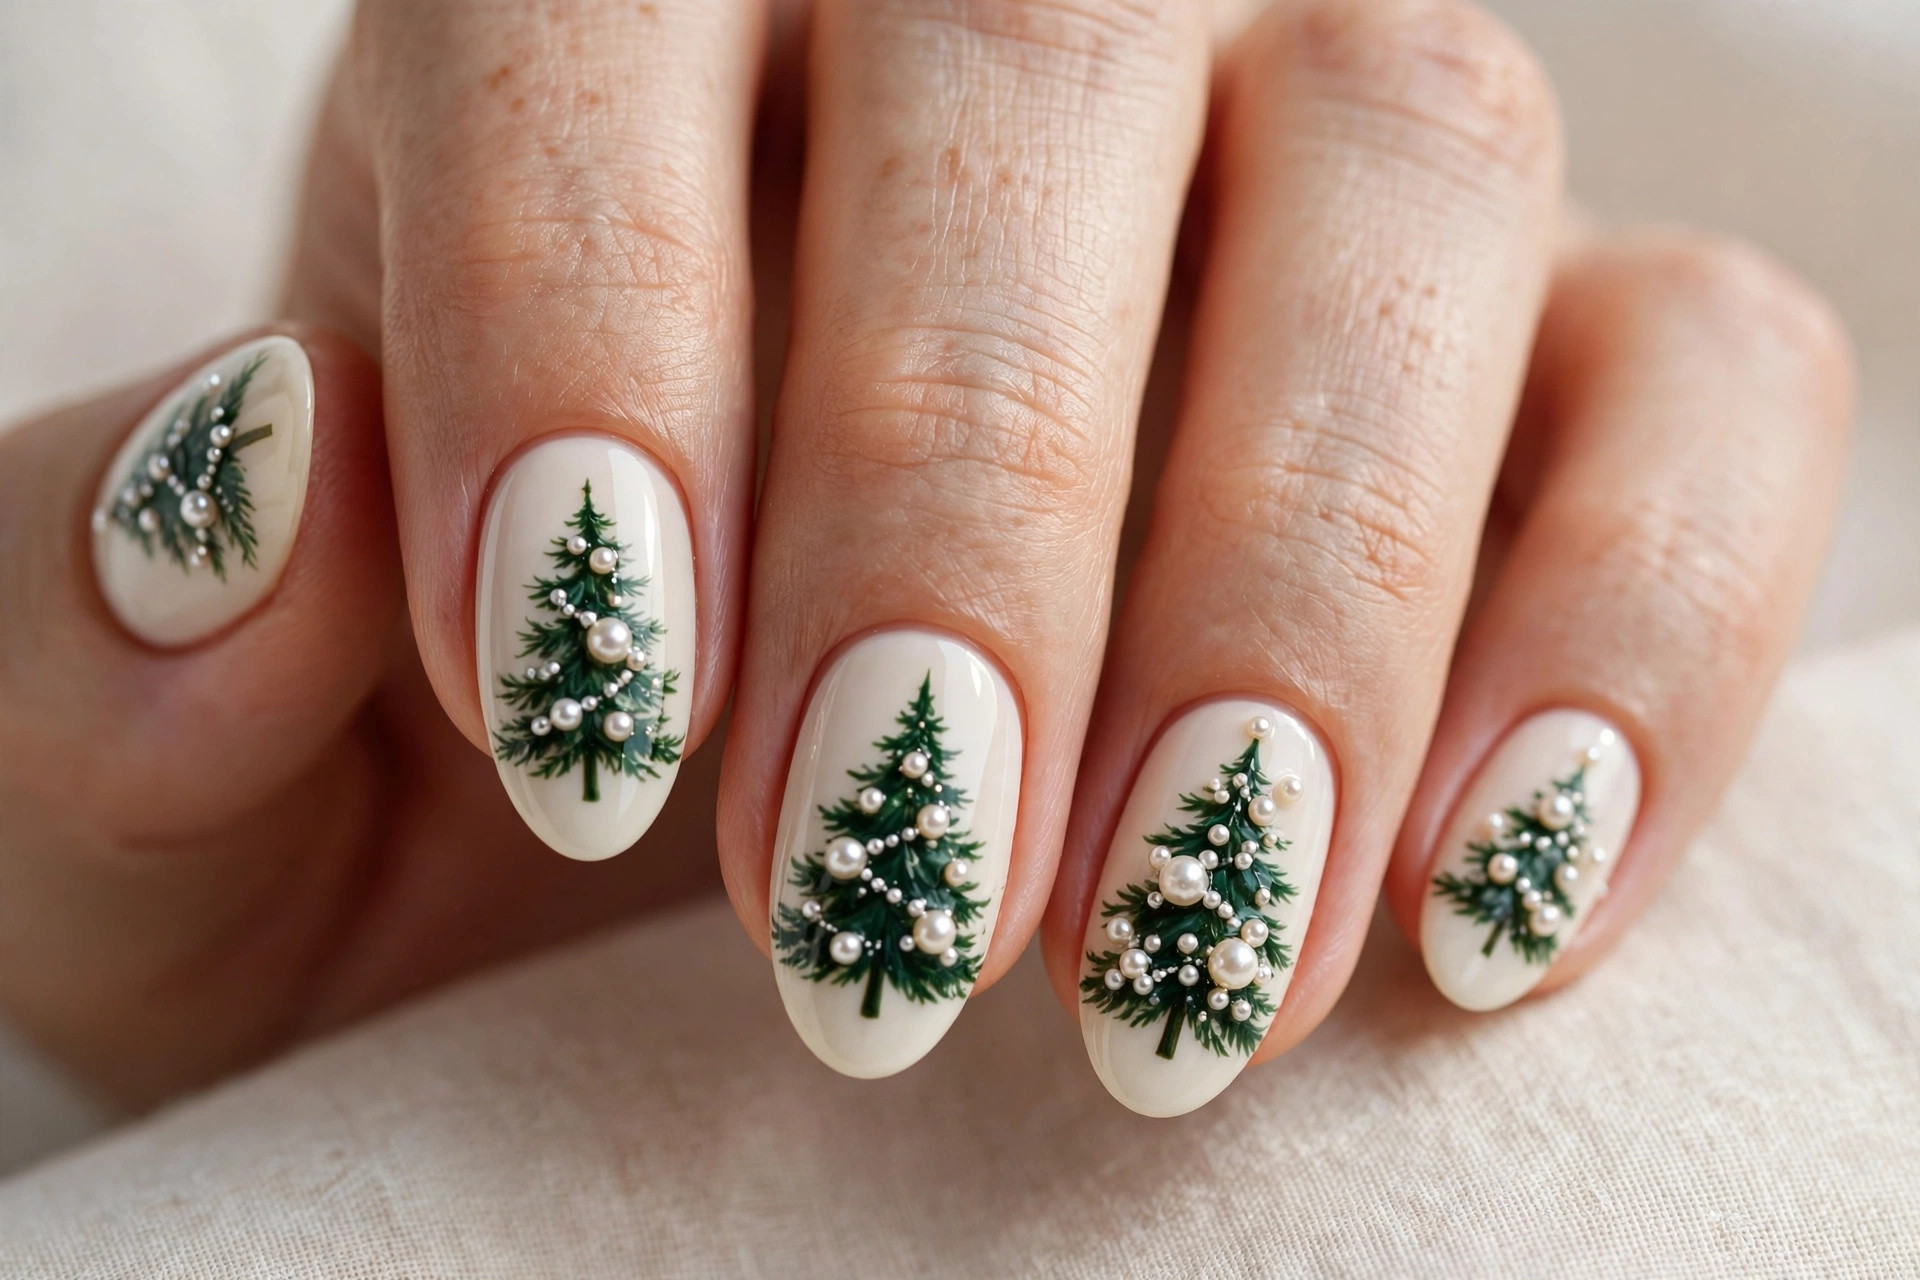
25. Pearl Tree
The most elegant tree in this roundup: deep forest green trees on ivory, decorated with tiny pearls instead of ornaments. The pearls sit like dew on the branches — subtle, tactile, and impossibly chic. It is a bridal-worthy Christmas design that still reads clearly as a tree.
This suits anyone with a classic, refined style and is stunning for December weddings and formal events. Ask your nail tech to place half-pearls with builder gel and cure them firmly, since pearls take knocks. Keep the base ivory rather than pure white — it flatters skin tones better and makes the pearls glow. Handle gently for the first 24 hours while everything fully sets.
Care and Longevity Tips for Christmas Tree Nail Art
Detailed nail art deserves protection. Always cap the free edge of each nail with your top coat — this single step is the biggest difference between a manicure that lasts two days and one that lasts two weeks. Reapply a thin layer of top coat every two to three days, especially if your design includes glitter, gems, or pearls, which lift more easily than flat polish.
Wear gloves for washing up and cleaning, and keep your hands moisturized with cuticle oil daily — dry cuticles are the main reason festive manicures start to look tired before the holidays are over. If you are doing your tree nail art at home, a quality starter set makes the fine details far easier to paint; this nail polish kit includes the fine brushes and dotting tools these designs need. For gems and pearls, a small bead of nail glue under each piece, sealed with top coat, will keep them secure through every party.
Final Thoughts
From classic red and green to pearls, plaid, and pure gold, Christmas tree nail art has a version for every style and every December plan. Pick the design that matches your mood — or wear a different tree on each hand and enjoy the whole forest. With good prep, a careful top coat, and a little patience, your festive trees will carry you from the first holiday party to New Year’s Day looking freshly painted.