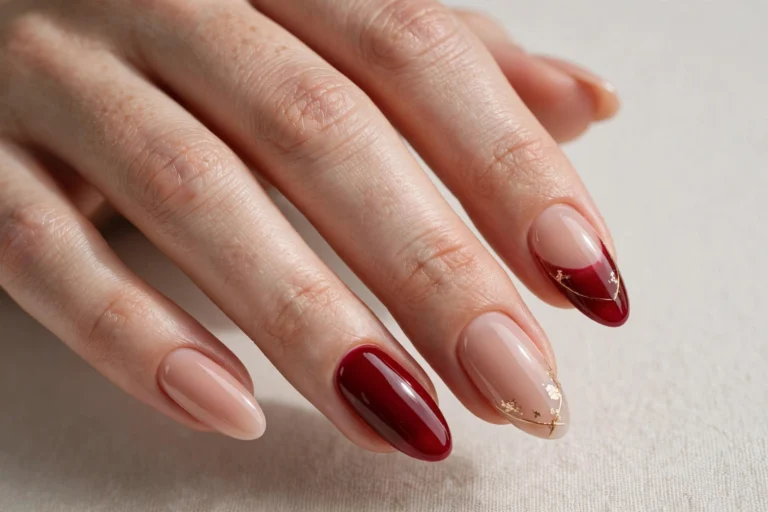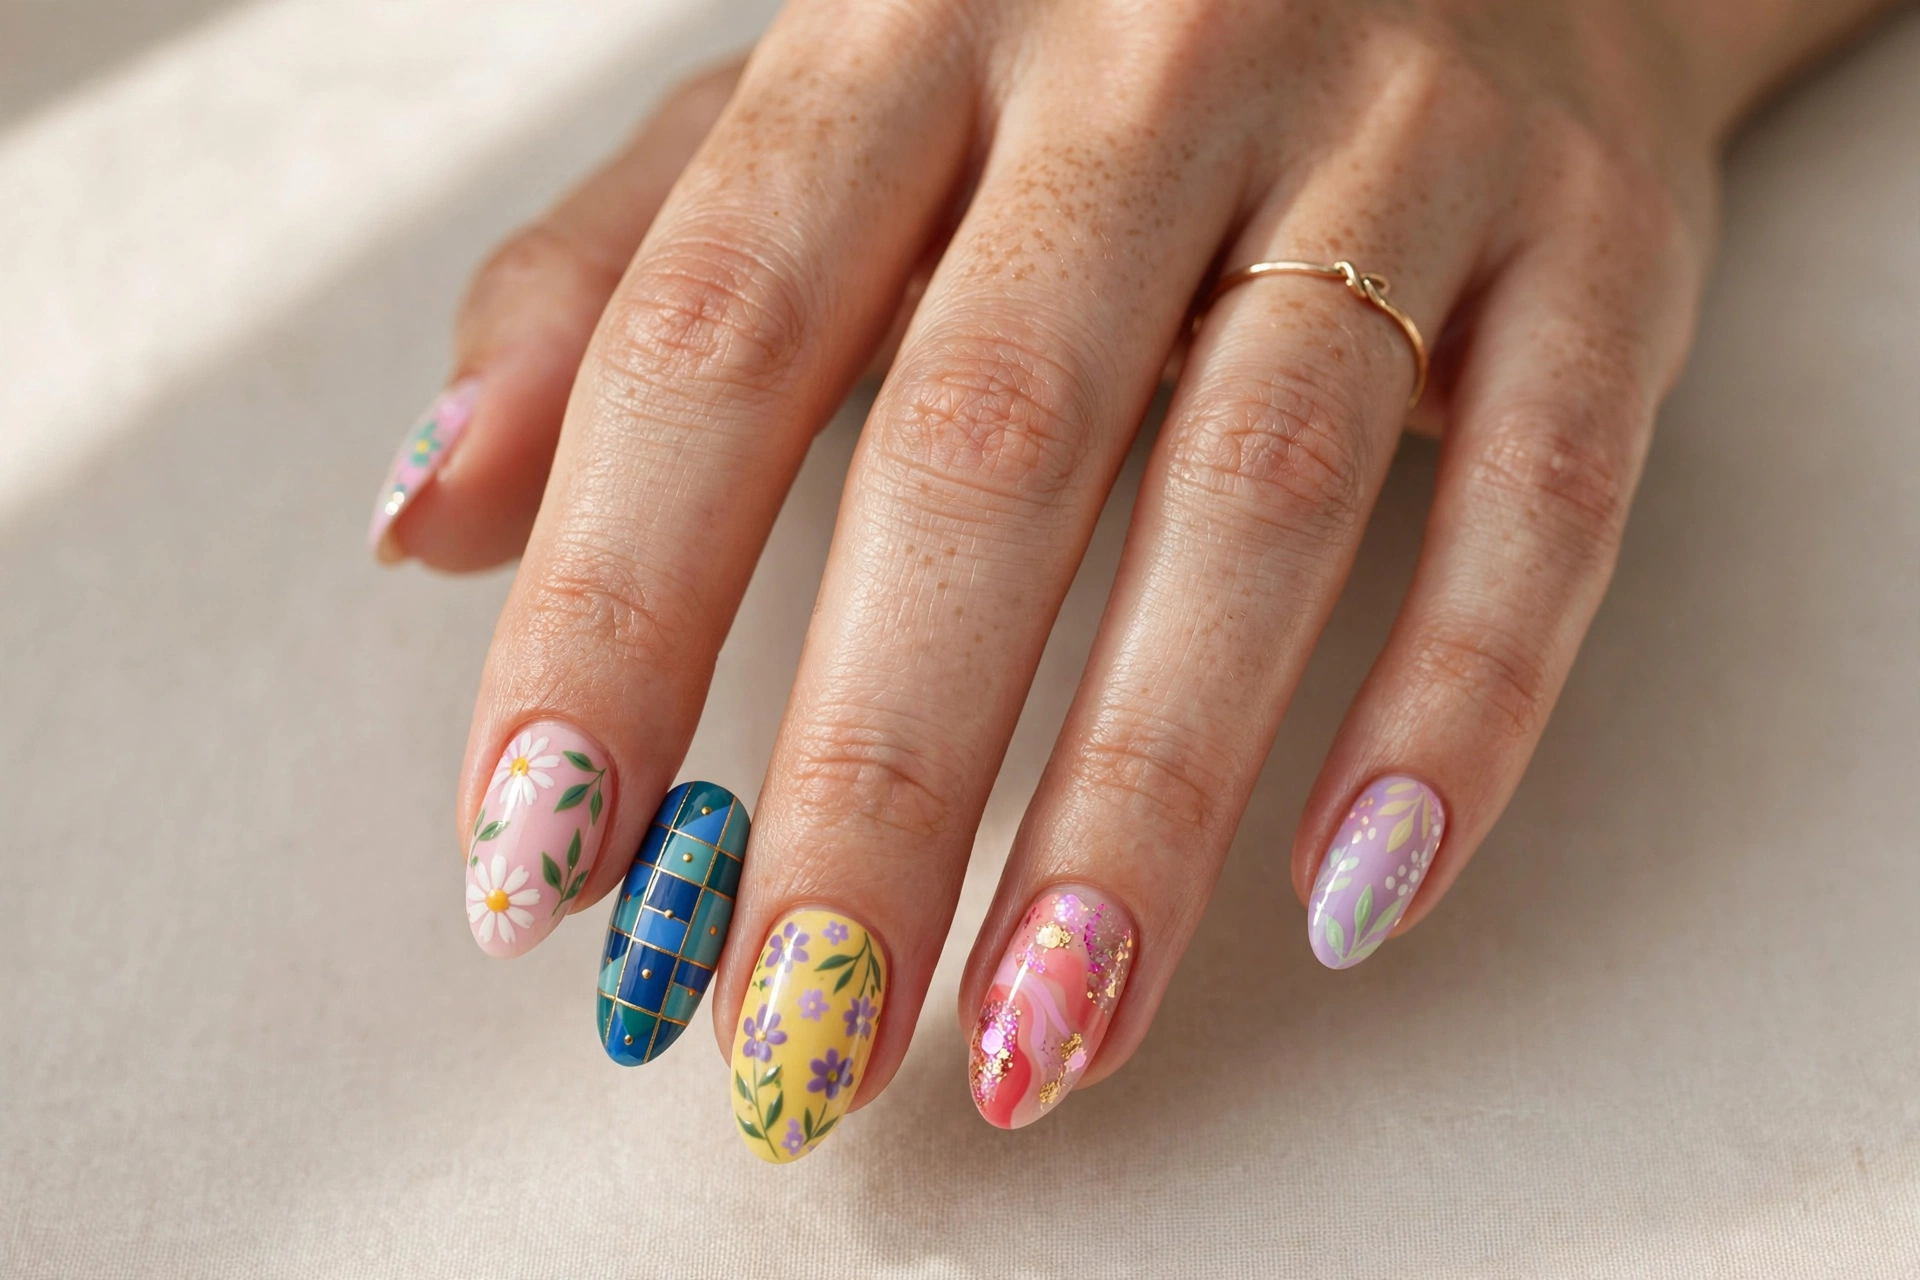
18 Fingernail Art Pictures That Will Inspire Your Next Manicure
Choosing your next manicure used to mean flipping through a dog-eared binder at the salon. These days, all you need is a scroll through fingernail art pictures to find a design that feels like you. A single photo can show you the true color, the shape, and the tiny details that a written description never quite captures.
That is exactly what this gallery is for. Below you will find 18 handpicked fingernail art pictures, each one paired with honest notes on who the design suits and how to actually get it. Whether you sit in a salon chair or paint your nails at the kitchen table, start with easy nail art designs you can try at home if you are new to doing your own nails, then come back and pick the look that made you stop scrolling.
Why Fingernail Art Pictures Are the Best Way to Pick Your Next Manicure
Words can describe a nail design, but they cannot show you how it wears. A picture reveals the finish — glossy or matte — the way the color catches the light, and whether that intricate detail actually looks good on a real hand rather than a flat mockup. Seeing several designs side by side also makes it easier to notice what you are drawn to: warm tones, clean minimalism, or full sparkle.
Photos also save you from salon miscommunication. Showing your technician a picture beats trying to explain “sort of a marble but softer” while pointing at a wall of polish bottles. And if you do your own nails, studying the picture first helps you gather the right tools before you start. For bolder ideas, browsing abstract nail art designs is a great way to train your eye for color and composition.
1. Classic Red Almond Nails
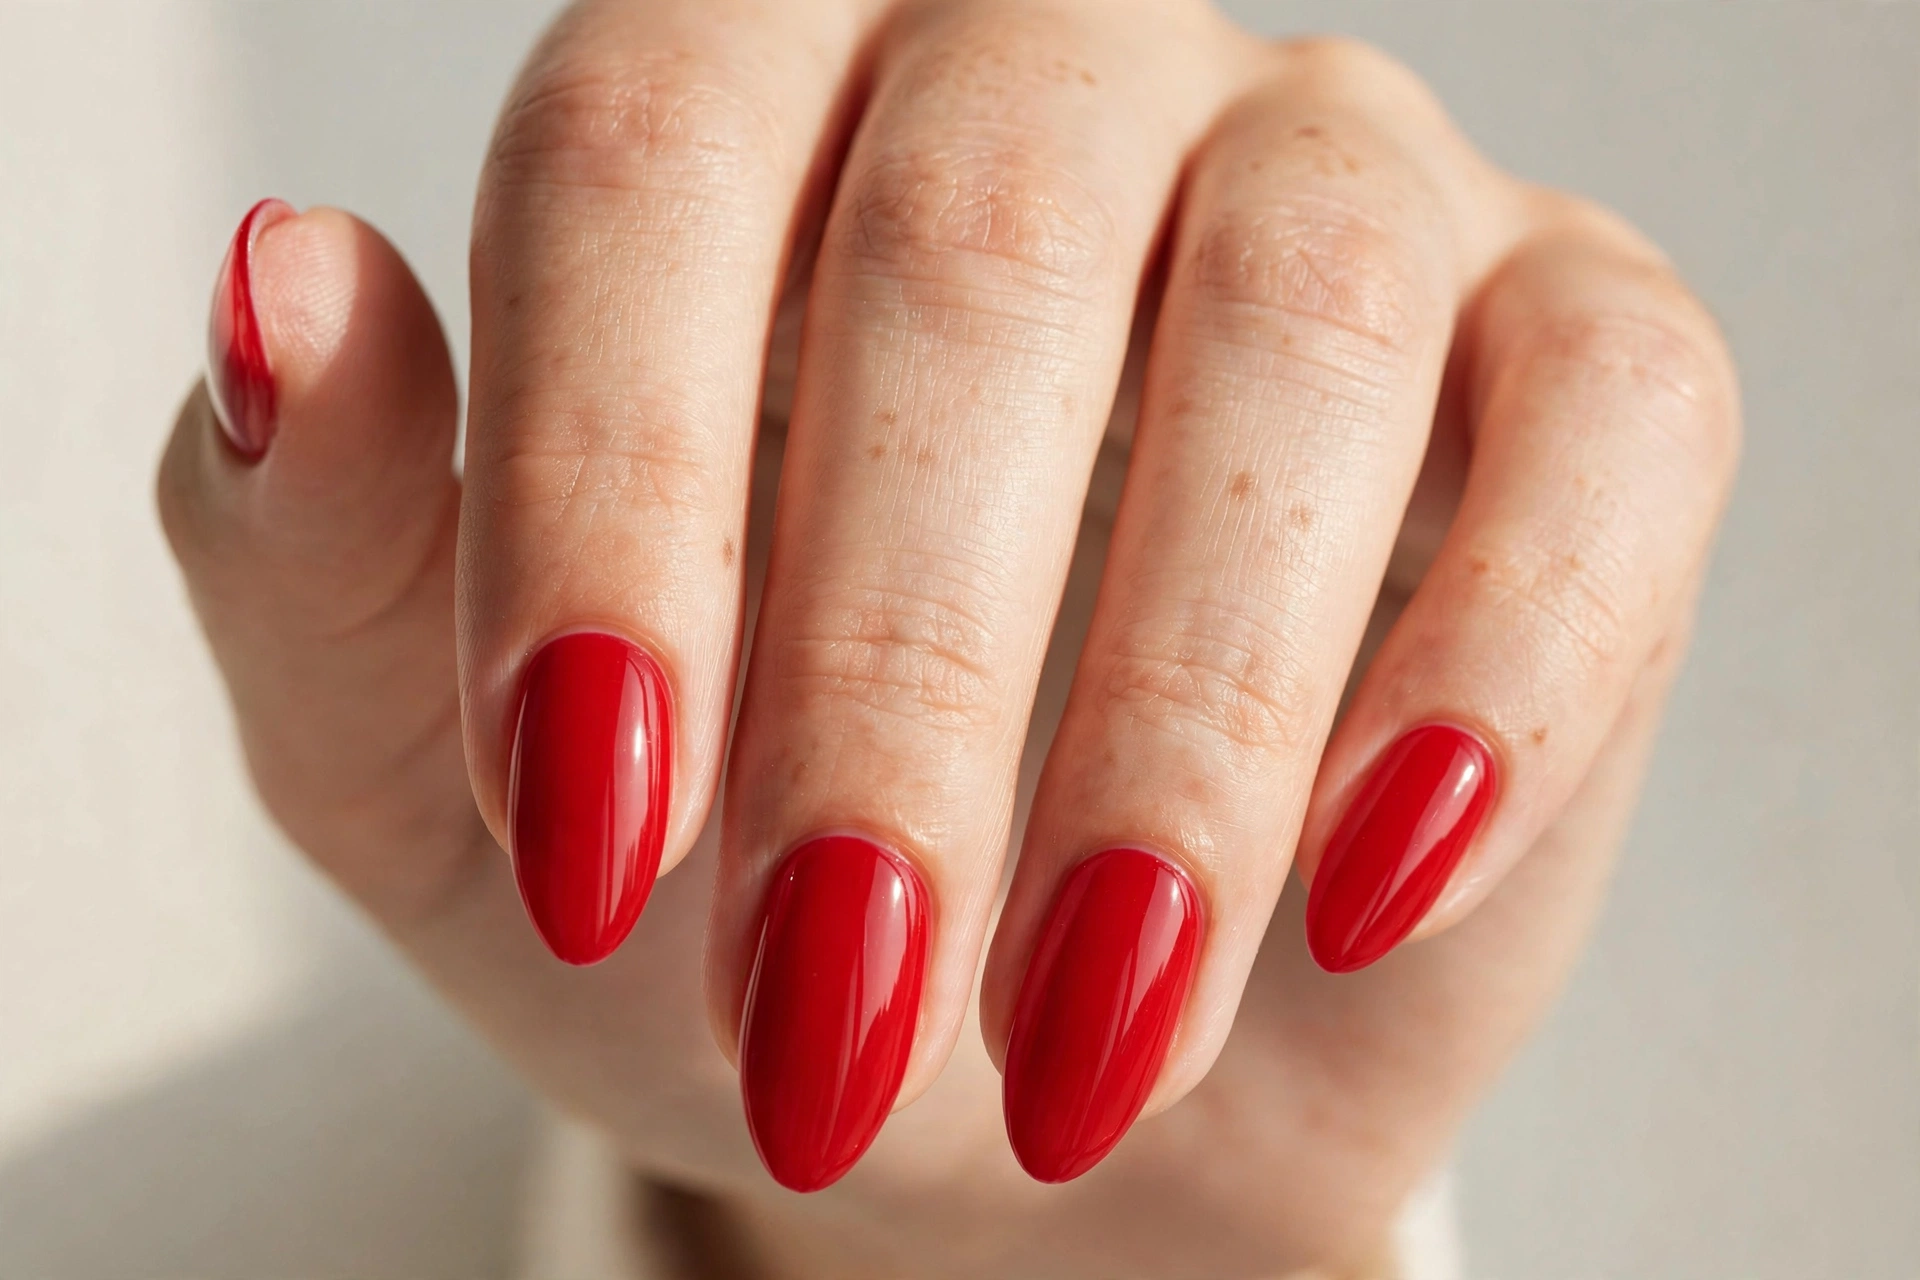
Some designs never leave the trend cycle, and this is one of them. A true red cream polish on an almond shape reads confident and polished without trying hard. The glossy finish keeps it fresh rather than flat, and the almond length gives the color room to breathe.
This look suits just about everyone. It flatters short fingers by drawing the eye lengthwise, and it works on any skin tone — cooler complexions lean toward cherry reds, warmer ones toward brick tones. It is also the rare design that fits both a job interview and a night out. To get it, apply two thin coats of a high-pigment red over a base coat and seal with a quick-dry top coat. Keep the free edge smooth with a glass file so the color sits evenly.
2. French Tips with a Gold Line
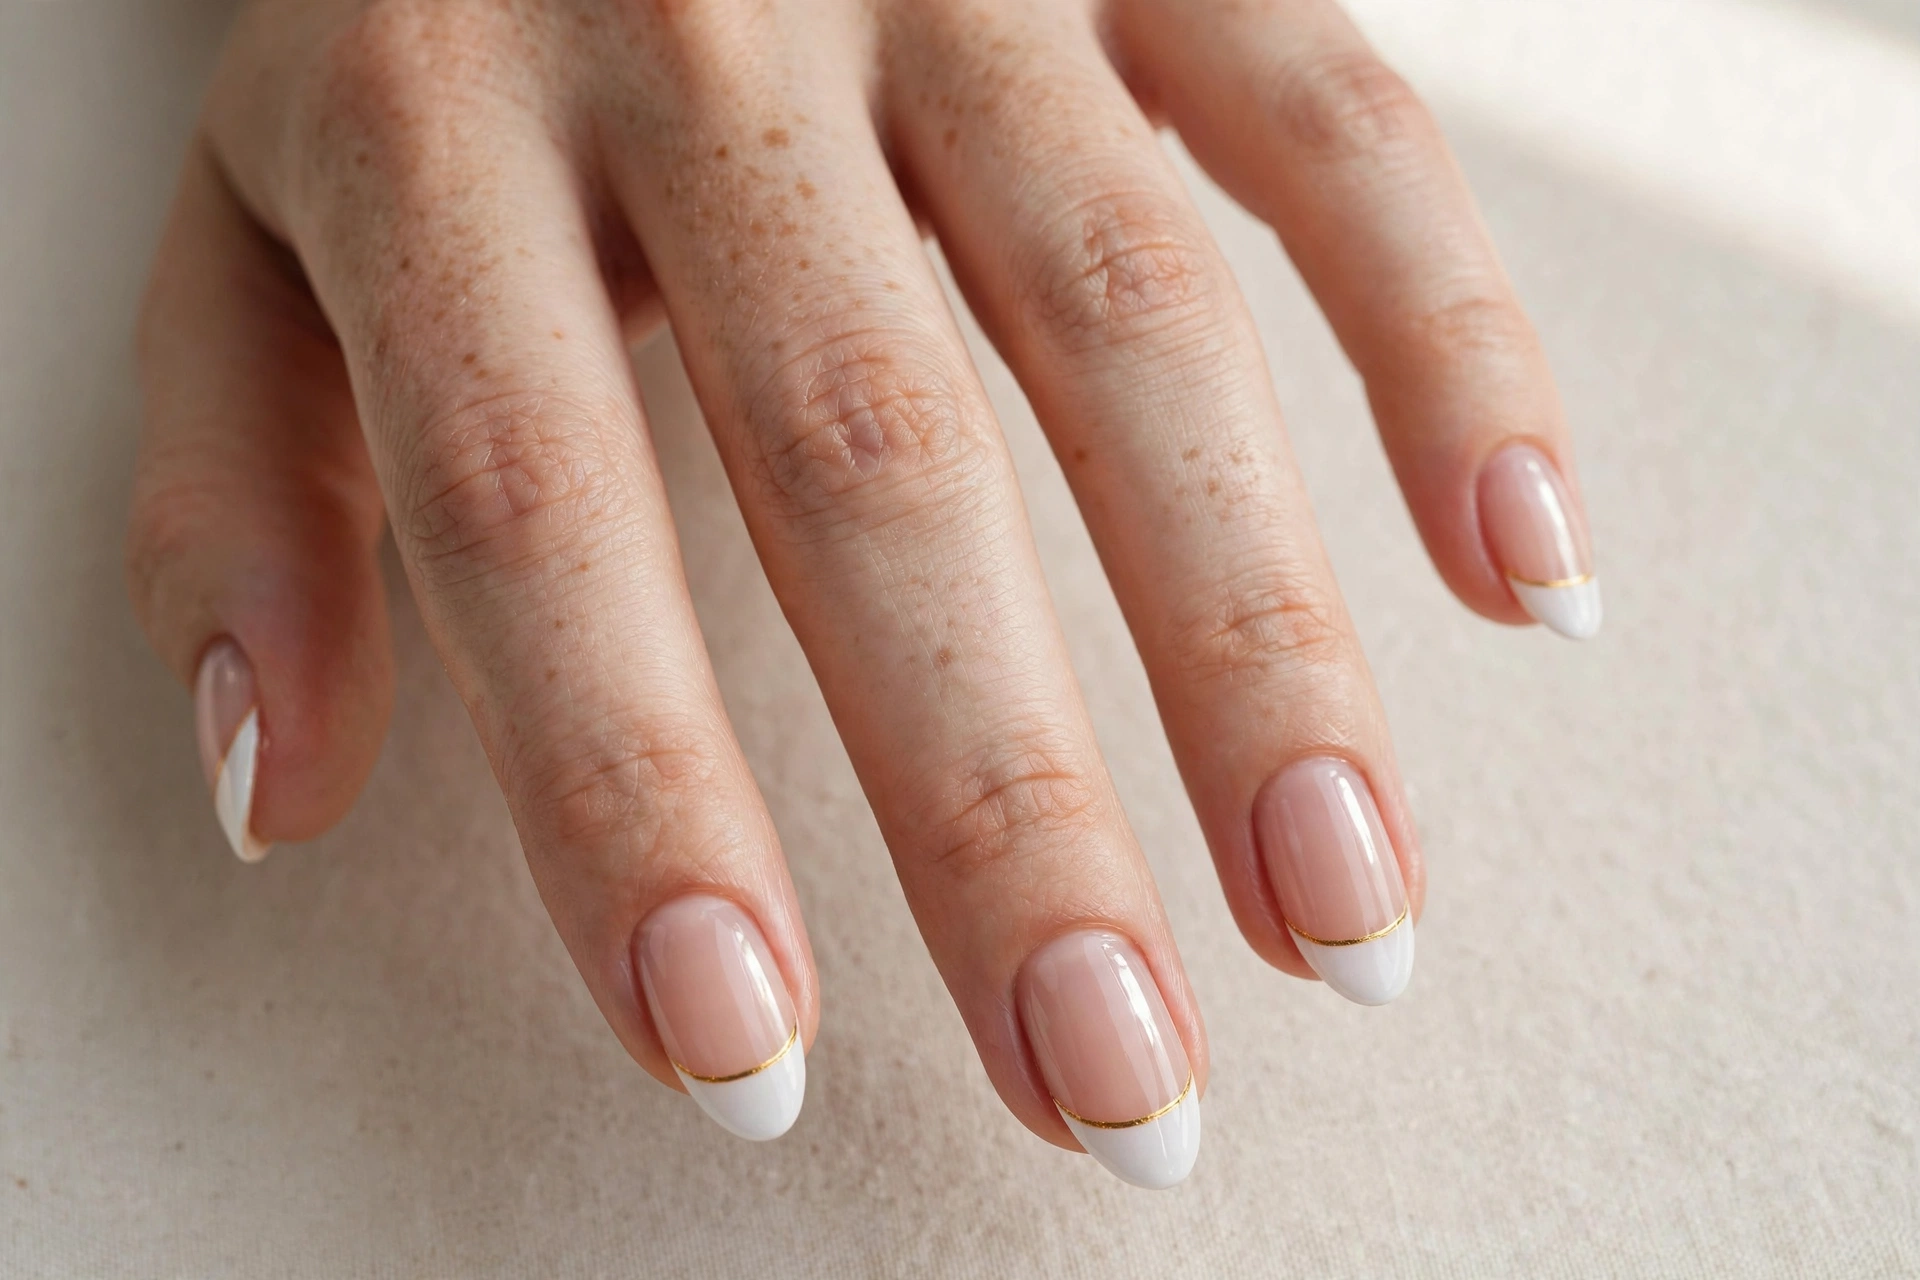
The French manicure got a quiet upgrade. The classic white tip is still there, but a hairline of metallic gold now traces the smile line, which makes the whole nail look more deliberate and expensive. It catches the light in a way plain white tips never do.
This design is made for people who like their nails neat but not boring. It suits office dress codes, wedding parties, and anyone growing out short nails, since the tip line visually lengthens the nail. Ask your technician for a micro French with gold striping tape or a thin liner brush. At home, paint the white tip first, let it dry fully, then lay the gold line with a striper polish and finish with top coat to smooth the layers.
3. Nude Matte with Polka Dots
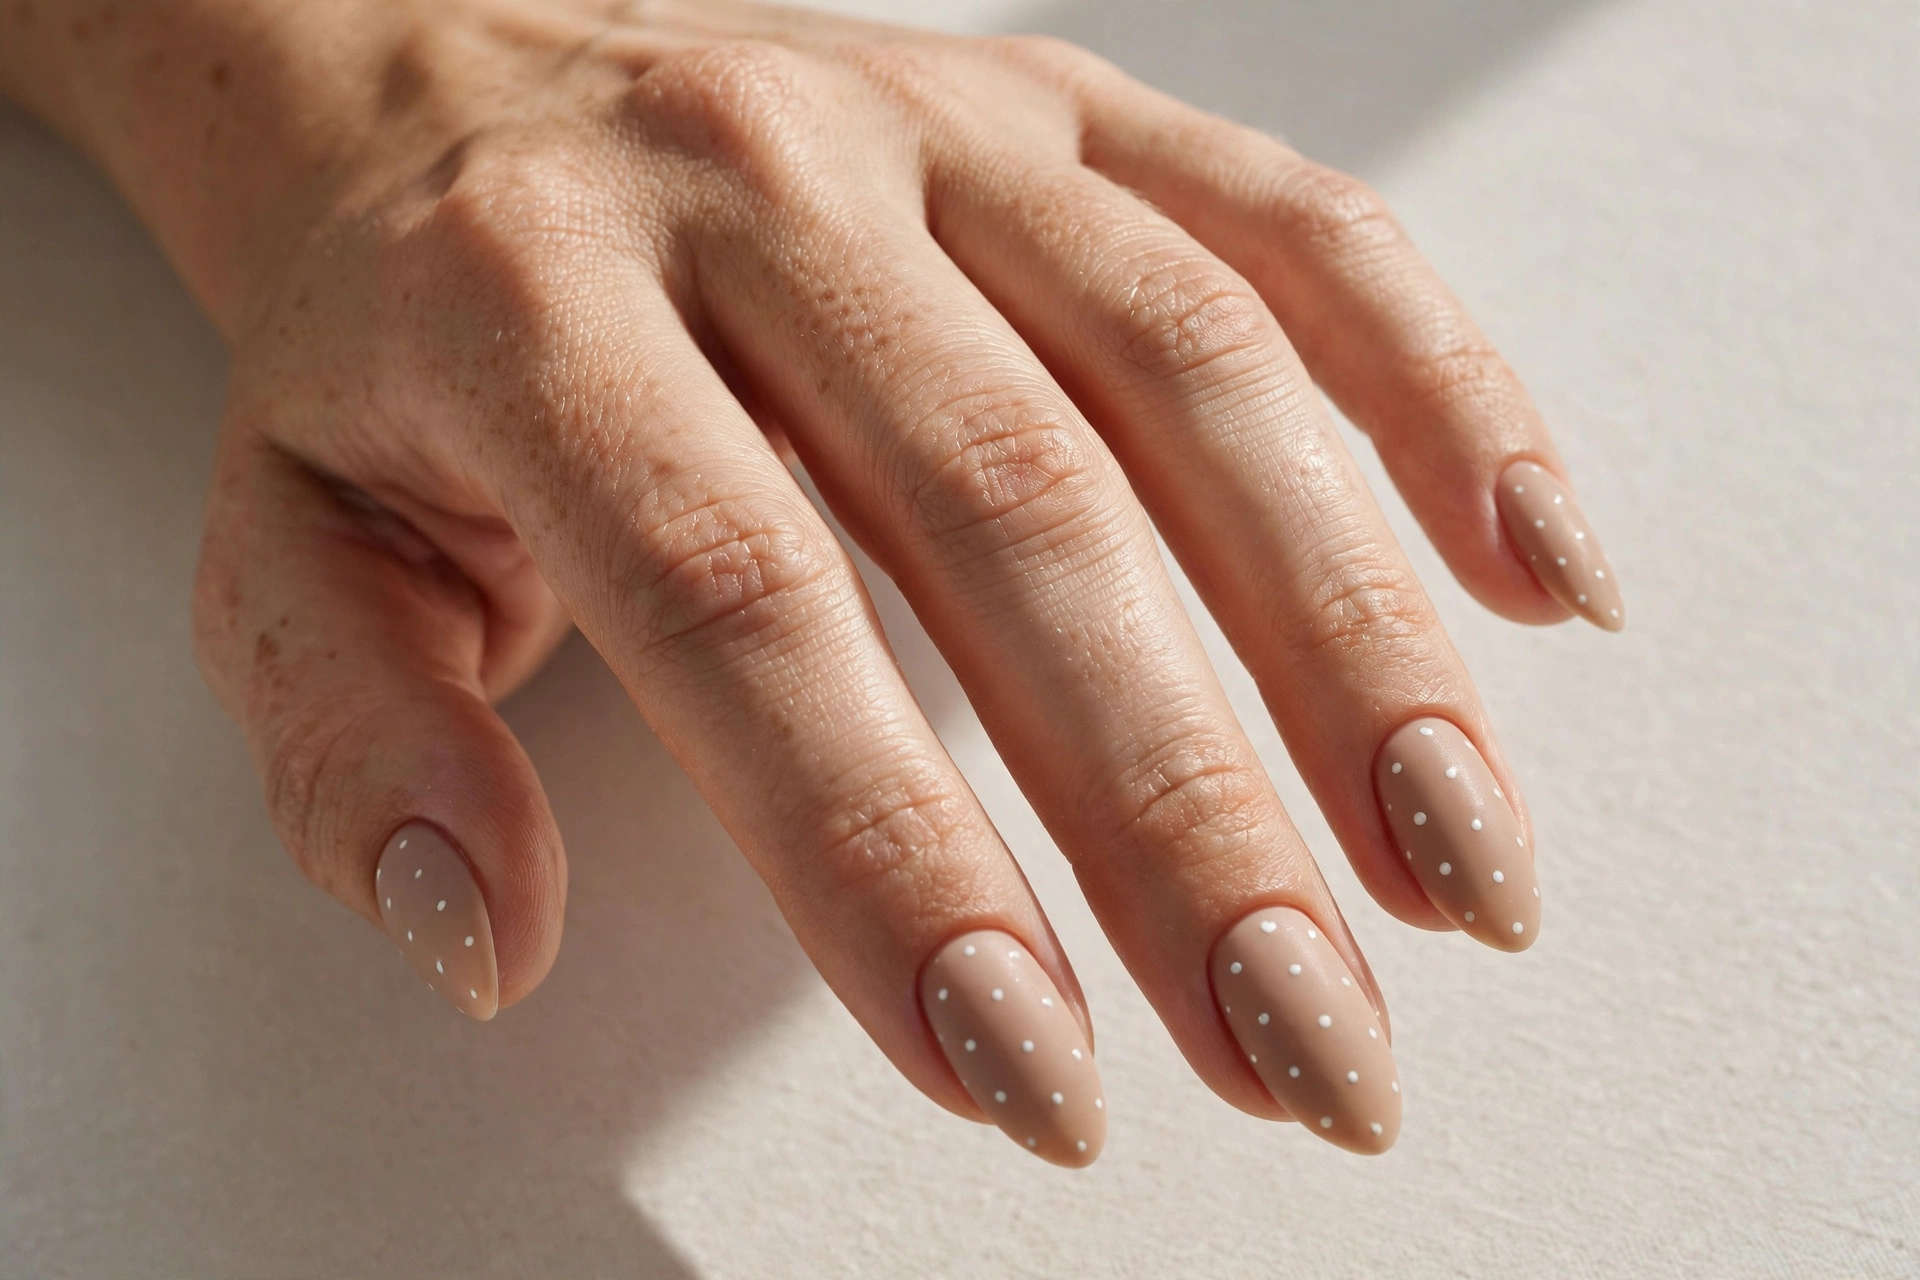
Nude nails with tiny white dots are the kind of design that gets compliments from people who “don’t usually notice nails.” The matte top coat flattens the base so the dots pop, and the look stays playful without ever feeling loud.
This is a great first design for beginners and a safe pick for anyone whose workplace frowns on bright color. It suits all nail lengths and hides regrowth well, so it is low maintenance between appointments. After your nude base dries, dip a dotting tool or the rounded end of a bobby pin in white polish and place the dots while the base is fully set. Seal everything with a matte top coat for the velvety finish.
4. Black and White Marble
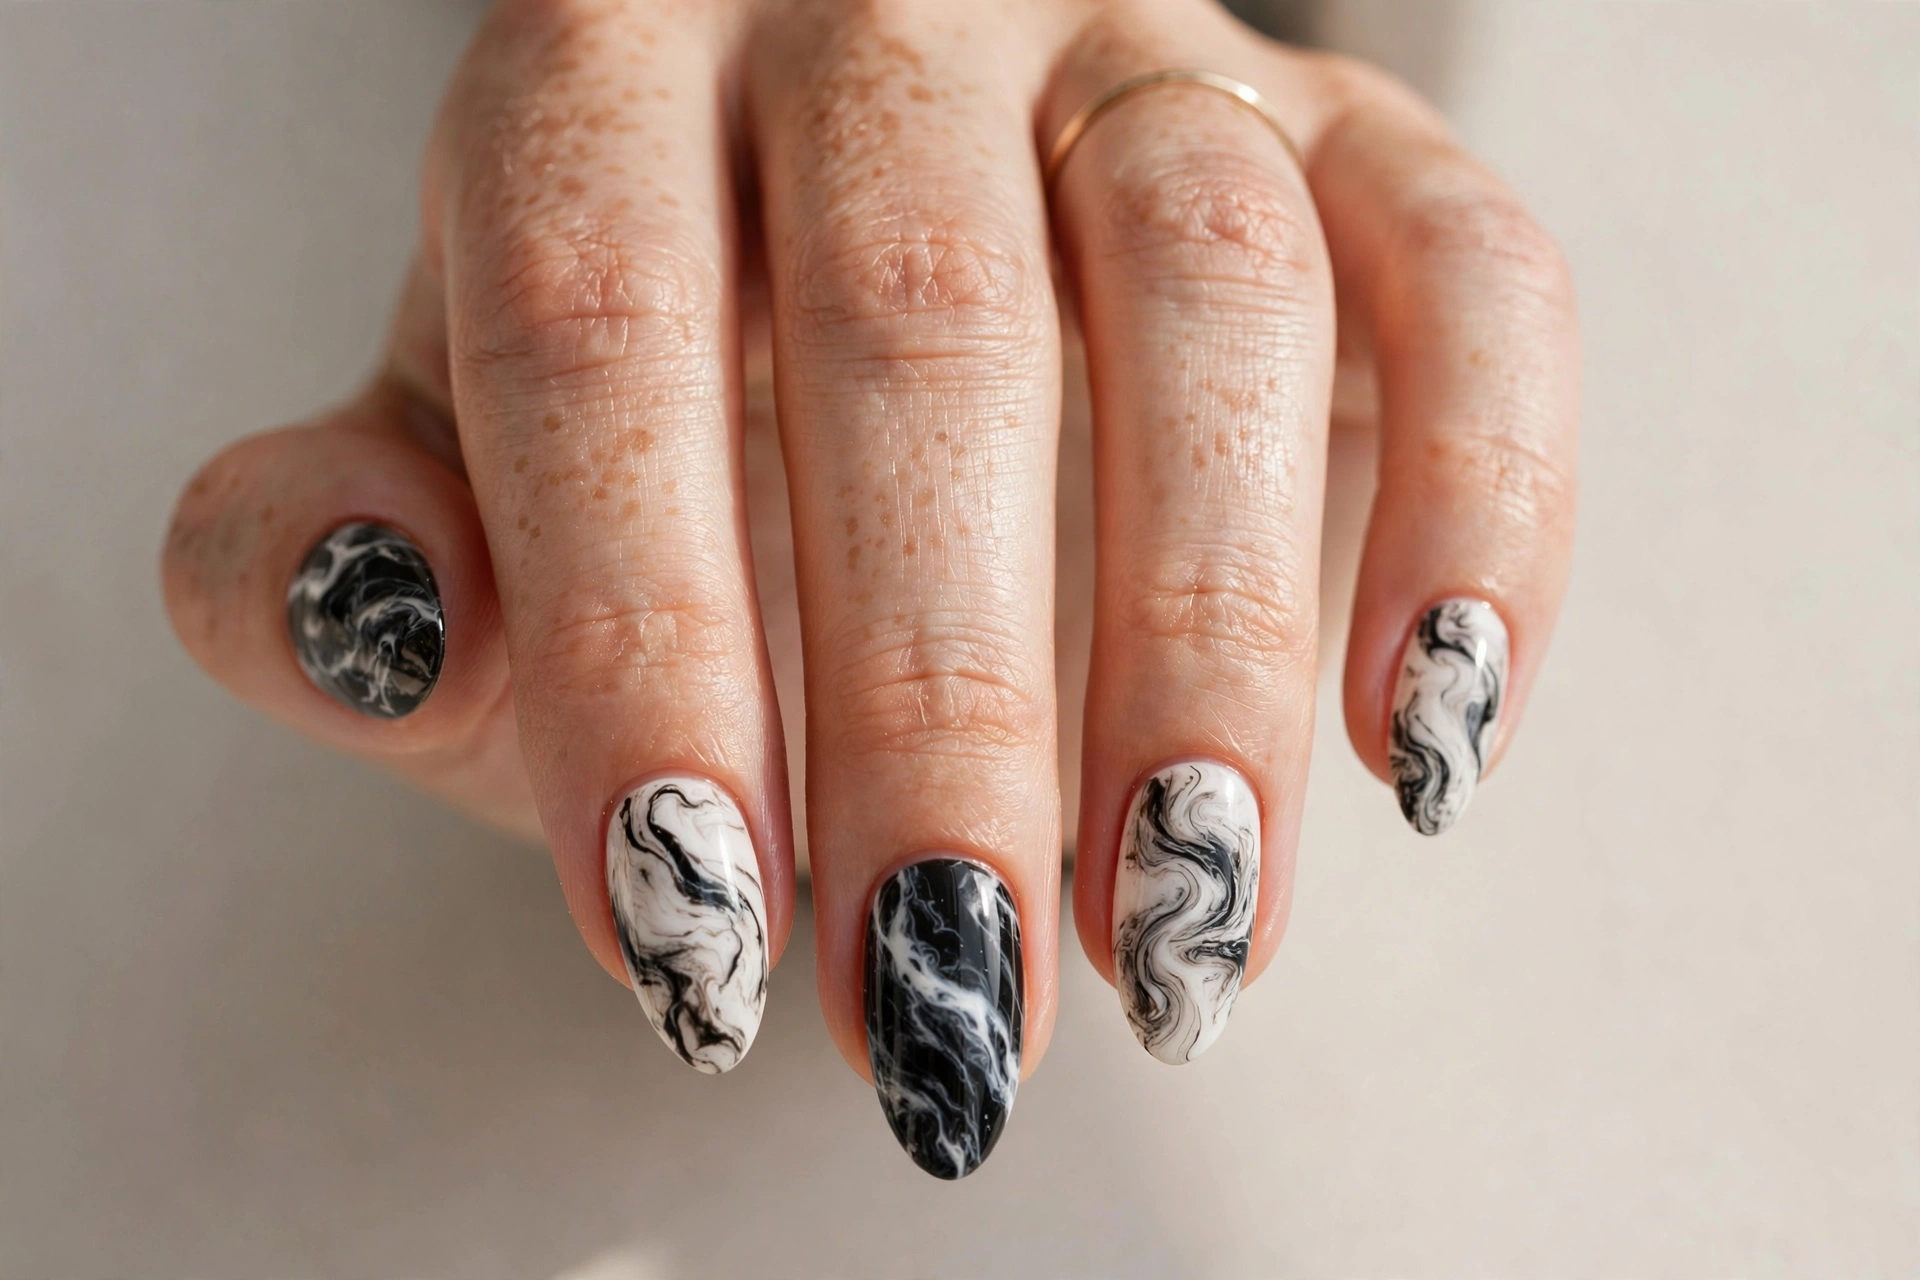
Marble nails look like they took an hour, but the magic is in the technique. Swirls of black over a milky white base create a stone-like effect where no two nails match — which is exactly the point. Each nail becomes a tiny abstract painting.
This design suits anyone who loves monochrome outfits or wants an edgy look that still feels refined. It works best on medium to long nails where the veining has room to spread. The water-marbling method involves dropping polish into water and dragging the pattern before dipping the nail, but a simpler route is dragging a toothpick through wet polish on the nail itself. A glossy top coat deepens the stone effect, so do not skip it.
5. Pastel Rainbow Tips
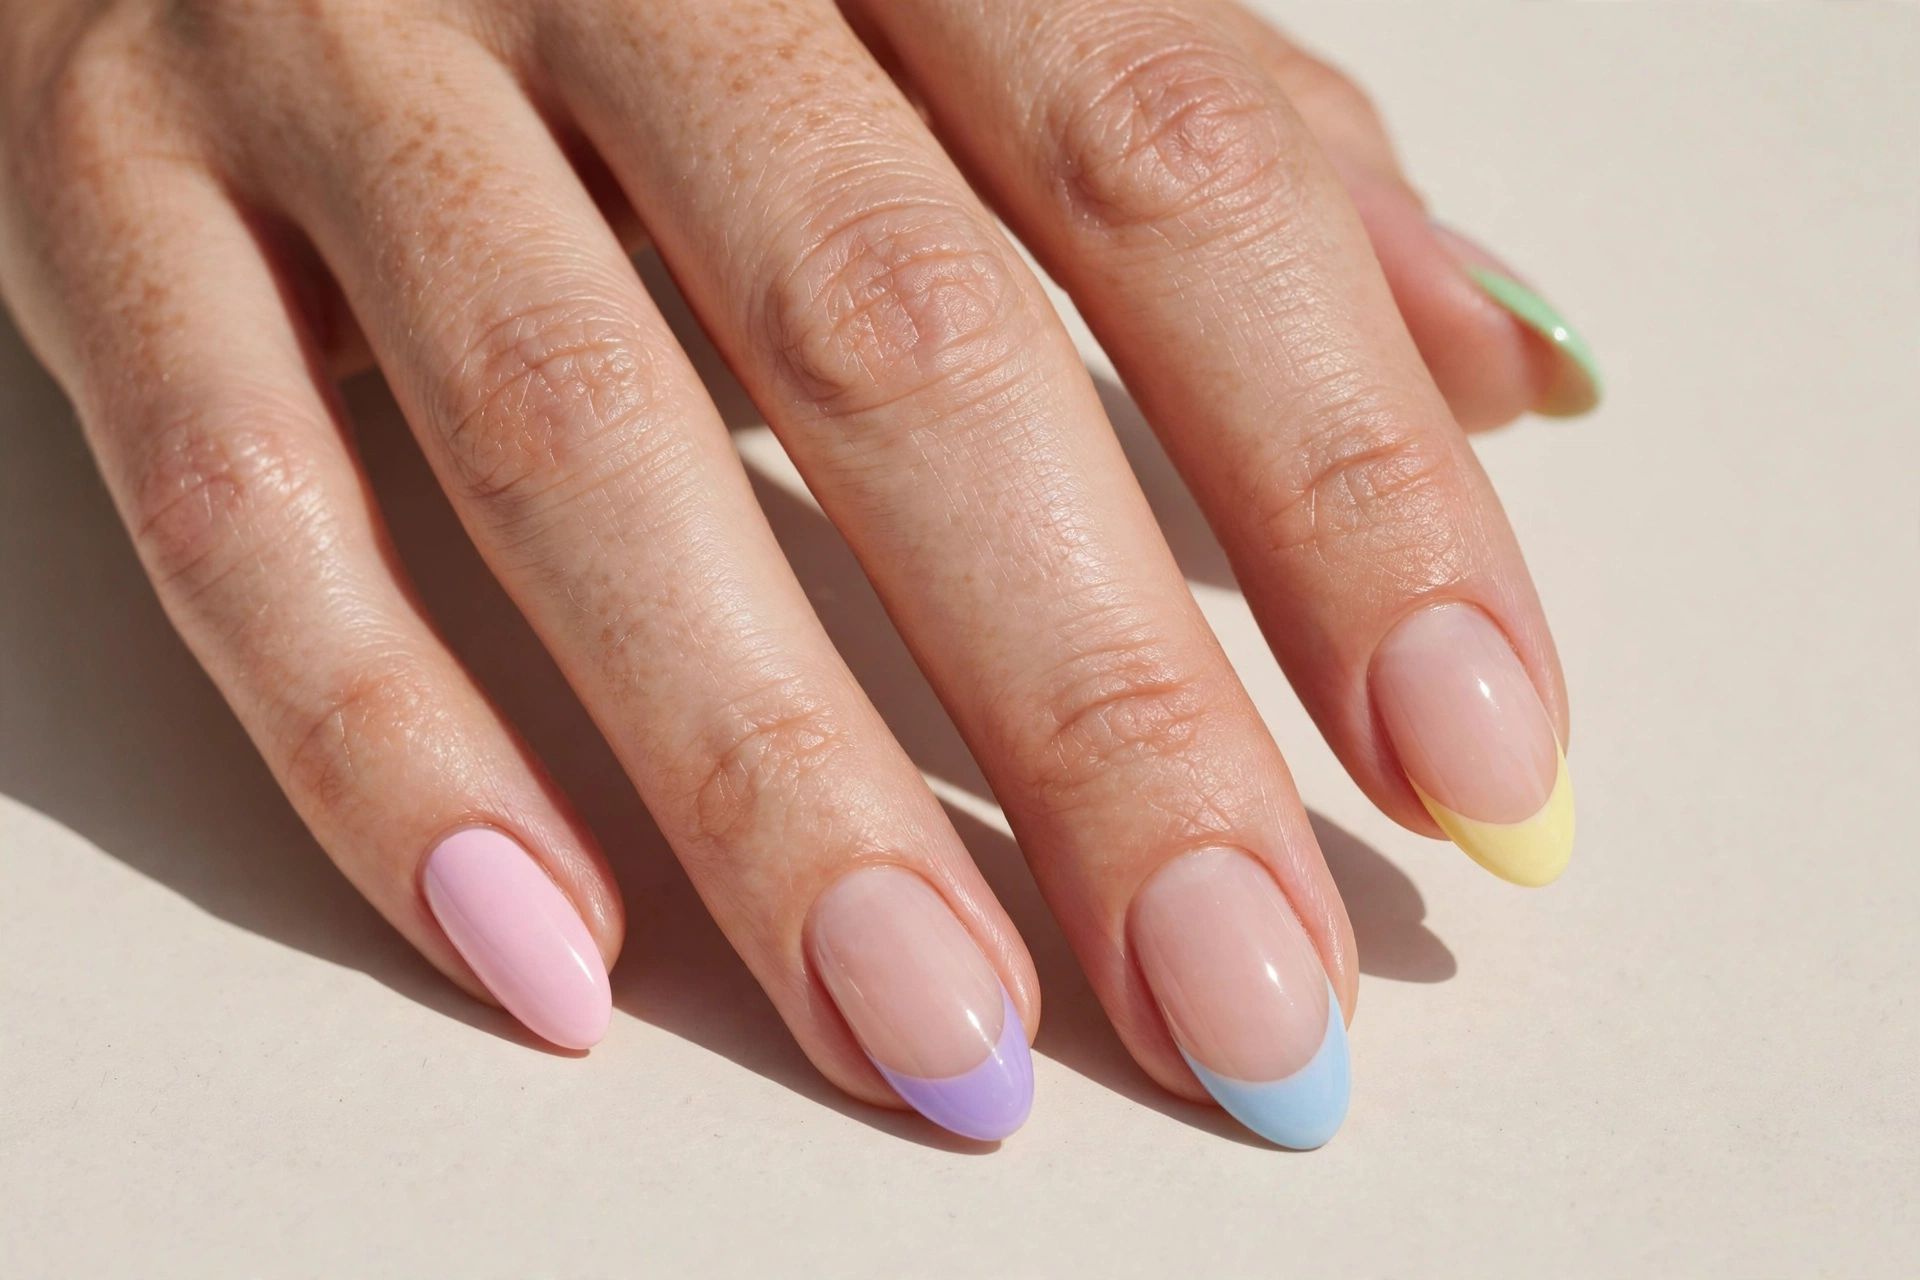
One French tip in every pastel shade turns a neutral base into something cheerful. The trick is keeping each color soft — baby pink, mint, lilac, butter yellow, powder blue — so the overall effect reads as one cohesive gradient rather than a crayon box.
This look is a favorite for spring, birthday season, and anyone who wants color without committing to a full rainbow nail. It suits short to medium nails and looks especially fresh on almond or oval shapes. Paint the tips freehand with a small brush or use French tip guides, working one color at a time. Keep the lines thin and even, then top coat the whole nail so the tips blend seamlessly into the base.
6. Daisy Accents
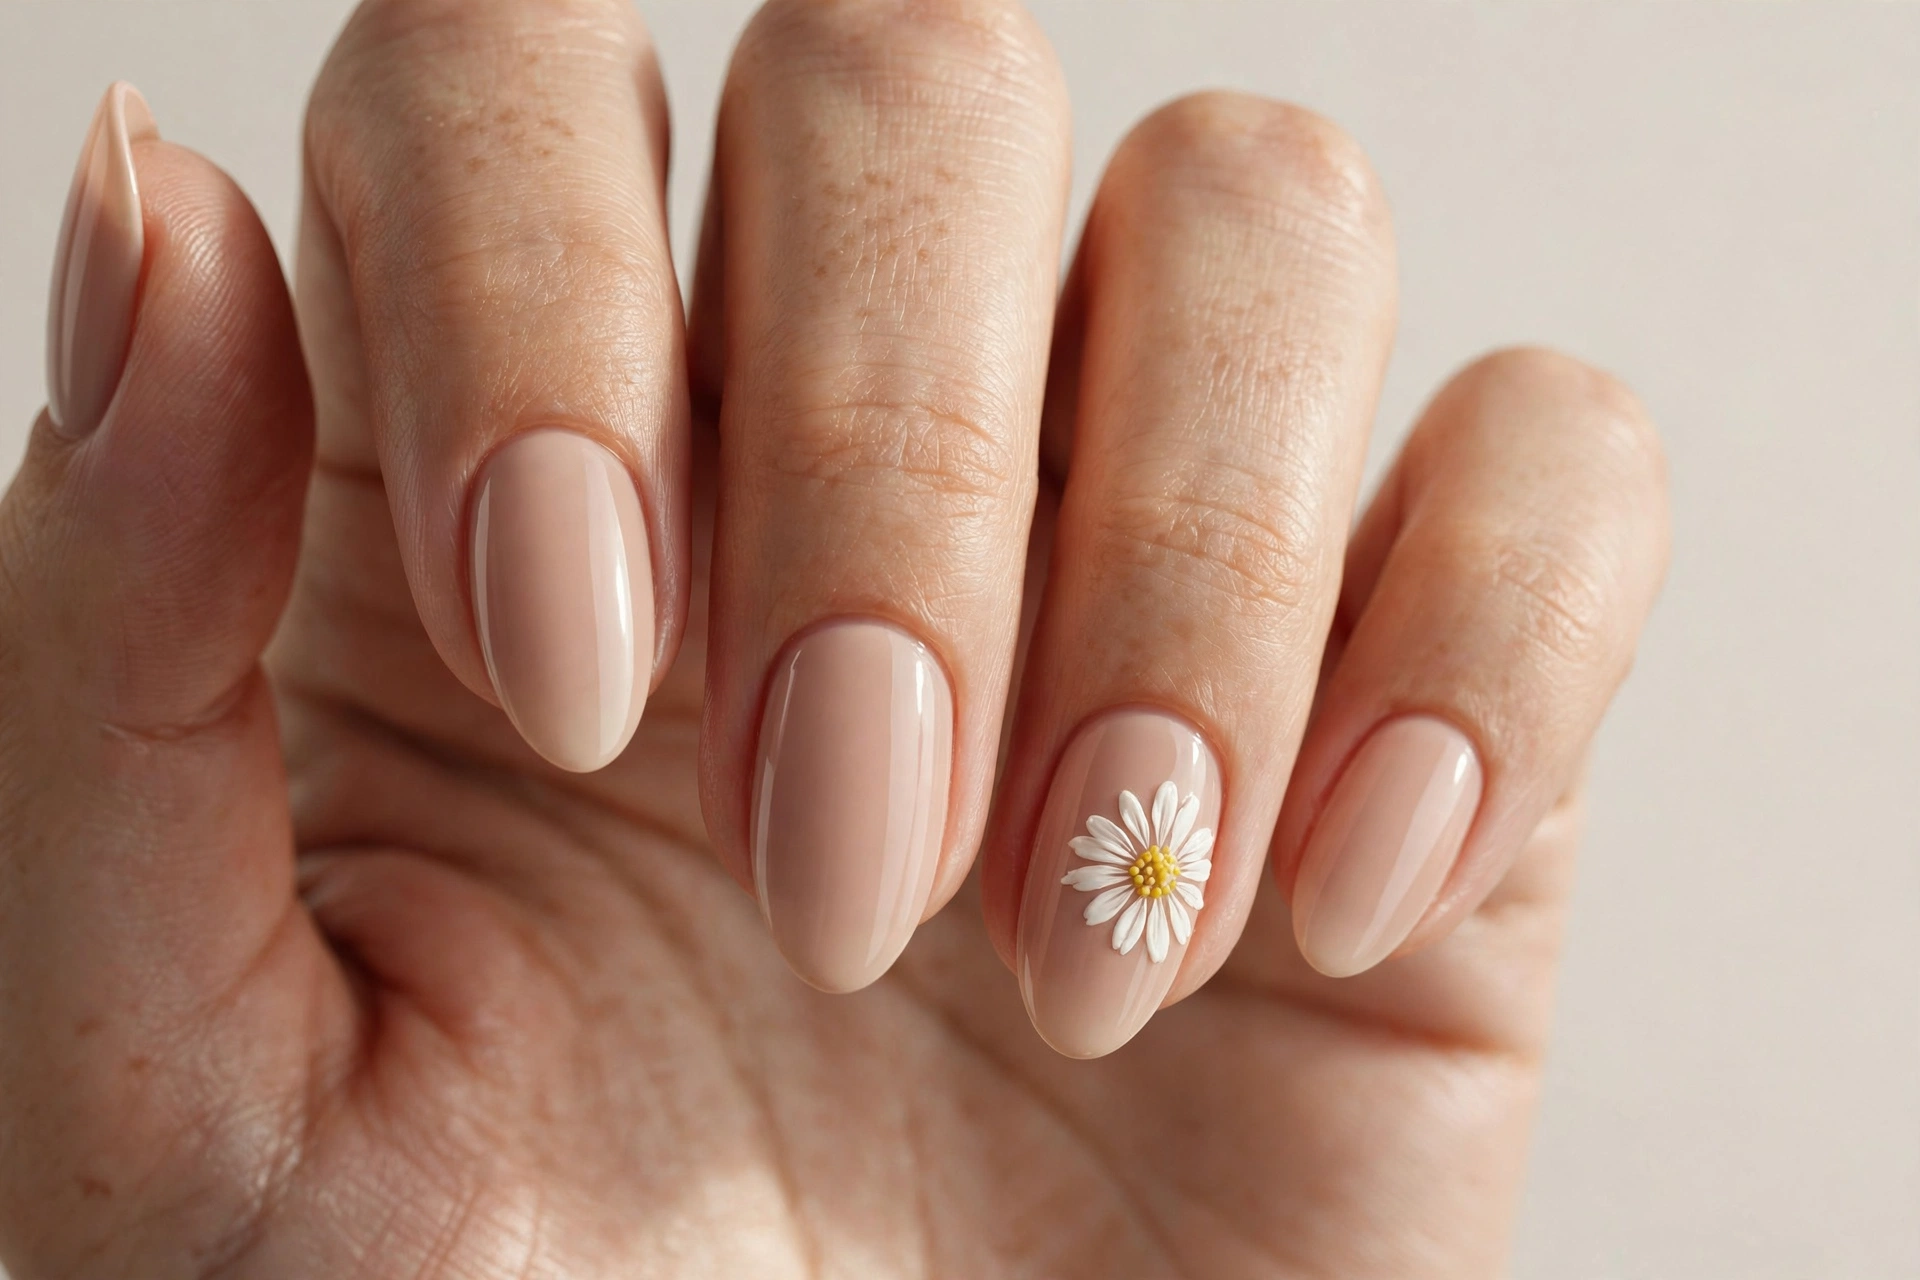
Tiny white daisies scattered over a nude base feel like sunshine you can carry around. The flowers are small enough to read as a pattern rather than a statement, which makes the design wearable long after the season it reminds you of.
Floral nails suit romantics, spring weddings, and anyone easing into nail art for the first time — the design is forgiving of wobbly lines. For more floral and creative inspiration, look through fresh ideas on nail art to see how simple motifs can transform a plain base. To paint daisies, place five small white dots in a circle with a dotting tool, add a yellow center, and connect a thin green stem if you like. A steady hand matters less than you think; slight imperfection keeps it charming.
7. Silver Glitter Ombre
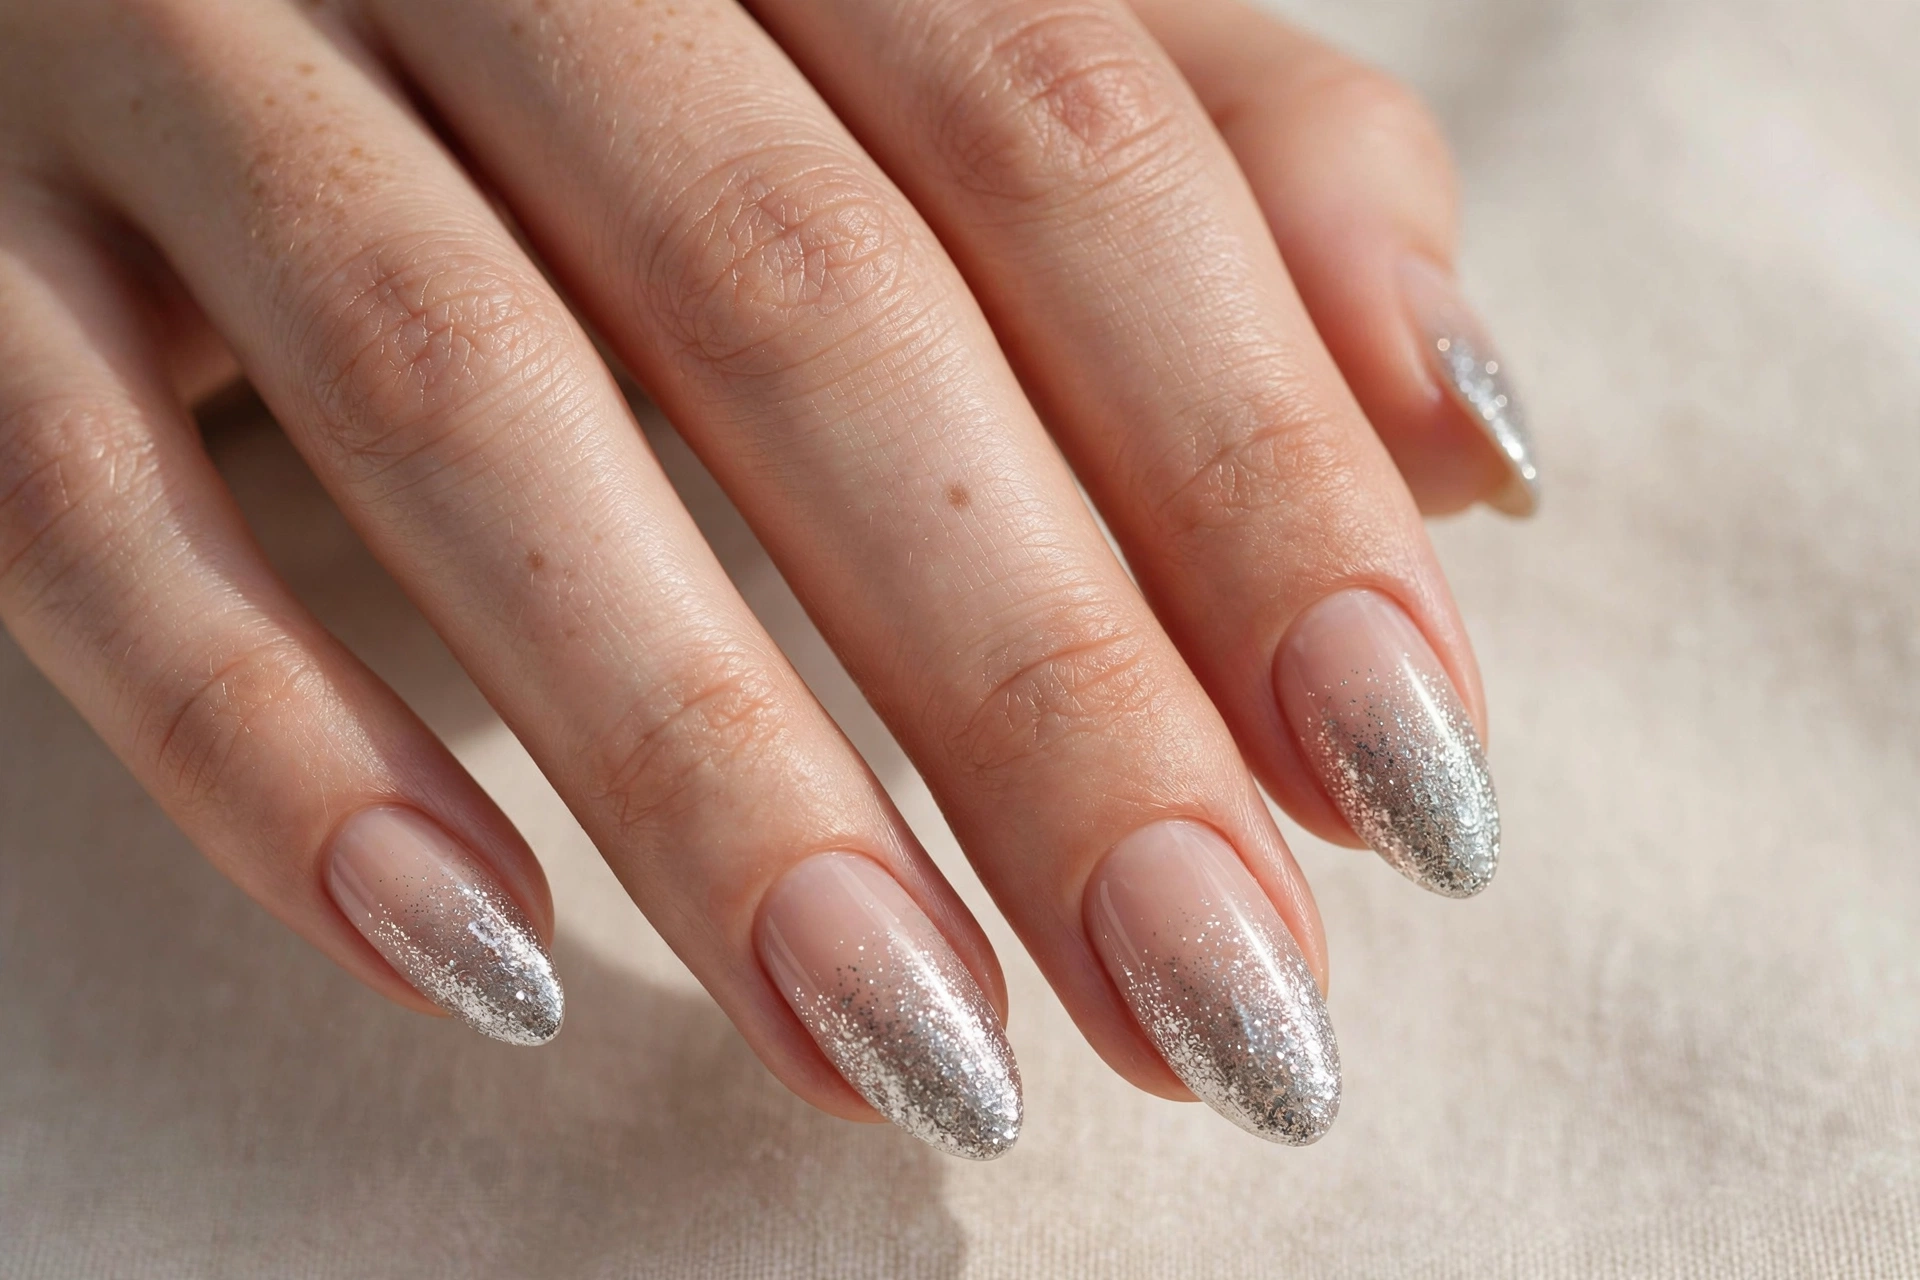
A glitter gradient that fades from a solid base into a sparkling tip is the ultimate party nail. The density is heaviest at the free edge and melts away toward the cuticle, so you get all the drama of glitter without the gritty texture all over.
This design suits evenings out, holiday events, and New Year’s Eve in particular. It flatters shorter nails because the gradient adds visual length. The easiest method is sponging: paint a nude or clear base, then dab glitter polish onto the tip with a makeup sponge, building up layers. Finish with two coats of a thick top coat to bury the glitter and keep the surface smooth.
8. Geometric Line Art
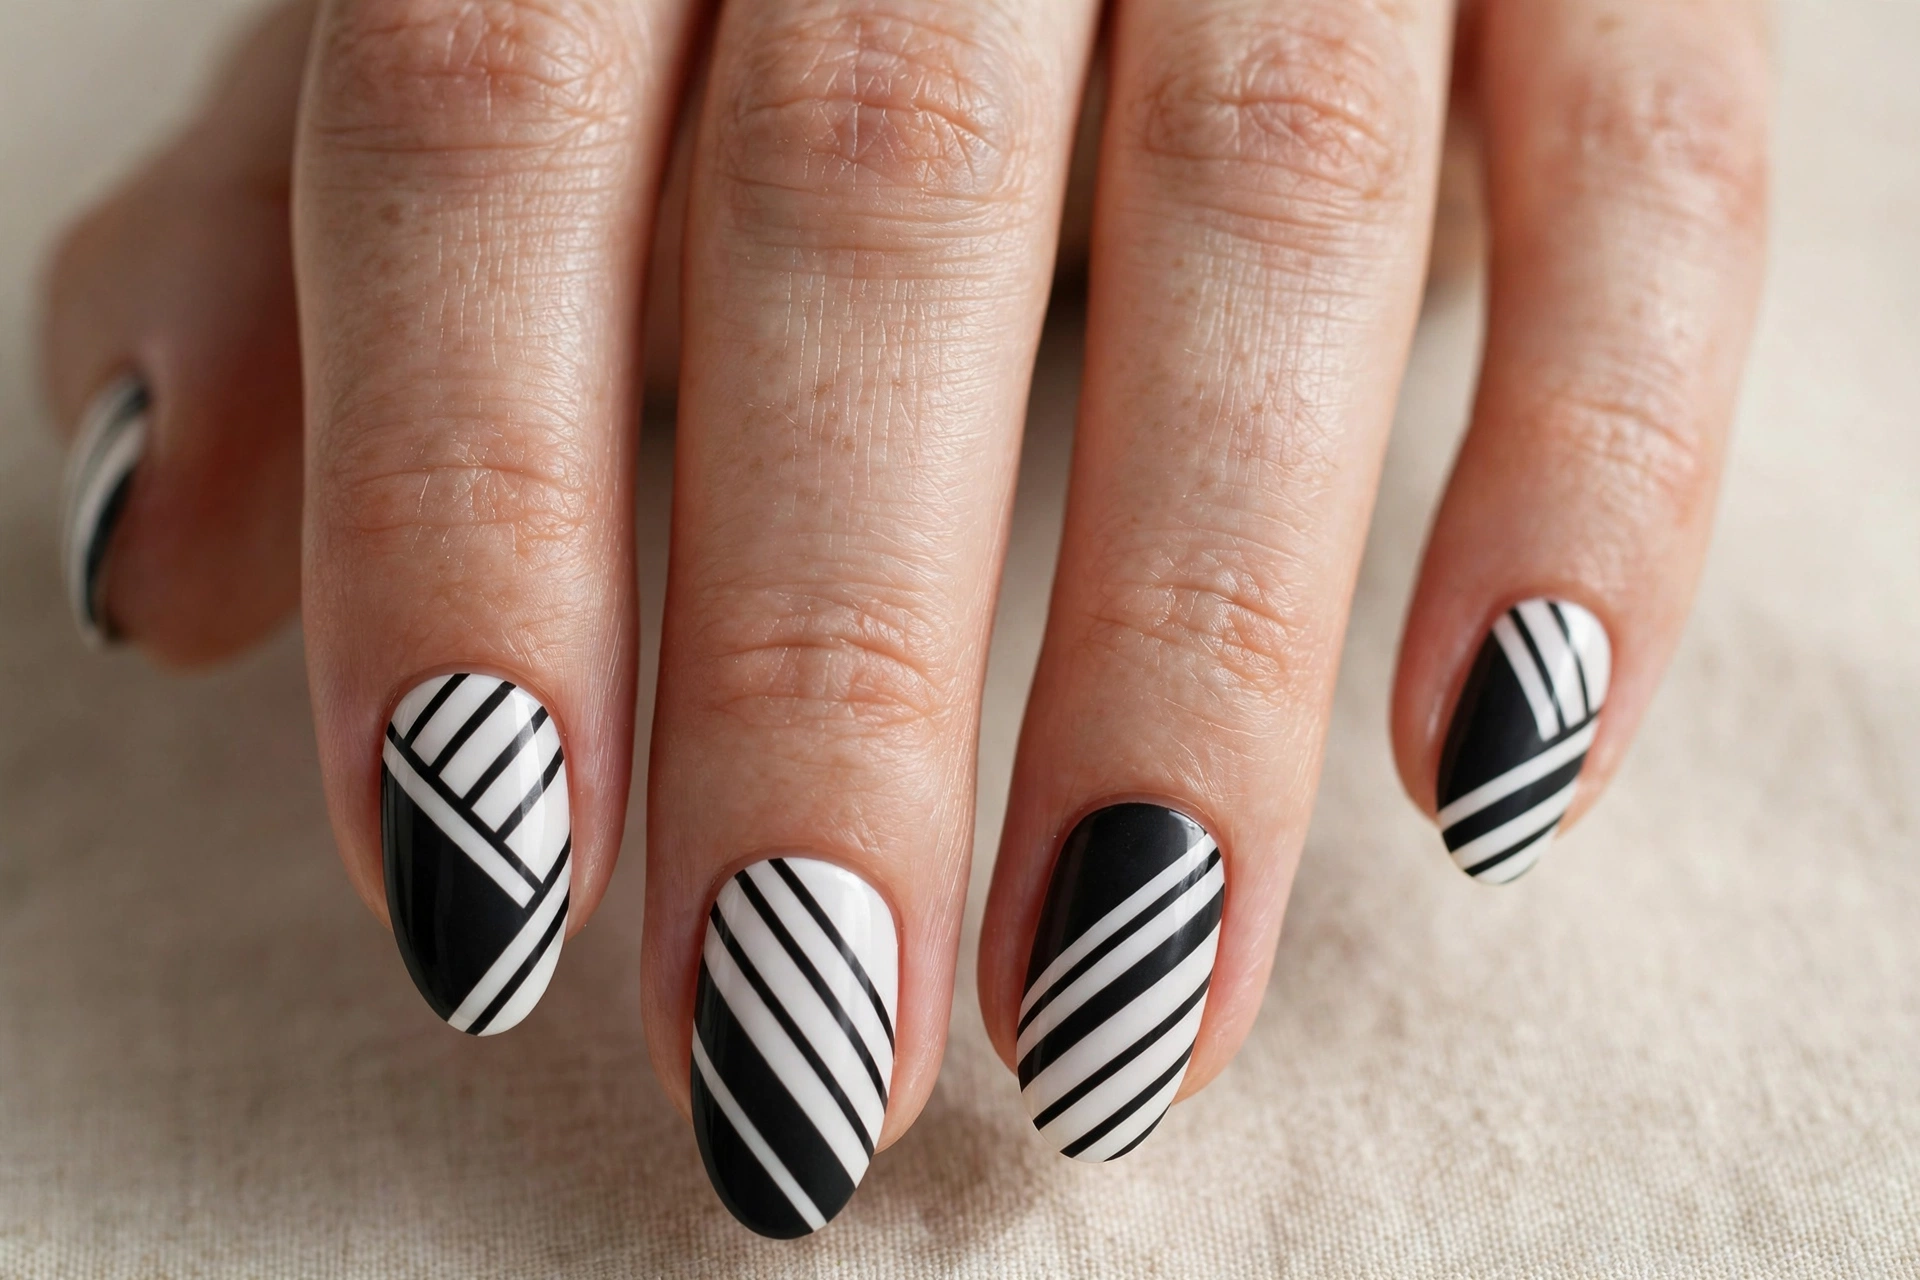
Sharp diagonal lines in black and white turn nails into tiny graphic prints. The contrast is bold, but the limited palette keeps it clean and modern — more gallery wall than heavy metal.
Geometric designs suit minimalists who still want their nails to make a point. They look sharpest on a squared or squoval shape with medium length, and they pair well with structured workwear. If you want to explore more structured patterns, nail art design ideas include several line-based looks that build on this same technique. Use striping tape to mask crisp lines, paint the black sections, peel the tape while the polish is still slightly tacky, and seal with top coat.
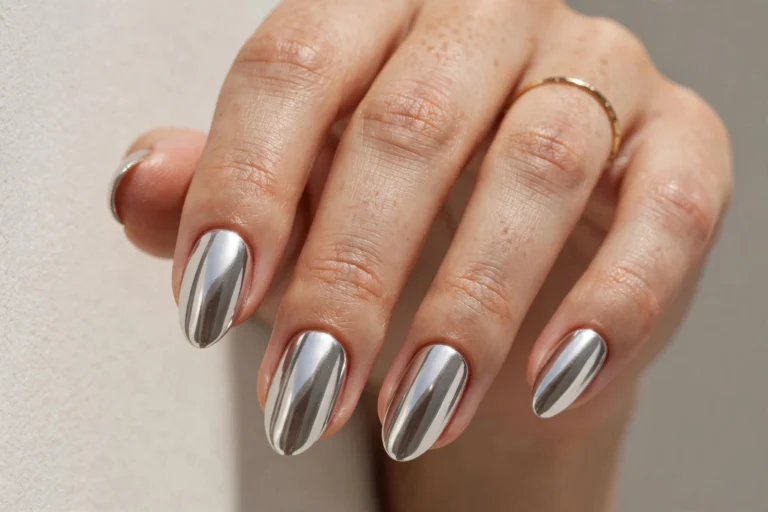
9. Rose Gold Chrome
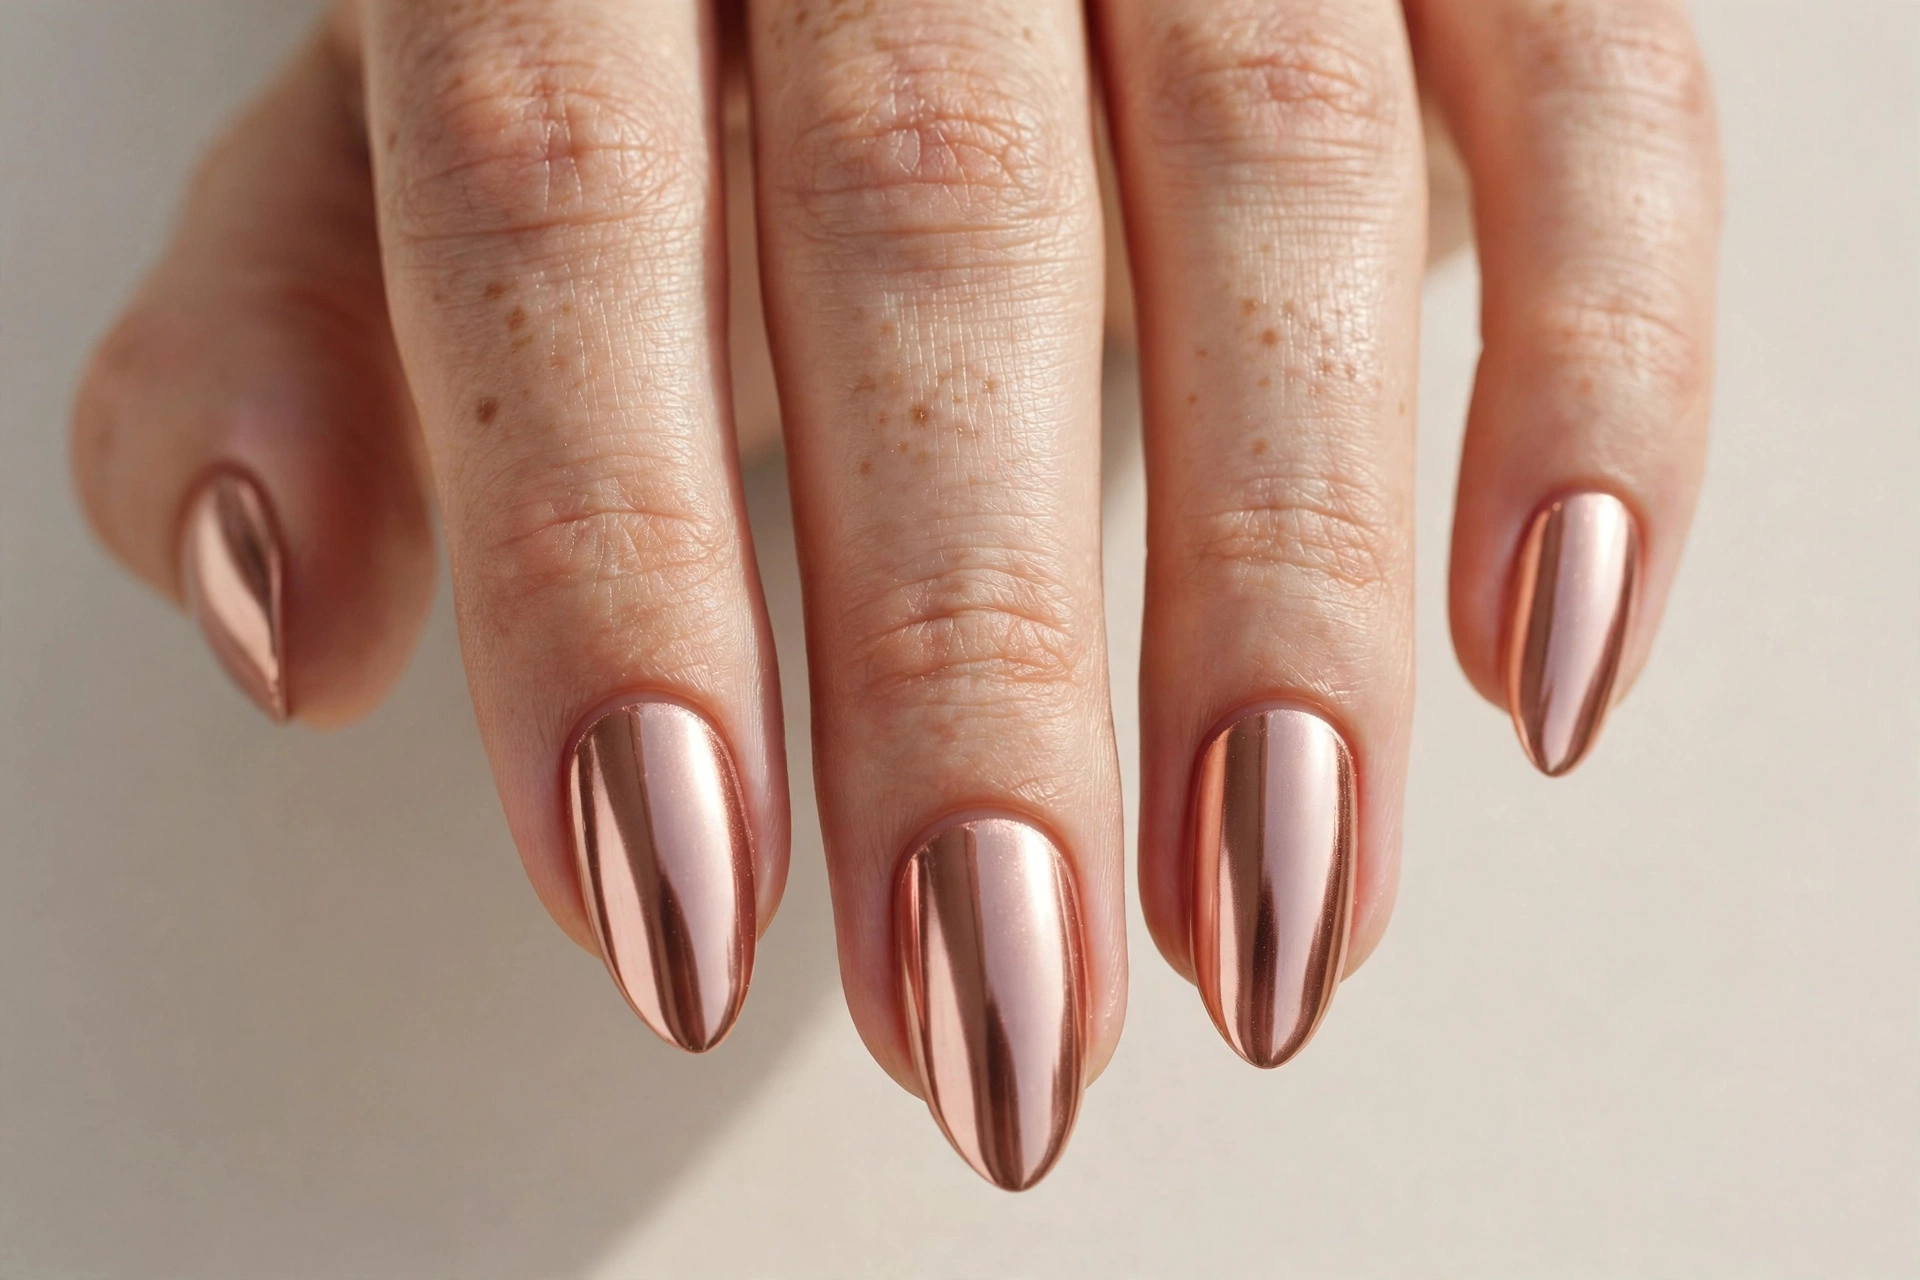
Rose gold chrome gives you a mirror finish in the most flattering metallic shade. The pink-gold tone warms up the chrome effect, so it reads glamorous rather than industrial. In sunlight, the reflection is genuinely striking.
This is the design for anyone who wants maximum shine with minimum pattern. It suits all skin tones and looks expensive on both short and long nails. Chrome powder is the key: apply a no-wipe gel top coat, cure it, then buff the powder on with a silicone tool until the mirror effect appears. Seal with another gel top coat. This one really needs a UV lamp, so it is a salon or gel-at-home project rather than regular polish.
10. Blue Watercolor Swirls
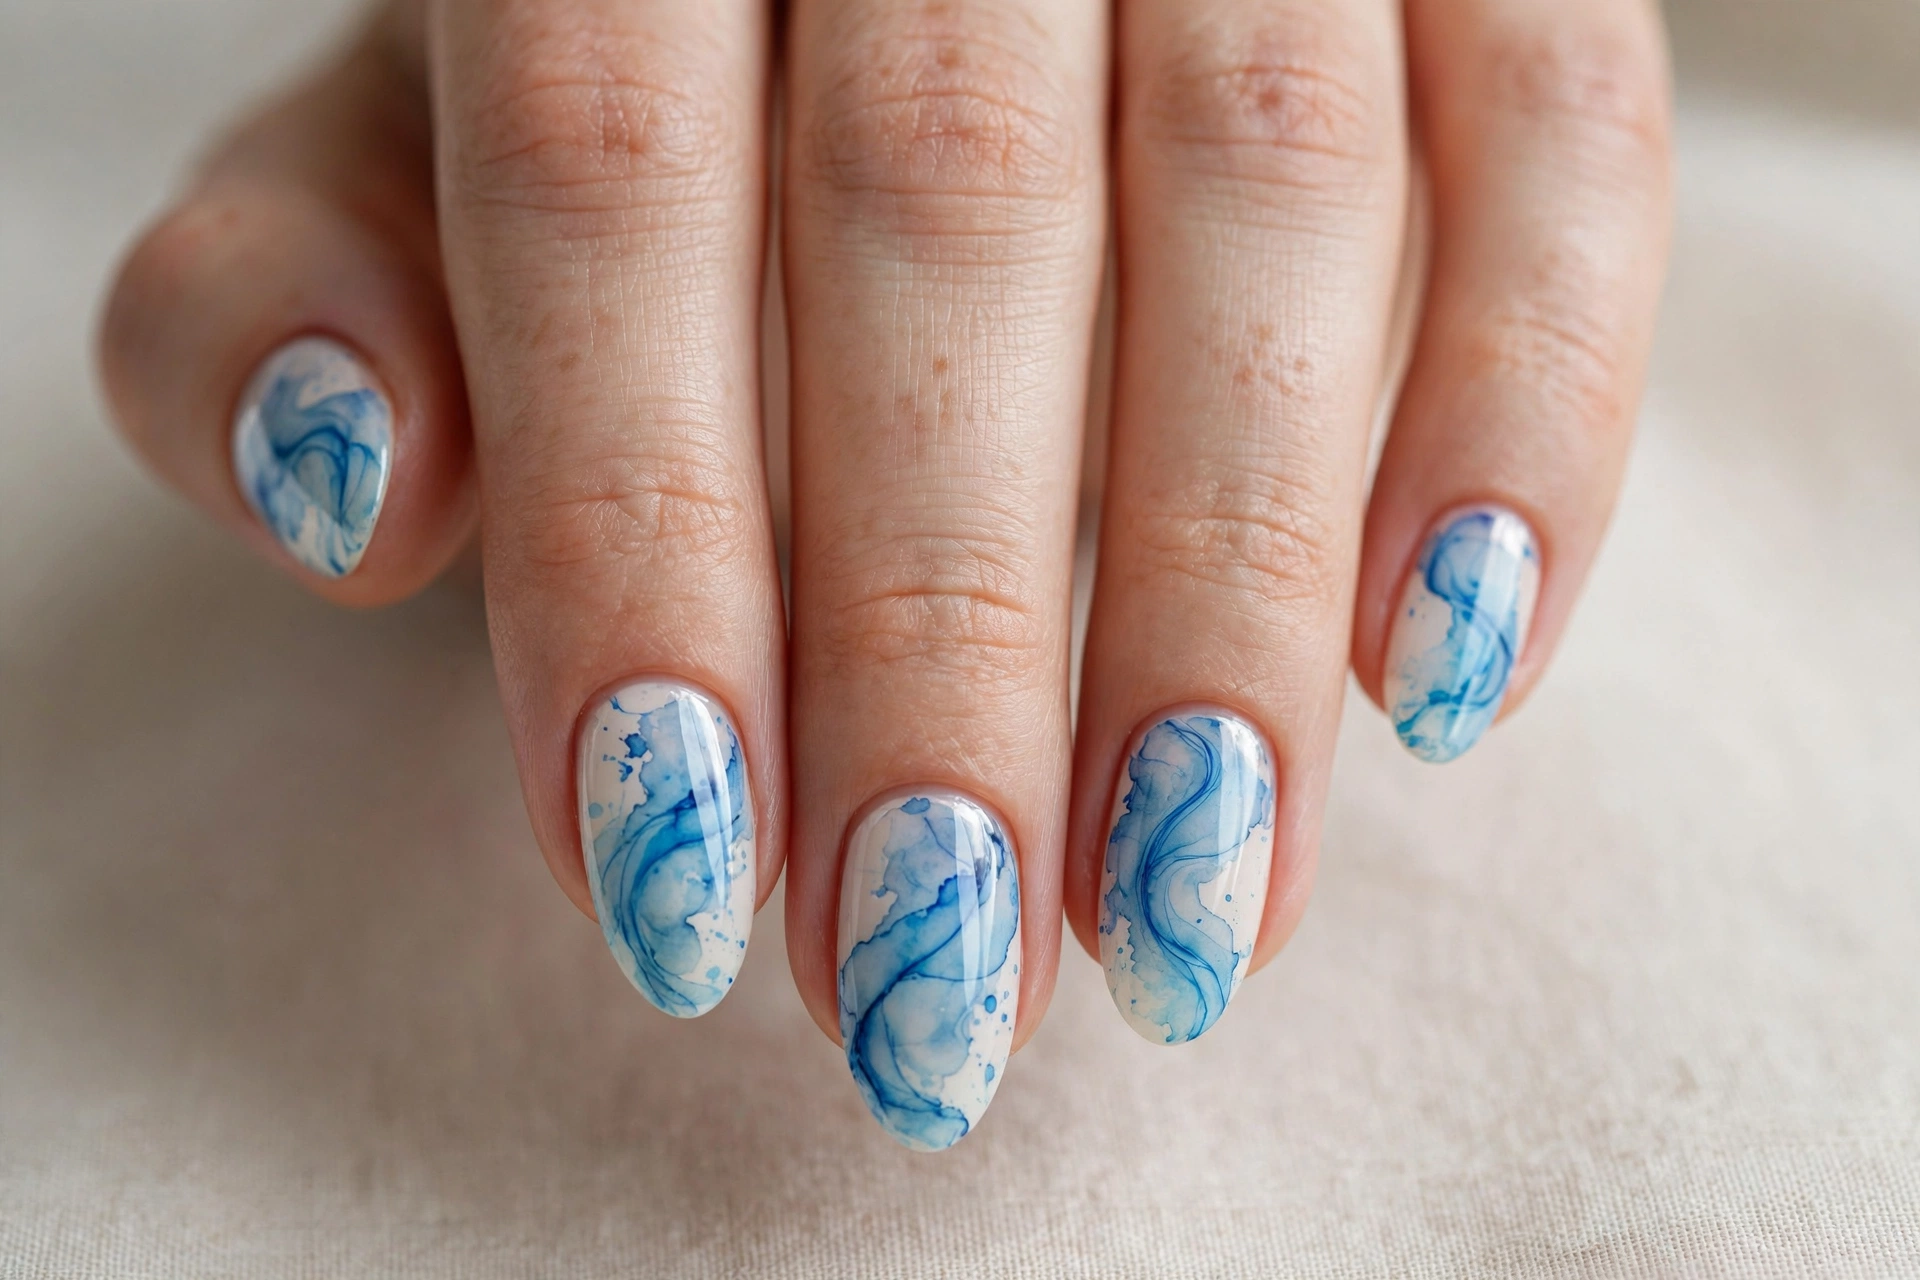
Watercolor nails look soft and dreamy, like ink blooming in water. Layers of sheer blue are swirled over a white base so the color stays translucent in places and saturated in others. No two nails look alike, and that is the charm.
This design suits creative types and anyone who finds solid color a bit flat. It works on any nail shape and looks especially pretty in natural daylight, where the translucency shows. To get the effect, paint a white base, then while it is still slightly tacky, drop small dots of sheer blue and drag them with a fine brush or toothpick. Work quickly and lightly — overworking muddies the colors. A glossy top coat gives the finished look its glassy, watery depth.
11. Tortoiseshell
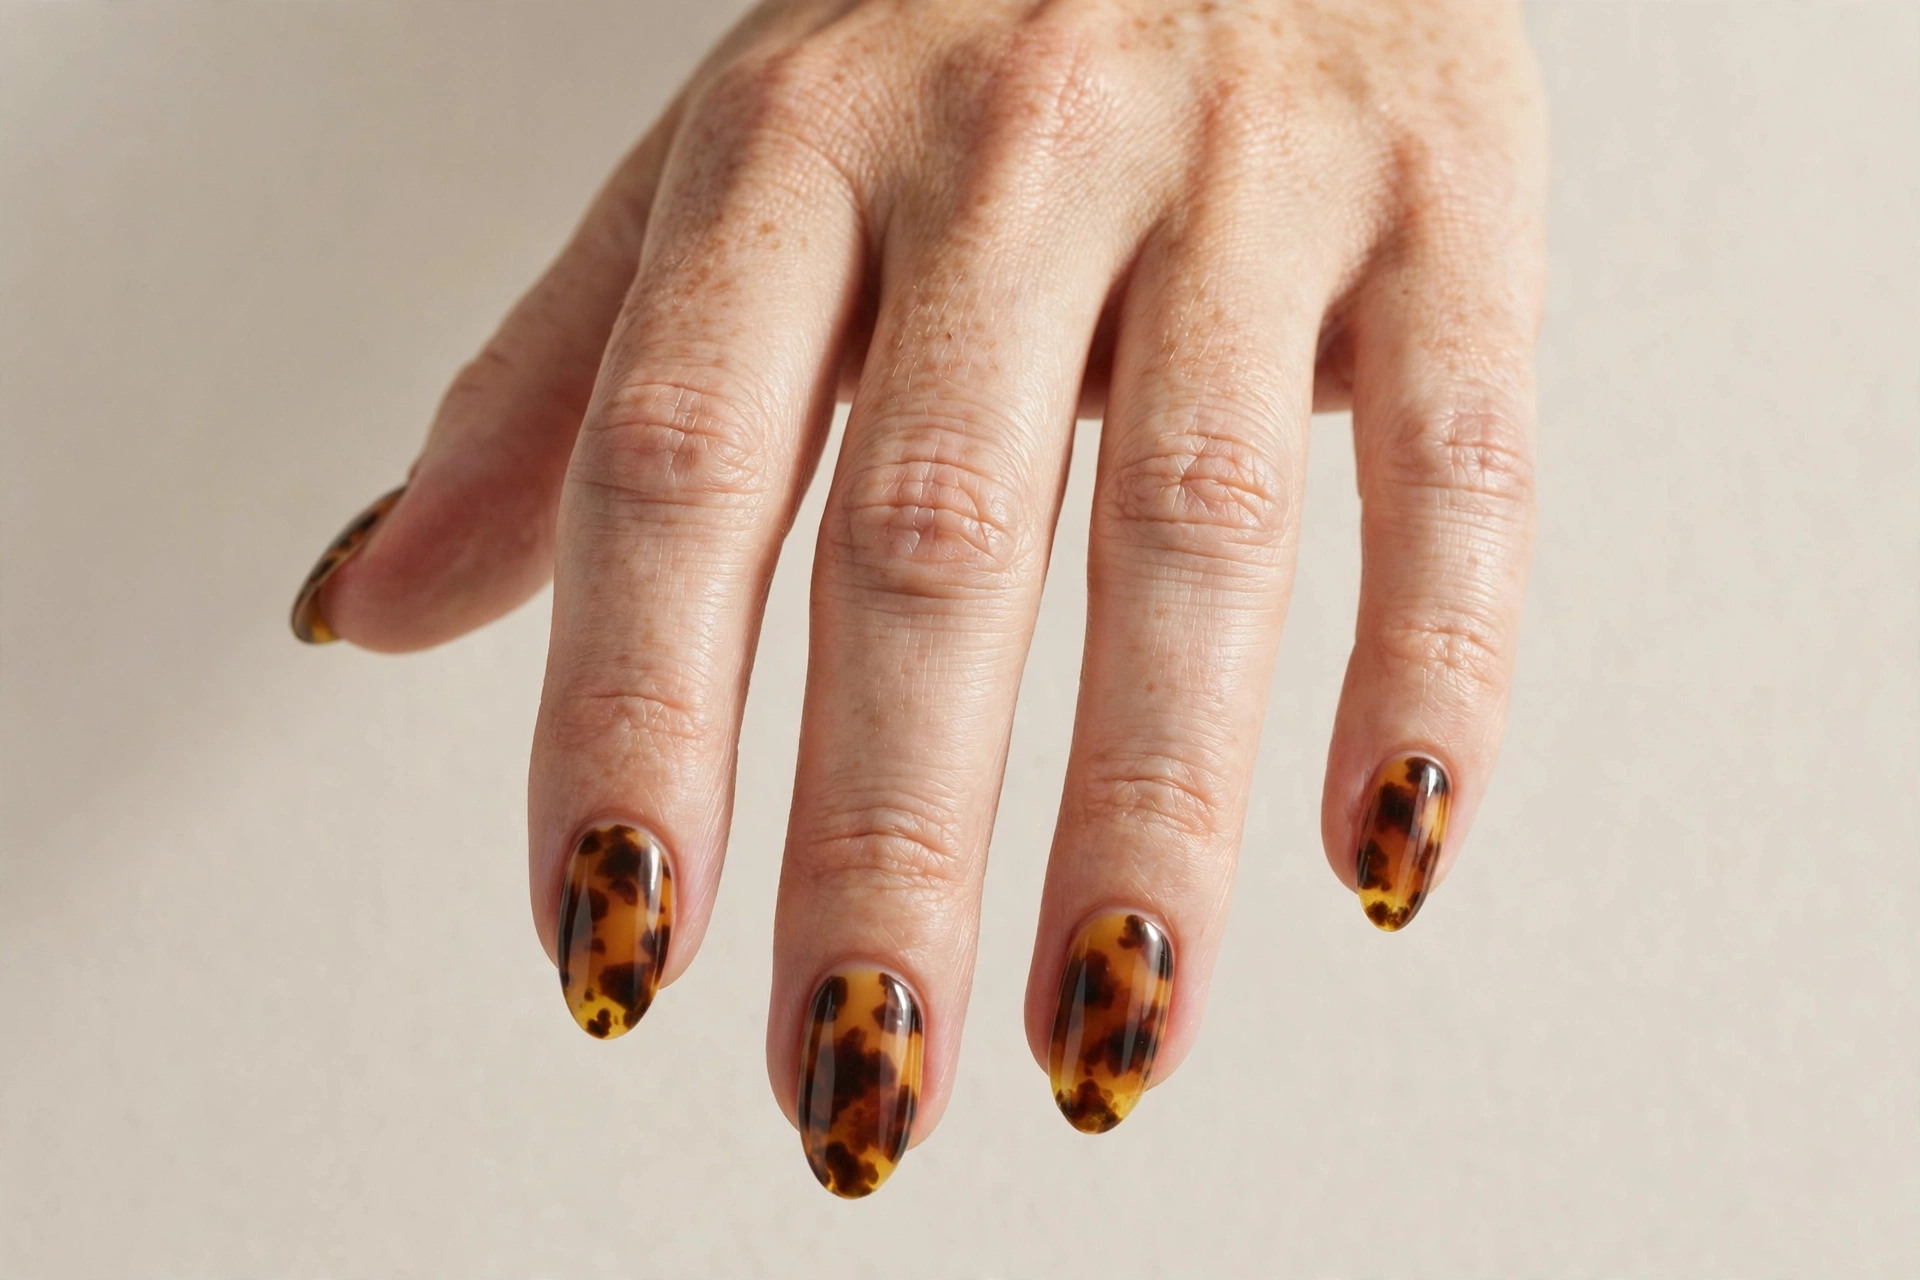
Tortoiseshell nails layer amber, caramel, and deep brown into a pattern that glows like real shell. It is a rich, warm design that looks far more complex than the technique requires — just layered blobs of color dragged into each other.
This is a beloved fall and winter design, but honestly it works year-round because the tones are neutral. It suits anyone who loves warm, earthy style and wants a design that hides wear well. Build it in layers: start with a caramel base, add irregular blobs of brown and amber jelly polishes while wet, and drag the edges slightly so they melt together. Let each layer dry before adding the next, then finish with a high-gloss top coat for the glassy shell effect.
12. Minimalist Single-Line Art
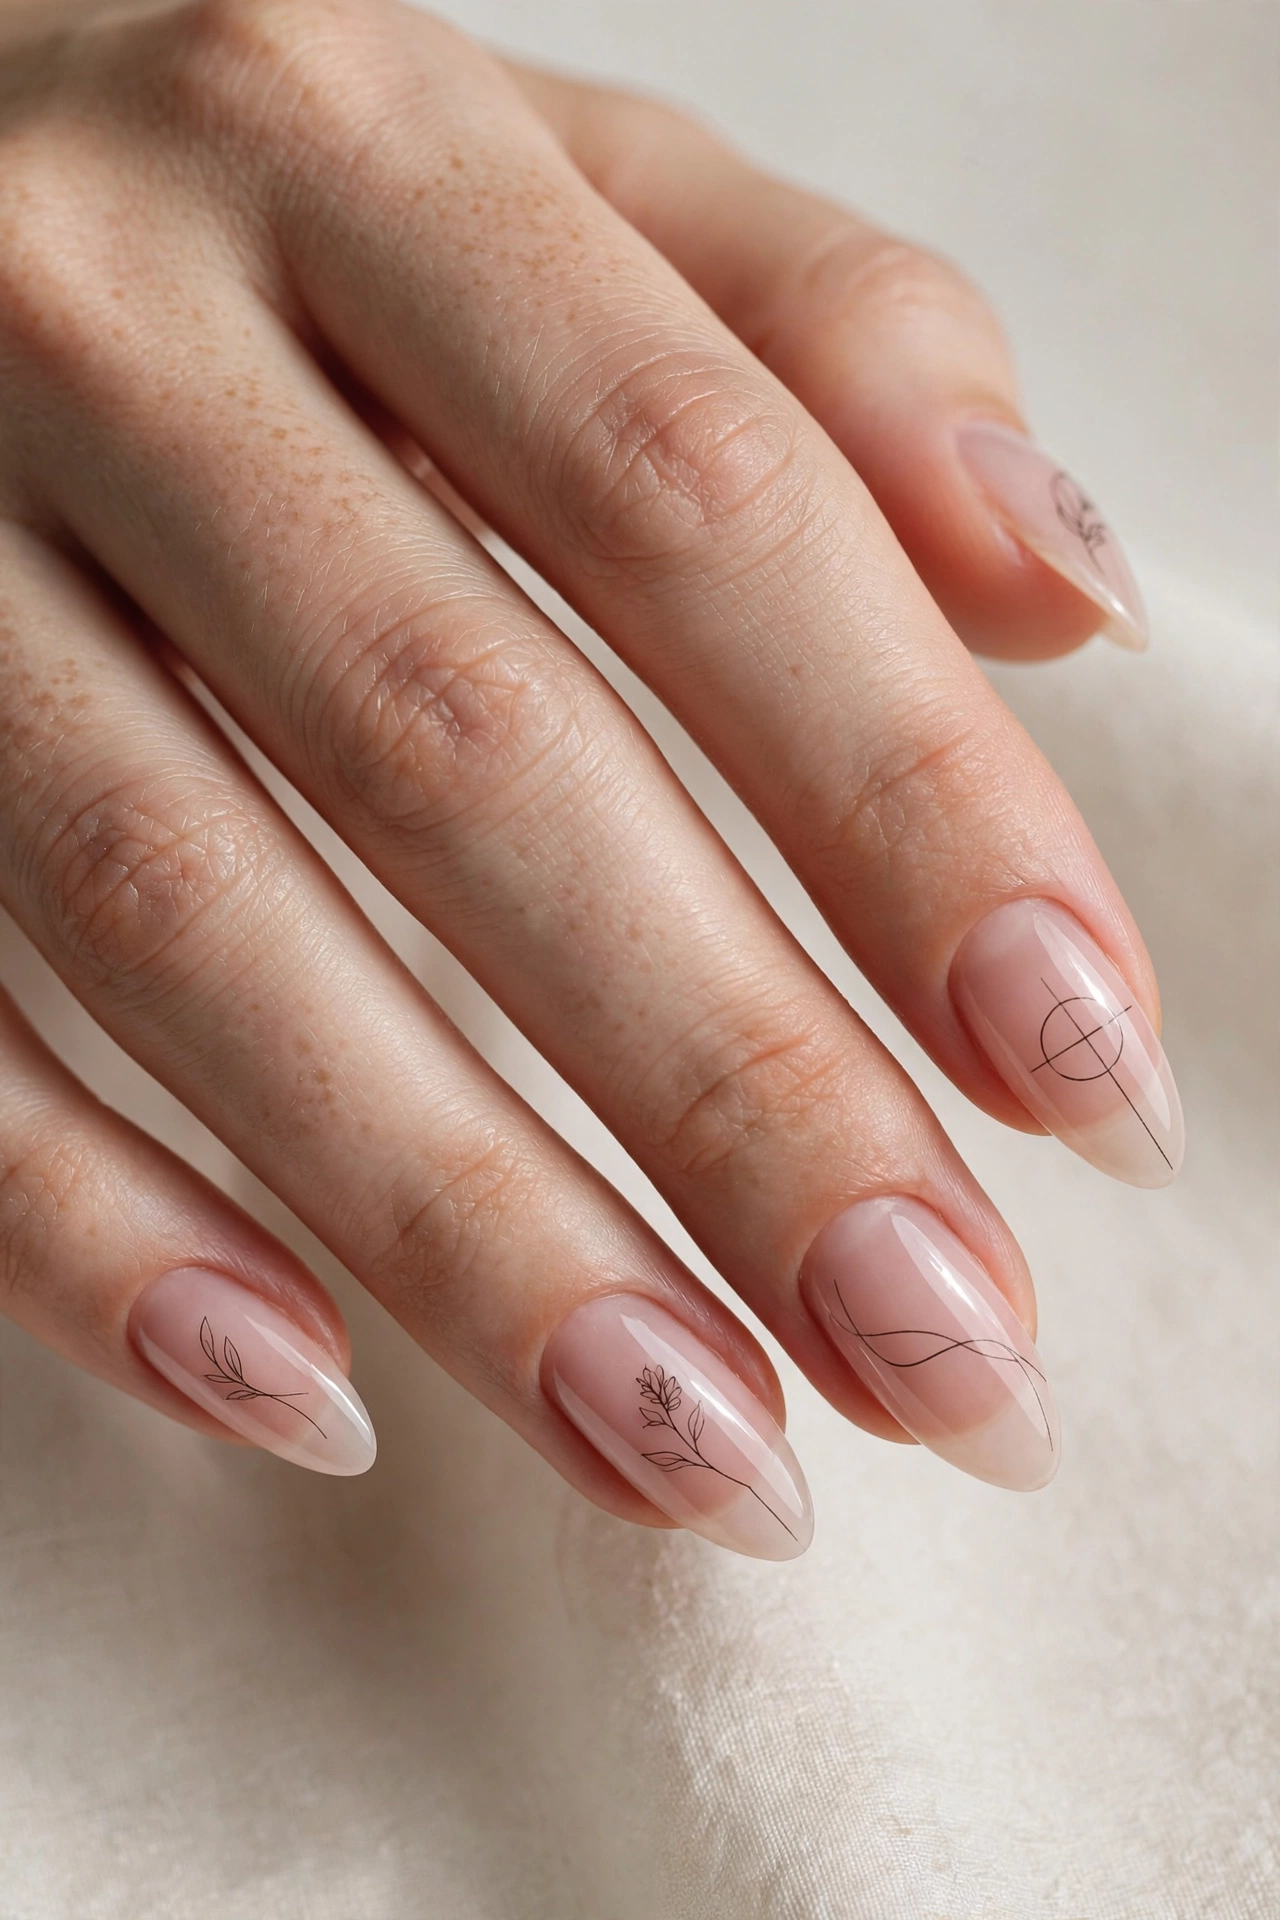
One thin black line curves across a sheer pink nail, and somehow that is enough. This is nail art at its most restrained — a single stroke that suggests a face, a wave, or an abstract squiggle. The negative space does most of the talking.
Minimalist line art suits anyone who wants nail art they can wear to a board meeting. It looks best on clean, well-shaped nails since there is nowhere to hide rough edges. Use a long, thin liner brush or a nail art pen, and commit to the stroke — hesitation shows. If you mess up, wipe it with a cotton swab dipped in acetone and try again before top coat. The sheer pink base makes the line read as deliberate rather than sparse.
13. Burgundy with Gold Foil
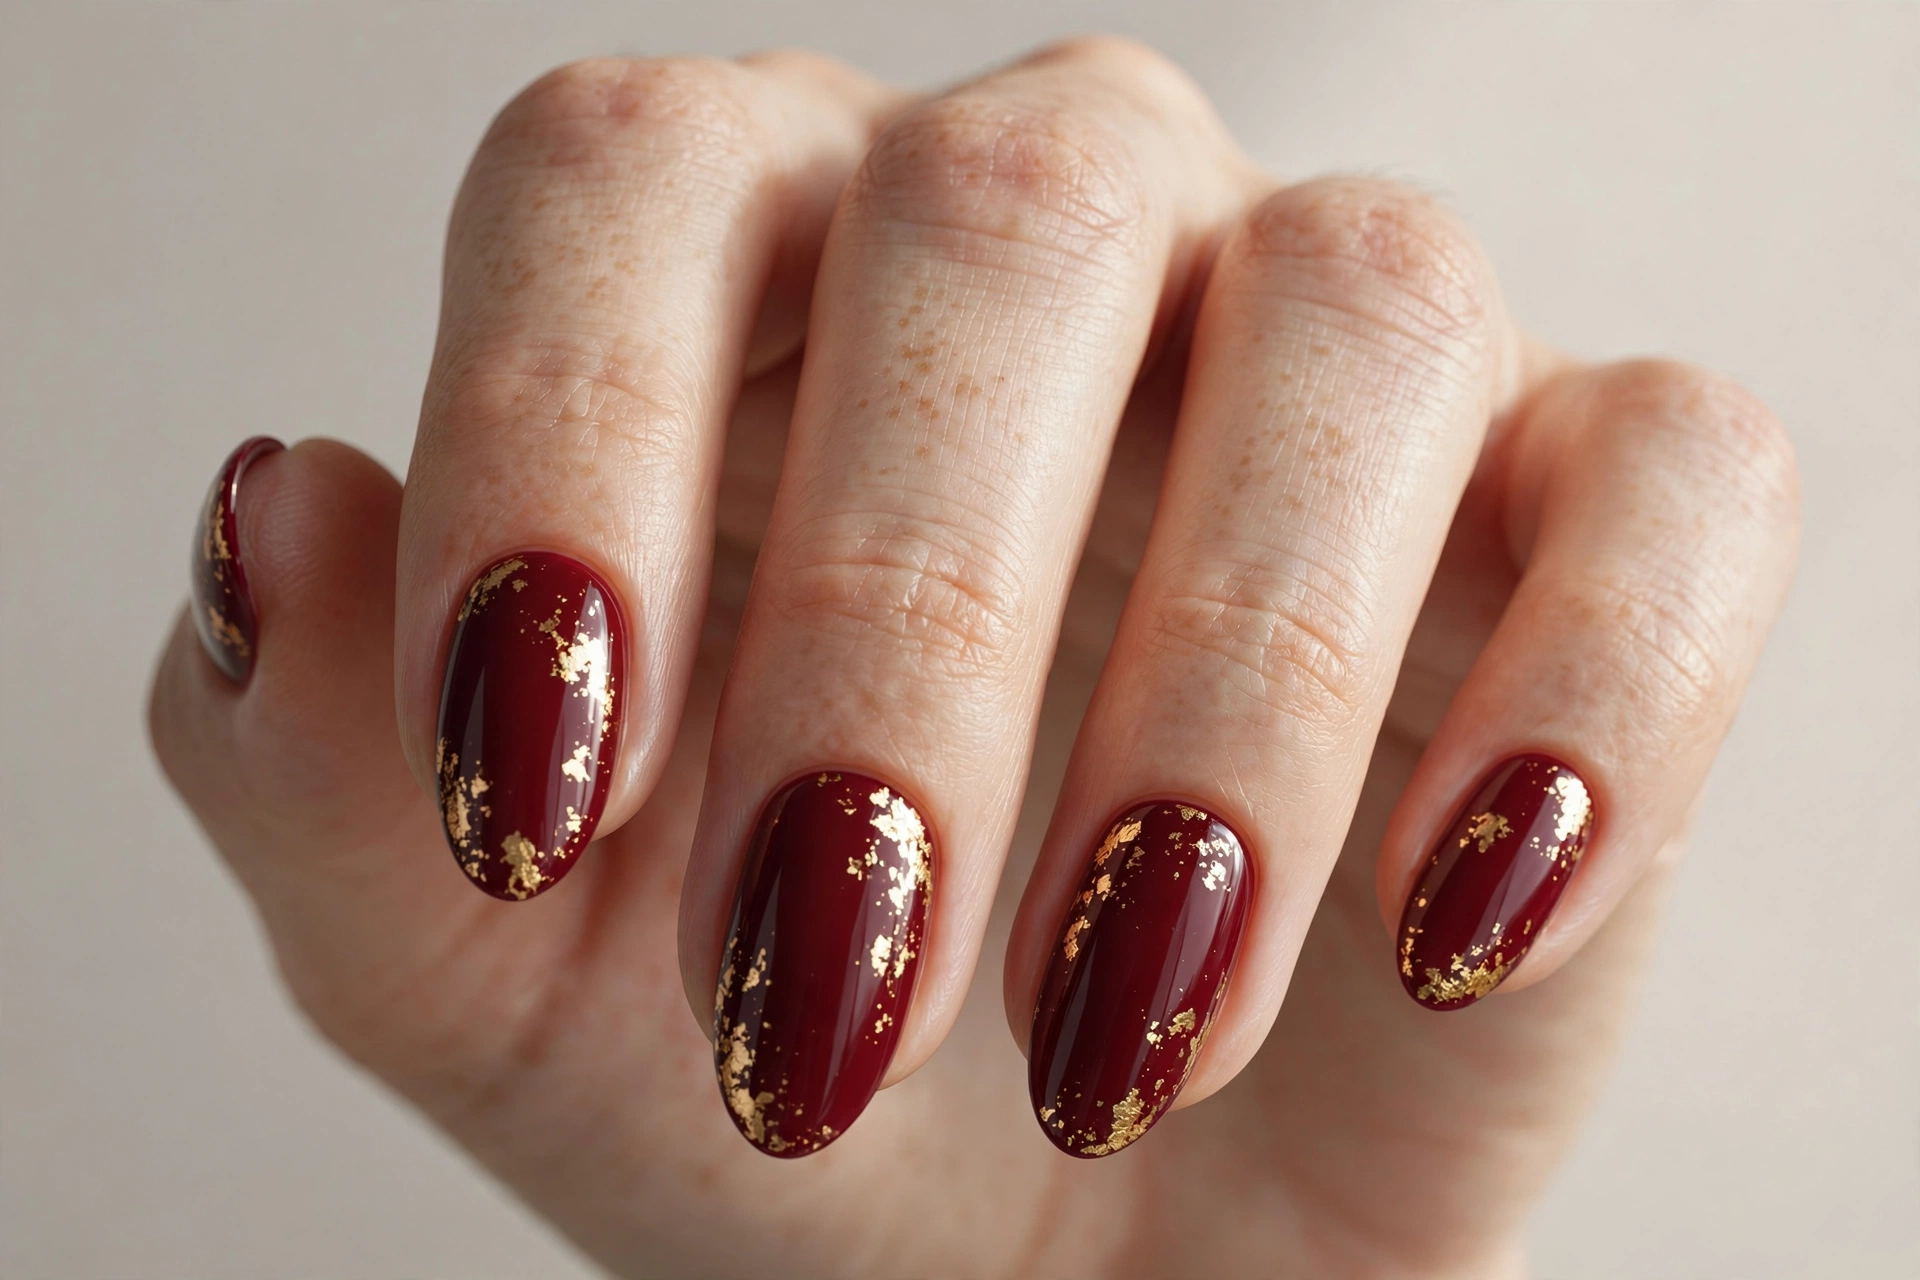
Deep burgundy already looks rich; scattered gold foil flakes make it look like jewelry. The foil catches light in random flashes, so the nail changes as your hand moves. It is the kind of detail that makes people ask where you got your nails done.
This design suits autumn events, date nights, and anyone who likes dark polish but wants something extra. It flatters medium to dark skin tones beautifully and looks luxurious on almond or stiletto shapes. After your burgundy base dries, press small pieces of gold foil onto the tacky top coat layer with tweezers, varying the placement on each nail. Seal with two coats of top coat so the foil edges lie flat and do not snag.
14. Pink Blush Gradient
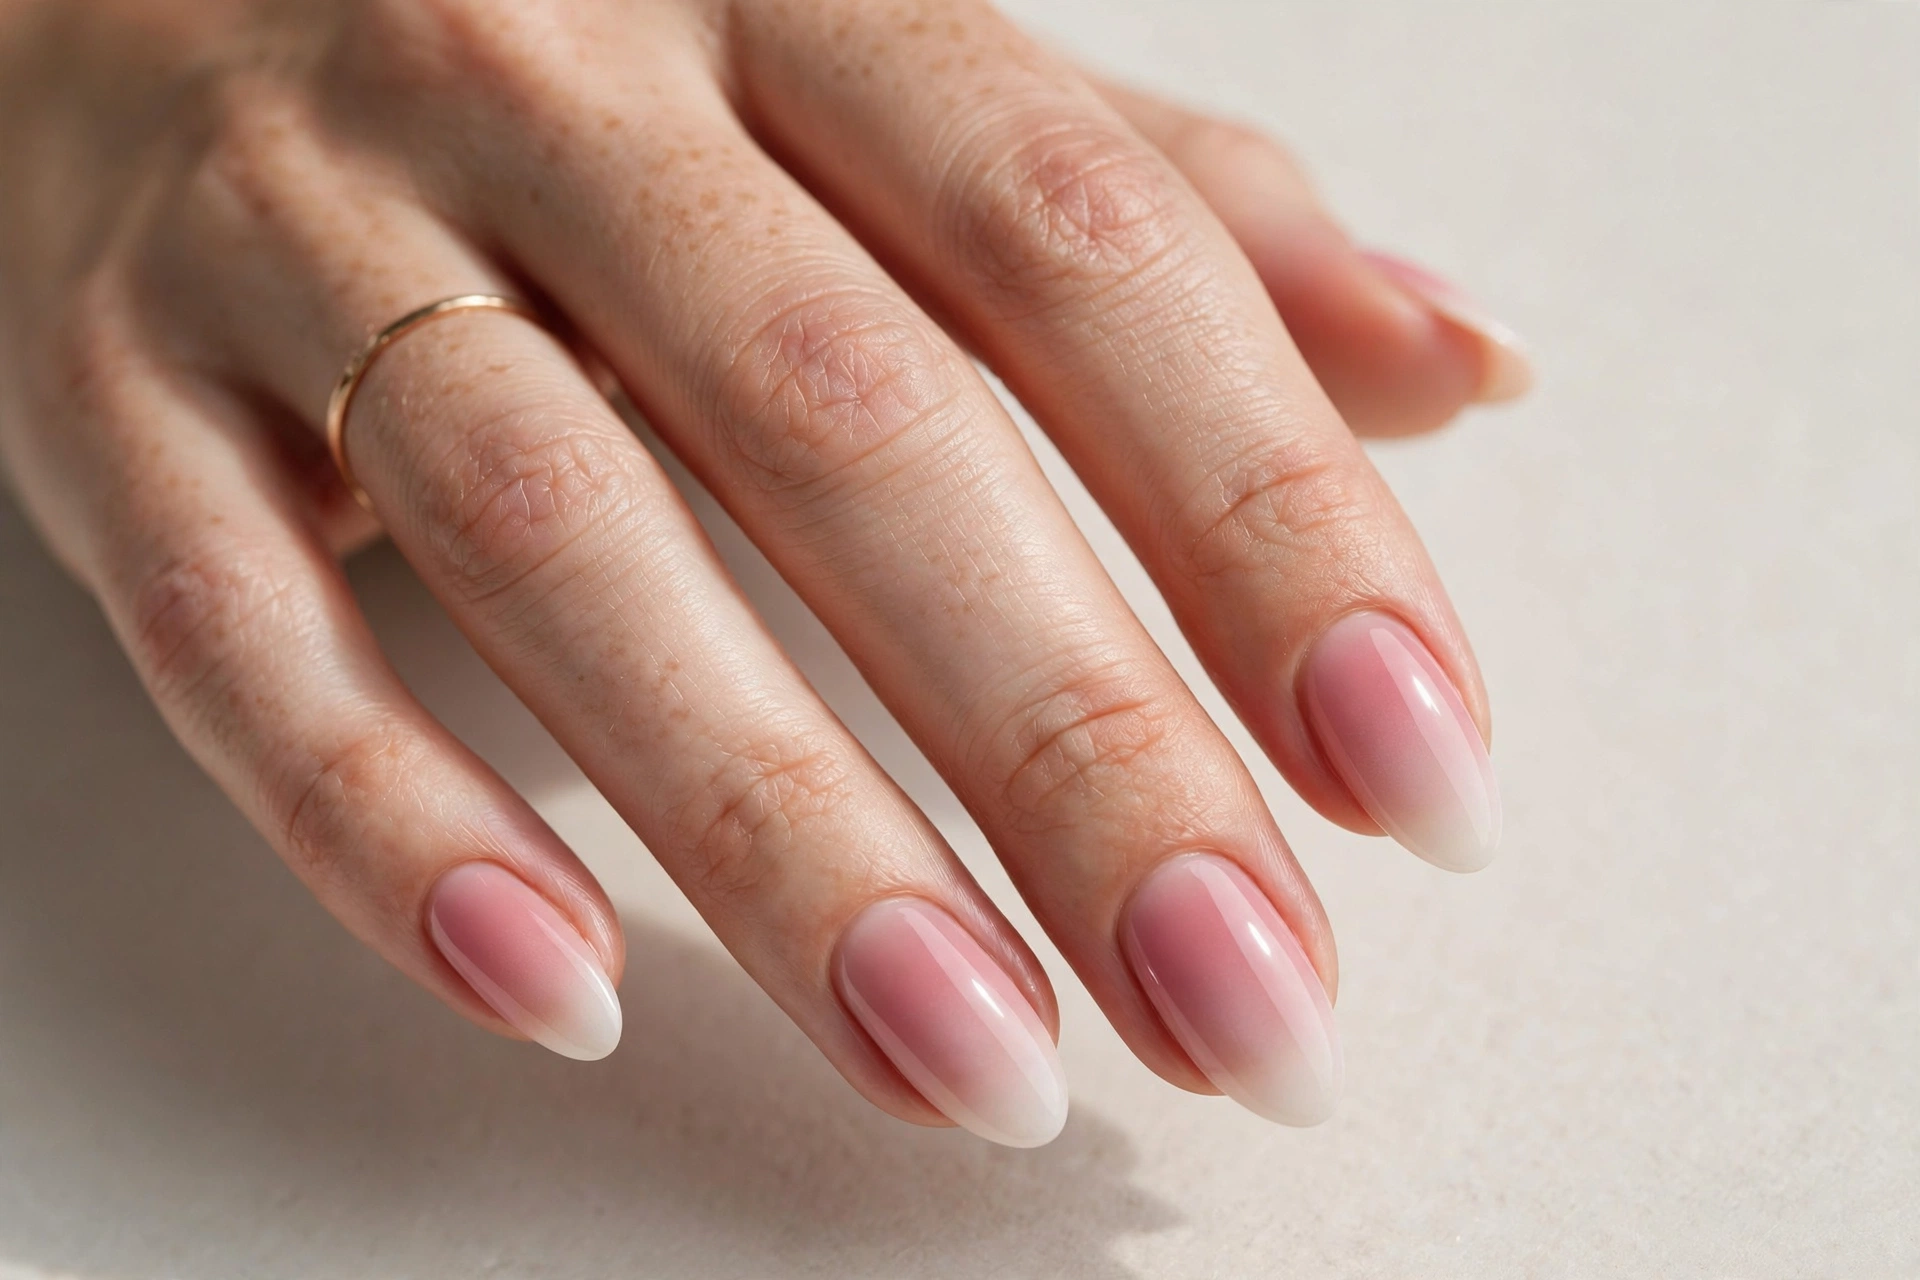
The baby boomer — a soft fade from white tip to pink base — is the quiet luxury of nail designs. It has the neatness of a French manicure without the hard line, which makes nails look longer and hands look more delicate.
This is a go-to for brides, new moms, and anyone who wants “my nails but better.” It suits every age and every setting, and the gradient hides tip wear far better than a classic French. The gradient is usually done with gel: a milky white is feathered down from the tip into a pink base with a fluffy brush, then cured. With regular polish, a makeup sponge dabbing white onto the tip and blending downward gives a decent version. Patience and thin layers are everything.
15. Cow Print Accent
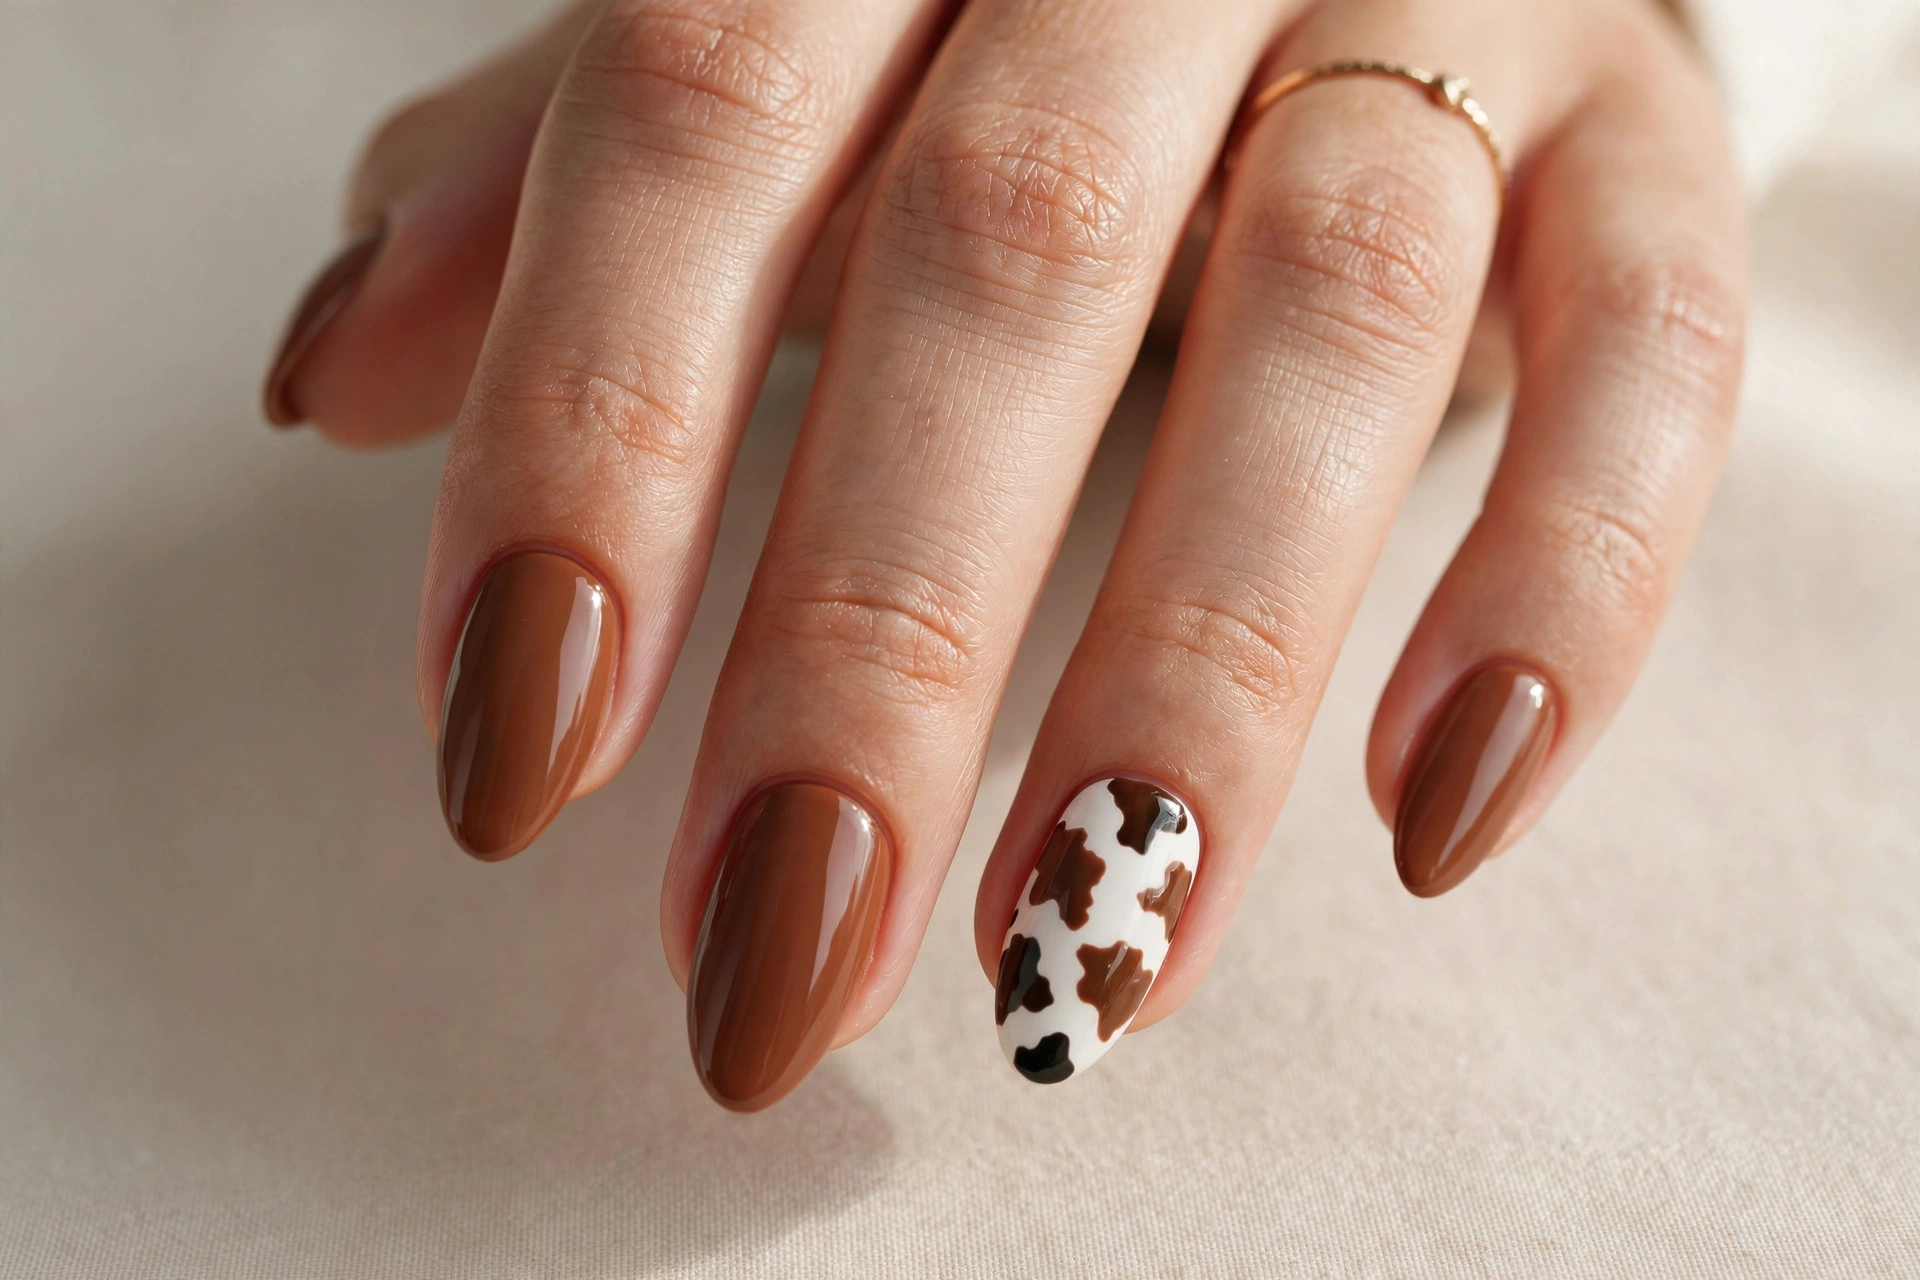
Cow print nails are pure fun — irregular brown patches on white that read as playful rather than polished. Worn as an accent on one or two nails with solid brown on the rest, it is trendy without overwhelming your whole hand.
This design suits anyone with a sense of humor about their nails and a love for western or streetwear style. It looks great on short nails and square shapes, where the patches have a clean canvas. The method could not be simpler: paint the accent nails white, then use a dotting tool or the brush itself to place irregular brown blobs of different sizes. Do not aim for symmetry — real cow print has none. Top coat to smooth it all out.
16. Emerald with Gold Tips
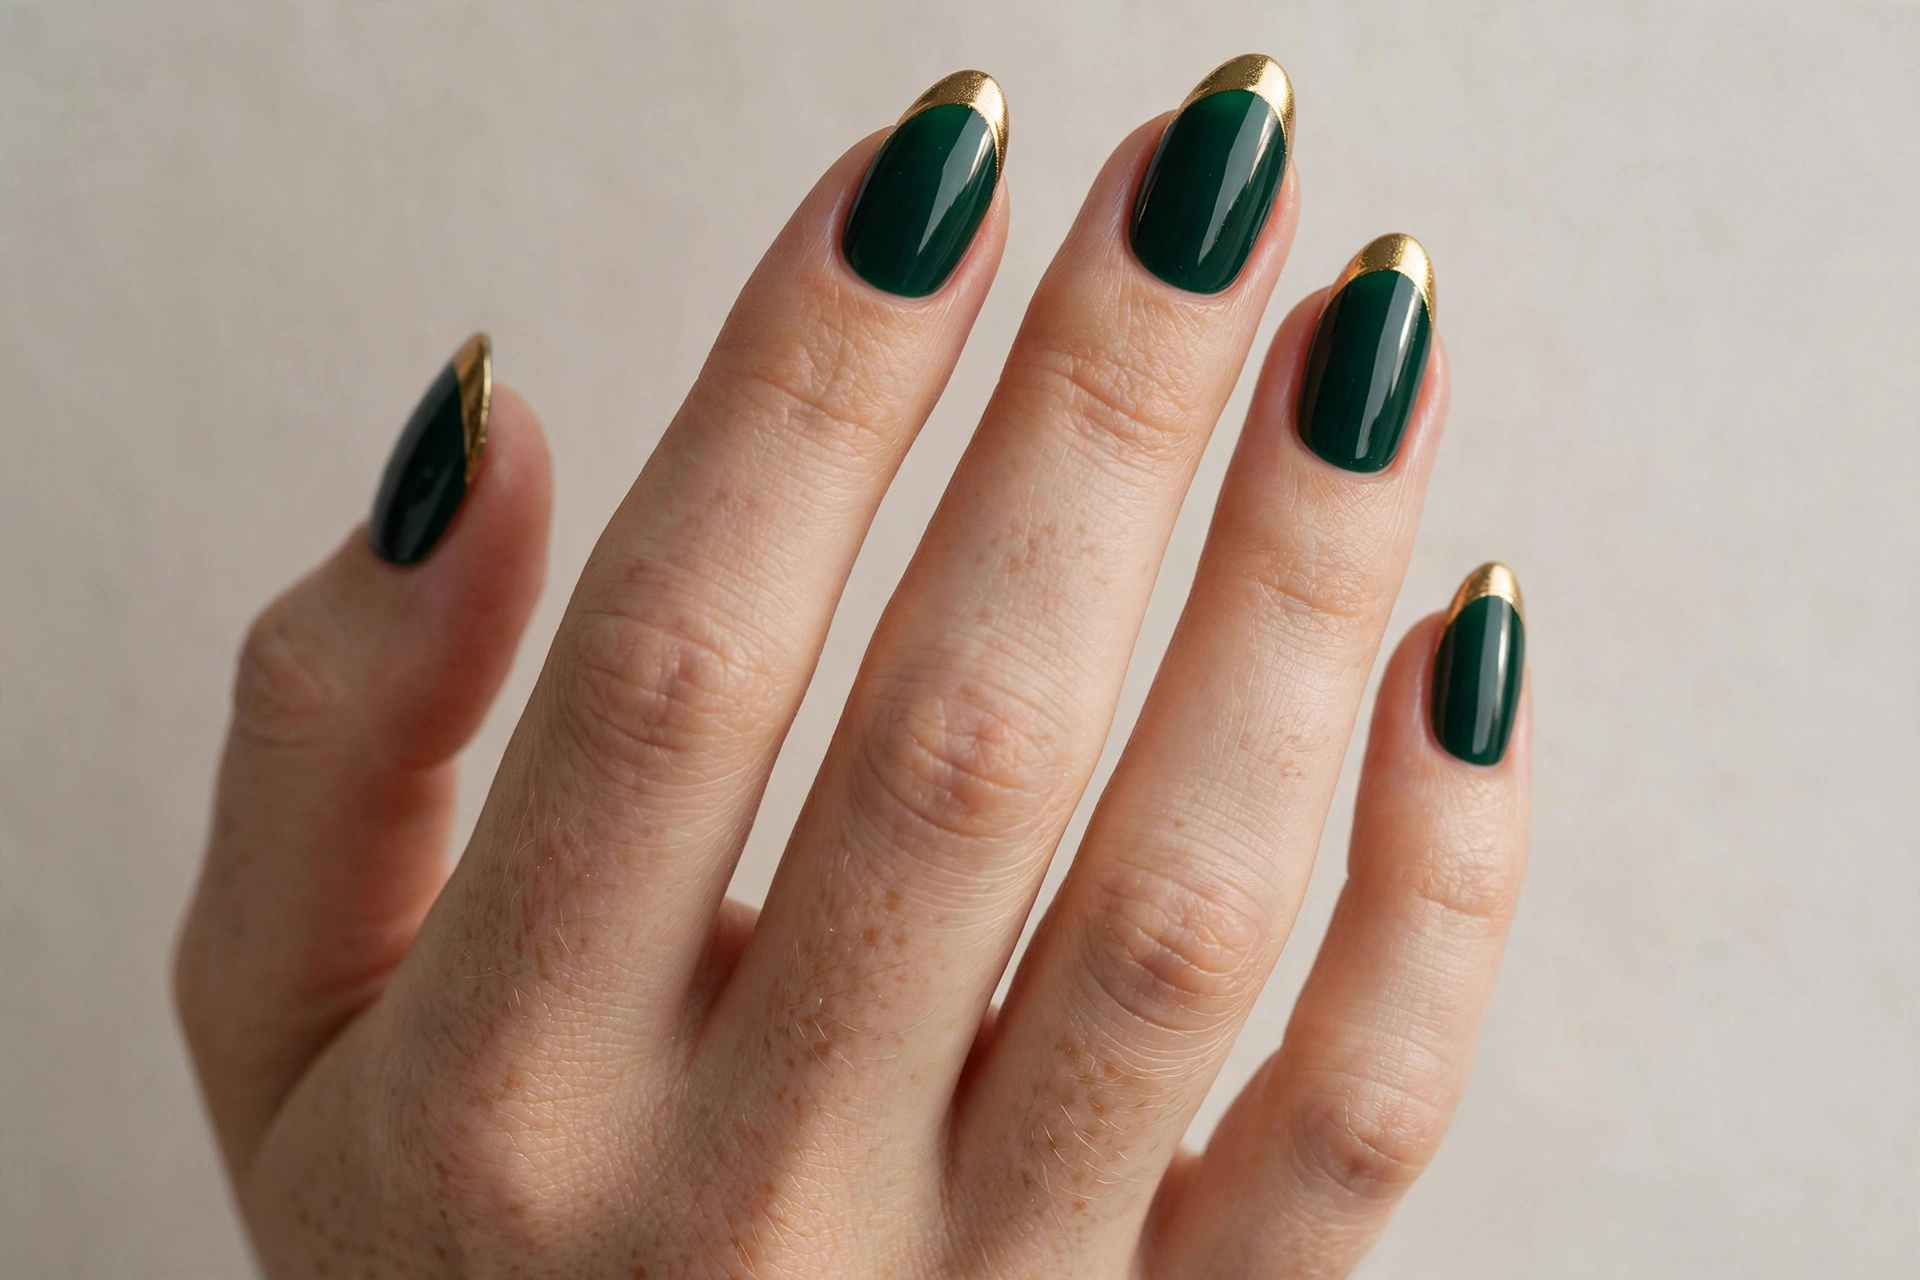
Deep emerald with metallic gold tips is old Hollywood glamour in nail form. The green is dark enough to read as neutral from a distance, then the gold edge flashes when you move your hands. It is dramatic without a single jewel or sticker.
This design suits holiday parties, evening events, and anyone whose style leans rich and classic. It works on all skin tones — the green is universally flattering — and looks best on medium to long nails where the gold tip has presence. Paint the emerald base first and let it dry completely. Then use a flat angled brush or French tip guides to lay the gold tip. A steady hand gives the cleanest line, and a glossy top coat fuses the two colors into one finish.
17. Lavender Aura
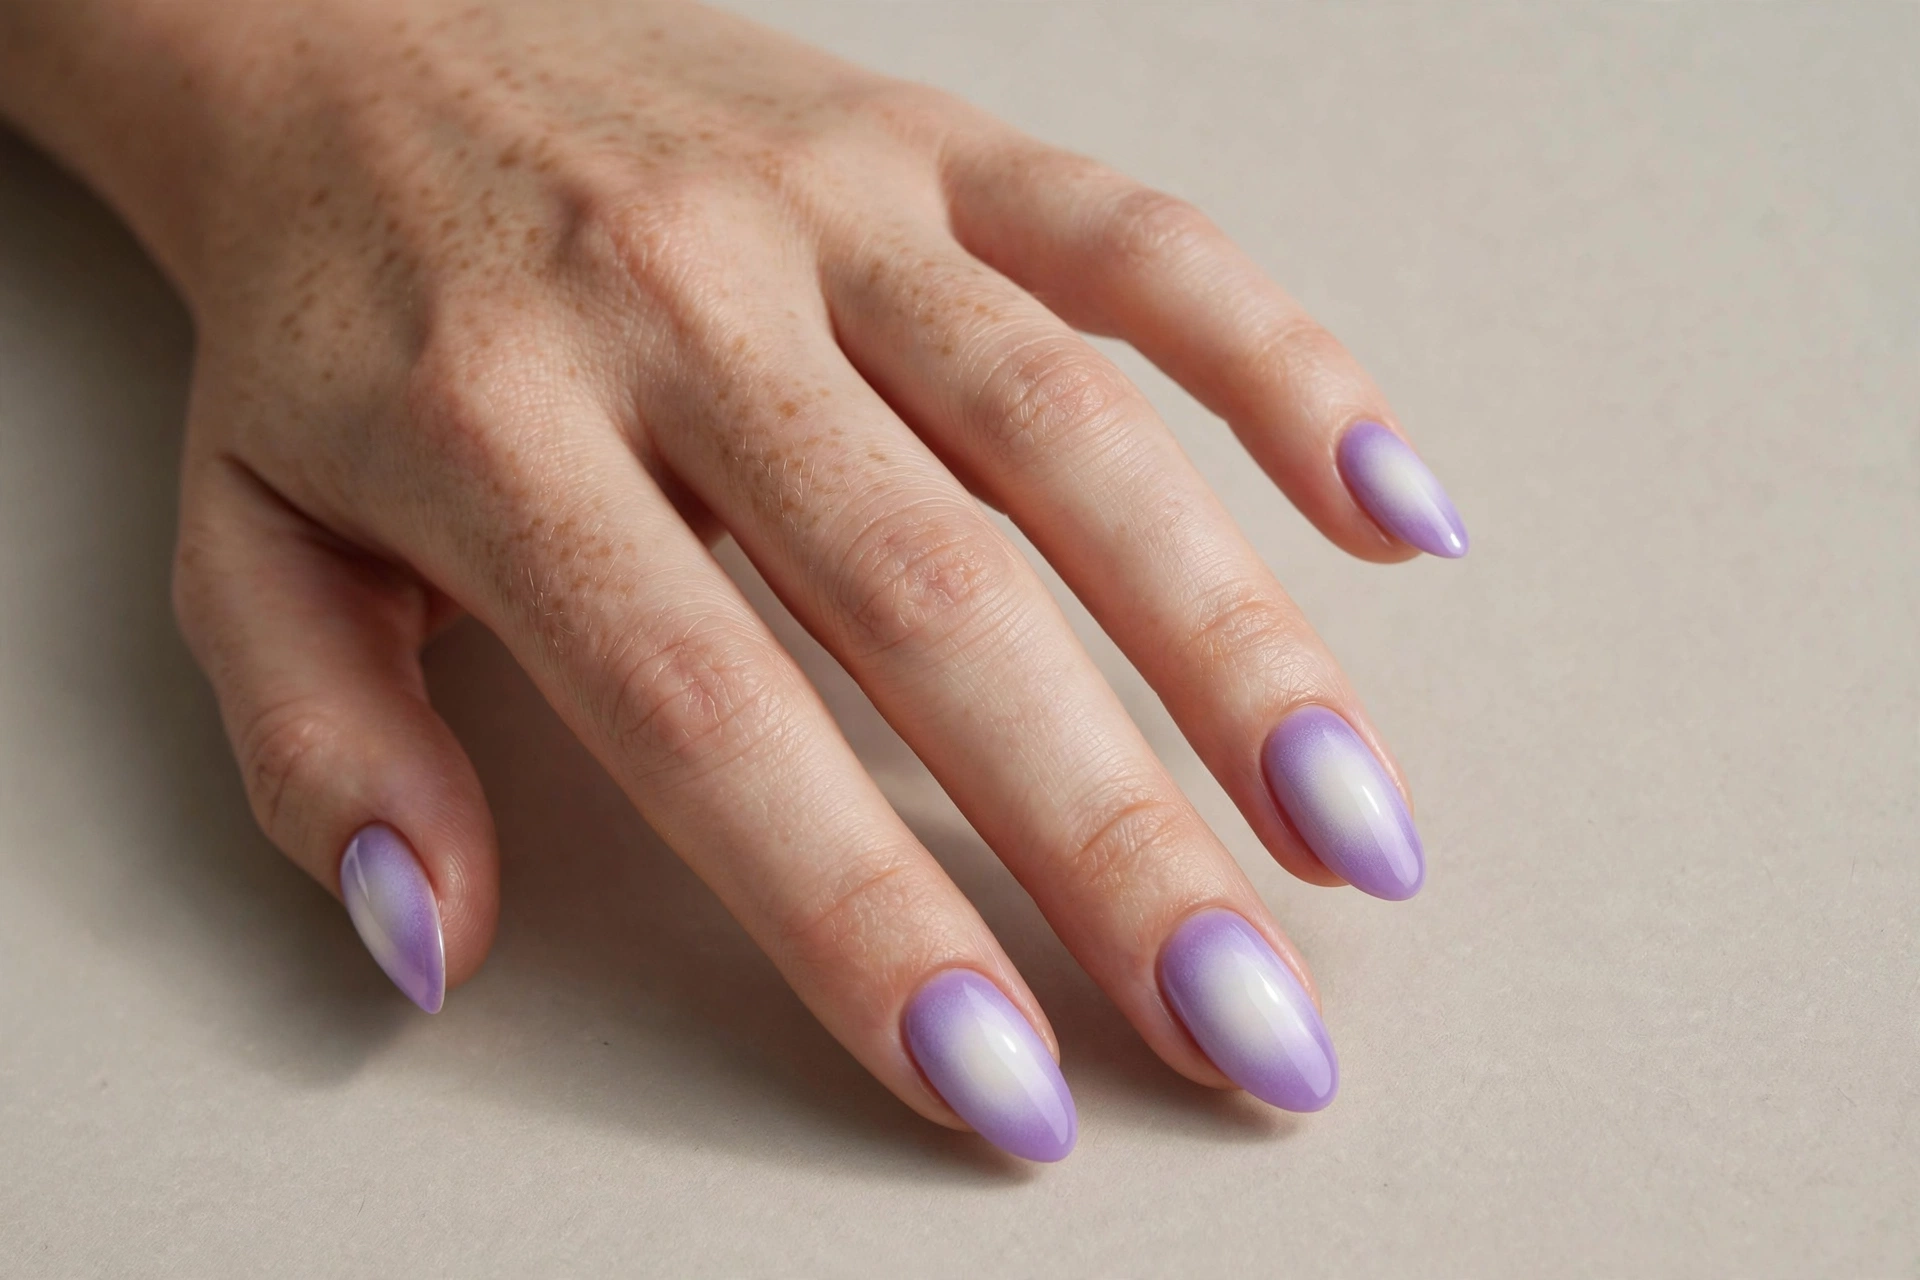
Aura nails airbrush a soft glow into the center of the nail, and lavender is one of the prettiest versions. The color blooms outward from a milky center into a purple haze at the edges — soft, ethereal, and completely modern.
This design suits dreamers, spring outfits, and anyone bored of flat color. It flatters short nails because the glow adds dimension that makes the nail bed look deeper. The classic method uses an airbrush, but a sponge works too: paint a white base, then dab lavender polish from the center outward, leaving the middle light. Blend the edges with a clean dry sponge before top coat. Two thin layers build a softer glow than one thick one.
18. Pearl Glazed Chrome
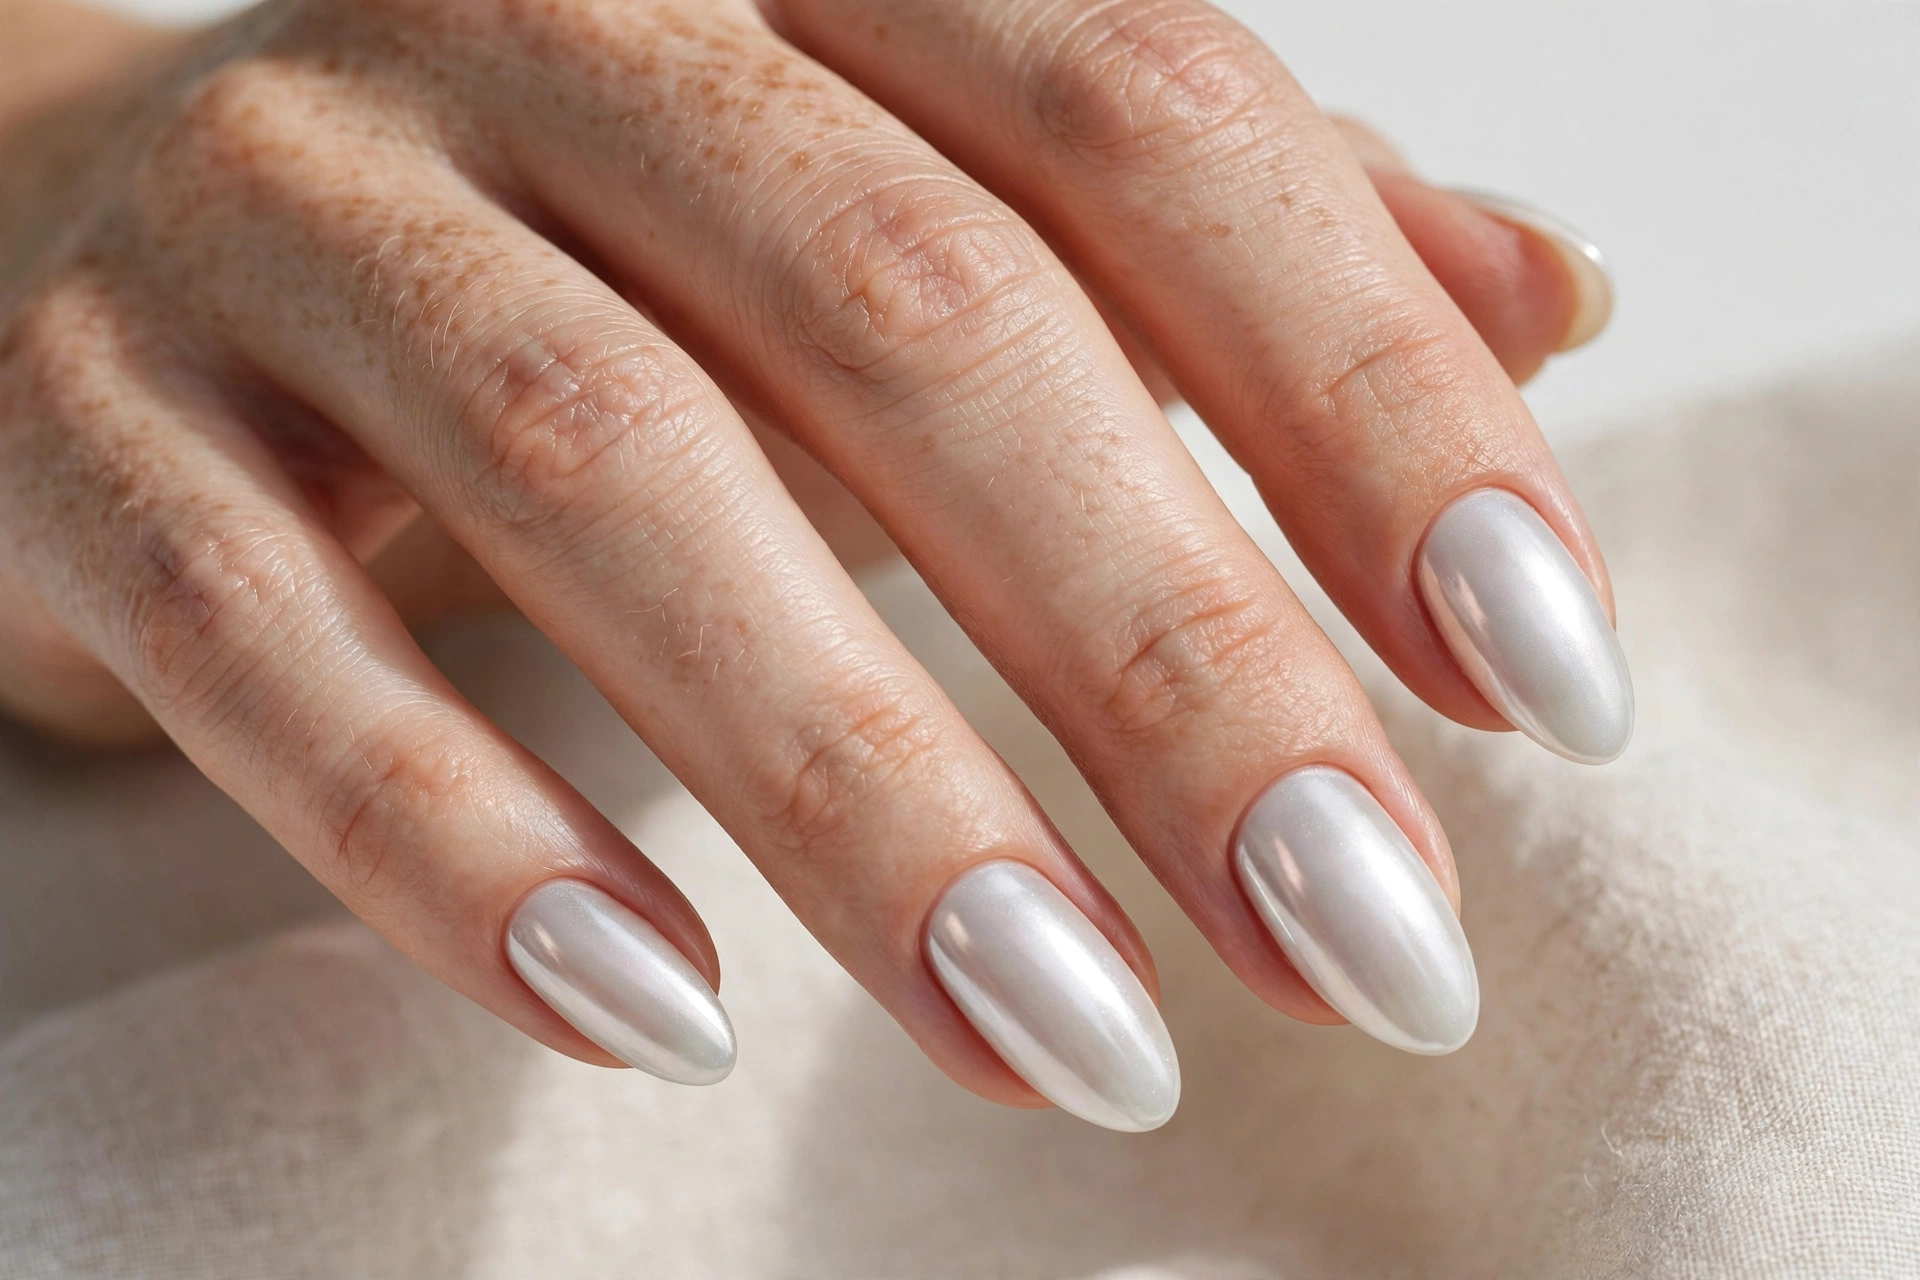
The glazed donut look — a pearly, iridescent sheen over a neutral base — became famous for a reason. It catches light with a subtle rainbow shimmer that reads expensive and futuristic at once, without any loud color.
This suits minimalists who still want their nails to feel special, and it is one of the most complimented designs of the last few years. It works on every nail length and every skin tone. Like rose gold chrome, it needs chrome powder and a UV lamp: apply a sheer white or nude gel base, cure a no-wipe top coat, buff on pearl chrome powder, and seal. The result is a lit-from-within glow that photographs beautifully — fitting for a gallery of fingernail art pictures.
How to Make Your Nail Art Last Longer
Pretty nails that chip on day two are nobody’s goal. Start with clean prep: push back cuticles, gently buff the shine off the nail plate, and wipe with alcohol or nail cleanser so polish actually grips. Thin coats always outlast thick ones, and capping the free edge — running polish along the very tip — is the single best trick against chips.
Reapply top coat every two or three days to refresh the seal, and wear gloves for dishes and cleaning. If you are building a DIY kit, this nail polish kit covers the basics — base coat, colors, and tools — in one box, which is handy when you are recreating designs from pictures like these. Store polish upright in a cool spot so it stays smooth for the next round.
Looking at fingernail art pictures is the fastest way to find a design you will actually love wearing. Save the ones that made you pause, show them to your technician or set them up next to your polish collection, and do not be afraid to mix ideas — a daisy accent on one nail and classic red on the rest is a perfectly good plan. The best nail art is the kind you keep glancing at all week.